How to Fix Common DNS Issues on Windows 10

Get Free Scanner and check your computer for errors
Fix It NowTo fix found issues, you have to purchase the full version of Combo Cleaner. Free trial available. Combo Cleaner is owned and operated by Rcs Lt, the parent company of PCRisk.com read more.
How to Fix Common DNS Issues on Windows 10
DNS translates domain names to IP addresses, which are used by browsers to load web pages. Without DNS, we would need to remember IP addresses rather than human-readable addresses. This article is dedicated to helping you fix common DNS-related issues.
DNS servers match domain names to their IP addresses. When you type a domain name into the browser address bar, the computer contacts the current DNS server requesting which Internet Protocol (IP) address is associated with the particular domain name. Finally, the computer connects to the IP address and opens the correct website.
To access the Internet, DNS must function correctly. If, however, there are problems with DNS settings in Windows, you might have issues accessing the Internet and various websites.
To fix DNS-related issues, you might need to flush and renew the DNS using Command Prompt, use another DNS server (such as Google's public DNS server), perform a clean boot and check for installed software preventing access to the Internet, change the MAC address of your network adapter, and so on.
In the guide below, we describe how to perform these various actions to fix common DNS problems.
Video Showing How to Fix Common DNS Issues:
Table of Contents:
- Introduction
- Flush DNS and Reset Winsock
- Use Google's Public DNS
- Perform a Clean Boot
- Disable Windows Update Peer-to-peer Feature
- Enter MAC Address Manually
- Adjust Power Options
- Update Network Adapter's Drivers
- Video Showing How to Fix Common DNS Issues
Download Computer Malware Repair Tool
It is recommended to run a free scan with Combo Cleaner - a tool to detect viruses and malware on your device. You will need to purchase the full version to remove infections. Free trial available. Combo Cleaner is owned and operated by Rcs Lt, the parent company of PCRisk.com read more.
Flush DNS And Reset Winsock
To reset network settings, you must execute several commands using Command Prompt. This method includes entering and executing "ipcofig" and "netsh" commands.
Ipconfig is a command-line tool that displays the current configuration of the installed IP stack on a networked computer. Using this tool, we can flush and reset the contents of the DNS client resolver cache and renew the DHCP configuration.
Netsh is a command-line scripting utility that allows you to, either locally or remotely, display or modify the network configuration of a computer that is currently running. Netsh also provides a scripting feature that allows you to run a group of commands in batch mode against a specified computer.
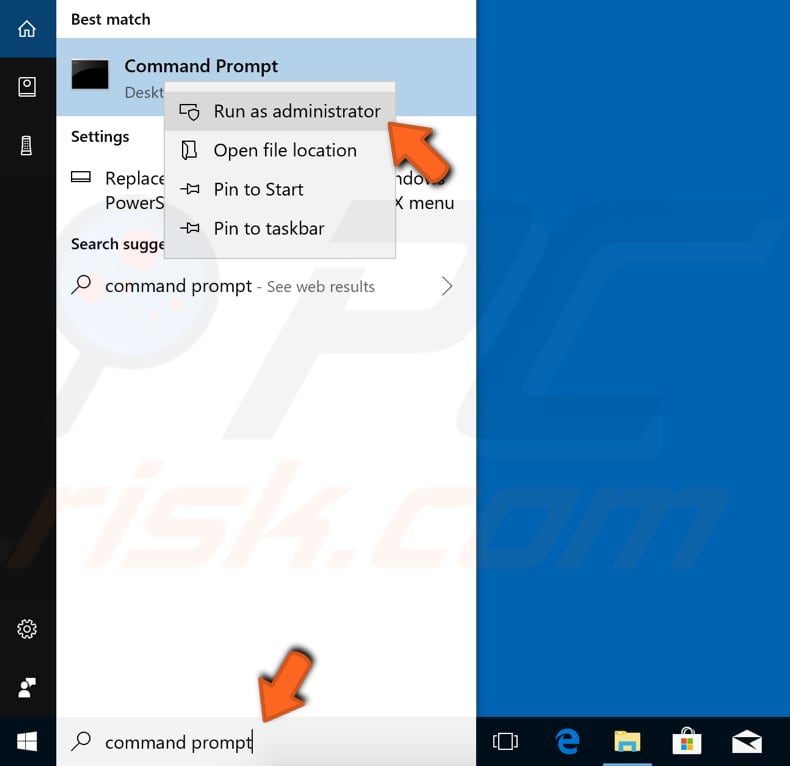
The commands require an elevated Command Prompt opened with administrator privileges. To open elevated Command Prompt, type "command prompt" in Search and right-click on the "Command Prompt" result. Choose "Run as administrator" to run it with administrative privileges.
When you select "Run as administrator", a User Account Control prompt will appear asking if you allow the Command Prompt to make changes to your computer. Click "Yes".
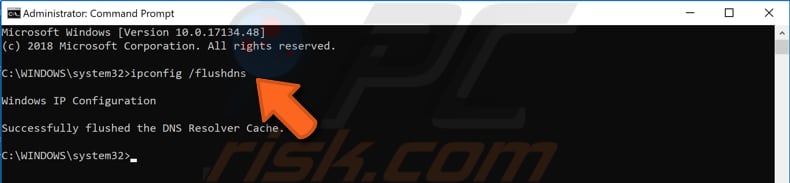
Now type these commands and press Enter after each:
ipconfig /flushdns
ipconfig /registerdns
ipconfig /release
ipconfig /renew
netsh winsock reset catalog
netsh int ipv4 reset reset.log
netsh int ipv6 reset reset.log
Exit Command Prompt and check if you are still having DNS problems when trying to access the Internet.
Use Google's Public DNS
Google's Public DNS is a free alternative Domain Name System (DNS) service offered to Internet users worldwide. The public DNS service and servers are maintained and owned by Google. It functions as a recursive name server providing domain name resolution for any host on the Internet.
We recommend that you use Google DNS for a faster and secure connection. Furthermore, using Google DNS might solve some common DNS problems. You must change the DNS manually, as described below.
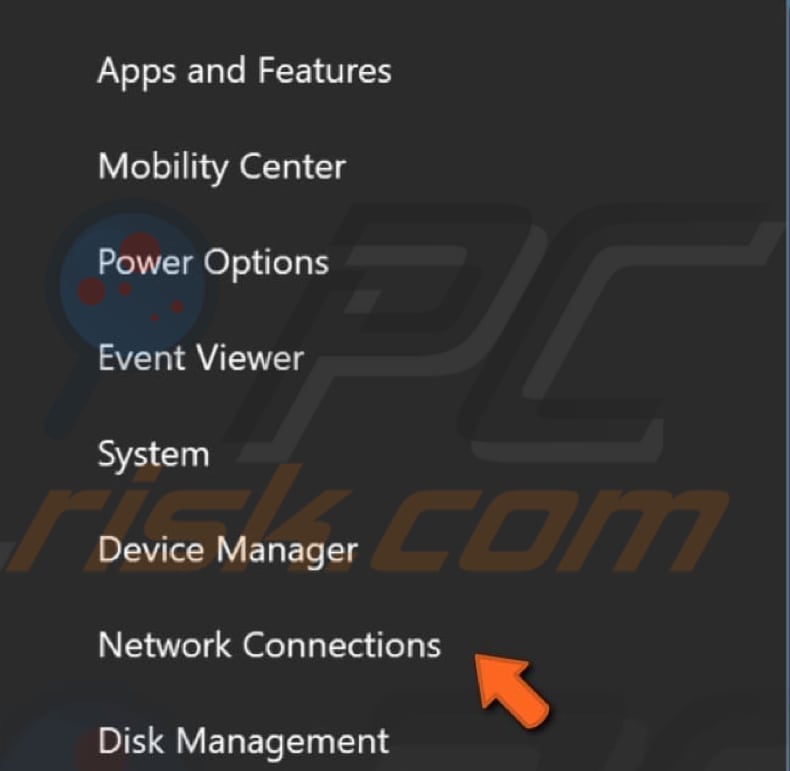
To change your DNS server to Google's DNS server, go to Network Connections settings. Right-click the Start menu and select "Network Connections", or go to Settings and click "Network & Internet".

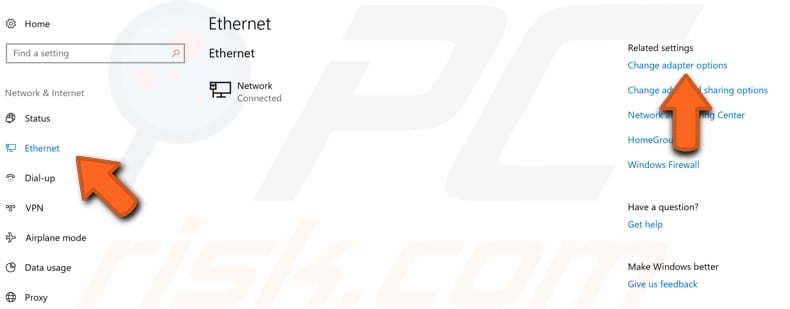
In the Network & Internet settings window, select your connection type (in our case, "Ethernet") on the left pane and then click "Change adapter options" on the right pane.

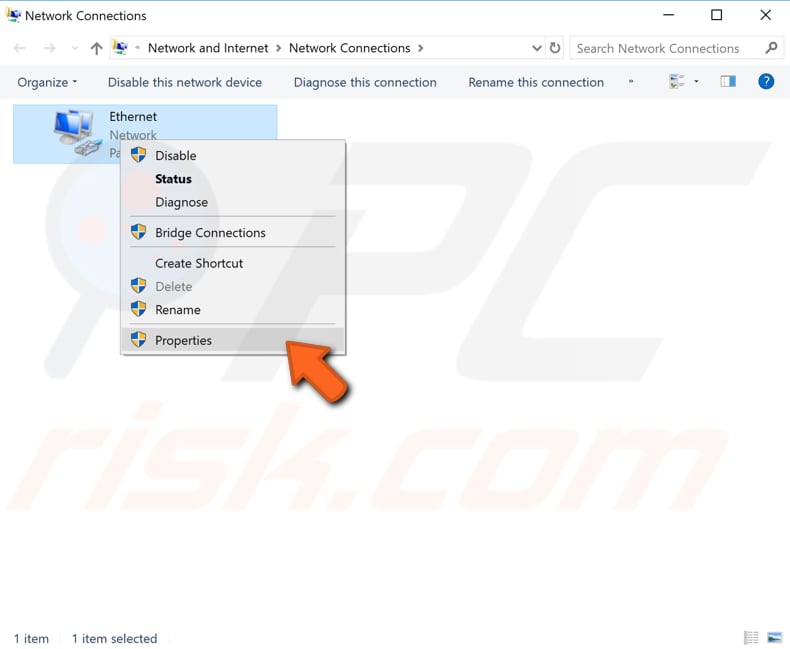
Right-click on your connection and select "Properties" from the drop-down menu.

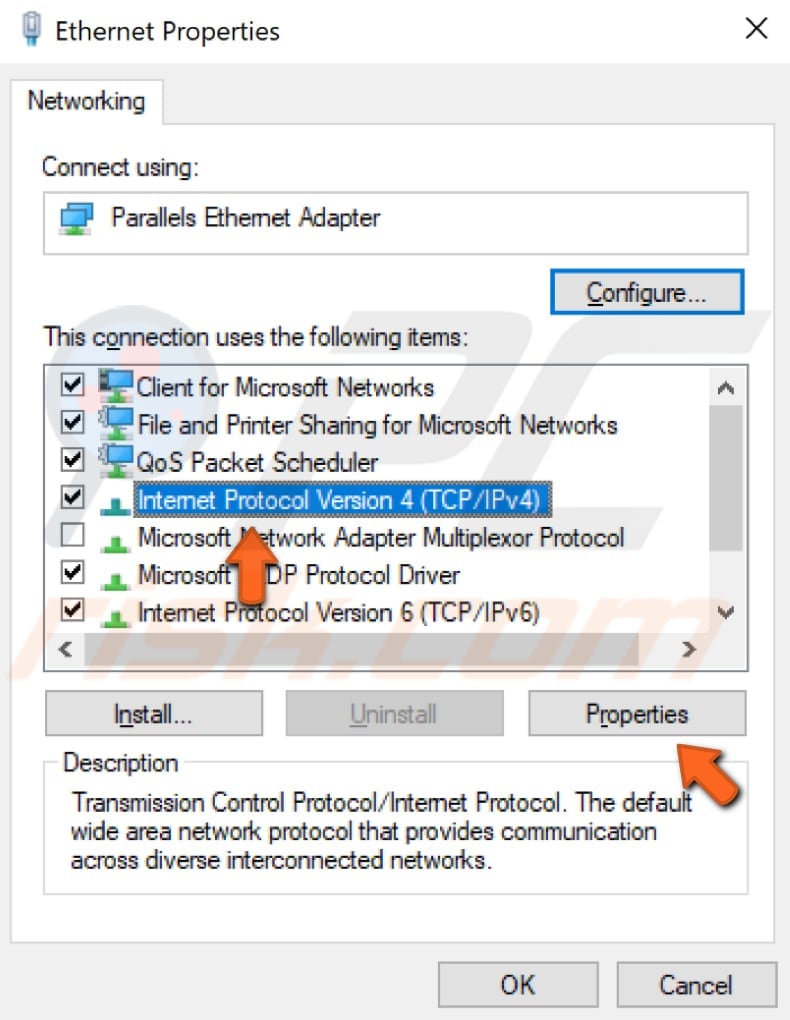
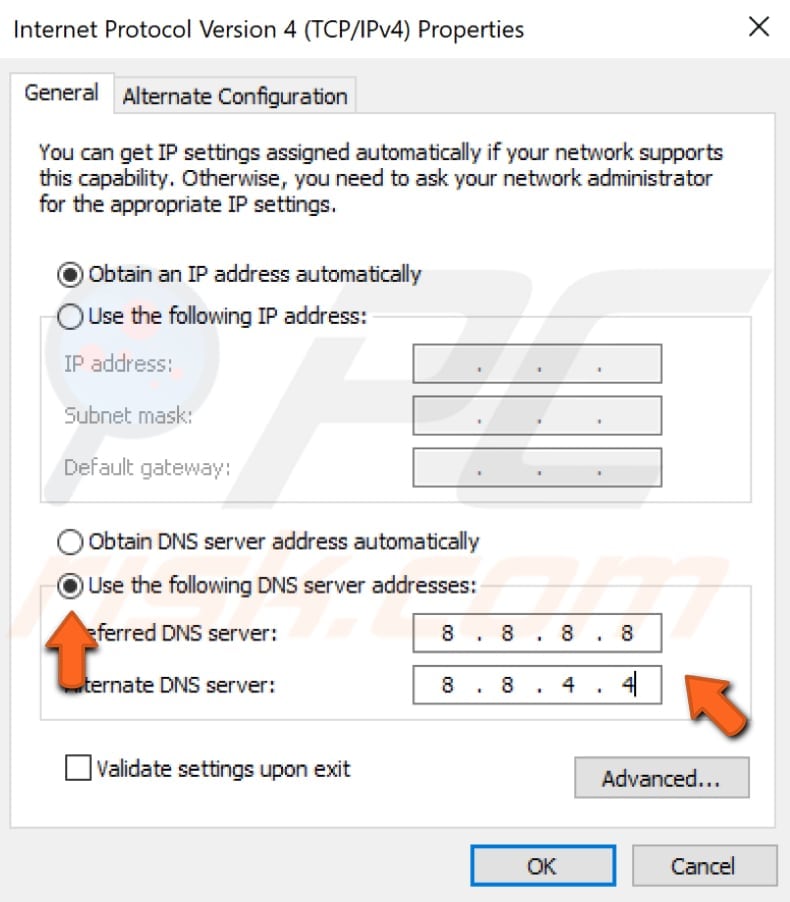
Select "Internet Protocol Version 4 (TCP/IPv4)" and click "Properties".
In the Internet Protocol Version 4 (TCP/IPv4) Properties window, select "Use the following DNS server addresses", enter 8.8.8.8 as the "Preferred DNS server" and 8.8.4.4 as the "Alternate DNS server". Click "OK" to save changes. Restart the computer and check if problems with the DNS are fixed and that you can access the Internet without DNS-related problems.
Perform A Clean Boot
When you start Windows using a normal startup operation, several applications and services start automatically and then run in the background. These programs include basic system processes, antivirus software, system utility applications, and other previously installed software. These applications and services can cause software conflicts.
A clean boot is performed to start Windows using a minimal set of drivers and startup programs. This helps eliminate software conflicts that occur when you install a program or an update. Some users have reported that installed third-party software was interfering with DNS. Therefore, a clean boot will determine if there is any software causing problems with DNS.
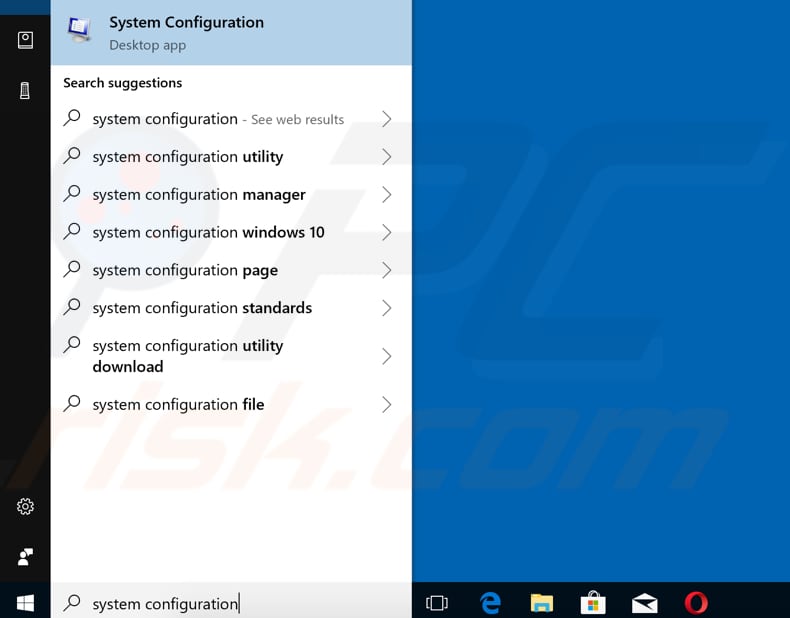
To perform a clean boot, type "system configuration" in Search and click on the "System Configuration" result.
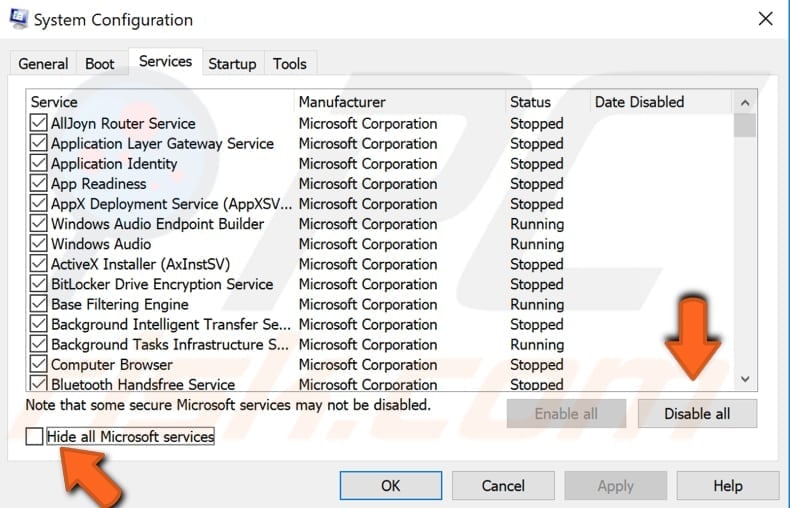
In the System Configuration window, click on the "Services" tab and mark the "Hide all Microsoft services" checkbox. Then, click on "Disable all".
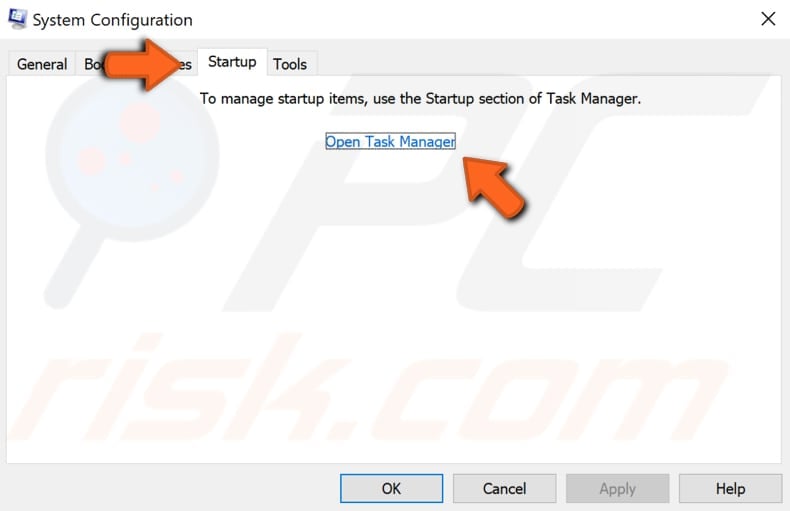
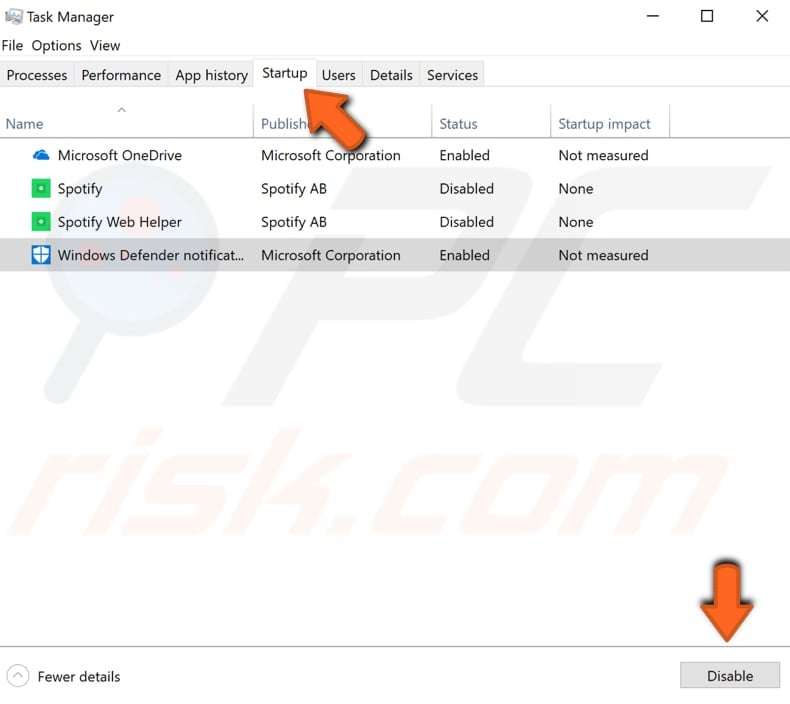
Click the "Startup" tab and click "Open Task Manager".
Under the Task Manager Startup tab, select the first application and click "Disable" to disable it. Disable all applications one by one, repeating this step. Once all programs are disabled, close Task Manager and click "OK" in the System Configuration Startup tab. Restart the computer and check if the DNS problem persists.
If you can access the Internet when performing a clean boot, you know that one of the programs launched at system startup is causing the problem.
Disable Windows Update Peer-to-peer Feature
Windows 10 has a new feature that helps to save download bandwidth. It is a new peer-to-peer (P2P) delivery update mechanism. Using the P2P option, you can download a Windows update once and then use that machine to spread the update to all computers on your local network.
You can also download Windows updates from other users in your area. This feature can interfere with the DNS, and thus disabling it might fix DNS problems.
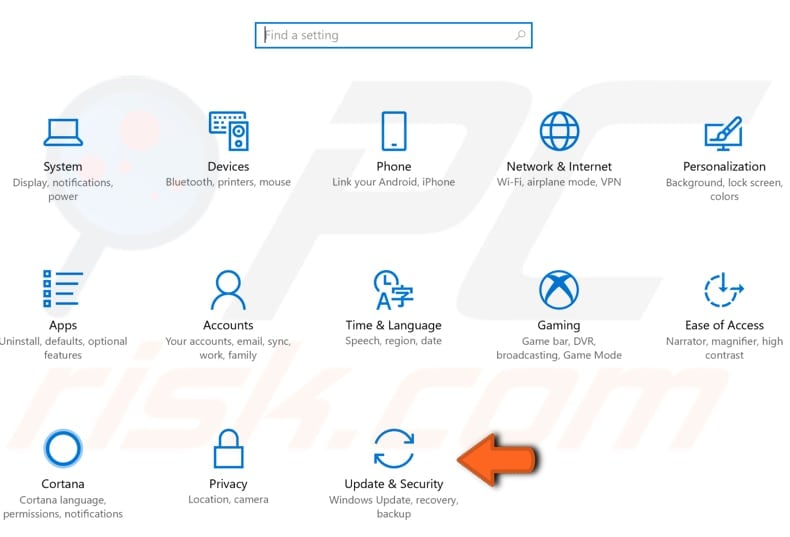
To disable this feature, go to Settings and select "Update & Security".
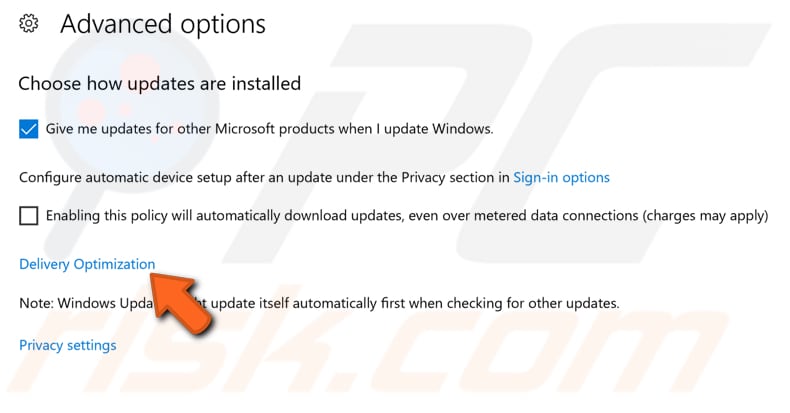
Locate "Advanced options" under "Update settings" and click it.

In the Advanced options window, click "Delivery Optimization".
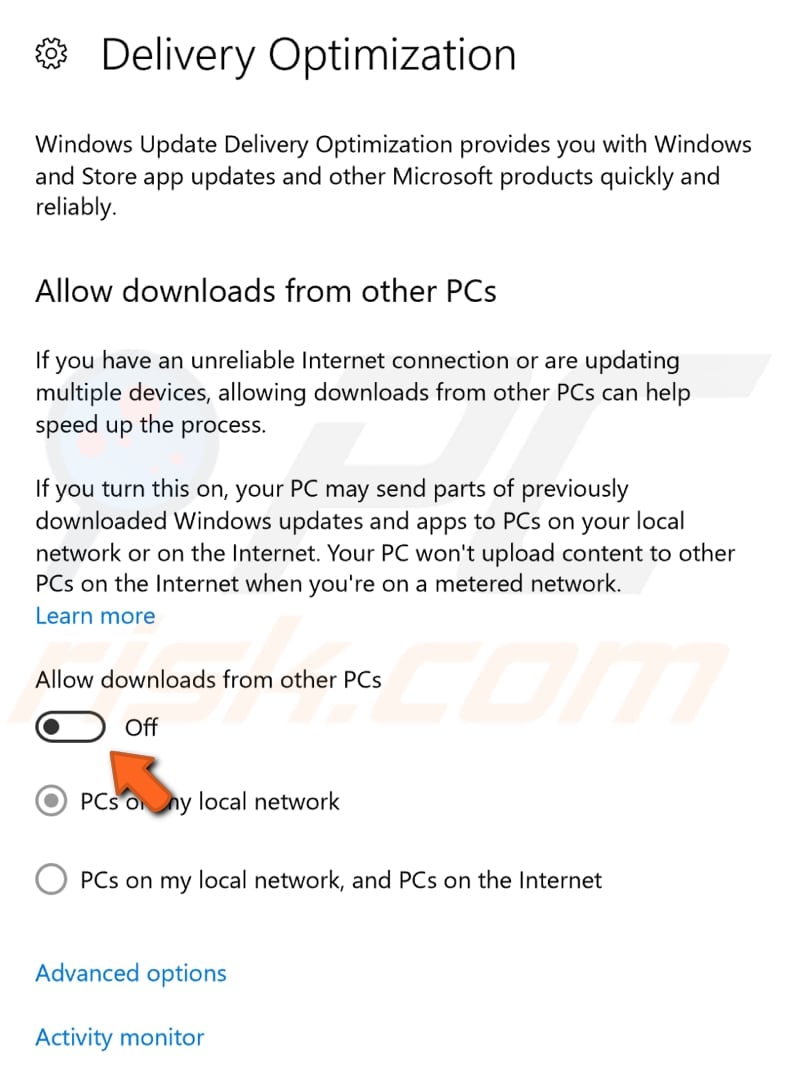
In the Delivery Optimization window, turn off the "Allow downloads from other PCs" option by toggling the switch. Check if the DNS problem persists.
Enter MAC Address Manually
A Media Access Control address (MAC address) of a device is a unique identifier assigned to network interfaces for communications at the data link layer of a network segment. MAC addresses are used as a network address for most IEEE 802 network technologies, including Ethernet and Wi-Fi.
MAC addresses are used in the media access control protocol sublayer of the OSI reference model. These MAC addresses are often assigned by the manufacturer of a network interface controller and stored in its hardware, such as the card's read-only memory or other firmware mechanisms.
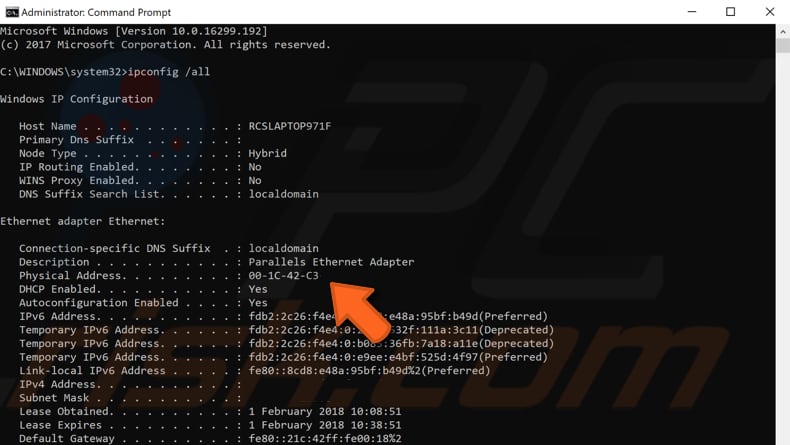
To enter a MAC address, you need to first identify it. Run Command Prompt as administrator, type the "ipconfig /all" command, and press Enter to execute it.
You will see a list of information about the configuration. Find "Physical Address" and take note - you will need this in the following steps.
Now that you have your MAC address, you can configure your network connection manually. Right-click the Start menu and select "Network Connections".
In the Network & Internet settings window, select your connection type (in our case, "Ethernet") on the left pane and then click on "Change adapter options" on the right pane.
Right-click on your connection and select "Properties" from the drop-down menu.
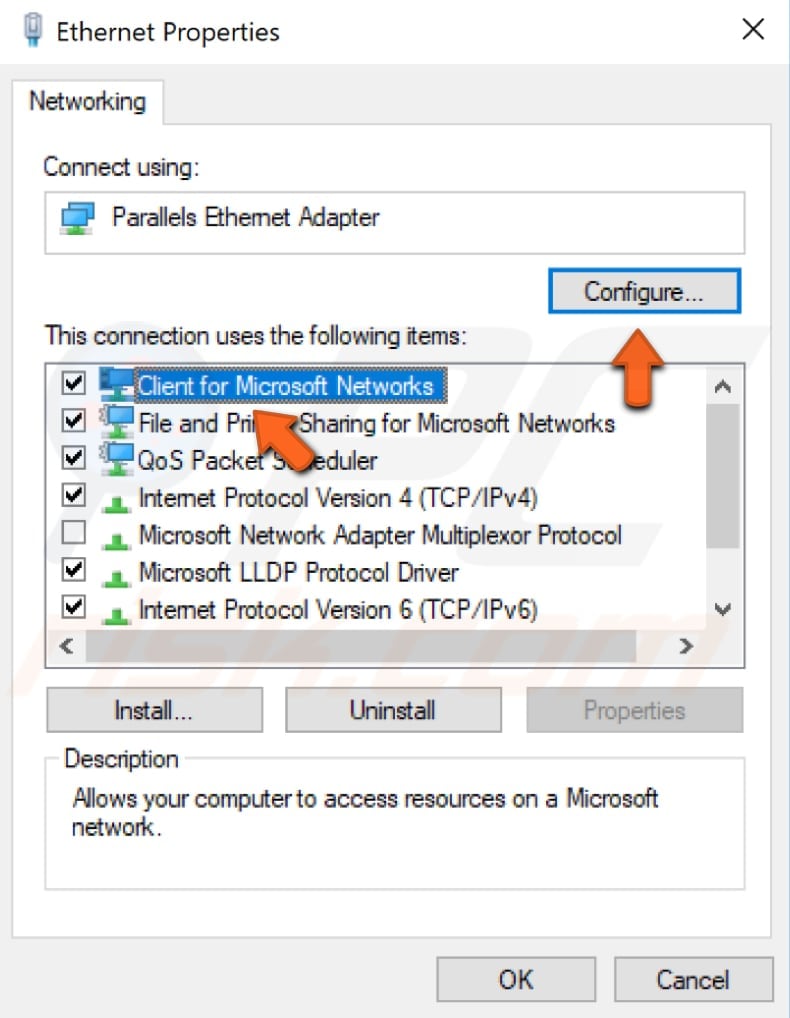
In the Properties window, select "Client for Microsoft Networks" (it should be selected automatically) and click "Configure". NOTE: Make sure that the "LLDP Protocol Driver" checkbox is ticked. Having this connection item disabled might also cause DNS problems.
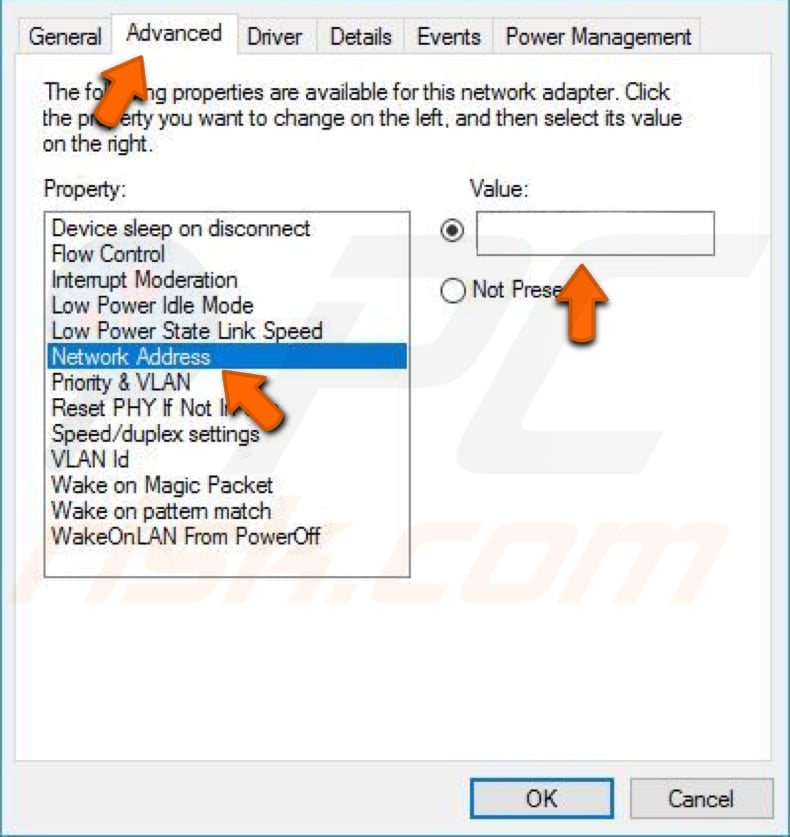
Now select the "Advanced" tab and then select "Network Address" under "Property:" Select "Value:" on the right pane and enter your MAC address (Physical Address), which you received when you entered the "ipconfig/ all" command in Command Prompt. Do not use dashes between letters and numbers.
Click "OK" to save the changes and see if this fixes the DNS problem. Note that there is a higher chance of the problem being fixed if you were using Google DNS before entering the MAC address manually.
Adjust Power Options
The Power Plan feature in Windows 10 is not new since it was also available in earlier operating system versions. Power Plan is a collection of hardware and system settings that manage how your computer uses power.
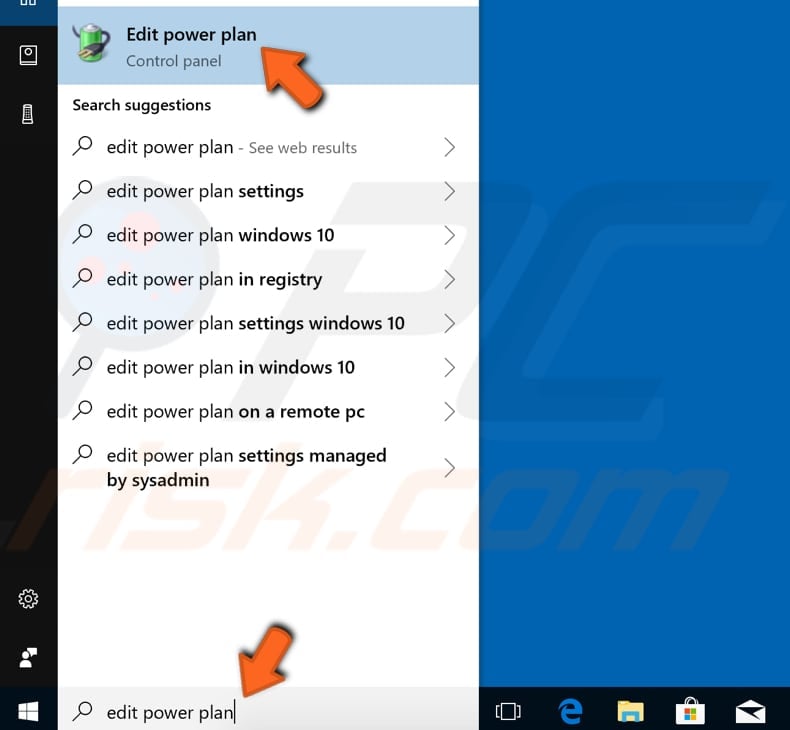
In this case, we will change the advanced power settings and set your wireless adapter to maximum performance. Type "edit power plan" in Search and click the "Edit power plan" result.
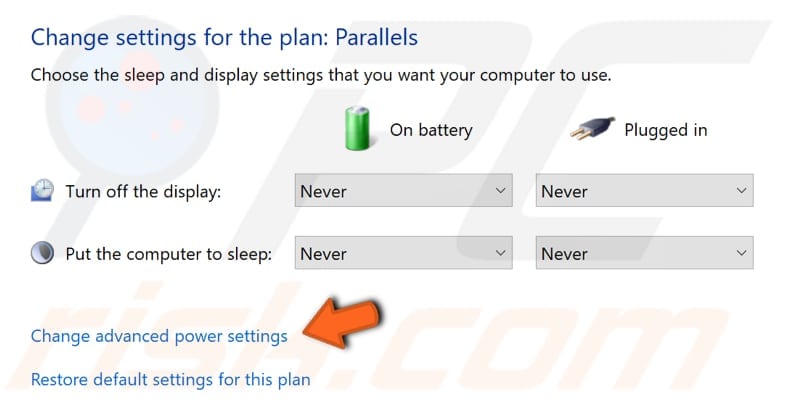
In the Edit Plan Settings window, you can edit the settings of the power plan you are currently using. You can edit other plans in the next window. Find and click "Change advanced power settings".
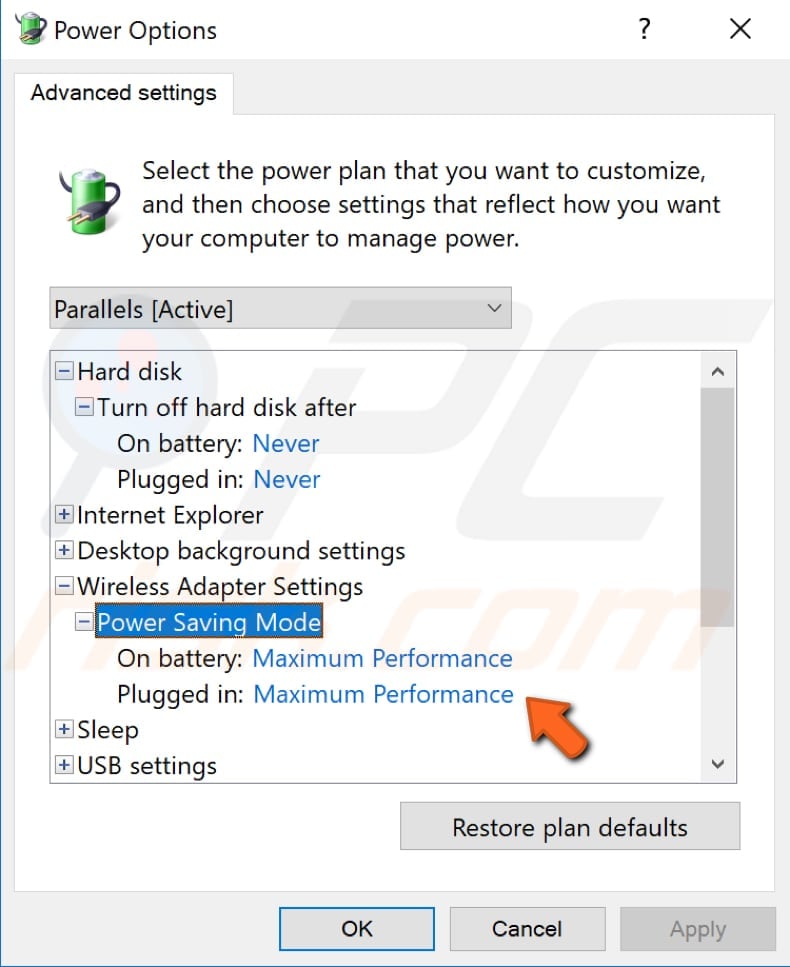
In the Power Options window, find the "Wireless Adapter settings" and expand it by double-clicking it or clicking the "+".
Then expand the "Power Saving Mode" setting and set "On battery" and "Plugged in" to "Maximum Performance". Click "Apply" to save changes and check if you still have DNS problems.
Update Network Adapter's Driver
A device driver informs the operating system and other software how to interact with particular hardware. If the appropriate driver is not installed, the device might not function properly. To update the network adapter driver, you will need to use Device Manager.
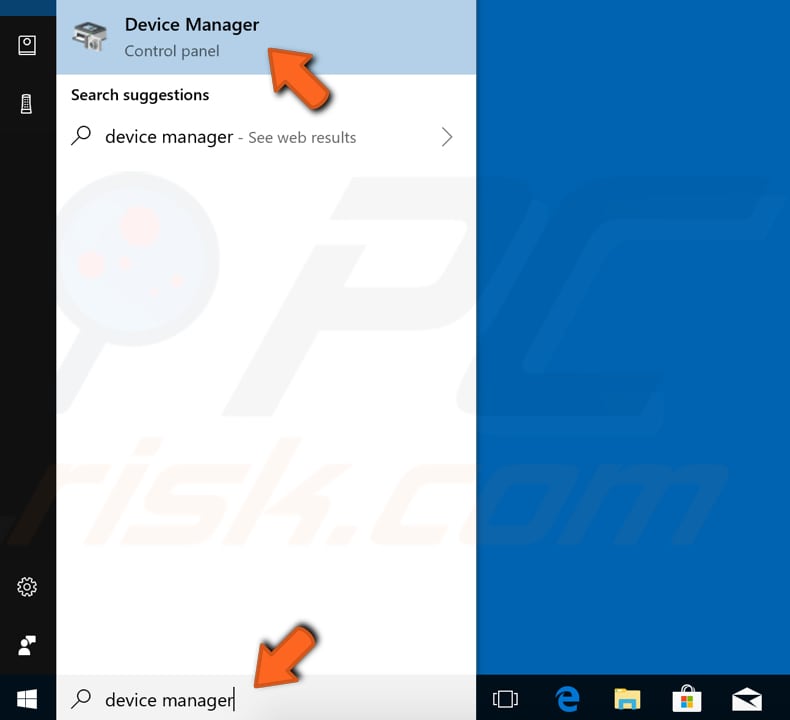
To open Device Manager, right-click the Start button and select "Device Manager" result from the contextual menu or type "device manager" in Search and click the "Device Manager" result.
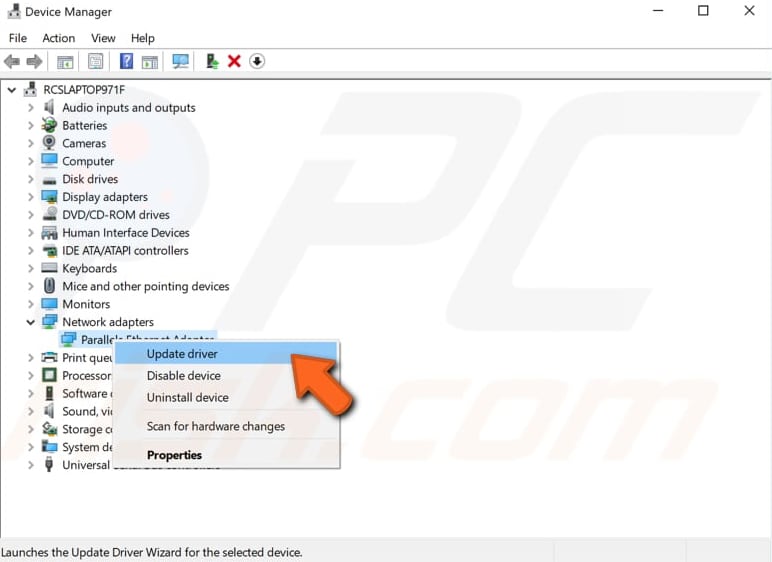
In Device Manager, you will see a list of devices connected to your computer. Find "Network adapters", expand it, and right-click your networking device. Then select "Update driver" option from the contextual menu.
You will be asked to search for updated driver software automatically or to browse your computer for driver software. If you select the first option, Windows will search your computer and the Internet for the latest driver software for your device. The second option requires having previously downloaded drivers on your computer or USB flash drive.
To update drivers in this way, you must visit the manufacturers' websites and download the correct drivers. Choose the option you prefer and follow the instructions.

The above methods usually solve common DNS issues. If you know of other solutions to this problem not mentioned in our guide, please share them with us by leaving a comment below.
Share:

Rimvydas Iliavicius
Researcher, author
Rimvydas is a researcher with over four years of experience in the cybersecurity industry. He attended Kaunas University of Technology and graduated with a Master's degree in Translation and Localization of Technical texts. His interests in computers and technology led him to become a versatile author in the IT industry. At PCrisk, he's responsible for writing in-depth how-to articles for Microsoft Windows.
▼ Show Discussion