How to Set Up and Troubleshoot Miracast

Get Free Scanner and check your computer for errors
Fix It NowTo fix found issues, you have to purchase the full version of Combo Cleaner. Free trial available. Combo Cleaner is owned and operated by Rcs Lt, the parent company of PCRisk.com read more.
How to Set Up Miracast and Troubleshoot Its Problems in Windows 10
Miracast enables certified (Miracast-certified) devices such as laptops, smartphones, and tablets to communicate with TVs, monitors, and projectors. This article will demonstrate how to set up and troubleshoot problems related to Miracast.

Its primary purpose is to replace cables and wires from the device to display. Miracast allows users to broadcast photos, music, videos, and other media from mobile devices and computers to larger screens (thus, it allows you to see your device's screen content on a bigger screen).
Miracast technology is built upon Wi-Fi Direct, allowing two devices to form a direct P2P (peer-to-peer) wireless connection and discover each other without a wireless router. It creates its own network on which paired devices can share data.
Today, this technology is often built-in, so most Smart TVs, Amazon Fire TV, Android TV, Roku, and other devices support Miracast. There are many Miracast receivers. However, not all work properly, if at all.
To use Miracast, you need both devices to support it. For Windows users, you must have Windows 8.1 or Windows 10. Older versions need third-party apps to support Miracast.
In the guide below, we show how to set up Miracast on Windows 10 and troubleshoot the most common problems relating to this technology.
Video Showing How to Set Up Miracast and Troubleshoot Its Problems:
Table of Contents:
- Introduction
- How to Check Miracast's Availability
- How to Set Up Miracast
- Update Display and Network Adapter's Driver
- Check WLAN AutoConfig Service
- Restore Your System Using Restore Points
- Video Showing How to Set Up Miracast and Troubleshoot Its Problems
Download Computer Malware Repair Tool
It is recommended to run a free scan with Combo Cleaner - a tool to detect viruses and malware on your device. You will need to purchase the full version to remove infections. Free trial available. Combo Cleaner is owned and operated by Rcs Lt, the parent company of PCRisk.com read more.
How to Check Miracast's Availability
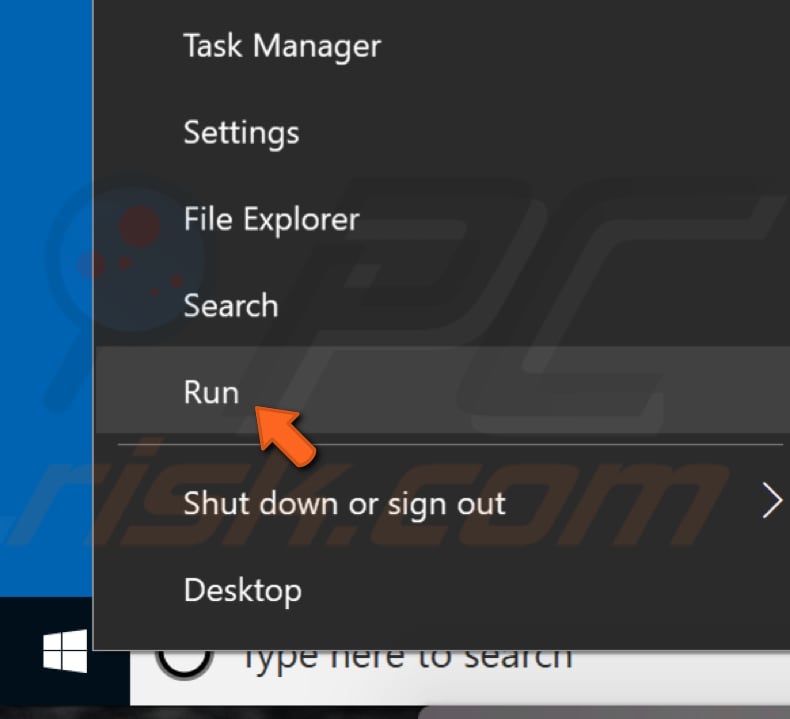
First, check if Miracast is supported on your computer. Press the Windows key + R or right-click Start and select "Run" from the contextual menu.
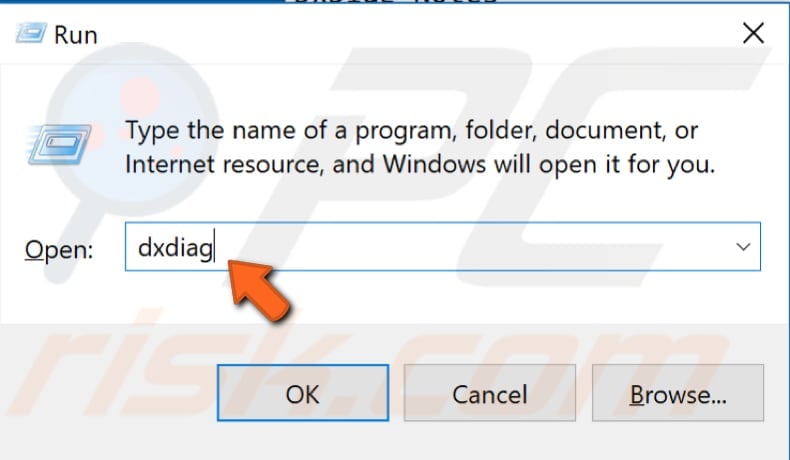
In the Run dialog box, type the name of a program, folder, document, or Internet resource - Windows will open it for you if it is valid. Type "dxdiag" and press Enter or click "OK".
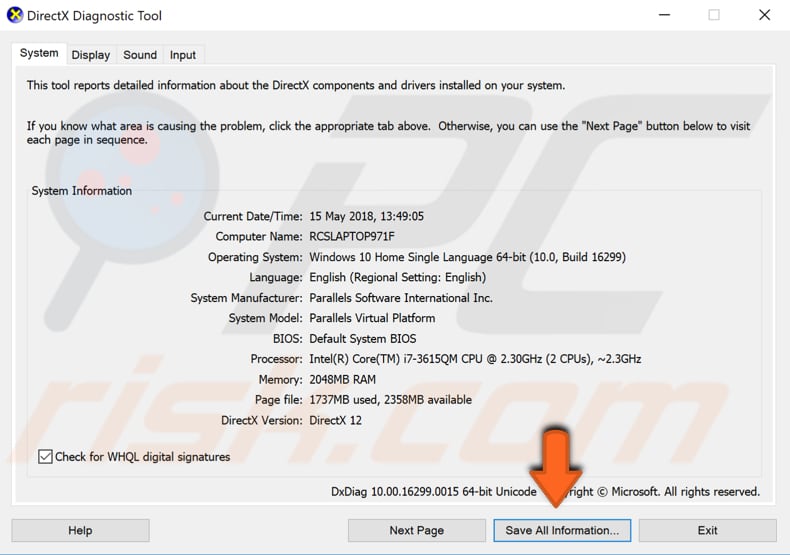
The DirectX Diagnostic Tool will appear. This tool reports detailed information about DirectX components and drivers installed on your system. Find the "Save All Information" button and select where you wish to save the text file.
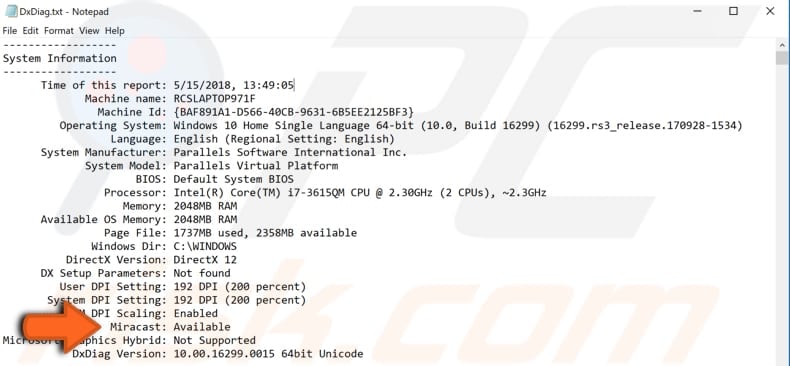
Open the saved file and you fill see detailed information about your system. Find "Miracast" under "System Information" and check if it is available.
How to Set Up Miracast
If you have a TV or other device that supports Miracast, then simply turn it on. If your display device does not have built-in Miracast support, then you need to plug a Miracast adapter (such as Microsoft Wireless Display Adapter) into your device.
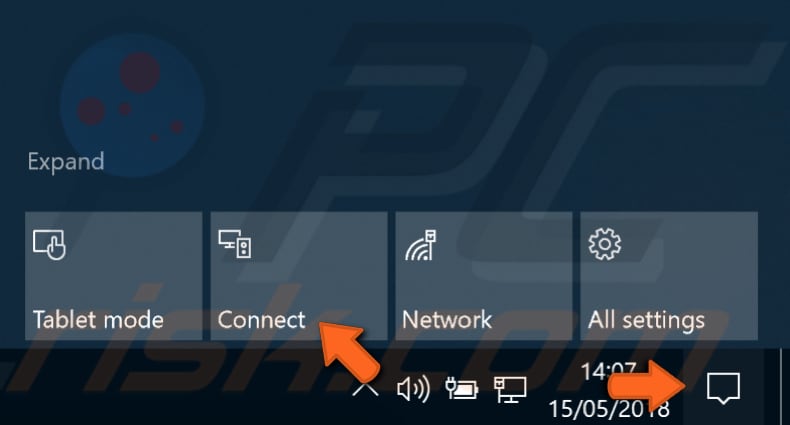
In Windows 10, the screen mirroring feature can be found in Action Center, among other Quick settings. Click the Notification area button on the Taskbar (placed near the date and time) and click the "Connect" button. If you do not see the "Connect" button, click "Expand" to view more settings.
A list of available Miracast devices will appear. Click the device name you wish to connect to, and the connection process will begin. You may need to enter a PIN to verify that a connection you are trying to establish is secure or simply to complete the connection on your display device.
You can also change the projection mode by choosing between monitor extensions, mirroring, and disabling the primary PC display. If you want to mirror/broadcast only the primary screen, select the "Second-Screen Only" option.
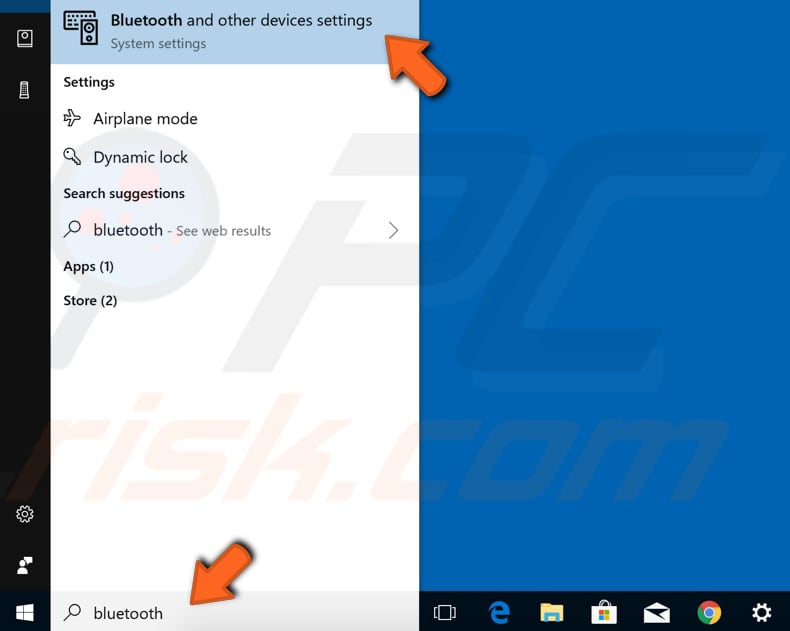
If there are no available devices displayed, you might want to add a device using Windows settings. Type "bluetooth" in Search and click the "Bluetooth and other devices settings" option.
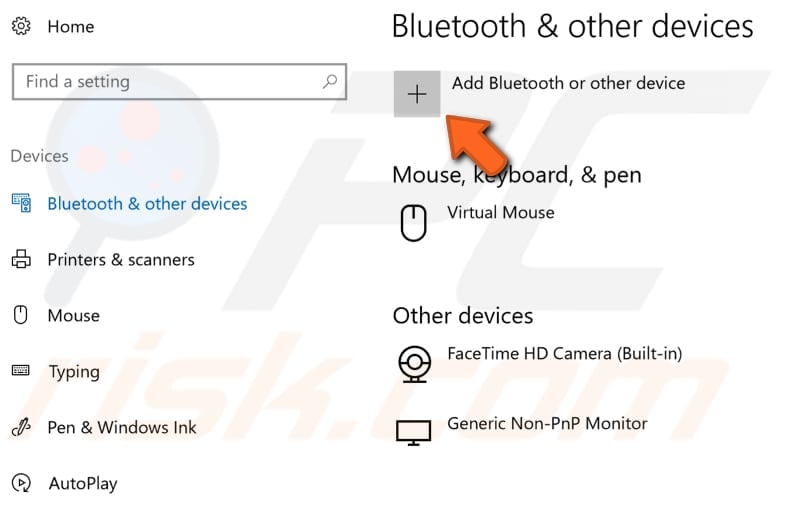
Now click the "Add Bluetooth or other device" button.
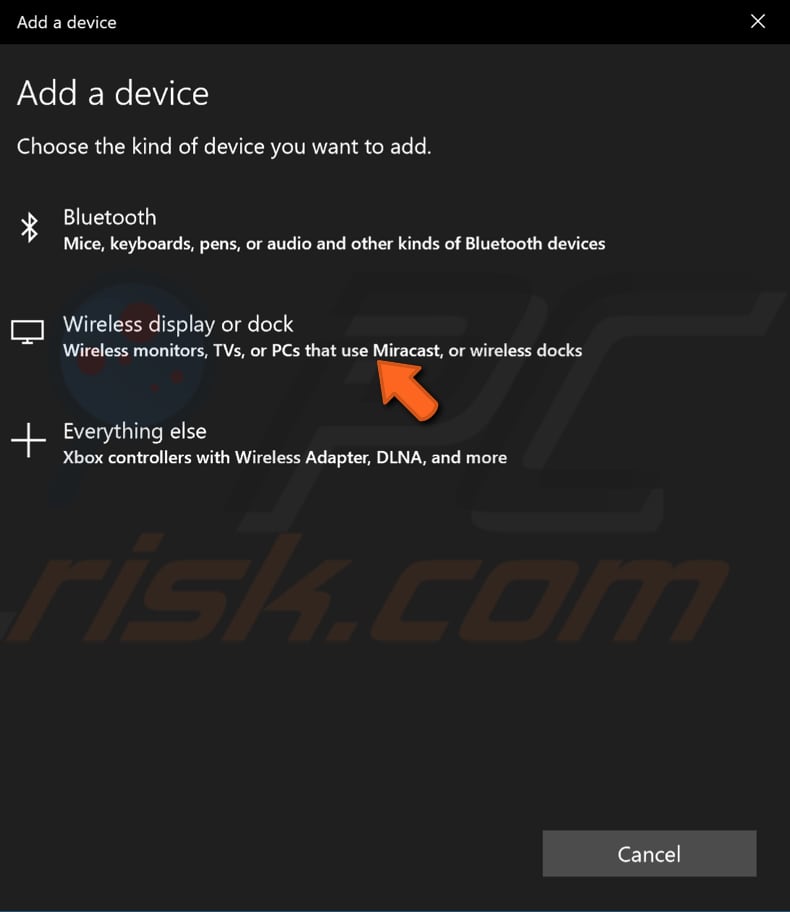
Select the "Wireless display or dock" option and see if it finds the device you want to connect.
Update Display and Network Adapter's Driver
If Miracast is not working, update your drivers. The device driver is software that informs the operating system and other software how to interact with particular hardware. The driver facilitates smooth communication between hardware and software. If the appropriate driver is not installed, the device might not function properly.
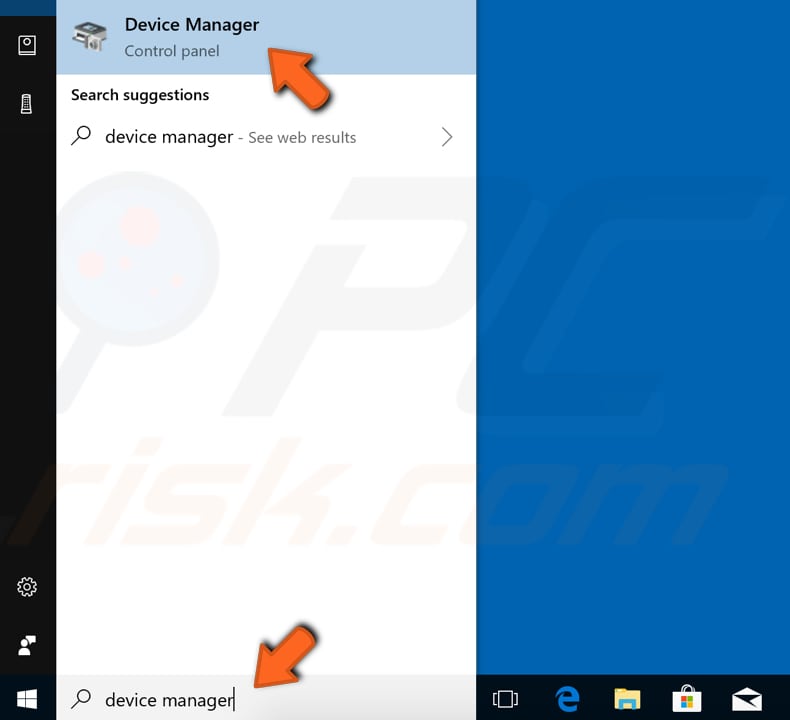
To update the Display adapter and Network adapter driver, use Device Manager. To open Device Manager, right-click the Start button and select the "Device Manager" result from the contextual menu, or type "device manager" in Search and click the "Device Manager" result.
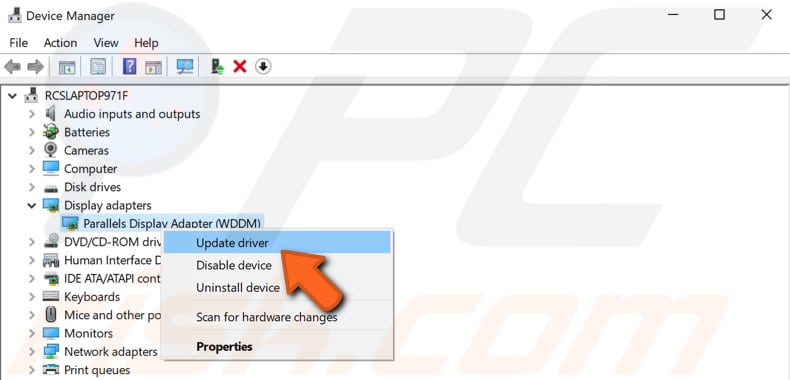
In Device Manager, you will see a list of devices connected to your computer. Find the "Display adapters" category and expand it, right-click your display adapter, and select "Update driver" from the contextual menu.
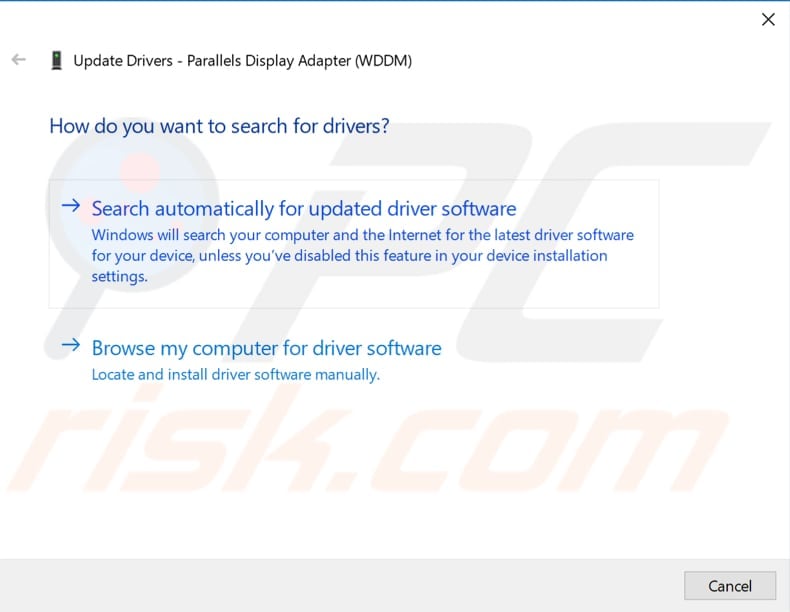
You will be asked if you want to search for an updated driver software automatically or to browse your computer for driver software. If you select the first option, Windows will search your computer and the Internet for the latest driver software for your device.
If you select the second option, you must locate and install drivers manually. Using this option requires having previously downloaded a driver on your computer or USB flash drive.
We recommend that you select the first option - select it and follow the instructions. If the first option does not solve the problem, download the latest drivers from the manufacturer's website.
Once the display adapter is up-to-date, find the "Network adapters" category in the Device Manager's list and repeat the steps. See if this solves the problem, and Miracast is now working without problems.
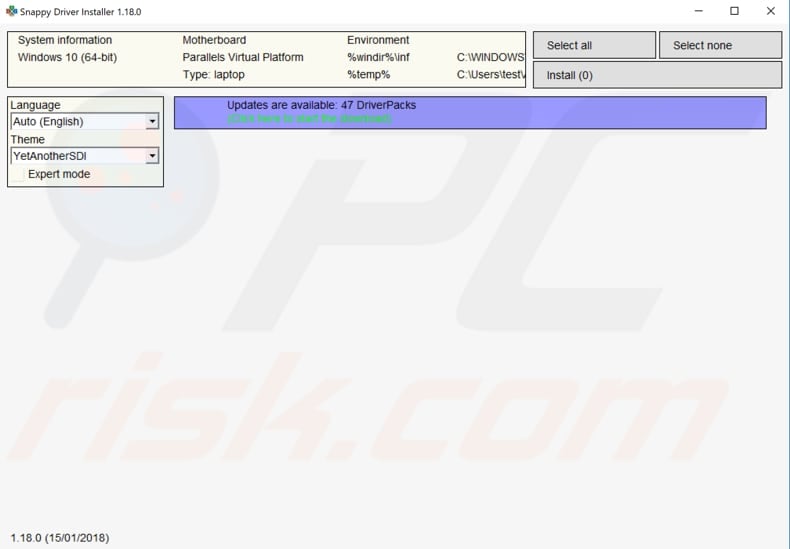
Snappy Driver Installer (SDI) is a powerful free driver updater tool for Windows that can store its entire collection of drivers offline. Drivers downloaded via Snappy Driver Installer include drivers for various hardware such as sound devices, video cards, network adapters, etc. You can download Snappy Driver Installer from here.
Check WLAN AutoConfig Service
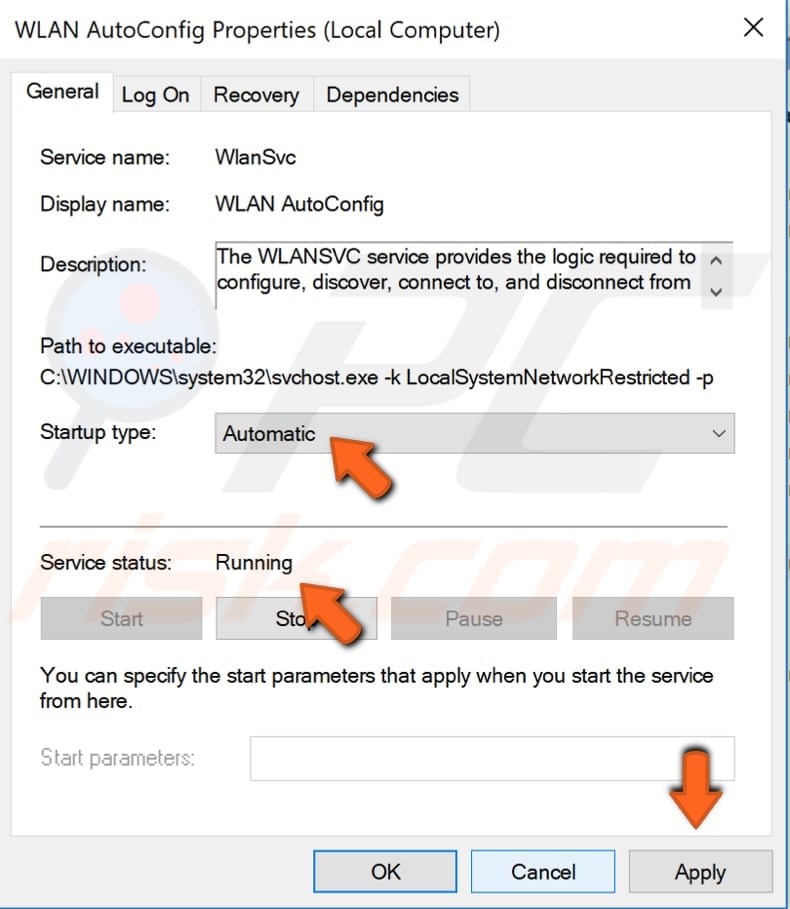
Windows Services (also known as services.msc) modify how Windows services run on your system. You can modify a service's settings for security, troubleshooting, and performance-related reasons. In this case, you need to check if the WLAN AutoConfig service is running and if the startup type is set to Automatic. WLAN AutoConfig service provides the logic required to configure, discover, connect to, and disconnect from a wireless local area network.
It also contains the logic to turn your computer into a software access point that other devices or computers can connect to your computer wirelessly using a WLAN adapter that can support this.
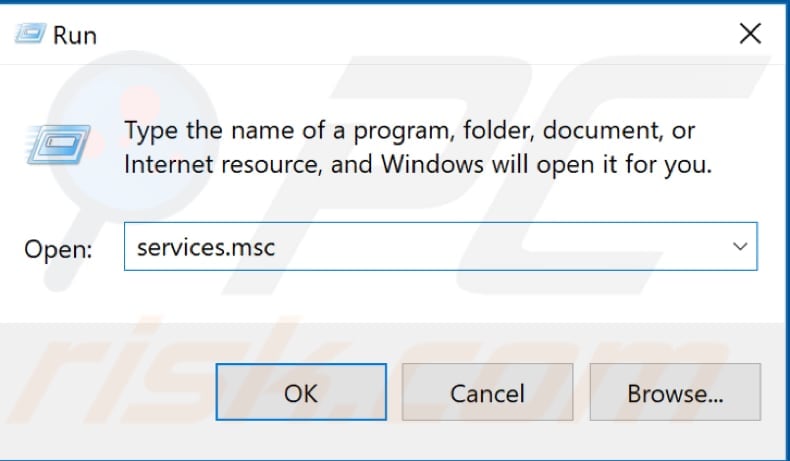
To check if the WLAN AutoConfig service is running and the startup type is set to automatic, open the Run dialog box. Press Windows (Win) key + R, or simply right-click Start and select "Run" from the contextual menu. In the Run dialog box, type "services.msc" and press Enter or click "OK".
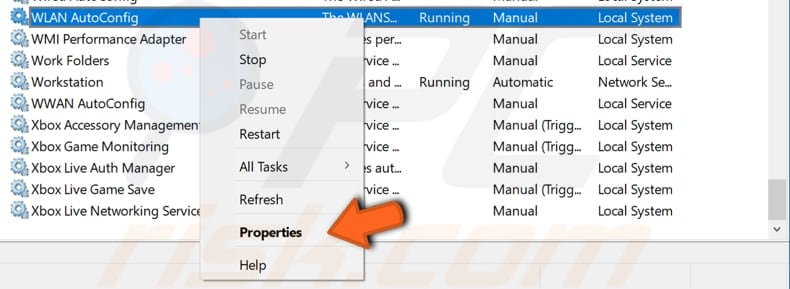
You will see a list of Windows services, find WLAN AutoConfig and right-click it, select "Properties" from the contextual menu.
In the WLAN AutoConfig Properties window, find "Startup type" and set it to "Automatic". Ensure that "Service status" is running. If it is not, then press the "Start" button to start it. Click "Apply" and exit Windows Services. Try to restart your computer and see if Miracast is now working.
Restore Your System Using Restore Points
If Miracast stopped working after you installed software or made other changes that could affect it, we recommend you use System Restore. A restore point is a collection of important system files stored by System Restore on a given date and time. System Restore reverts everything to a saved restore point, but first, you must have one recorded.
To use this tool, you must have created restore points. With a created restore point, this feature will bring your system back to the previous working state, without affecting your files and data. If you have any system restore points created before you started experiencing problems with Miracast, you might be able to fix the problem by performing a System Restore.
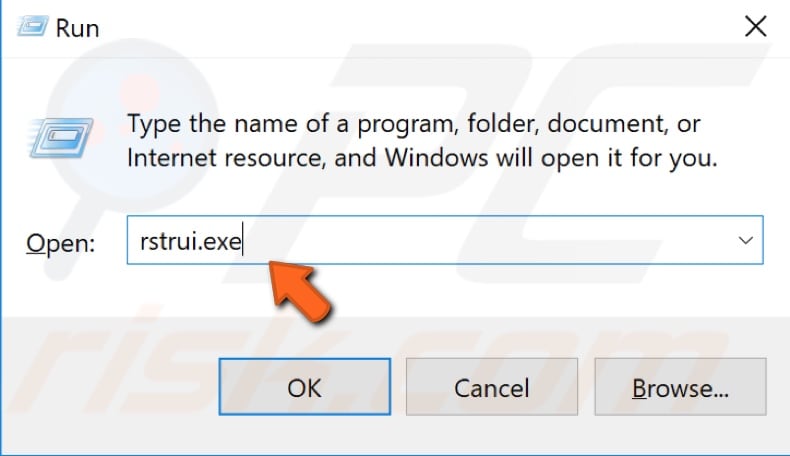
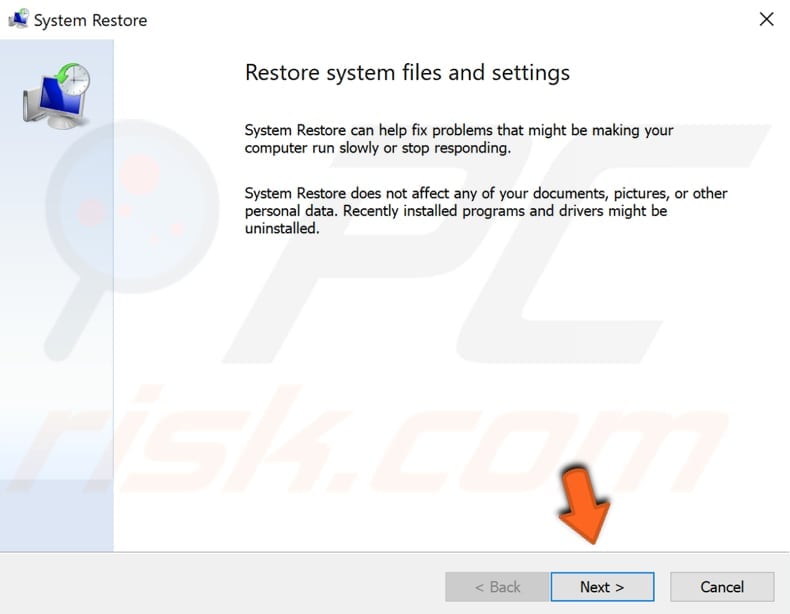
To restore your system, launch Run by pressing the Windows Key + R and type "rstrui.exe". In the Run dialog box, press Enter or click "OK".
In the System Restore window, click "Next".
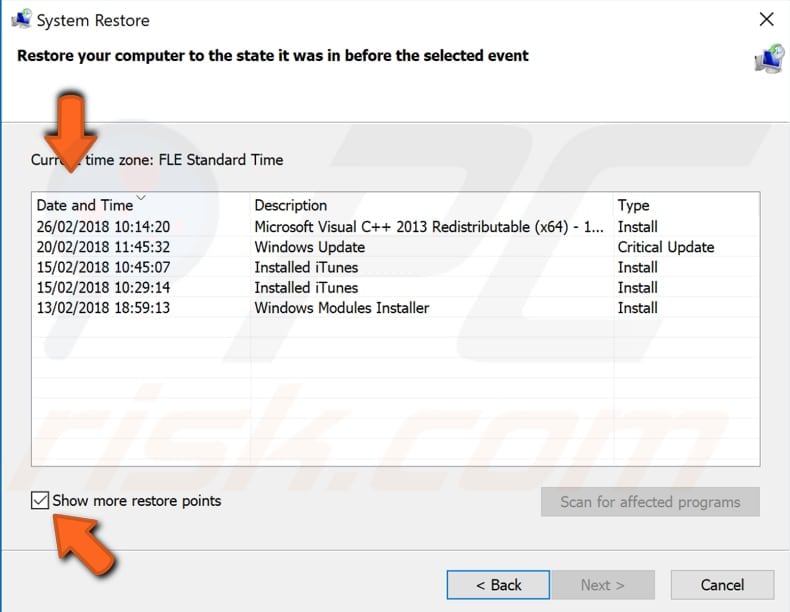
If there are restore points created, you will see a list of them. Mark the "Show more restore points" checkbox, which should display more restore points. Select the most appropriate restore point (depending on the time created, etc.) and click "Next".
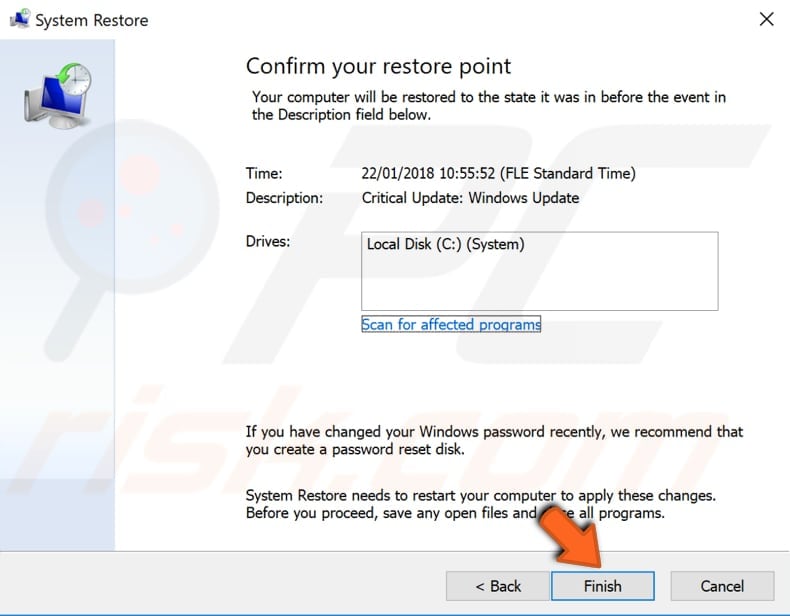
Confirm the restore point. Your computer will be restored to the state before the event detailed in the "Description" field. If you are happy with your choice, click "Finish" and begin the system restore process.
We hope this guide was helpful, and you can now set up Miracast on Windows 10 and troubleshoot common problems. If you know of other methods that solve problems with Miracast not mentioned in our guide, please share them with us by leaving a comment in the section below.
Share:

Rimvydas Iliavicius
Researcher, author
Rimvydas is a researcher with over four years of experience in the cybersecurity industry. He attended Kaunas University of Technology and graduated with a Master's degree in Translation and Localization of Technical texts. His interests in computers and technology led him to become a versatile author in the IT industry. At PCrisk, he's responsible for writing in-depth how-to articles for Microsoft Windows.
▼ Show Discussion