FIX: Windows couldn’t automatically bind the IP protocol stack to the network adapter

Get Free Scanner and check your computer for errors
Fix It NowTo fix found issues, you have to purchase the full version of Combo Cleaner. Free trial available. Combo Cleaner is owned and operated by Rcs Lt, the parent company of PCRisk.com read more.
How to Fix "Windows couldn't automatically bind the IP protocol stack to the network adapter" Error in Windows 10?
If your Windows 10 Network Diagnostics presents you with the "Windows couldn't automatically bind the IP protocol stack to the network adapter" error message, read this article to fix this error.
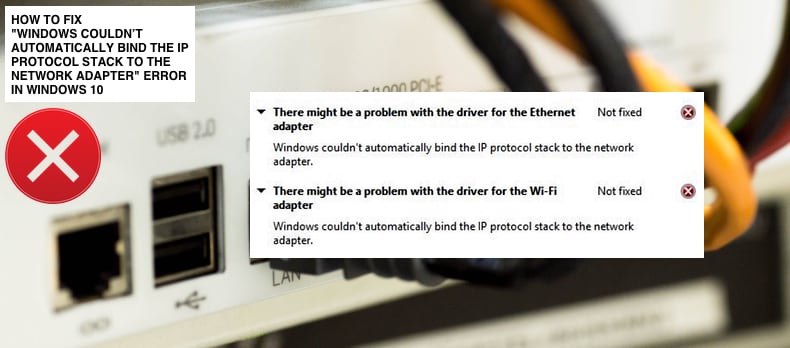
Windows 10 Troubleshooters are usually able to fix problems automatically. However, they can also only show errors but can't fix them. If you have problems connecting to the Internet, a Windows troubleshooter may show a message, saying:
There might be a problem with the driver for the Ethernet adapter
or
There might be a problem with the driver for the Wi-Fi adapter
This Error message is usually followed by an explanation message, stating:
Windows couldn't automatically bind the IP protocol stack to the network adapter.
In many cases, a Windows Troubleshooter can't fix the underlying problems causing these error messages.
Among various possible causes for this error, a VPN (Virtual Private Network) client might be the cause of this error. To fix this problem, you might need to disable the VPN client or uninstall it completely.
You might also need to reset Windows Sockets, edit Windows Registry, and update Network adapter drivers. This guide outlines several methods to fix the "Windows couldn't automatically bind the IP protocol stack to the network adapter" error.
Video on How to Fix "Windows couldn't automatically bind the IP protocol stack to the network adapter" Error:
Table of Contents:
- Introduction
- Reset Your IP and Clear DNS Cache
- Check Adapter Options
- Update Your Network Adapter
- Change WLAN AutoConfig Service's Startup Type
- Shut Down Your Computer Using Shift Key
- Edit Registry
- Video on How to Fix "Windows couldn't automatically bind the IP protocol stack to the network adapter" Error
Download Computer Malware Repair Tool
It is recommended to run a free scan with Combo Cleaner - a tool to detect viruses and malware on your device. You will need to purchase the full version to remove infections. Free trial available. Combo Cleaner is owned and operated by Rcs Lt, the parent company of PCRisk.com read more.
Reset the IP and Clear DNS Cache
This method includes entering and executing "netsh" and "ipconfig" commands into Command Prompt. Netsh is a command-line scripting utility that allows you to, either locally or remotely, display or modify the network configuration of a computer that is currently running.
Netsh also provides a scripting feature to run a group of commands in batch mode against a specified computer.
Ipconfig is a command-line tool that displays the current configuration of the installed IP stack on a networked computer. Using this tool, we can flush and reset the contents of the DNS client resolver cache and renew the DHCP configuration.
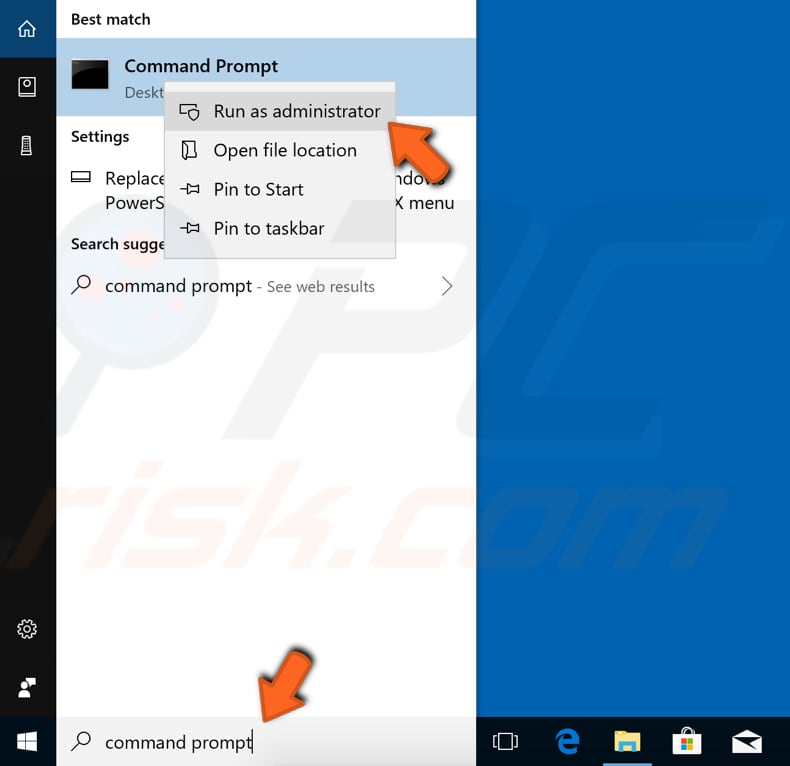
The commands require an elevated Command Prompt opened with administrator privileges. To open elevated Command Prompt, type "command prompt" in Search and right-click on the "Command Prompt" result. Choose "Run as administrator" to run it with administrative privileges.
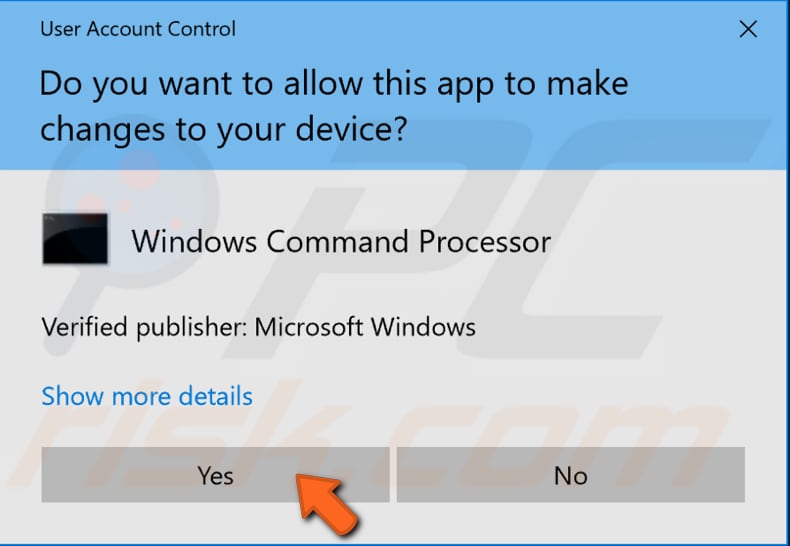
When you select "Run as administrator", a User Account Control prompt will appear asking if you allow the Command Prompt to make changes to your computer. Click "Yes".
Elevated Command Prompt will appear. In the Command Prompt window, type these commands:
netsh winsock reset
netsh int ip reset

Command Prompt will display a message stating that you must restart the computer to complete the reset after executing the first command - ignore it and execute both commands by pressing Enter after each. Restart the computer and then type these commands:
ipconfig /release
ipconfig /flushdns
ipconfig /renew

Press Enter on the keyboard after entering each command. When all commands are executed, restart the computer and see if this fixes the "Windows couldn't automatically bind the IP protocol stack to the network adapter" error.
Check Adapter Options
A simple adapter options check might fix the problem. Go to Network and Sharing Center by right-clicking the Network icon on the taskbar near the clock and selecting the "Open Network & Internet settings" option from the contextual menu.

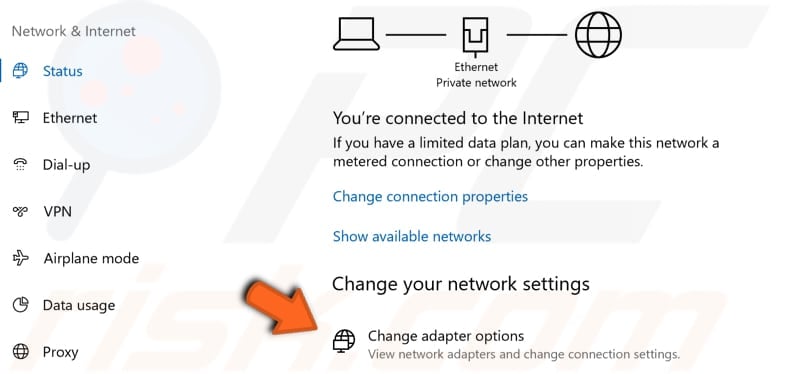
This will get you to the Status window - click "Change adapter options" under Change your network settings.
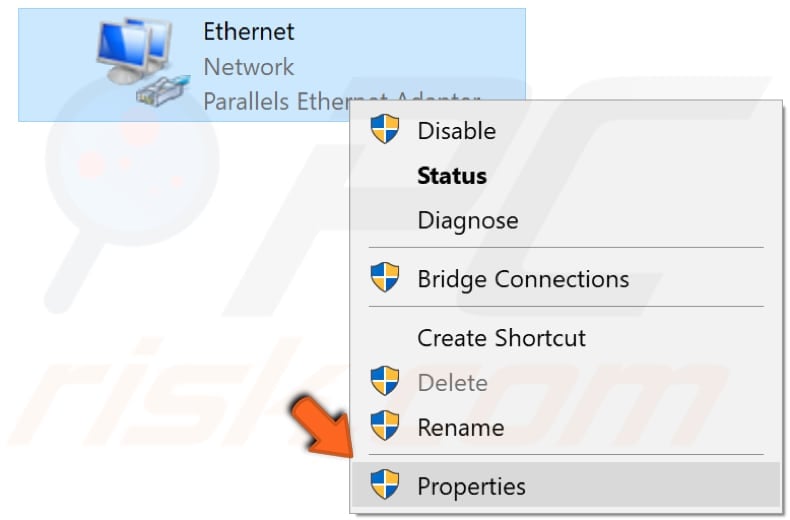
In the Network Connections window, right-click the connection experiencing the "Windows couldn't automatically bind the IP protocol stack to the network adapter" error and select "Properties".
In the connection properties window, you will see a list of items used by your connection. Ensure that these items are checked and uncheck the items that are not mentioned:
Client for Microsoft Networks
File and Printer Sharing for Microsoft Networks
QoS packet scheduler
Internet Protocol Version 4 (TCP/IPv4)
Microsoft LLDP Protocol Driver
Internet Protocol Version 6 (TCP/IPv6)
Link-Layer Topology Discovery Mapper I/O driver
Link-Layer Topology Discovery Responder
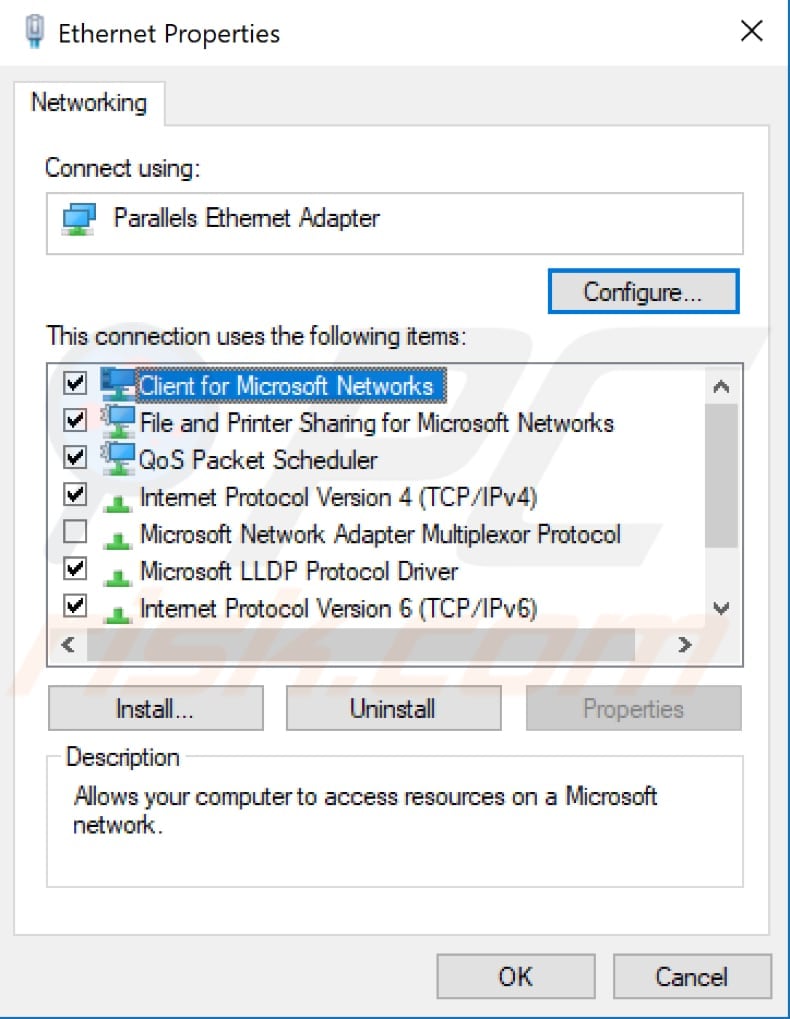
Click "OK" to save the changes made (if any) and close the network connection properties window. See if this fixes the "Windows couldn't automatically bind the IP protocol stack to the network adapter" error.
Update Your Network Adapter
This problem might be caused by an old or incorrect driver. In this case, you need to get an updated/new driver for your network adapter. There is an easy way to do this automatically with Snappy Driver Installer or manually, using a Device Manager. Either way, you will need a computer with a working Internet connection to download the drivers or to download the Snappy Driver Installer.
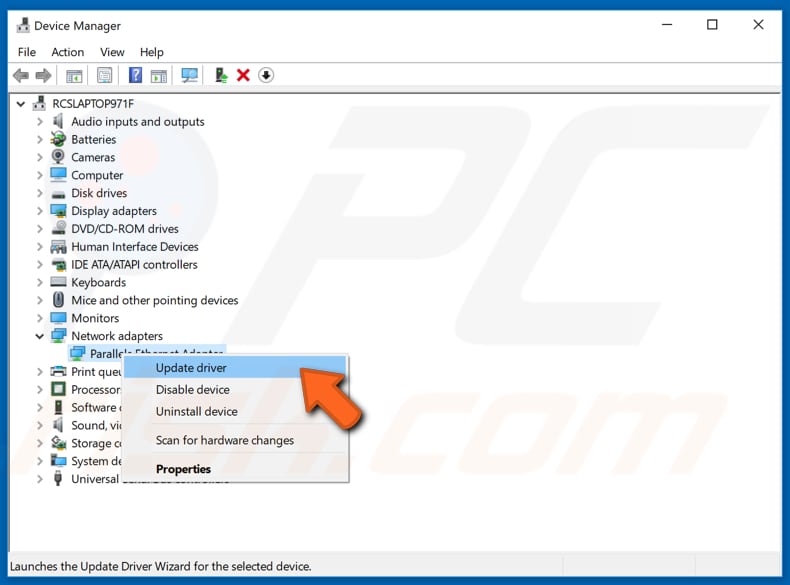
To update drivers manually, go to the network adapter manufacturer website and download the latest driver. Copy it to a USB drive. Go to Device Manager (type "device manager" in Search and open it). Expand the "Network adapters" section, select your network adapter, and right-click on it. Then, choose "Update Driver".
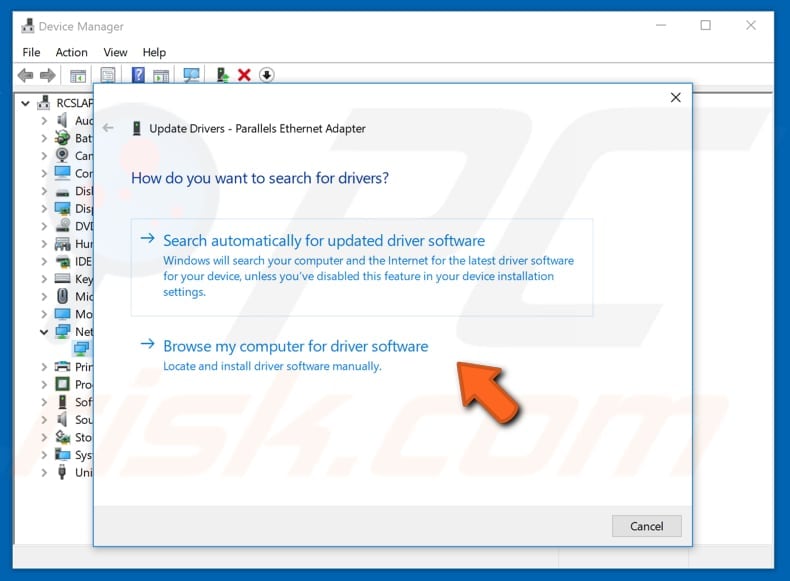
You will be asked how you wish to search for drivers and provided with two options: 1) search automatically for updated driver software; 2) browse your computer for driver software.
The first option requires an Internet connection (choose the second option since you have problems with your Internet connection). Locate the driver on the USB drive and follow the instructions.
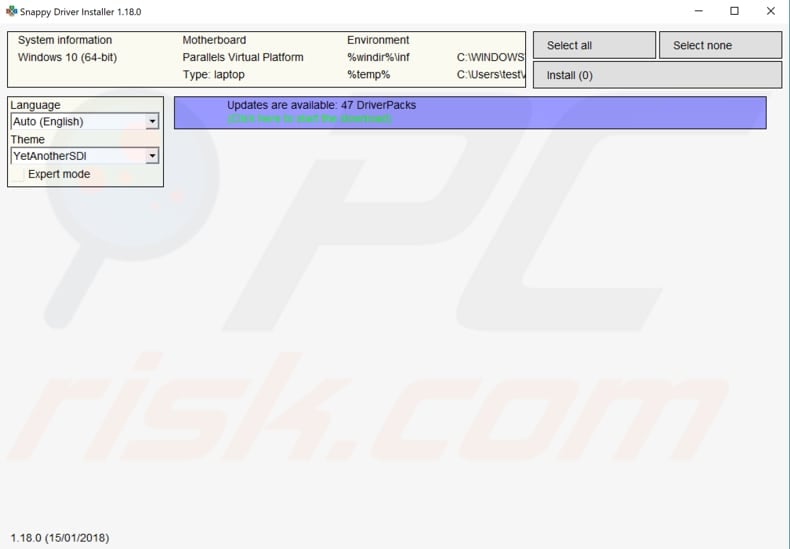
To update drivers automatically, you can use a downloaded Snappy Driver Installer. This is a powerful free driver updater tool for Windows that can store its entire collection of drivers offline. Having offline drivers gives Snappy Driver Installer the ability to have access to fast driver updates, even if there is no active Internet connection. You can download Snappy Driver Installer from here.
After you have finished updating and installing drivers (manually or automatically), restart Windows for them to take effect. Try to connect to the Internet to see if you still receive the "Windows couldn't automatically bind the IP protocol stack to the network adapter" error.
Change WLAN AutoConfig Service's Startup Type
Windows Services (also known as services.msc) are used to modify how Windows services run on your system. These services are responsible for running available programs and managing many system settings and resources. You can modify a service's settings for security, troubleshooting, and performance-related reasons.
One of these services is WLAN AutoConfig, which provides the logic required to configure, discover, connect and disconnect from a wireless local area network as defined by standards. It also contains the logic to turn your computer into a software access point so that other devices or computers can connect to your computer wirelessly using a WLAN adapter that can support this.
Some users have reported that changing WLAN AutoConfig service's startup type fixed the "Windows couldn't automatically bind the IP protocol stack to the network adapter" error.
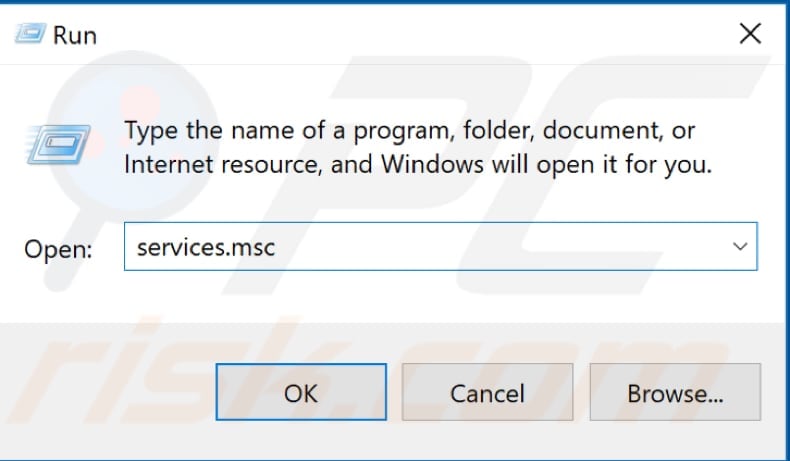
To change it, press the Windows (Win) key + R, or simply right-click Start and select "Run" from the contextual menu. Type "services.msc" in the Run dialog box and press Enter or click "OK".
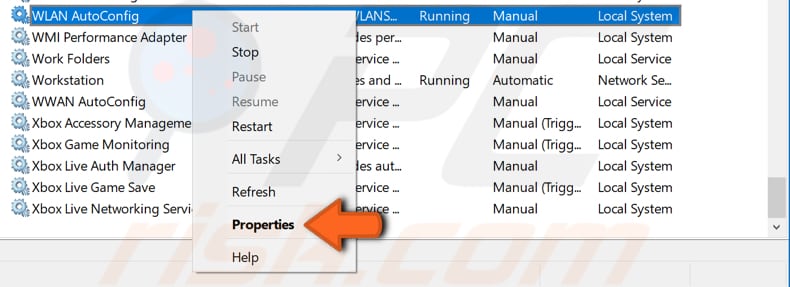
Find the WLAN AutoConfig service in the services list (press W on your keyboard, which is quicker, and scroll down until you find this service) and right-click it. Select "Properties" from the contextual menu.
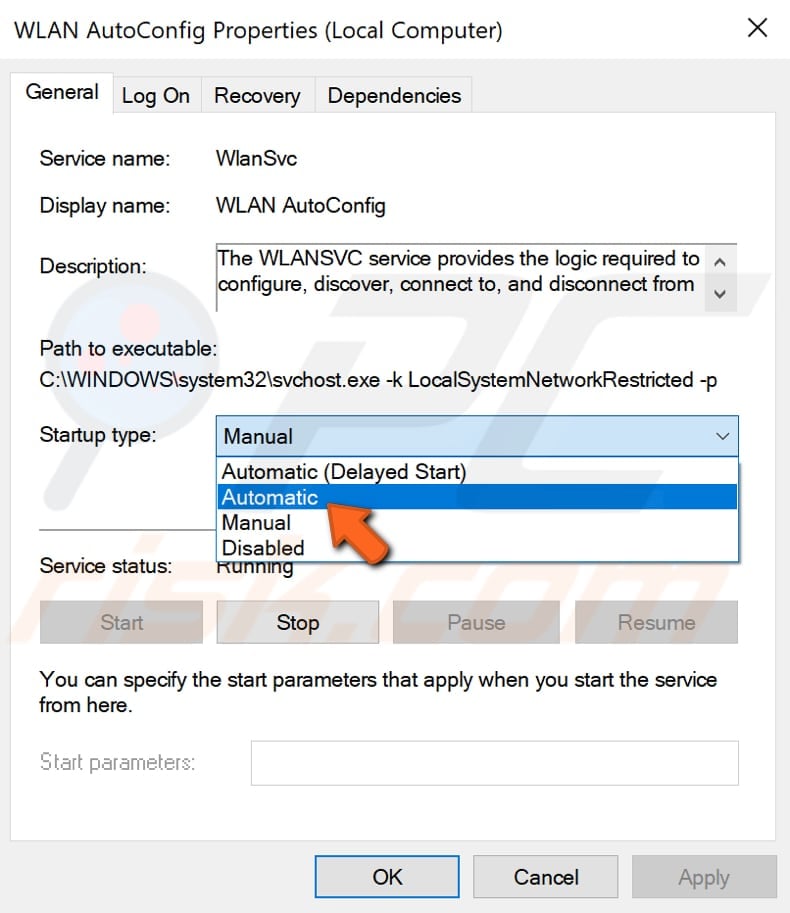
In the WLAN AutoConfig Properties (Local Computer) window, find "Startup type" and set it to "Automatic". Click "Apply" to save the changes and close all Services windows.
Restart the computer and see if this fixes the "Windows couldn't automatically bind the IP protocol stack to the network adapter" error.
Shut Down Your Computer Using Shift Key
If you have already tried to restart your computer (or tried to shut it down the usual way), you could also try to shut it down using the Shift key by clicking the "Shut down" option while holding the Shift key pressed.
This might sound improbably, but some users have reported that this simple solution fixed the "Windows couldn't automatically bind the IP protocol stack to the network adapter" error.
Shut down the computer using the Shift key, wait for a minute, and then turn it on again - see if this solves the problem.

Edit Registry
Windows Registry is a collection of databases of configuration settings in Microsoft Windows operating systems. It stores much of the information and settings for software programs, hardware devices, user preferences, operating system configurations, and much more. Many of the options exposed in the registry are not accessible elsewhere in Windows.
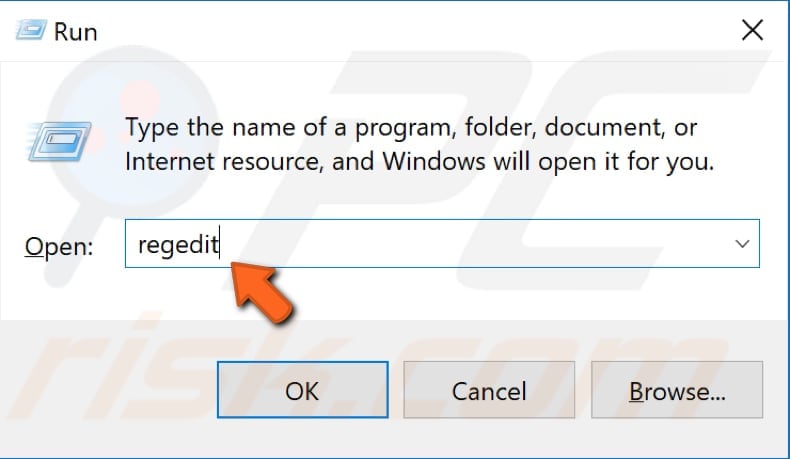
To edit the registry, use Windows Registry Editor by opening the Run dialog box (press Windows [Win] key + R or right-click Start and select "Run") and type "regedit". Press Enter or click "OK".
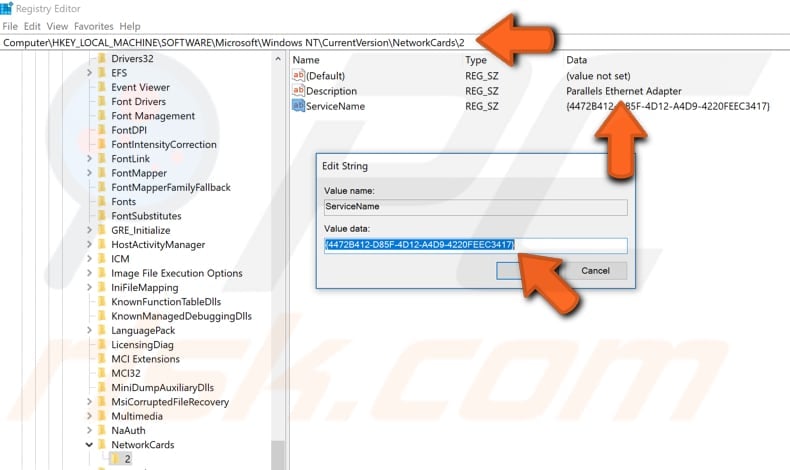
Now follow this path: "HKEY_LOCAL_MACHINE\SOFTWARE\Microsoft\Windows NT\CurrentVersion\NetworkCards". Expand the "NetworkCards" key. You will see folders numbered 2, 3, 4, and so on (in our case, it is just the 2).
You can see which adapter the registry sub-key corresponds to by looking at the Description REG_SZ file and the adapter's name in the "Data" column. Double-click the "ServiceName" REG_SZ file and copy its value data.
Now follow this path: "HKEY_LOCAL_MACHINE\SYSTEM\CurrentControlSet\Services\Tcpip\Parameters\Interfaces\Value Data of ServiceName string". Replace "Value data of ServiceName string" with the value data you copied from the ServiceName REG_SZ file and paste the whole directory into the Registry Editor bar.
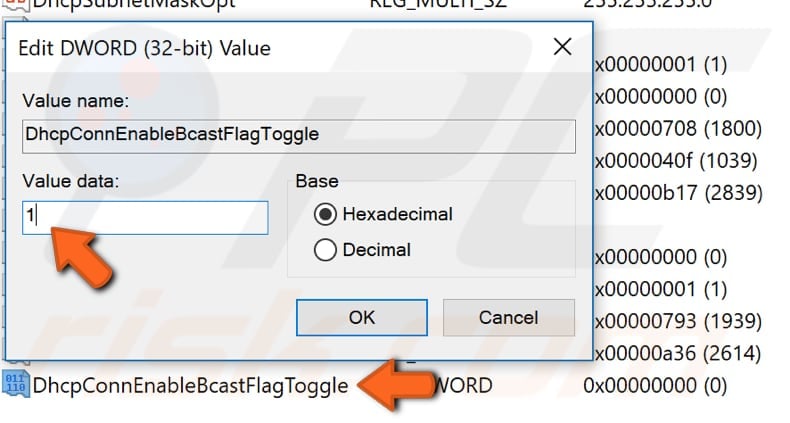
Right-click the empty space on the right pane and select "New", then "DWORD (32-bit) Value" and name it "DhcpConnEnableBcastFlagToggle".

Double-click the newly-created DhcpConnEnableBcastFlagToggle registry and set "Value data" to 1. Click "OK" to save the changes.
Exit Registry Editor and restart the computer - see if this fixes the "Windows couldn't automatically bind the IP protocol stack to the network adapter" error.
We hope this article was helpful, and one of the solutions fixed the "Windows couldn't automatically bind the IP protocol stack to the network adapter" error.
If you know of other solutions to this problem not mentioned in our guide, please share them with us by leaving a comment below.
Share:

Rimvydas Iliavicius
Researcher, author
Rimvydas is a researcher with over four years of experience in the cybersecurity industry. He attended Kaunas University of Technology and graduated with a Master's degree in Translation and Localization of Technical texts. His interests in computers and technology led him to become a versatile author in the IT industry. At PCrisk, he's responsible for writing in-depth how-to articles for Microsoft Windows.
▼ Show Discussion