How to Fix Nvidia Driver Crashing on Windows 10?
Get Free Scanner and check your computer for errors
Fix It NowTo fix found issues, you have to purchase the full version of Combo Cleaner. Free trial available. Combo Cleaner is owned and operated by Rcs Lt, the parent company of PCRisk.com read more.
Nvidia Display Driver Keeps Crashing on Windows 10? Follow the Steps in This Article to Fix that
Nvidia's GeForce series graphics card drivers may start to crash unexpectedly due to many reasons. This article contains to most effective troubleshooting steps to help you fix this issue.

A graphics (video) driver is necessary for the operating system and programs to use computer graphics hardware. Updated graphics drivers are essential and often deliver better performance.
Driver updates typically provide bug fixes and compatibility with newer software. In this case, specifically video games. Nvidia graphics cards are popular, but the drivers for said graphics cards sometimes cause problems.
Nvidia graphics card drivers may randomly start crashing. Sometimes, the driver may recover and allow you to continue playing your game, but that's not always the case.
This guide features several methods to address an Nvidia driver crash, including downloading and installing the latest drivers or older driver versions (paradoxically), adjusting your Power Options settings, disabling Windows services, etc.
Video Showing How to Fix Nvidia Driver Crash on Windows 10:
Table of Contents:
- Introduction
- Change Your Screen Resolution
- Reinstall Nvidia Drivers
- Download Drivers From Your Laptop Manufacturer
- Stop Automatic Driver Updates
- Disable iGPU
- Manage 3D Settings in Nvidia Control Panel
- Disable Your Antivirus
- Clean Your Graphic Card
- Video Showing How to Fix Nvidia Driver Crash on Windows 10
Download Computer Malware Repair Tool
It is recommended to run a free scan with Combo Cleaner - a tool to detect viruses and malware on your device. You will need to purchase the full version to remove infections. Free trial available. Combo Cleaner is owned and operated by Rcs Lt, the parent company of PCRisk.com read more.
Change Your Screen Resolution
Screen resolution refers to the clarity of the text and images displayed on your screen. At higher resolutions (such as 1600 x 1200), items appear sharper.
They also appear smaller, so more items can fit on the screen. The opposite is true at lower resolutions (such as 800 x 600): fewer items fit on the screen, but they appear larger.
Some users have reported that changing (decreasing) the screen resolution fixes the Nvidia driver crash issue. To lower the screen resolution, simply right-click the background and select "Display settings" from the contextual menu.

Now, click the arrow next to your screen resolution and select a lower resolution than the current setting. See if this solves the issue with the Nvidia driver.

Reinstall Nvidia Drivers
This method includes uninstalling current Nvidia drivers and installing the latest ones. To uninstall current Nvidia drivers, first go to Control Panel. Type "control panel" in Search and select the "Control Panel" result.

Now click "Uninstall a program" under Programs. If you do not see the Control Panel menu as shown in the image below, select "Category" in the "View by:" drop-down menu. You can find it in the top-right corner of the Control Panel window.

Locate the "NVIDIA Graphics Driver", right-click it and select "Uninstall" from the drop-down menu. You can click the "Uninstall" button positioned above the list to uninstall the driver.

Go to the Nvidia website and download the latest drivers for the graphics card.
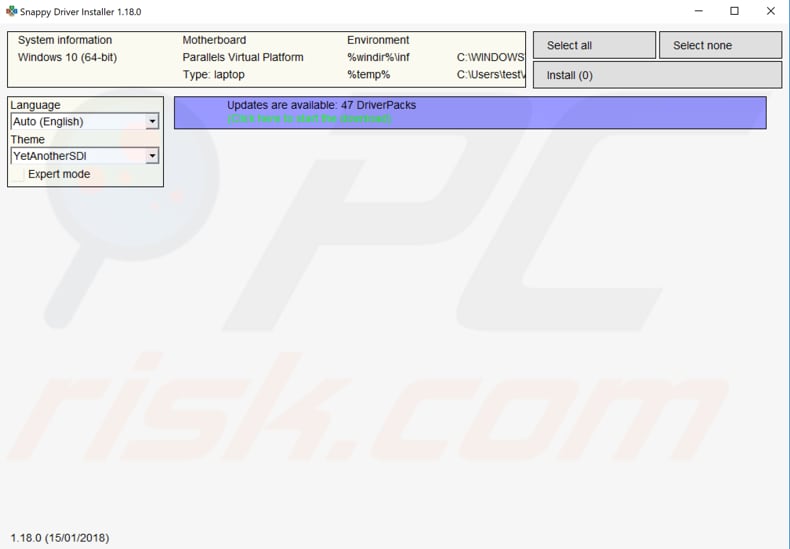
If you are unsure which drivers to download for the Nvidia graphics card, use third-party software such as Snappy Driver Installer. Snappy Driver Installer (SDI) is a powerful free driver updater tool for Windows that can store its entire collection of drivers offline. You can download Snappy Driver Installer from here.

Download Drivers From Your Laptop Manufacturer
This method applies only to laptop owners. If you are not using a laptop computer, skip this step.
Uninstall current drivers, applying the steps mentioned in the previous solution, and then go to the laptop manufacturer's web page and download the latest graphics drivers. Some users have reported that this solution helped them to fix issues with crashing Nvidia graphics drivers.
Stop Automatic Driver Updates
This method includes stopping automatic driver updates and downloading older versions of Nvidia drivers. The latest drivers are usually recommended. However, in some cases, older drivers work better and provide a solution.
Before installing older drivers, you first need to stop automatic driver updates. Do this by typing "system" in Search and select the "System" result.

Locate "Advanced system settings" on the left pane and click it.

In the System Properties window, select the "Hardware" tab and click "Device Installation Settings".

In the Device installation settings window, select "No (your device might not work as expected)" and click "Save changes".

Now that you have disabled automatic driver updates remove the current Nvidia graphics drivers and install older versions. We described the uninstall process in the first solution above. You can find 'beta' and older drivers for Nvidia products here.
Disable iGPU
A graphics processing unit (GPU) is a specialized electronic circuit designed to rapidly manipulate and alter memory to accelerate the creation of images in a frame buffer intended for output to a display device. GPUs are used in embedded systems, mobile phones, personal computers, workstations, and game consoles
iGPU is Integrated Graphics Processing Unit (or integrated GPU). This is a GPU made by the CPU (Central Processing Unit) manufacturer of the computer. There is another term, 'dGPU', which is a discrete GPU, a separate chip.
Now that we know the terminology, we will describe a solution that includes disabling the iGPU by accessing BIOS settings. BIOS (Basic Input Output System) is software stored in a small memory chip on the motherboard. You might need to access the BIOS to change how the device works, or to assist in troubleshooting a problem.
In this case, we need the BIOS to disable the iGPU. To access BIOS, press and hold the Del or F2 keys when starting the computer (or when it boots up). In the BIOS settings, locate the iGPU (or integrated graphic card) option and disable it. Save the changes and restart your computer. See if this helps to fix the issue with the Nvidia graphics driver.
Manage 3D Settings in Nvidia Control Panel
First, open the Nvidia Control Panel. Usually, you can access it by right-clicking on the desktop and selecting the "NVIDIA Control Panel". In the Nvidia Control Panel window, find "Manage 3D settings" on the left pane and select it.
Select "Power Management Mode" and set it to "Prefer Maximum Performance", and turn off the V-Sync (Vertical Synchronization) option. Click "Apply" to save changes and see if this fixes the problem with the Nvidia graphic driver.
NOTE: The Nvidia Control Panel settings might vary depending on the version on your computer, but generally, they should be similar to those described.
We also recommend that you set Power Options to High Performance by typing "power" in Search and select the "Power & sleep" result.

Click "Additional power settings" on the right pane.

Now, click "Show additional plans" and select "High performance" option.

Disable Your Antivirus
It is also possible that antivirus software is causing Nvidia driver crashes. Temporarily disable the antivirus software to determine if the driver still crashes and is thus causing the problem.
If so, we suggest you consider using different antivirus software (and uninstall the current software). Some users have reported that Avast antivirus software, specifically, was causing Nvidia driver crashes and that removing this software solved the problem.
Clean Your Graphic Card
The graphic card may be overheating due to dust, in which case it requires cleaning. Open the computer case and remove the graphic card. Carefully clean and replace it. See if this solves the issue with driver crashes.
NOTE: You may invalidate your computer and/or graphic card warranty by removing your graphic card.
We hope that one of the solutions above helps you solve the issue of Nvidia drivers, and you can use your computer without any Nvidia-related problems.
Share:

Rimvydas Iliavicius
Researcher, author
Rimvydas is a researcher with over four years of experience in the cybersecurity industry. He attended Kaunas University of Technology and graduated with a Master's degree in Translation and Localization of Technical texts. His interests in computers and technology led him to become a versatile author in the IT industry. At PCrisk, he's responsible for writing in-depth how-to articles for Microsoft Windows.

▼ Show Discussion