How to Fix the 'Windows can't set up a homegroup on this computer' Error?

Get Free Scanner and check your computer for errors
Fix It NowTo fix found issues, you have to purchase the full version of Combo Cleaner. Free trial available. Combo Cleaner is owned and operated by Rcs Lt, the parent company of PCRisk.com read more.
How to Easily Fix the "Windows can't set up a homegroup on this computer" Error on Windows 10?
Using Homegroup makes file sharing easier, but many computers running different Windows versions sometimes can't join or create a HomeGroup on their local network. In this article, you will show you several possible solutions for the "Windows can't set up a homegroup on this computer" error.

A homegroup is a group of computers on a home network that can share files and printers. Having a Homegroup makes file sharing easier. However, some users often run into problems when joining an existing homegroup on their local network.
In most cases, Windows users get the "Windows can't set up a homegroup on this computer" error. Every time the user tries to join or create a Homegroup using the affected computer, this error appears.
What Causes the "Windows can't set up a homegroup on this computer" Error?
Most of the time, this error occurs due to the "Peer Networking Grouping" service failing to start. Peer Networking Grouping service is a service that is responsible for enabling multi-party communication using Peer-to-Peer Grouping.
This service has a lot to do with Windows' ability to join and create Homegroups, and it determines how computers on the same Homegroup communicate. The troubleshooting methods found below may help you fix the "Windows can't set up a homegroup on this computer" error.
How to Fix the "Windows can't set up a homegroup on this computer" Error:
Table of Contents:
- Introduction
- Check if the Peer Networking Grouping Service Is Running
- Delete idstore.sst File
- Run Windows Troubleshooter
- Enable IPv6
- Check if Your Computer Is Connected to the Same Network
- Video Showing How to Fix the "Windows can't set up a homegroup on this computer" Error
Download Computer Malware Repair Tool
It is recommended to run a free scan with Combo Cleaner - a tool to detect viruses and malware on your device. You will need to purchase the full version to remove infections. Free trial available. Combo Cleaner is owned and operated by Rcs Lt, the parent company of PCRisk.com read more.
Check if the Peer Networking Grouping Service Is Running
In Windows NT operating systems, a Windows service is a computer program that runs in the background. A Windows service must comply with the interface rules and protocols of the Service Control Manager, the component responsible for managing Windows services.
It is the Services and Controller app, services.exe, that launches all the services and manages their actions, such as start, end, and etc. Windows services can be configured to start when the operating system is started and run in the background as long as Windows is running.
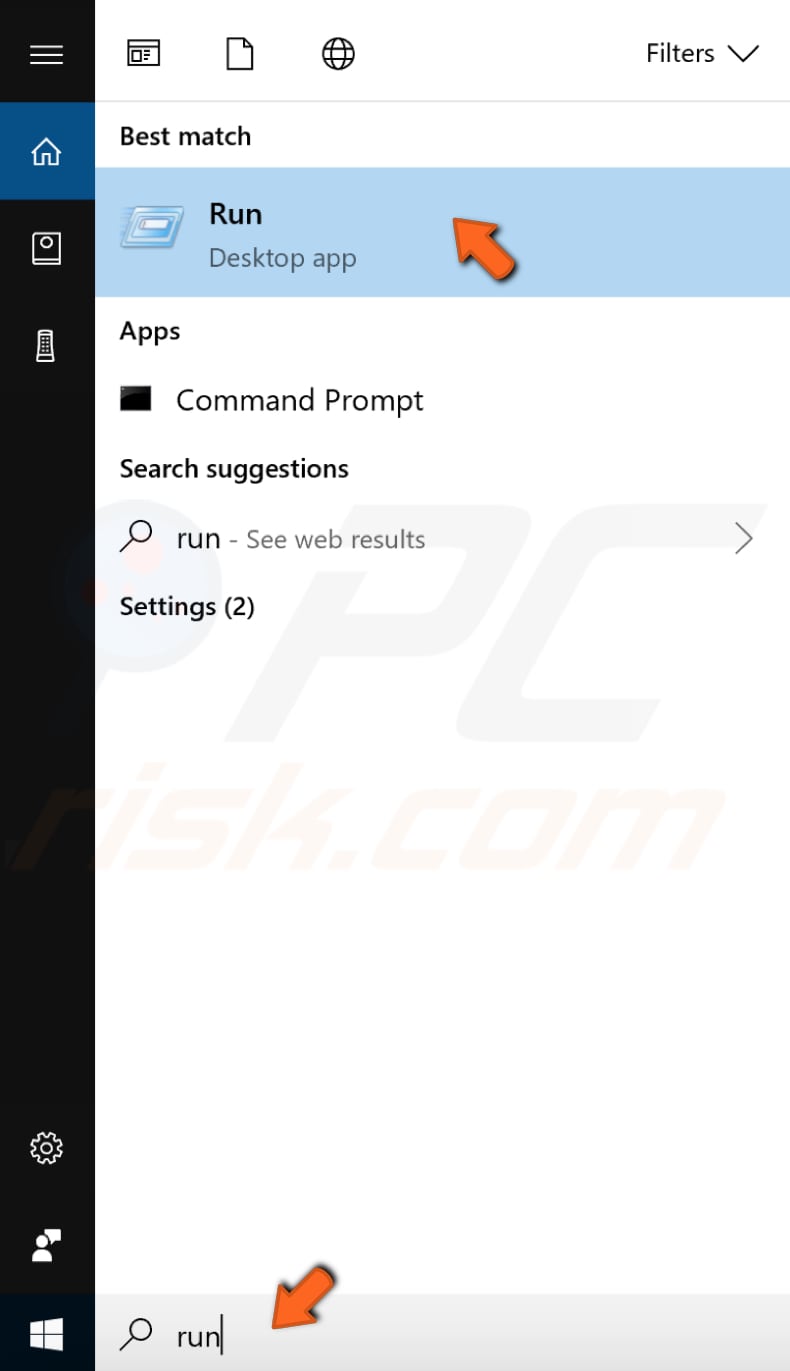
Alternatively, they can be started manually or by an event. We will check if the Peer Networking Grouping service is running and if not, you will need to start it manually. You will have to apply the steps for all computers on your Homegroup. First, type "run" in Search and click on the "Run" result to open its dialog box.
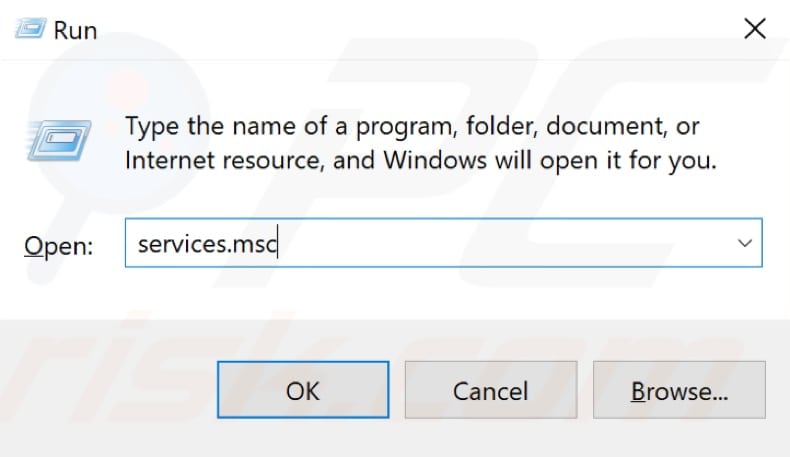
Type "services" and click "OK" or press Enter on your keyboard to open Windows Services.
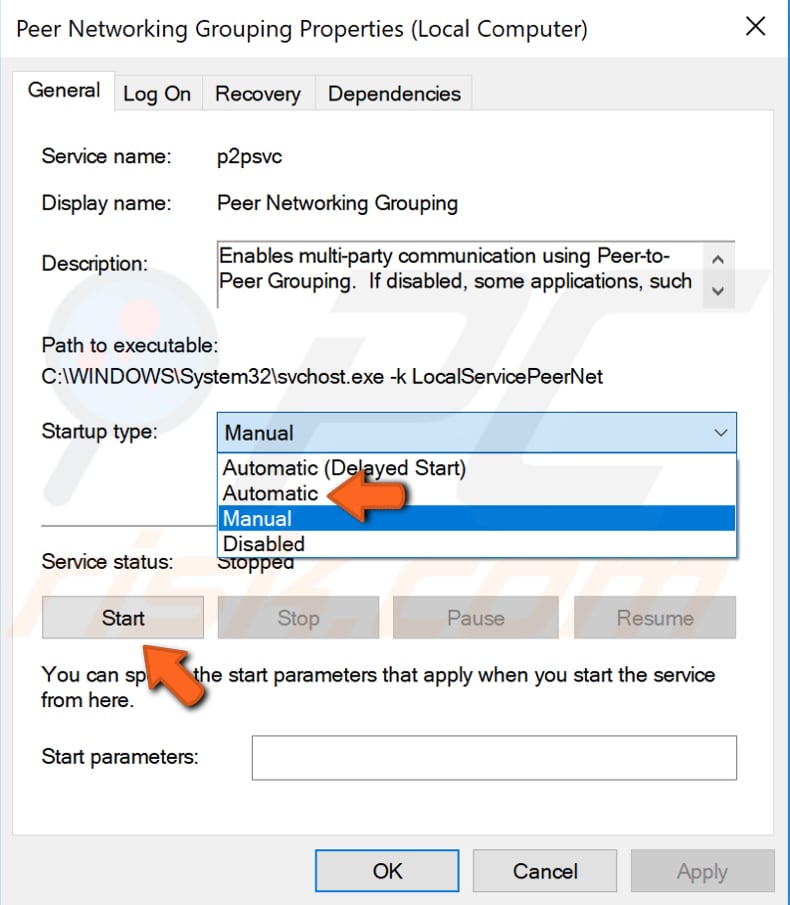
In the local services list find "Peer network grouping", "Peer network identity manager", "Homegroup listener" and "Homegroup provider".
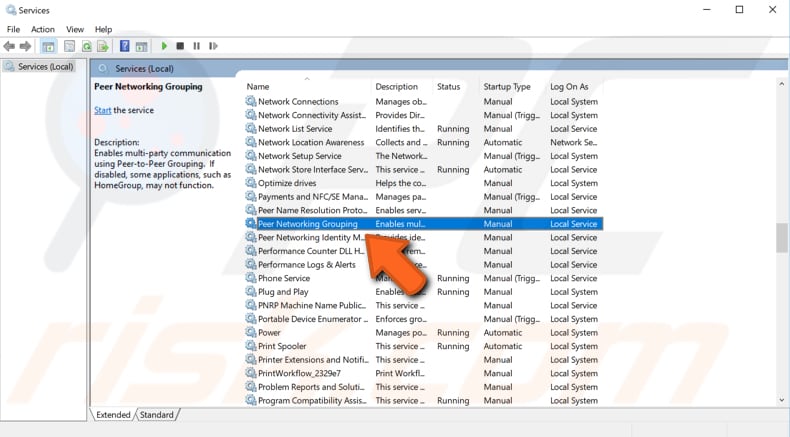
Check if those services are enabled or set to "Automatic". If not, then start them and set them to "Automatic". Leave your Homegroup. Try to create a new Homegroup and see if this helped to fix the "Windows can't set up a home group on this computer" error.
Delete idstore.sst File
Idstore.sst is a type of SST file associated with Microsoft Windows developed by Microsoft Corporation for the Windows Operating System. The SST file format preserves all certificate store properties and is useful for transferring certificates between computers.
Before deleting it, you will have to execute a command in elevated Command Prompt. Command Prompt is the input field in a text-based user interface screen, a command-line interpreter application available in most Windows operating systems. It is used to execute entered commands.
Some commands available in Windows require that you run them from an elevated Command Prompt. This means you have to be running it with administrator-level privileges.
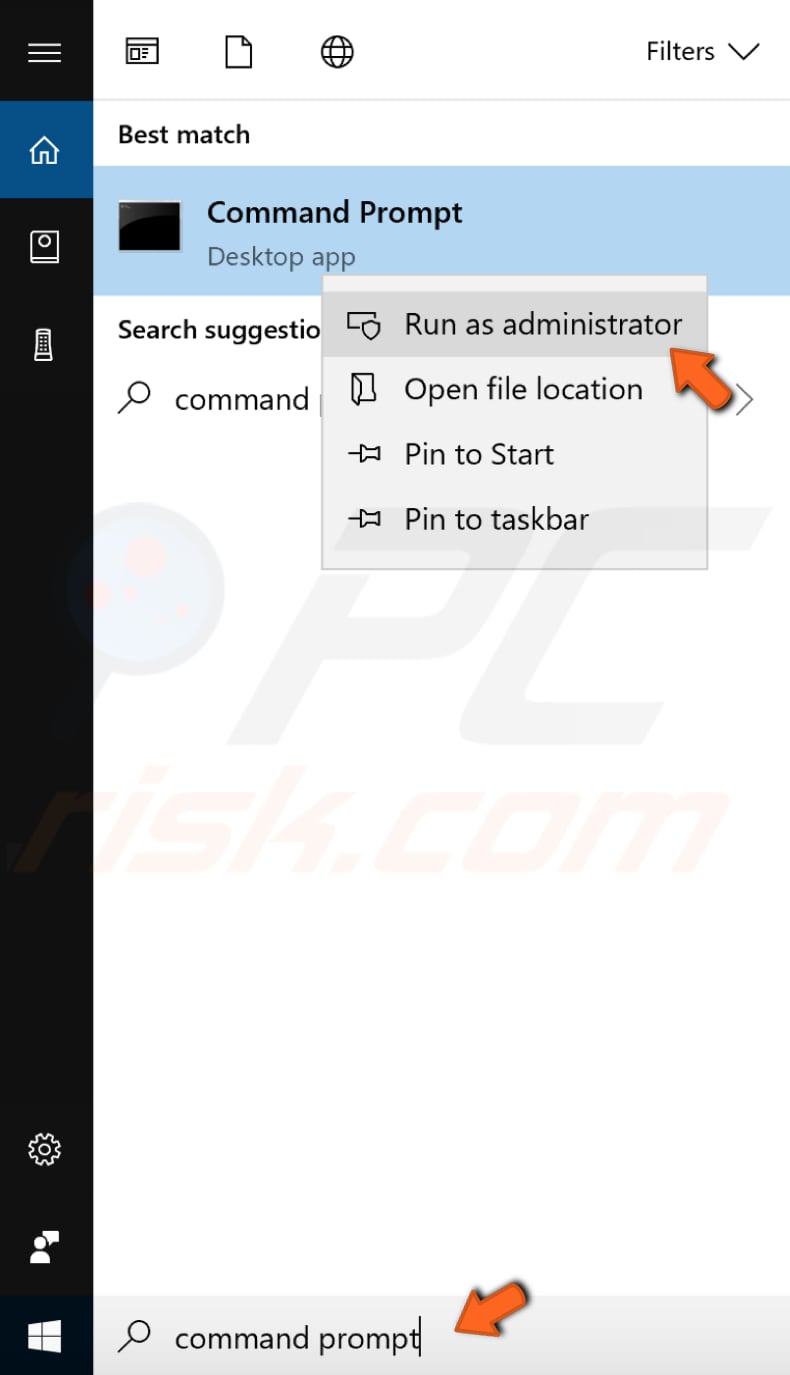
To open elevated Command Prompt, type "command prompt" in Search and right-click on the "Command Prompt" result, select "Run as administrator".
In opened Command Prompt, type in the "net stop p2pimsvc /y" command and press Enter on your keyboard. By executing this command, you will disable the Peer Networking Identity Manager. Peer Networking Identity Manager provides identity services for the Peer Name Resolution Protocol (PNRP) and Peer-to-Peer Grouping services.

Now go to File Explorer (you can access it by clicking on its icon on the taskbar or by pressing Ctrl + E keys on your keyboard) and go to this location: "C:\Windows\ServiceProfiles\LocalService\AppData\Roaming\PeerNetworking".
If you will get a warning message saying, "You don't currently have permission to access this folder" click "Continue" to permanently get access to this folder.
Once you're in the PeerNetworking folder, find idstore.sst file and right-click on it, select "Delete" in the dropdown menu. Restart your computer and check whether the "Windows can't set up a homegroup on this computer" error is fixed.
Run Windows Troubleshooter
Windows includes several troubleshooters designed to quickly diagnose and automatically resolve various computer problems. Troubleshooters cannot fix all issues, but they are an excellent place to start if you encounter a problem with your computer or operating system.
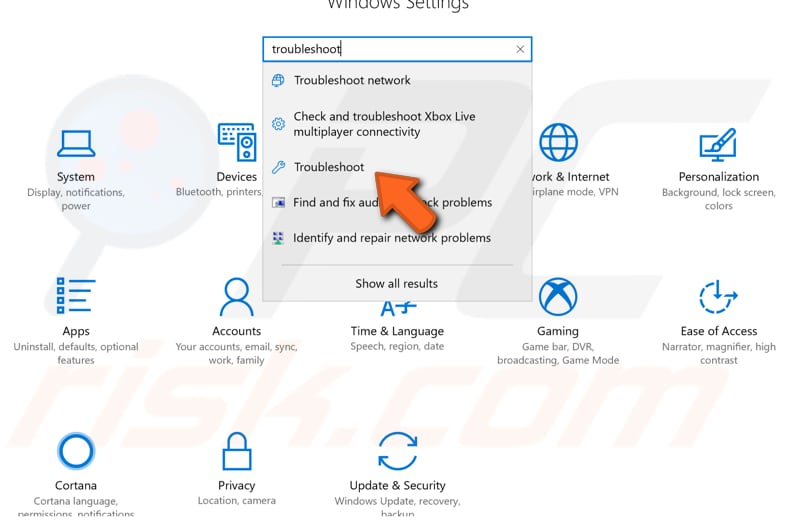
Go to Settings, type "troubleshoot", and select "Troubleshoot" from the list to start troubleshooting.
Scroll down to find "HomeGroup" under "Find and fix problems" list and select it, click "Run the troubleshooter".
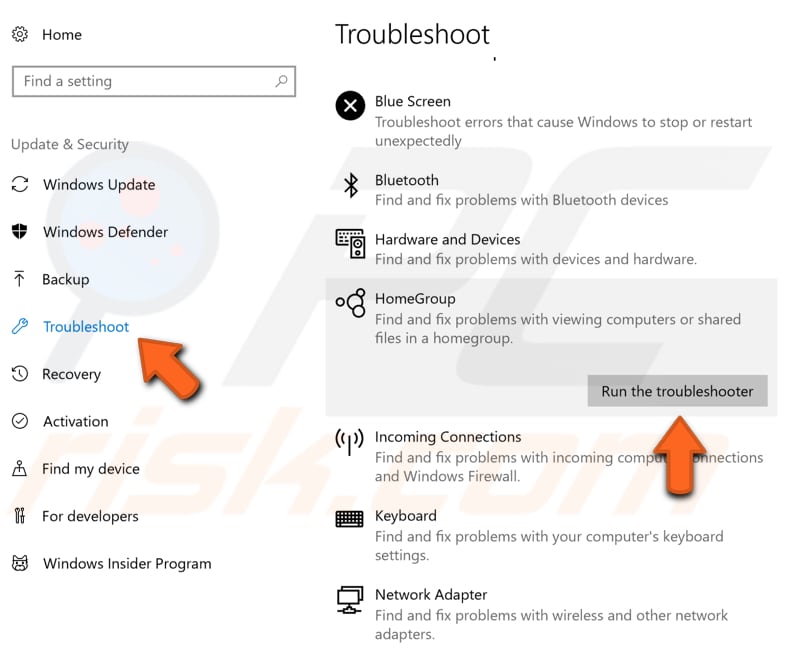
It will automatically check all the settings required for the HomeGroup to function correctly and tell you whether there is a problem or not. Usually, it can also try to fix any other potential issues.
Enable IPv6
Internet Protocol version 6 (IPv6) is the most recent Internet Protocol (IP) version. This communications protocol provides an identification and location system for computers on networks and routes traffic across the Internet.
IPv6 was developed to deal with the long-anticipated problem of IPv4 address exhaustion. To use the Windows HomeGroup feature, you have to make sure that IPv6 is enabled.
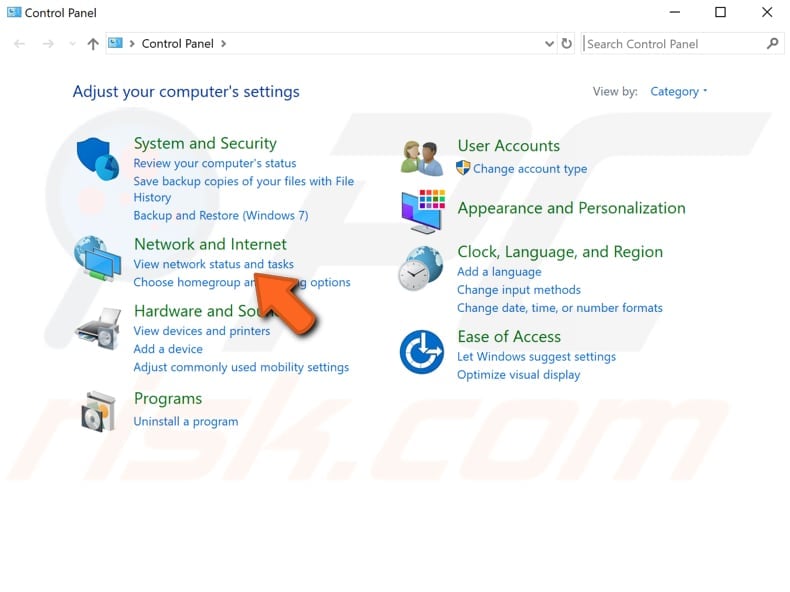
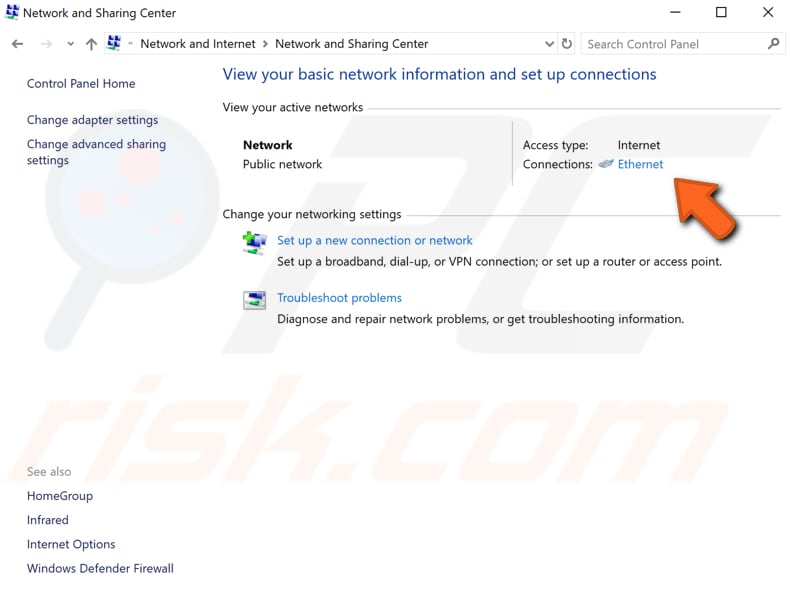
The easiest way to enable IPv6 on the Windows operating system is via the Network and Sharing Center. Go to Control Panel and click "View network status and tasks" under "Network and Internet" to open it.
Click on your connection (in our case, it is "Ethernet").
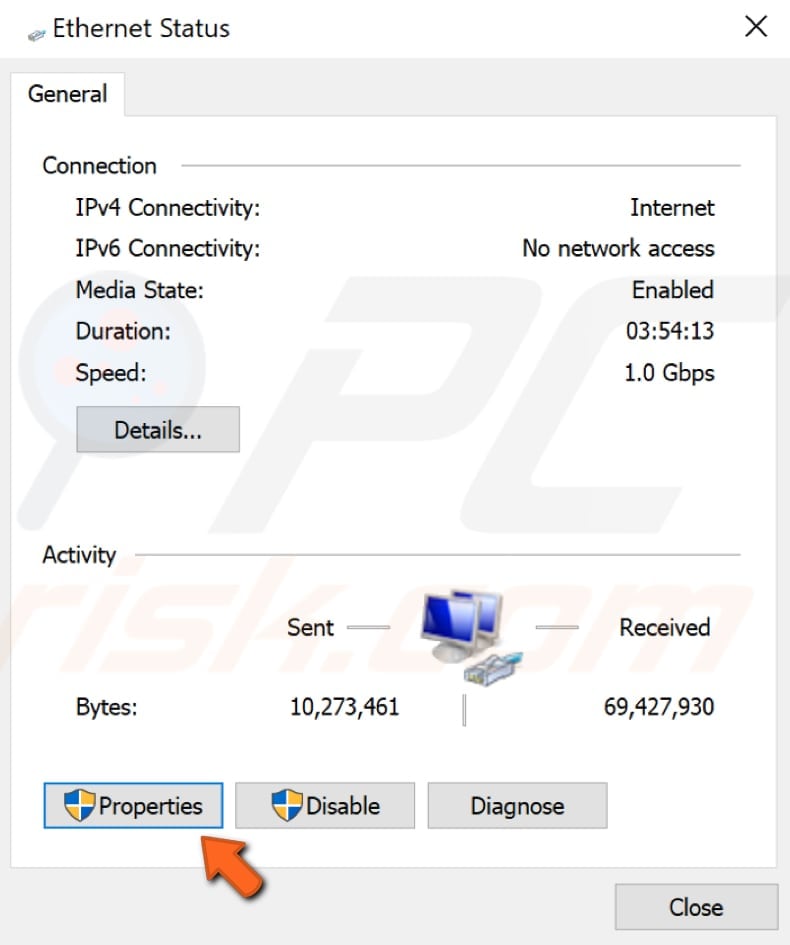
In your connection's status window, click on "Properties".
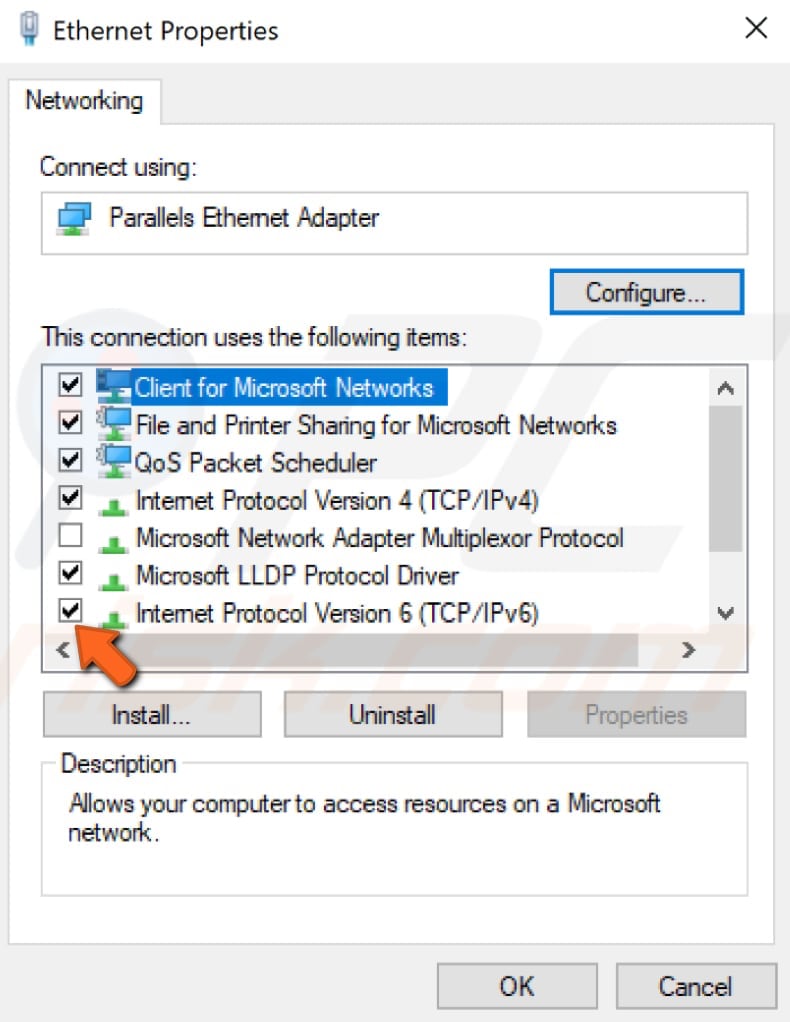
In your connections properties window, find "Internet Protocol Version 6 (IPv6)" and make sure that the checkbox near it is marked. Both IPv6 and IPv4 must be enabled. Click "OK" to save changes.
Check if Your Computer Is Connected to the Same Network
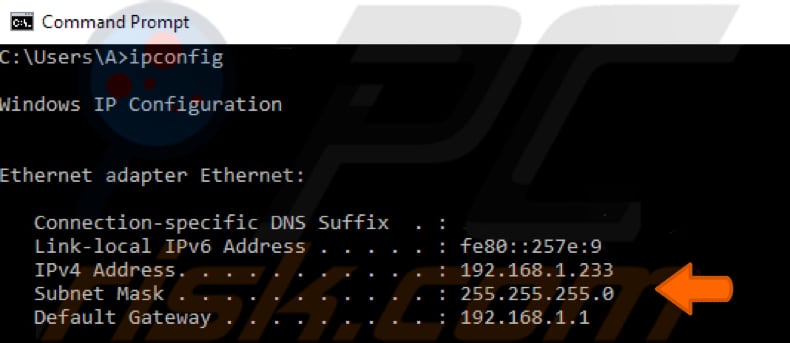
Make sure that your computer is connected to the same network as the HomeGroup. You can check it by entering an "ipconfig" command in the Command Prompt. This command displays all current TCP/IP network configuration values and refreshes Dynamic Host Configuration Protocol (DHCP) and Domain Name System (DNS) settings.
Used without parameters, ipconfig displays the IP address, subnet mask, and default gateway for all adapters. Open Command Prompt by typing "command prompt" in Search and clicking on the "Command Prompt" result. In opened Command Prompt window, type "ipconfig" and press Enter on your keyboard to execute this command.
It will show you your computer's IP configuration. The first 3 parts of the IP Address should be the same on all computers on the HomeGroup.
That's it, we hope that one of the methods described above helped you to fix the "Windows can't set up a homegroup on this computer" error, and now you can share files, folders, and other stuff on your HomeGroup without any problems.
Share:

Rimvydas Iliavicius
Researcher, author
Rimvydas is a researcher with over four years of experience in the cybersecurity industry. He attended Kaunas University of Technology and graduated with a Master's degree in Translation and Localization of Technical texts. His interests in computers and technology led him to become a versatile author in the IT industry. At PCrisk, he's responsible for writing in-depth how-to articles for Microsoft Windows.
▼ Show Discussion