How to Disable Driver Signature Enforcement?

Get Free Scanner and check your computer for errors
Fix It NowTo fix found issues, you have to purchase the full version of Combo Cleaner. Free trial available. Combo Cleaner is owned and operated by Rcs Lt, the parent company of PCRisk.com read more.
How to Easily Disable Driver Signature Enforcement on Windows 10?
The Driver Signature Enforcement feature ensures that Windows can only load drivers that have been 'signed' by Microsoft. However, there may be times when you need to install drivers not digitally signed by Microsoft, and this feature will prevent you from doing so. Fortunately, you can disable Driver Signature Enforcement, and in this article, we show how.
Microsoft designed Driver Signature Enforcement to achieve maximum security. When installing drivers on your computer, some might work properly, and others might not. The Driver Signature Enforcement feature ensures that Windows can only load drivers that have been 'signed' by Microsoft.
Suppose a driver is not certified or signed by Microsoft. In that case, you will receive a message such as "Driver has been altered," "Windows cannot install this driver," or another similar notification.
Many programs use driver files that do not have digital signature authentication - these could be unofficial drivers, outdated drivers, or those developed by yourself or other individuals.
To install unsigned drivers on your computer and make them work properly, you must disable driver signature enforcement. The instructions provided below will show you how to disable Driver Signature Enforcement.
Video Showing How to Disable Driver Signature Enforcement:
Table of Contents:
- Introduction
- Disable Driver Signature Enforcement Feature Using Command Prompt
- Disable Driver Signature Enforcement Feature Using Automatic Repair
- Video Showing How to Disable Driver Signature Enforcement on Windows 10
Download Computer Malware Repair Tool
It is recommended to run a free scan with Combo Cleaner - a tool to detect viruses and malware on your device. You will need to purchase the full version to remove infections. Free trial available. Combo Cleaner is owned and operated by Rcs Lt, the parent company of PCRisk.com read more.
Disable Driver Signature Enforcement Feature Using Command Prompt
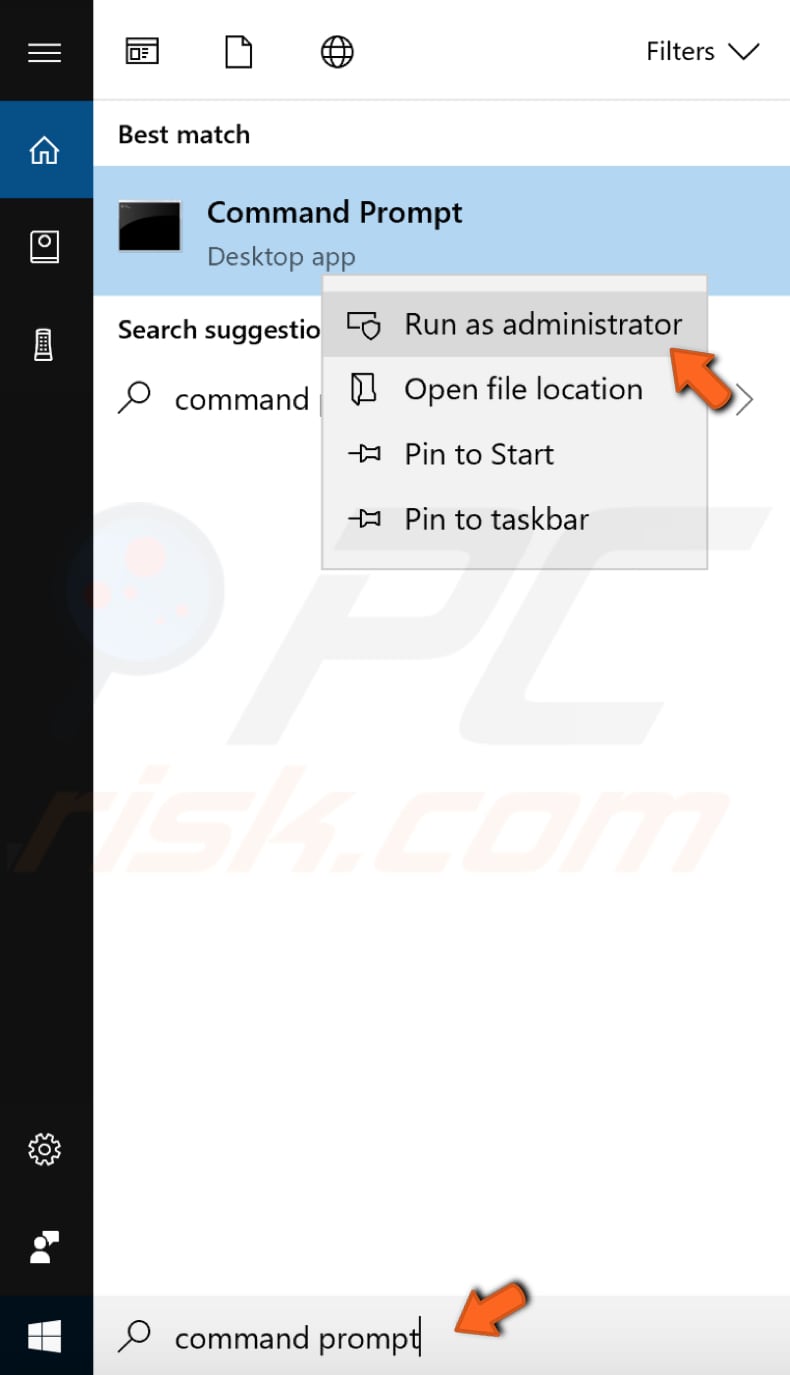
This solution is a permanent one, so make sure that you want to disable the Driver Signature Enforcement feature for good. To run Command Prompt as administrator, type "command prompt" in Search and right-click the "Command Prompt" result. Select "Run as administrator" from the drop-down menu to run Command Prompt with administrator privileges.
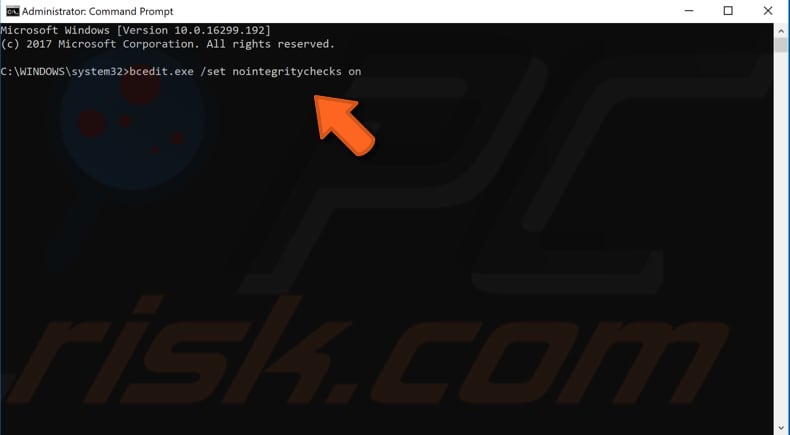
When Command Prompt is open, type this command: "bcdedit.exe /set nointegritychecks on" and press Enter to execute it.
If you want to re-enable the Driver Signature Enforcement feature, open Command Prompt as administrator and type this command: "bcdedit.exe /set nointegritychecks off." This is essentially the same command as before, except that the last word is changed from "on" to "off."
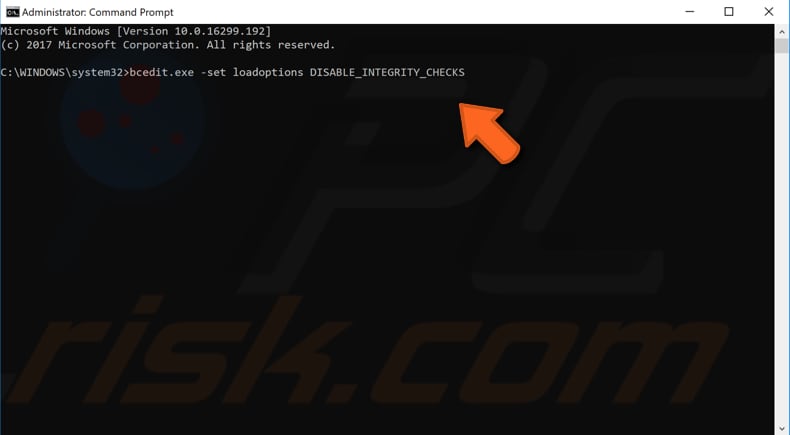
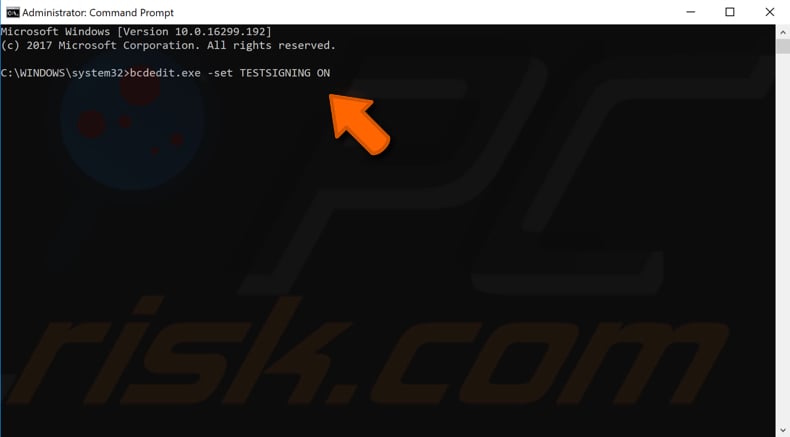
Another way to disable the Driver Signature Enforcement feature via Command Prompt is to open Command Prompt as administrator and type the following commands: "bcdedit.exe -set loadoptions DISABLE_INTEGRITY_CHECKS." Press Enter to execute.
Then, enter this command: "bcdedit.exe -set TESTSIGNING ON" and press Enter.
Close Command Prompt and restart your computer for the changes to take effect.
To re-enable Driver Signature Enforcement, repeat the steps by changing the first command to "bcdedit -set loadoptions ENABLE_INTEGRITY_CHECKS" and the second command to "bcdedit -set TESTSIGNING OFF." After completing these steps, restart your computer for the changes to take effect.
Disable Driver Signature Enforcement Feature Using Automatic Repair
Automatic Repair is a built-in troubleshooter, which should help to fix the most common computer issues. It is a system recovery tool that automates common diagnostic and repair tasks of unbootable Windows 10 installations. In this case, we will use the Startup Settings option to disable the Driver Signature Enforcement Feature.
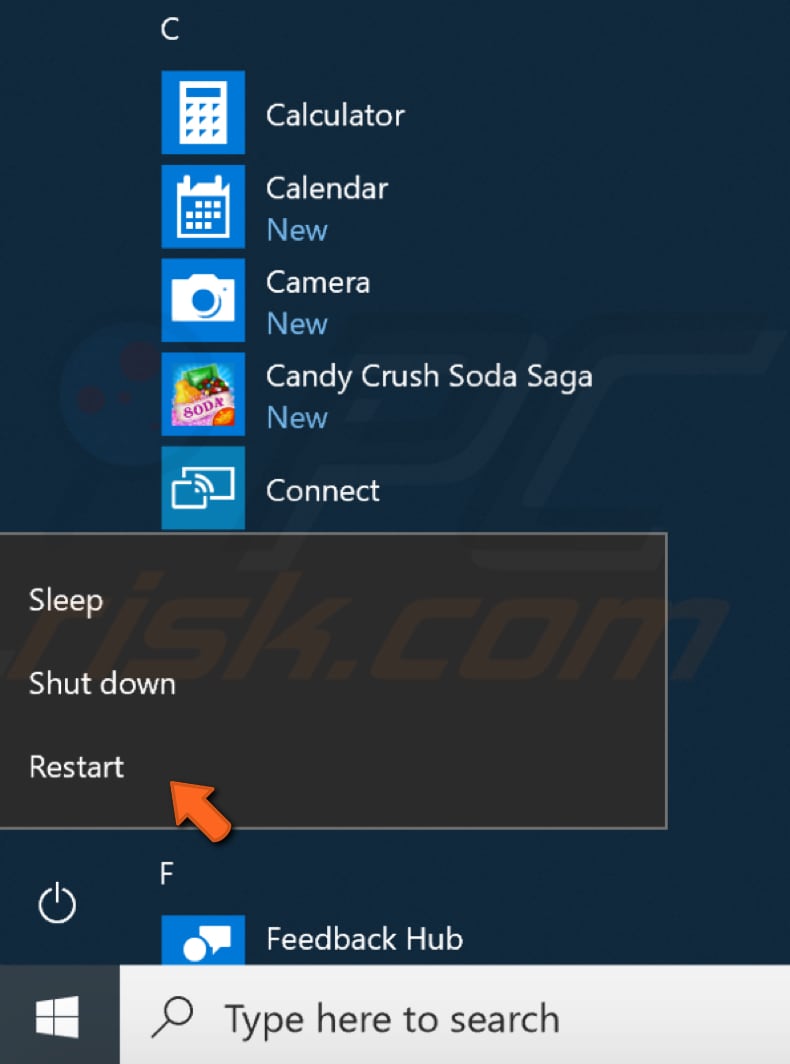
Bear in mind that this method disables Driver Signature Enforcement temporarily - it will be re-enabled the next time you start Windows. To temporarily disable Driver Signature Enforcement, click the Power button and click "Restart" while holding the Shift key. This will restart your computer and open the Automatic Repair screen.
In the Automatic Repair blue screen, click "Troubleshoot".
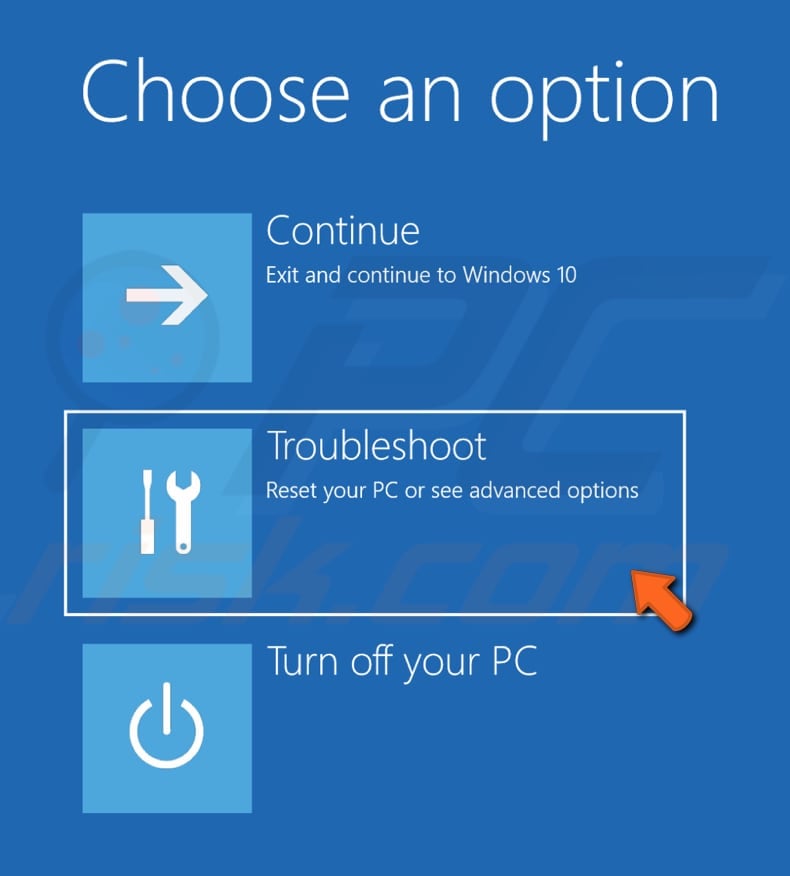
In Troubleshoot, click "Advanced Options".

In Advanced options, select "Startup Settings."
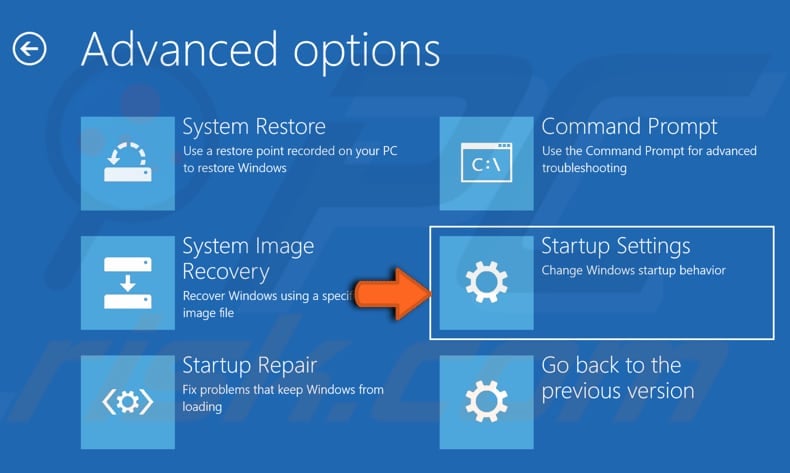
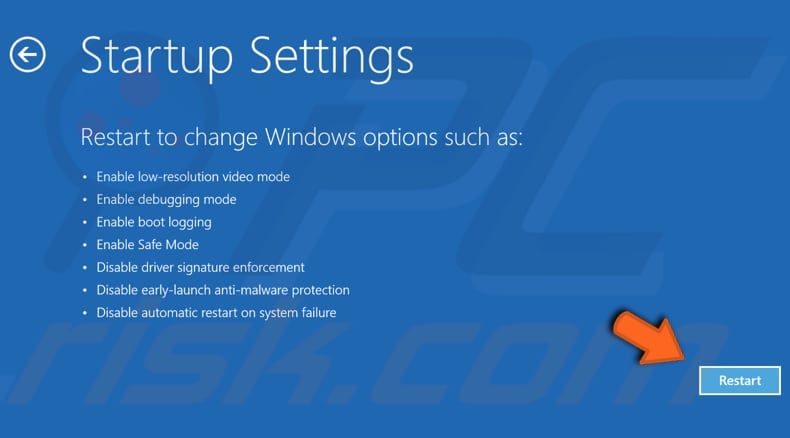
In Startup settings, click "Restart." This will restart your computer so you can change Windows options.
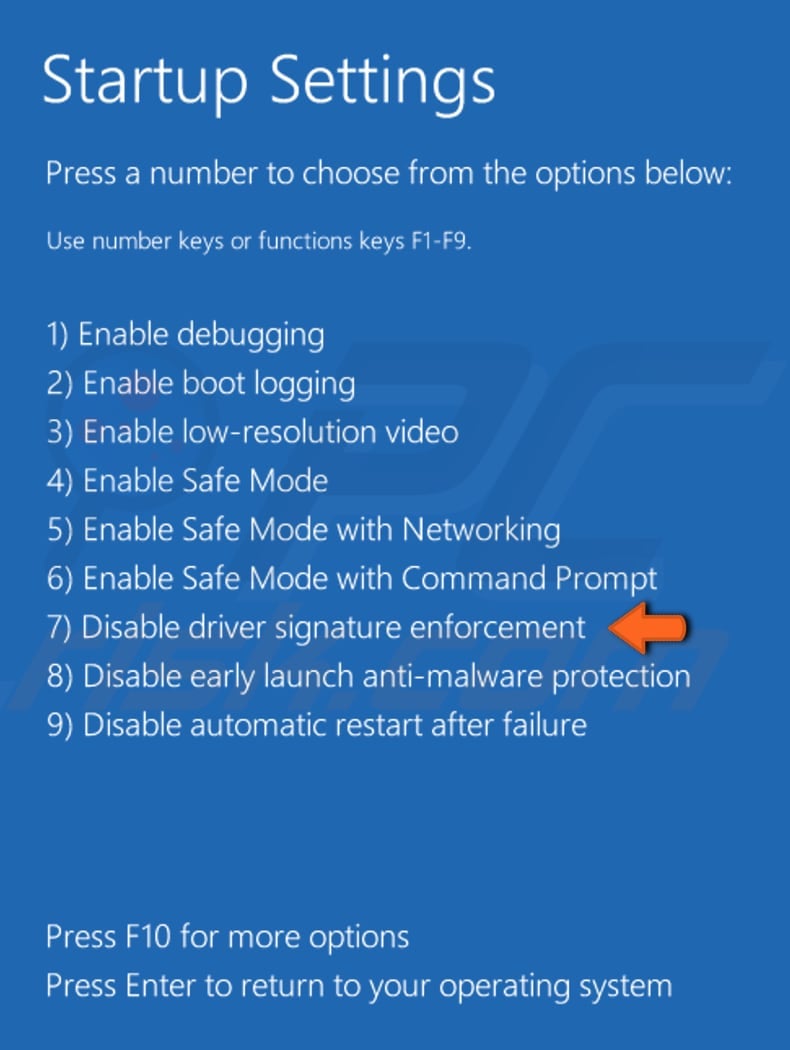
Now press number 7 or F7 and this will start Windows with the option to disable Driver Signature Enforcement.
Now you can install the unsigned drivers, until the next restart. We hope that this guide was helpful and that you were able to disable Driver Signature Enforcement.
Share:

Rimvydas Iliavicius
Researcher, author
Rimvydas is a researcher with over four years of experience in the cybersecurity industry. He attended Kaunas University of Technology and graduated with a Master's degree in Translation and Localization of Technical texts. His interests in computers and technology led him to become a versatile author in the IT industry. At PCrisk, he's responsible for writing in-depth how-to articles for Microsoft Windows.
▼ Show Discussion