How to Remove Programs From Add Remove Programs List Manually?

Get Free Scanner and check your computer for errors
Fix It NowTo fix found issues, you have to purchase the full version of Combo Cleaner. Free trial available. Combo Cleaner is owned and operated by Rcs Lt, the parent company of PCRisk.com read more.
How to Remove Programs From Add/Remove Programs List Manually on Windows
Sometimes programs get uninstalled incorrectly, leaving entries in the 'Add/Remove Programs' (a.k.a 'Programs and Features') list. This guide shows how to remove these problematic entries from the Add/Remove Programs list.
Programs can sometimes be uninstalled incorrectly, or associated directories get mistakenly deleted. This leaves entries in the Add/Remove Programs list that you cannot simply delete.
When you click such entries and try to remove them, Windows displays an error, or nothing happens. This is frustrating when there are a lot of remaining entries. Fortunately, there are ways to remove them.
Note: Removing programs manually includes editing the Windows Registry. This can cause irreversible damage to your system if not done correctly. Follow the steps carefully.
Video Showing How to Remove Programs From Add/Remove Programs List Manually:
Table of Contents:
- Introduction
- Remove Entries Using Registry Editor
- Remove Entries Using CCleaner
- Video Showing How to Remove Programs From Add/Remove Programs List Manually
Download Computer Malware Repair Tool
It is recommended to run a free scan with Combo Cleaner - a tool to detect viruses and malware on your device. You will need to purchase the full version to remove infections. Free trial available. Combo Cleaner is owned and operated by Rcs Lt, the parent company of PCRisk.com read more.
Remove Entries Using Registry Editor
Windows Registry, usually referred to as just the registry, is a collection of databases of configuration settings in Microsoft Windows operating systems. It stores much of the information and settings for software programs, hardware devices, user preferences, operating system configurations, and much more. Many of the options exposed in the registry are not accessible elsewhere in Windows. A wide variety of advanced settings can only be changed by directly editing the registry. Some other settings may be accessible through Group Policy – but the Group Policy editor is only included on Professional editions of Windows. The registry allows you to change most settings that can be accessed through Group Policy.
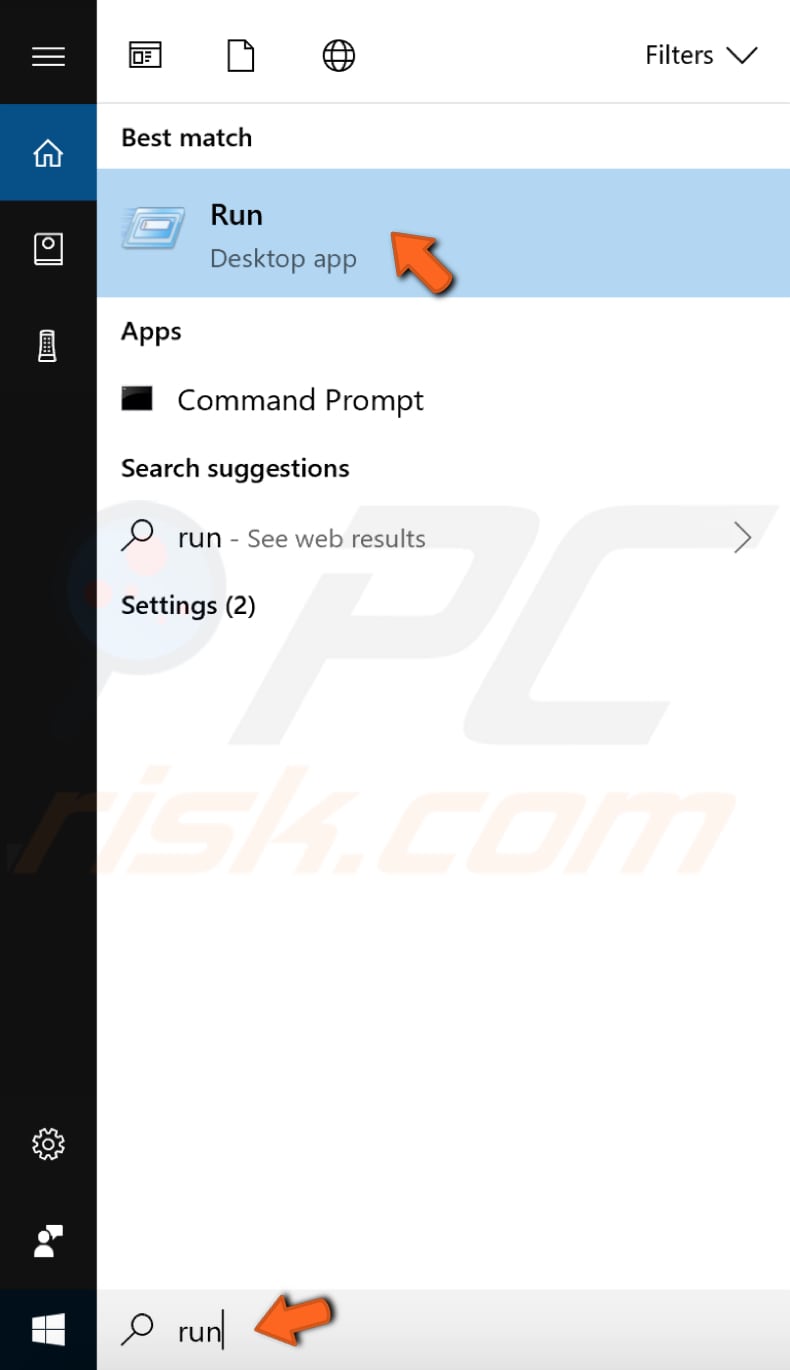
To open Registry Editor, type "run" in Search and click the "Run" result.
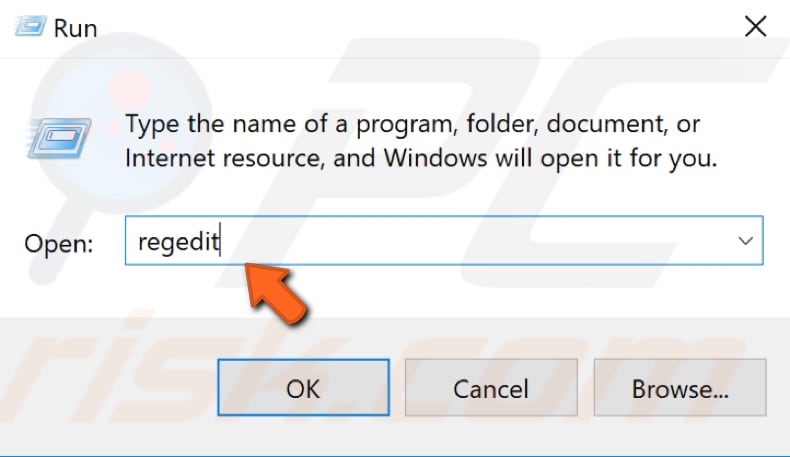
In the Run dialog box, type "regedit" and click "OK" to open Registry Editor.
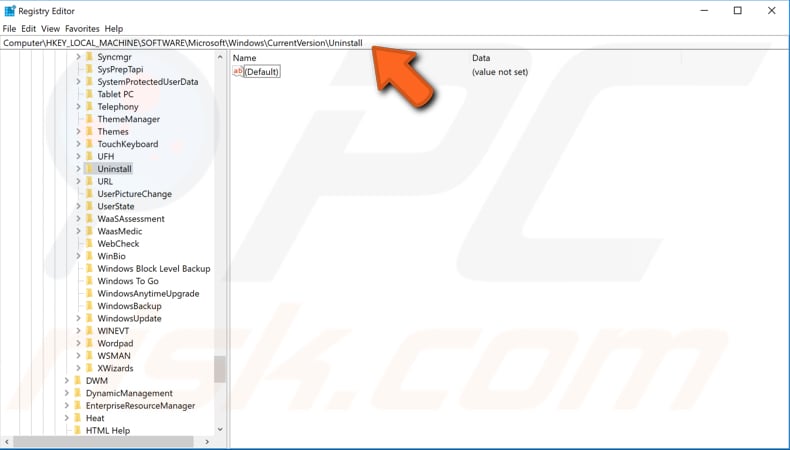
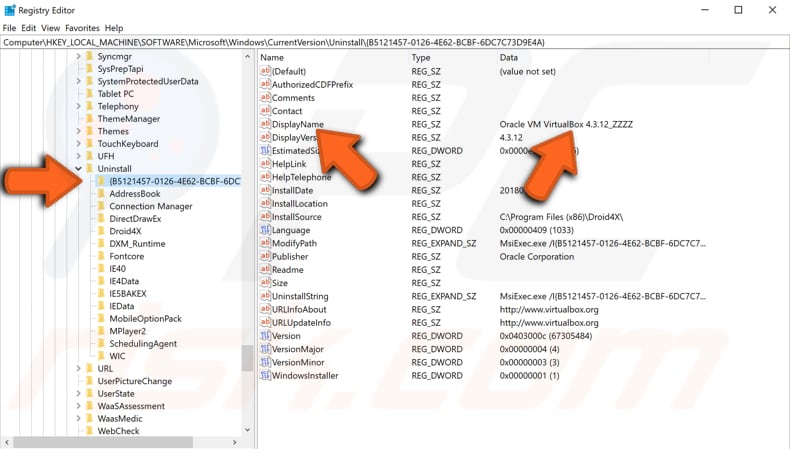
When the Registry Editor window is open, follow this path: "HKEY_LOCAL_MACHINE\SOFTWARE\Microsoft\Windows\CurrentVersion\Uninstall." You can reach it by manually expanding directories or simply copying and pasting this path into Registry Editor's box under the menu.
Within the registry directory, you will see two entries: software IDs and names. The first are more difficult to identify - click each entry and look for the software name in the description pane, labeled “DisplayName." You can see in our example that the registry key "{B5121457-0126-4E62-BCBF-6DC7C73D9E4A}" is labeled "Oracle VM VirtualBox 4.3.12" in the Add/Remove Programs list.
We recommend that you look for the program you wish to remove by checking readable names first. If you cannot find the program you are looking for, try checking the "DisplayName" setting in the directories with abstract IDs.
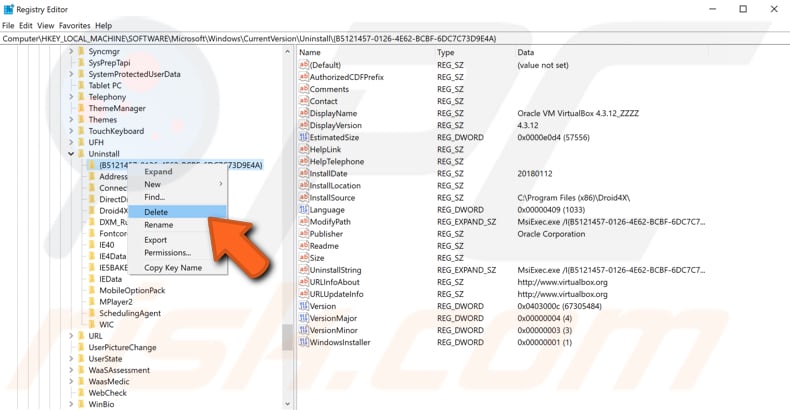
When you find the program you want to remove from the entry list, simply right-click on it and choose "Delete" from the drop-down menu. Restart your computer when finished.
If you are using the 64-bit version of Windows, go to a different sub-directory in the registry. Follow this path: "HKEY_LOCAL_MACHINE\SOFTWARE\Wow6432Node\Microsoft\Windows\CurrentVersion\Uninstall". Here, you will find (if entries for the applications are present) a directory structure identical to the previous \Uninstall directory. Some entries will be identified by an abstract ID and others by name. If there is no entry for the application you just removed in the previous section, this is due to not all applications having entries in both registry directories. Restart your computer when finished for the changes to take effect.
Remove Entries Using CCleaner
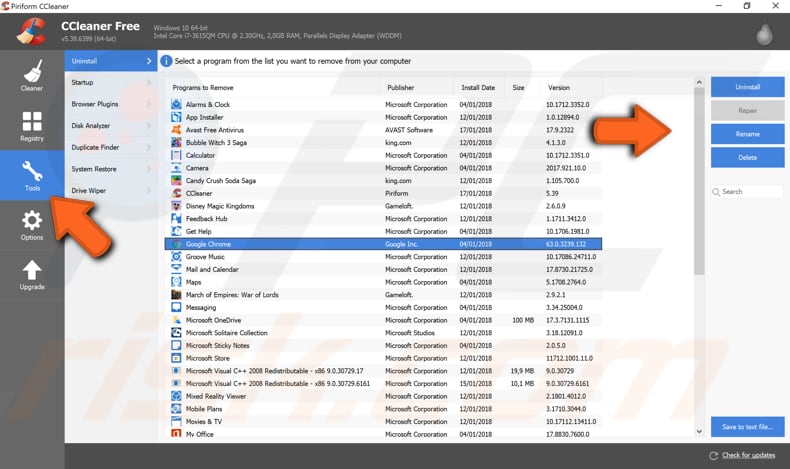
CCleaner is a small, effective utility for computers running Microsoft Windows that cleans 'junk' and issues that accumulate over time: temporary files, broken shortcuts, and other problems. CCleaner can clean redundant files from various programs saving hard disk space, remove unneeded entries in Windows Registry, help you uninstall software, and select which programs start with Windows. Download Cleaner here.
Open CCleaner when downloaded and click "Tools" on the left pane. Select the "Uninstall" section to start uninstalling programs/remove entries you no longer need. Simply click the program name and then click "Uninstall" in the top-right corner. If you want to remove the entry from the program list, click "Delete." Restart your computer when finished for the changes to take effect. You should no longer see those programs on the Add/Remove Programs list.
That's it! After following the above steps, you will be able to completely uninstall and remove programs from Windows and associated entries. We hope this helps!
Share:

Rimvydas Iliavicius
Researcher, author
Rimvydas is a researcher with over four years of experience in the cybersecurity industry. He attended Kaunas University of Technology and graduated with a Master's degree in Translation and Localization of Technical texts. His interests in computers and technology led him to become a versatile author in the IT industry. At PCrisk, he's responsible for writing in-depth how-to articles for Microsoft Windows.
▼ Show Discussion