A beginner’s guide to creating and using Quick Actions on a Mac

Get Free Scanner and check your computer for errors
Fix It NowTo fix found issues, you have to purchase the full version of Combo Cleaner. Free trial available. Combo Cleaner is owned and operated by Rcs Lt, the parent company of PCRisk.com read more.
How to create and use Quick Actions: Step-by-step
Quick Actions on a Mac can help you complete tasks faster. They let you perform tasks with just a few clicks. You can create these actions for tasks you do often, like resizing images or renaming files.
Creating Quick Actions might seem complicated at first, but it's easier than you think. Automator and Shortcuts are built into your Mac, so you don't need to download anything extra. Once you make a Quick Action, it becomes available in Finder. You can then use it anytime you need to perform that task.
By the end of this guide, you will know how to create and use Quick Actions. Let's make your Mac experience smoother and more efficient!
Video on A beginner’s guide to creating and using Quick Actions on a Mac
Table of Contents:
- Introduction
- Create a Quick Action with Automator
- Edit a Quick Action in Automator
- Create a Quick Action with the Shortcuts app
- Edit a Quick Action in the Shortcuts app
- How to use the Quick Actions you created
- Customize the Quick Actions menu
- Video on A beginner’s guide to creating and using Quick Actions on a Mac
Download Computer Malware Repair Tool
It is recommended to run a free scan with Combo Cleaner - a tool to detect viruses and malware on your device. You will need to purchase the full version to remove infections. Free trial available. Combo Cleaner is owned and operated by Rcs Lt, the parent company of PCRisk.com read more.
Create a Quick Action with Automator
Automator is a built-in app on macOS that allows you to easily create workflows, applications, and Quick Actions. This guide will show you how to create a Quick Action to convert images to PNG format using Automator.
1. Open the Automator app on your Mac. Use Spotlight or go to the Launchpad.
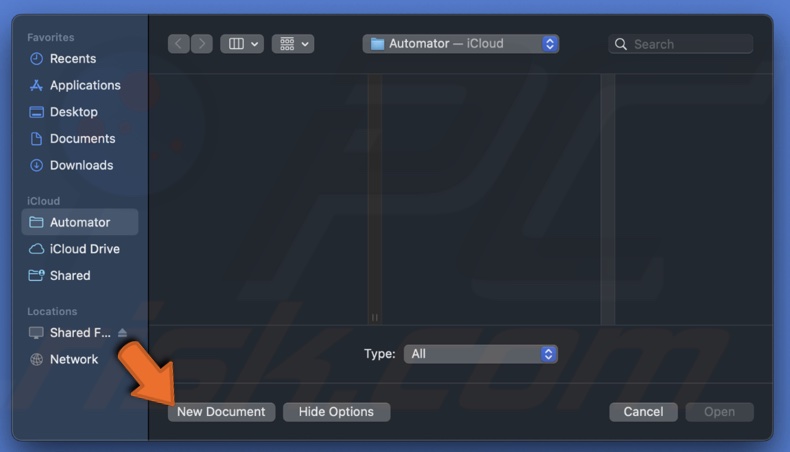
2. Click on the "New Document" button.
3. Choose "Quick Action" from the options and click "Choose".
4. In the left pane, ensure "Actions" is selected. Expand "Library" if needed to see all categories.
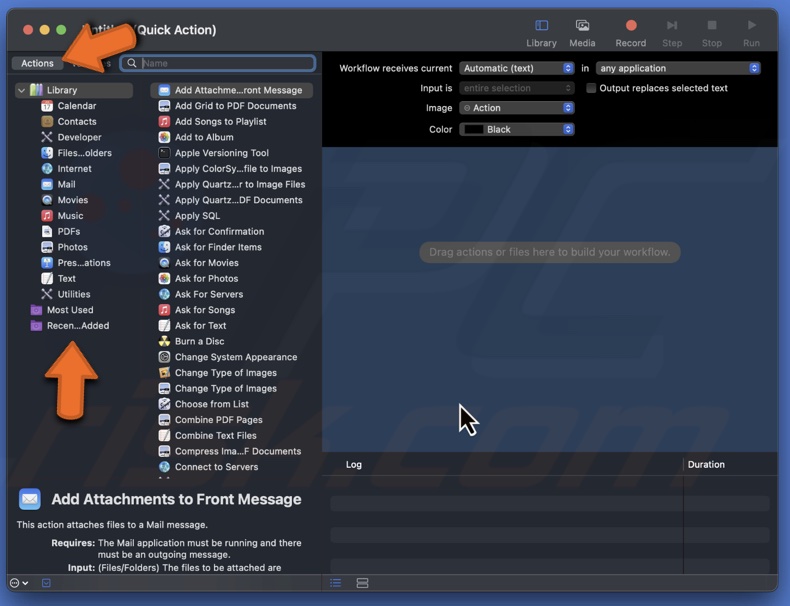
5. Select the category for your action. For this example, select "Photos".
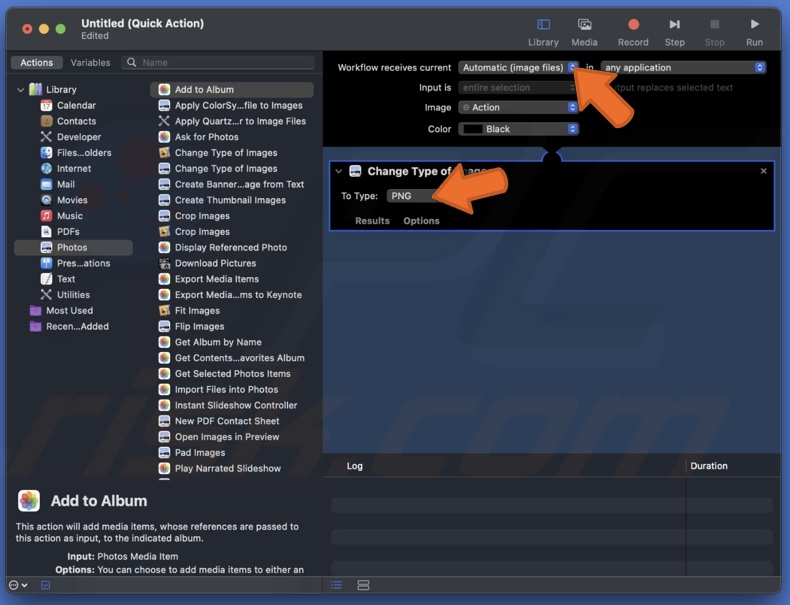
6. In the middle pane, find the action you want and drag it to the workspace on the right. In this example, I'll drag "Change Type of Image".
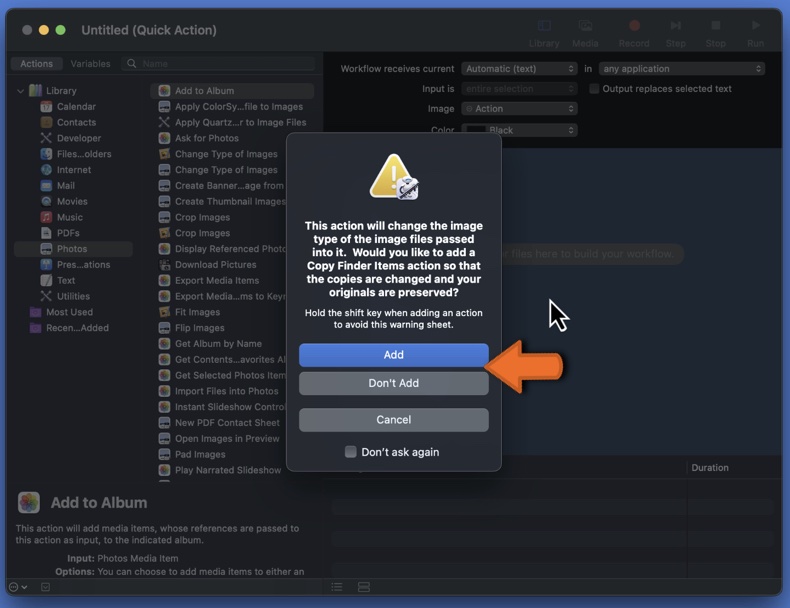
7. If prompted to add an action to copy the items before changing them, choose "Add" or "Don't Add" based on your preference.
8. At the top of the workspace, set "Workflow receives current" to "Image Files" since this action applies to images.
9. In the action you added, select "PNG" from the "To Type" drop-down box to convert images to PNG format.
10. Click "File" in the menu bar and select "Save".
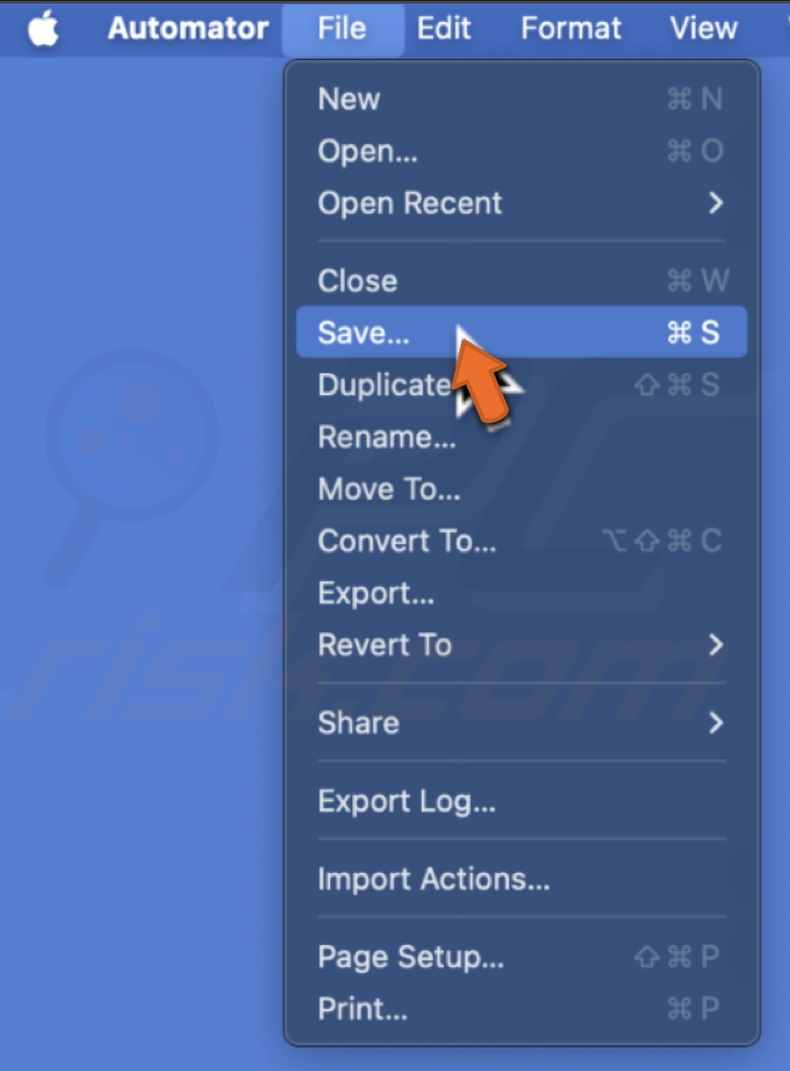
11. Name your Quick Action and click "Save".
Edit a Quick Action in Automator
If you need to make changes to your Quick Action created in Automator, follow these simple steps:
1. Open the Automator application.
2. Browse through your files to find the Quick Action you want to edit.
3. Click on it and then click "Open".

4. Adjust the workflow as needed to fit your new requirements.
5. Go to the menu bar at the top and select "File".
6. Click "Save" to save your edits.
Once you've saved, your Quick Action will be updated and ready to use right away.
Create a Quick Action with the Shortcuts app
If using Automator seems too complicated, you can set up Quick Actions easily with the Shortcuts app on your Mac.
Let's use the Zip and Email shortcut as an example. This shortcut lets you compress multiple files into a zip file and email them with just one click.
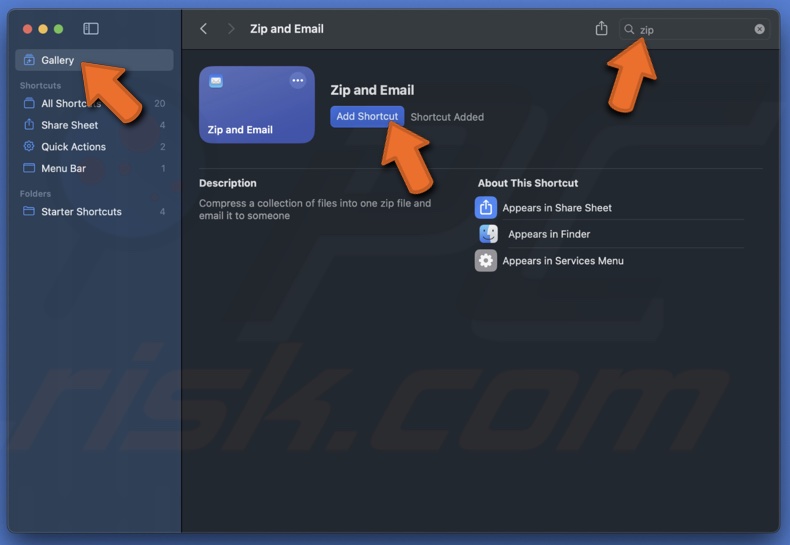
1. Launch the Shortcuts app and search for "Zip and Email" in the Gallery section.
2. When you find the shortcut, click "Add Shortcut" to include it in your library.
3. Then, select the "All Shortcuts" tab in the sidebar.
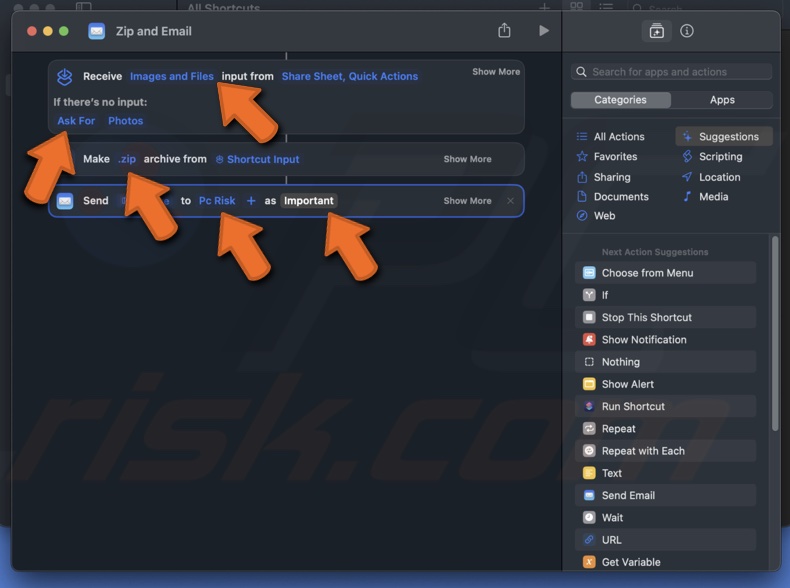
4. Double-click on "Zip and Email" to open it for editing.
5. By default, the shortcut compresses files. You can change this to compress images, folders, or PDFs.
6. If no input is received, choose actions like "Stop and Respond" or "Ask For."
7. Select the type of compressed file you want, such as .zip.
8. Add the email recipients.
9. Set the email subject line.
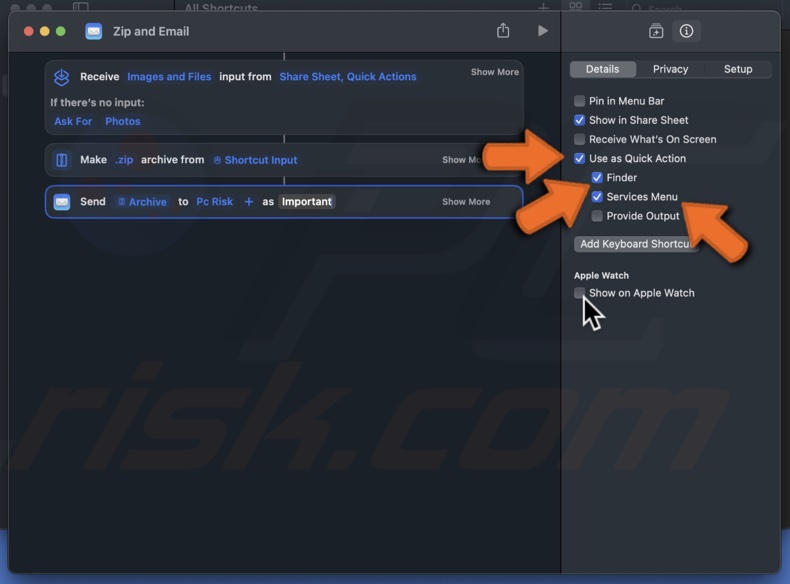
10. Click the "Shortcut Details" icon (i) at the top.
![]()
11. Check the boxes for "Use as Quick Action", "Finder", and "Services Menu" Optionally, select other preferences.
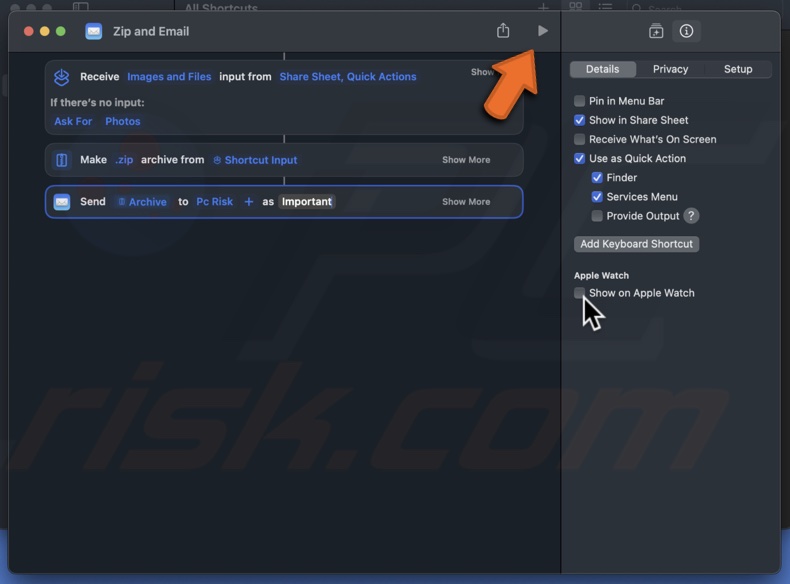
12. Test the shortcut by pressing the "Play" button at the top.
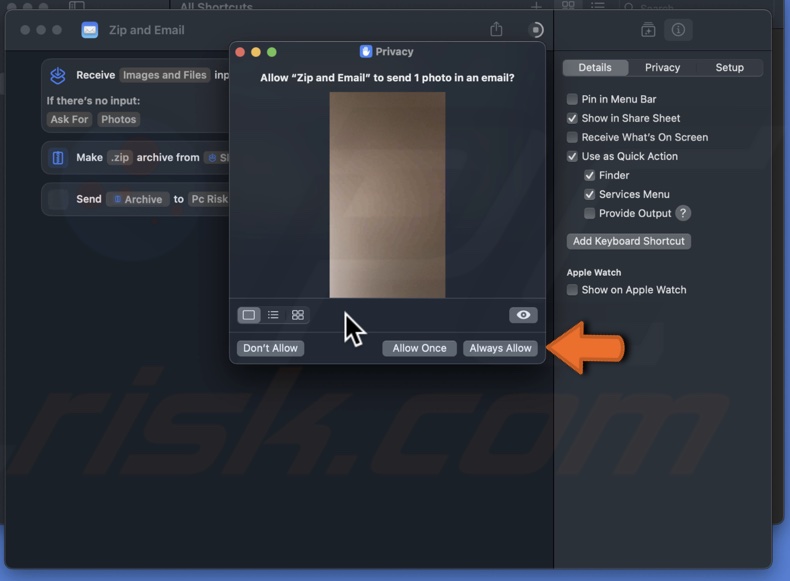
13. Select a file for the test, click "Open", and allow the shortcut to access your files by choosing "Allow Once" or "Always Allow".
14. An email should open with the recipient(s), subject line, and attached ZIP file. You can add a message and send it or close it since this is a test.
15. Close the shortcut template window and return to the main screen of the Shortcuts app. Your changes are saved automatically.
Edit a Quick Action in the Shortcuts app
Whether you want to add steps, change parameters, or improve efficiency, editing a Quick Action is simple. Here's how to customize your Quick Actions in the Shortcuts app:
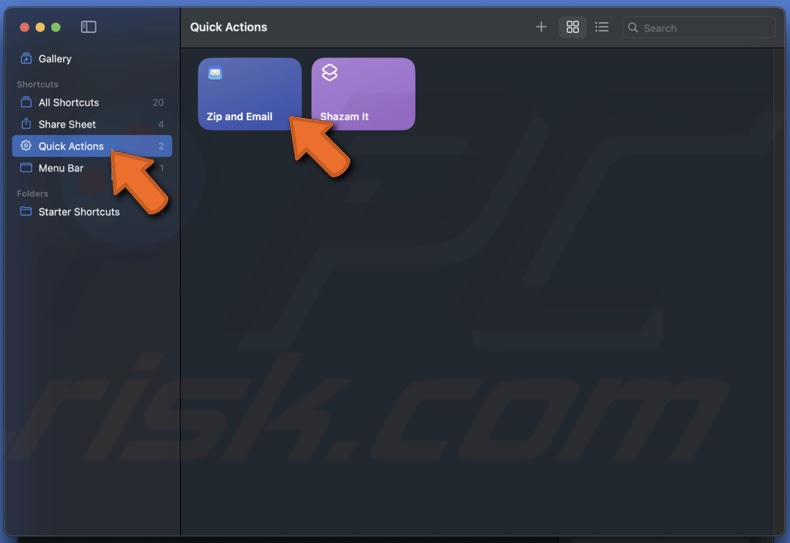
1. Start by opening the Shortcuts app on your Mac.
2. In the sidebar, click on "Quick Actions".
3. Find the Quick Action you want to edit. You can either double-click on it or right-click and choose "Edit".
4. A template will appear. Here, you can make any changes you need to the Quick Action.
5. Test the updated shortcut to ensure it works as expected. Any changes you make will be saved automatically.
That's it! Your Quick Action has now been updated with new changes.
How to use the Quick Actions you created
Once you've created your own Quick Actions using Automator or Shortcuts, you can easily apply them to files, folders, and other items right from the Finder. Here 4 different options on how you can use your Quick Action.
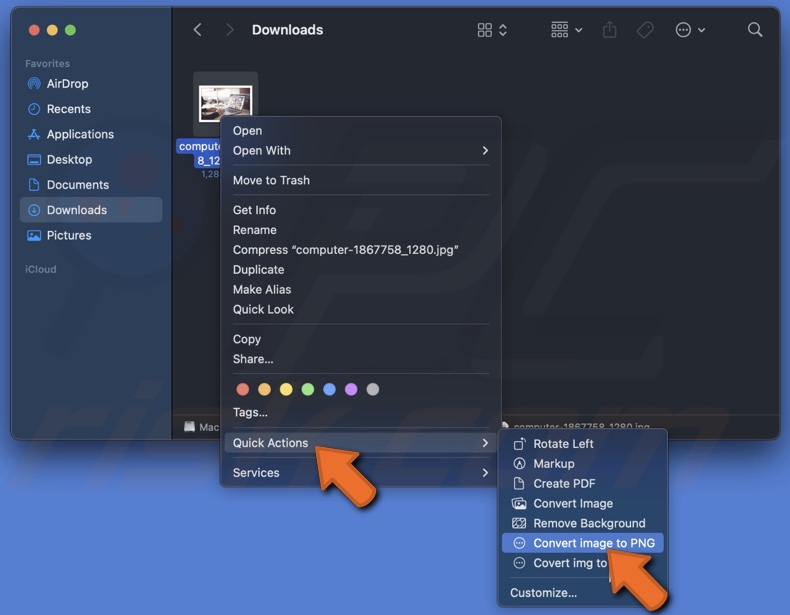
With right-click:
1. Start by opening the Finder on your Mac.
2. Choose the image you want to convert to PNG.
3. Right-click on the selected item and hover over "Quick Actions".
4. Choose the action you want from the pop-out menu and follow the instructions.
From the Finder Preview
1. Look at the Finder Preview on the right side.
2. Click the Quick Action button below the preview or click "More" to find additional actions.
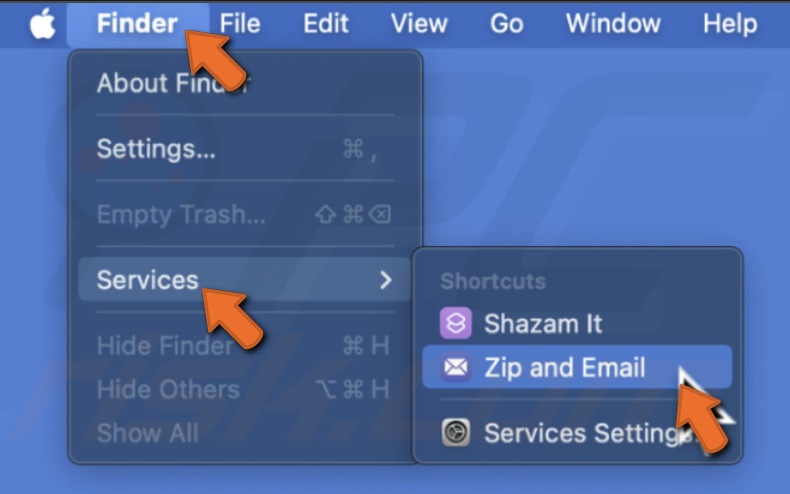
From the Menu Bar:
1. Go to "Finder" in the menu bar at the top.
2. Hover over "Services".
3. Select the desired Quick Action from the list.
From the Touch Bar:
1. If your Mac has a Touch Bar, tap the Quick Actions button to see and choose an action.
By customizing the Quick Actions menu in Finder, you can hide actions you don't use often or rearrange them to keep your favorite ones at the top. Here's how you can do it:
1. Open the Quick Actions Menu.
- Option 1: Open Finder, click on "More" below the Preview pane on the right, and select "Customize".
- Option 2: Open Finder, right-click an item, go to "Quick Actions", and select "Customize".
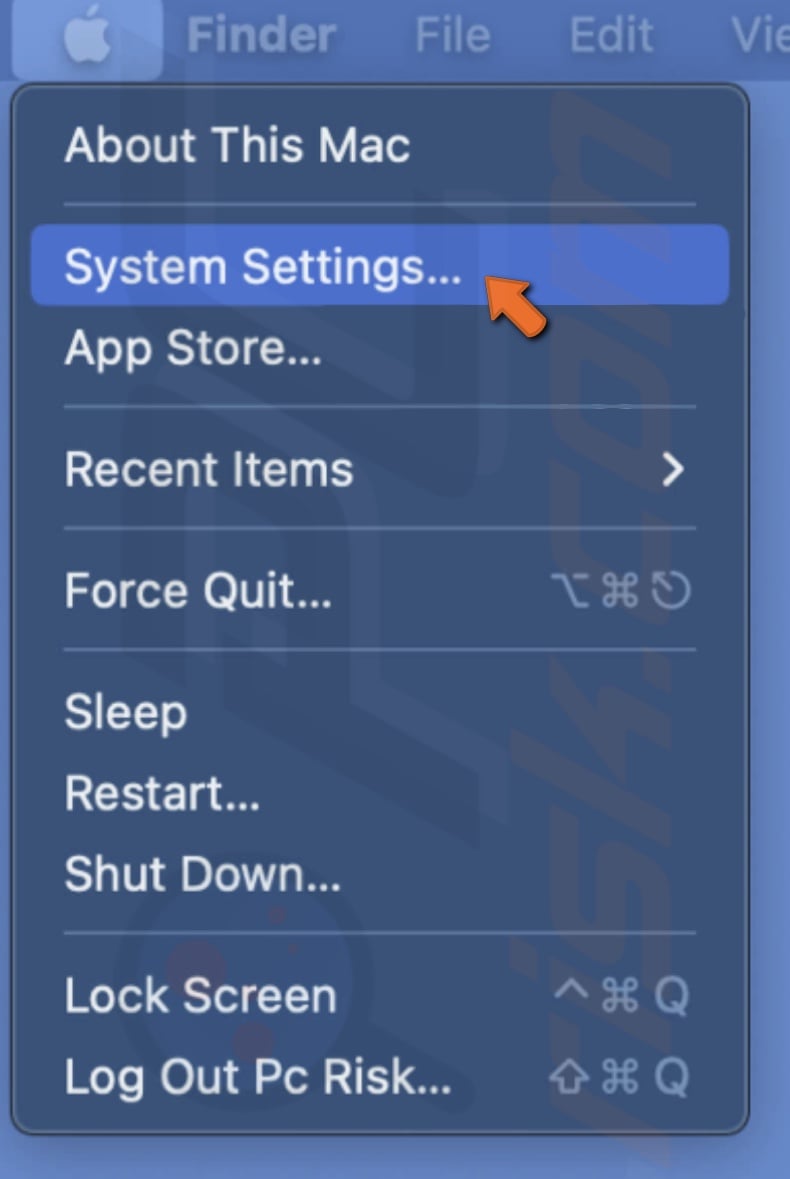
- Option 3: Open System Settings, select "Privacy & Security", choose "Extensions" on the right, and click "Finder".

2. A small window will appear showing all available Quick Actions.
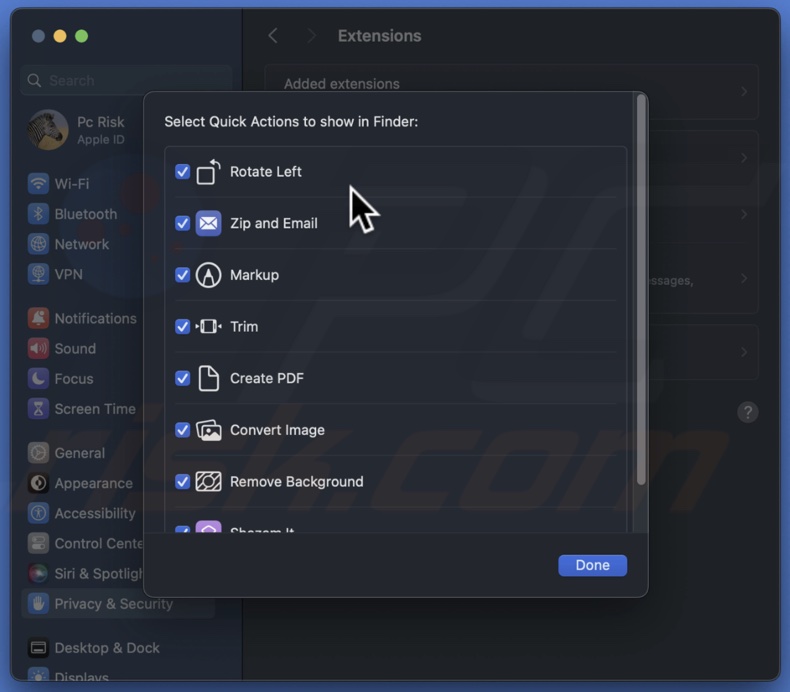
3. Check the boxes next to the actions you want to keep in the menu. Uncheck the boxes for the actions you want to hide.
4. Drag an action up or down to rearrange the order. Release the action when you see the blue line in the desired position.
5. Click "Done" to save your customized Quick Actions menu.
By following these steps, you can easily manage your Quick Actions in Finder, making your workflow more efficient.
By now, you should have a solid understanding of how to create, edit, and customize Quick Actions using both Automator and the Shortcuts app. Don't hesitate to get creative and experiment with creating actions that fit your specific needs.
Share:

Karolina Peistariene
Author of how-to guides for Mac users
Responsible for collecting, analyzing, and presenting problem-solving solution articles related to macOS issues. Years of macOS experience combined with solid research and analyzing skills help Karolina provide readers with working and helpful solutions as well as introduce various features Mac has to offer.
▼ Show Discussion