How to diagnose and fix high CPU usage by coreaudiod on Mac

Get Free Scanner and check your computer for errors
Fix It NowTo fix found issues, you have to purchase the full version of Combo Cleaner. Free trial available. Combo Cleaner is owned and operated by Rcs Lt, the parent company of PCRisk.com read more.
Coreaudiod using too much CPU? Here's how to fix it!
The coreaudiod is a vital process on your Mac that handles all audio functions. It is part of Core Audio, macOS's audio system API (Application Programming Interface). This API lets third-party developers use your Mac's audio features, like the microphone and speakers.

But it's not just for third-party apps; built-in apps such as Music, Apple TV, Podcasts, Garageband, and iMovie also use Core Audio. Whenever these apps play, or record audio, coreaudiod runs in the background to manage it.
Usually, coreaudiod uses very little of your Mac's CPU. However, sometimes problems can arise that cause it to use more CPU power than usual. Here are some reasons why this might happen:
- Missing audio settings directory. It may malfunction if Core Audio can't find the directory where audio settings are stored (/Library/Preferences/Audio/).
- Conflicts with third-party apps. Sometimes, third-party apps that use audio can conflict with Core Audio, causing problems.
- Overheating issues. When your Mac is at risk of overheating, macOS usually makes the kernel_task process take over CPU resources to cool down the system. However, there are reports that other processes, like WindowServer and coreaudiod, can also use more CPU in such situations.
Whether you're dealing with software conflicts, missing directories, or want to ensure your Mac runs smoothly, follow this guide to get your audio back on track. Let's dive in and restore harmony to your Mac's audio system.
Video on How to diagnose and fix high CPU usage by coreaudiod on Mac
Table of Contents:
- Introduction
- Method 1. Confirm if coreaudiod is the problem
- Method 2. Verify the audio preferences directory
- Method 3. Reset coreaudiod
- Method 4. Delete unnecessary items from your Mac
- Method 5. Update your Mac
- Method 6. Keep track of audio apps
- Method 7. Check for malware on your Mac
- Video on How to diagnose and fix high CPU usage by coreaudiod on Mac
Download Computer Malware Repair Tool
It is recommended to run a free scan with Combo Cleaner - a tool to detect viruses and malware on your device. You will need to purchase the full version to remove infections. Free trial available. Combo Cleaner is owned and operated by Rcs Lt, the parent company of PCRisk.com read more.
Confirm if coreaudiod is the problem
Here's how to check if coreaudiod is causing issues on your Mac:
1. Open the Activity Monitor application.
2. In Activity Monitor, click on the "CPU" tab at the top.
3. You'll see a list of processes sorted by how much CPU they are using. Look for "coreaudiod" in the list.
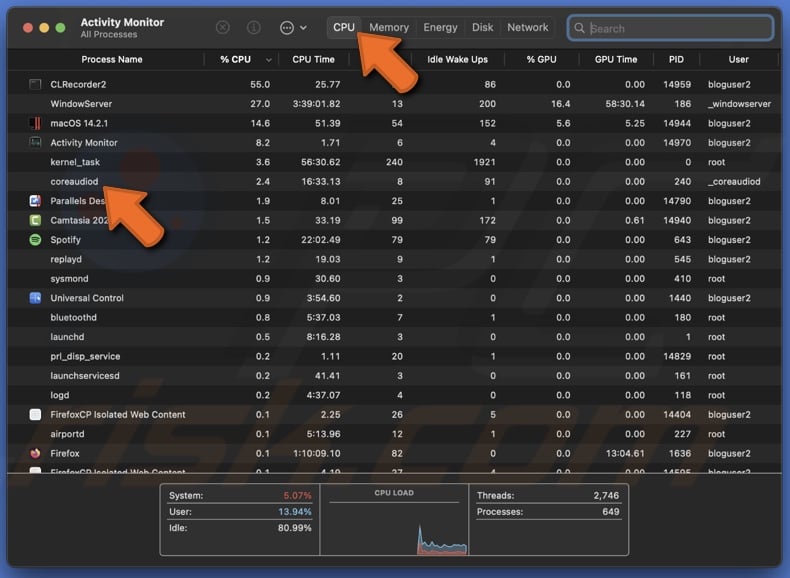
4. If "coreaudiod" uses a lot of CPU power, it will be near the top of the list. This means it could be the cause of the problem you're experiencing.
Verify the audio preferences directory
1. When Finder is selected, click on the "Go" menu at the top of the screen and select "Go to Folder".
2. In the path bar that appears, enter the following path: /Library/Preferences/Audio/
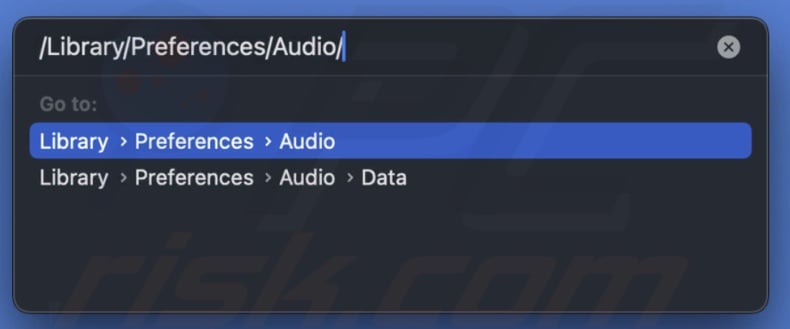
3. If you are directed to an "Audio" folder, everything is set up correctly.
Reset coreaudiod
If you're having issues with your sound, restarting the core audio service on your Mac might help. Here's how to do it:
1. Open the Terminal application.
2. In the Terminal window, type or paste this command: sudo killall coreaudiod
3. Press Return on your keyboard.
4. You'll be asked for your password. Type it in and press "Return" again.
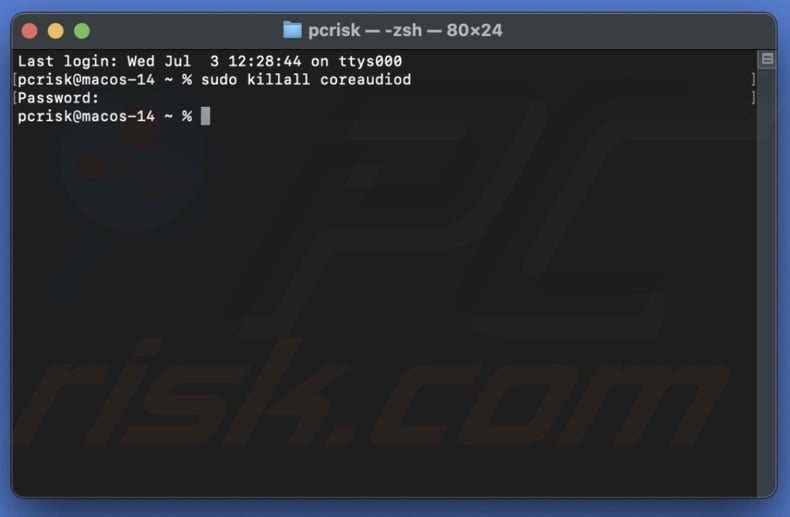
5. Once the command has run, close the Terminal.
This should restart the core audio service and might fix your sound issues.
Delete unnecessary items from your Mac
When your Mac starts acting up, it's a good idea to clear out the junk files. These are files like caches, temporary files, old settings for apps you no longer have, and language files you don't use. Finding and deleting these files manually can be challenging and take a lot of time.
But don't worry—you don't have to do it yourself. Combo Cleaner can handle it for you with just a few clicks.
1. First, download Combo Cleaner from combocleaner.com. Follow the instructions to install it on your Mac.
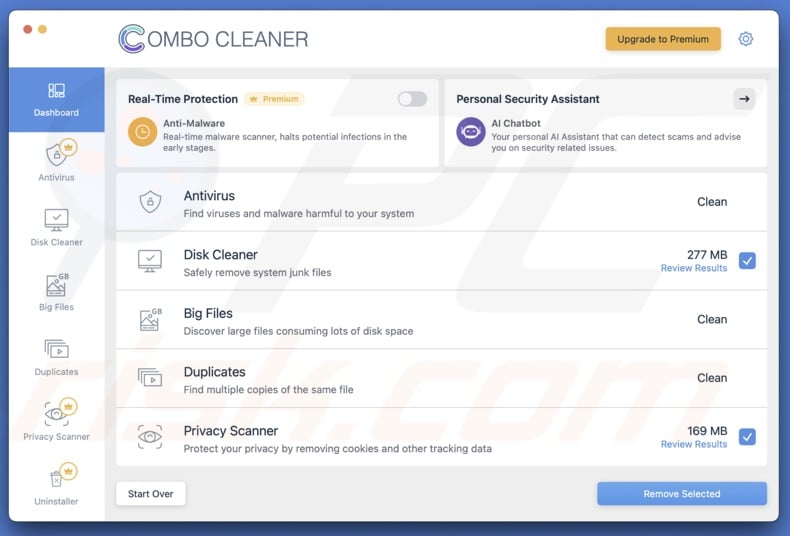
2. Once installed, open the Combo Cleaner.
3. In Combo Cleaner, select the "Disk Cleaner" tab. Click the "Start Scan" button to start scanning your Mac.
4. After the scan is complete, review the list and remove unnecessary stuff.
5. Then, go to the "Big Files", "Duplicates", and "Uninstaller" tabs and do the same to remove junk files.
Update your Mac
If your Mac is having issues or acting weird, it's a good idea to check for a macOS update. If a solution is provided in the update, it can often solve your problem.
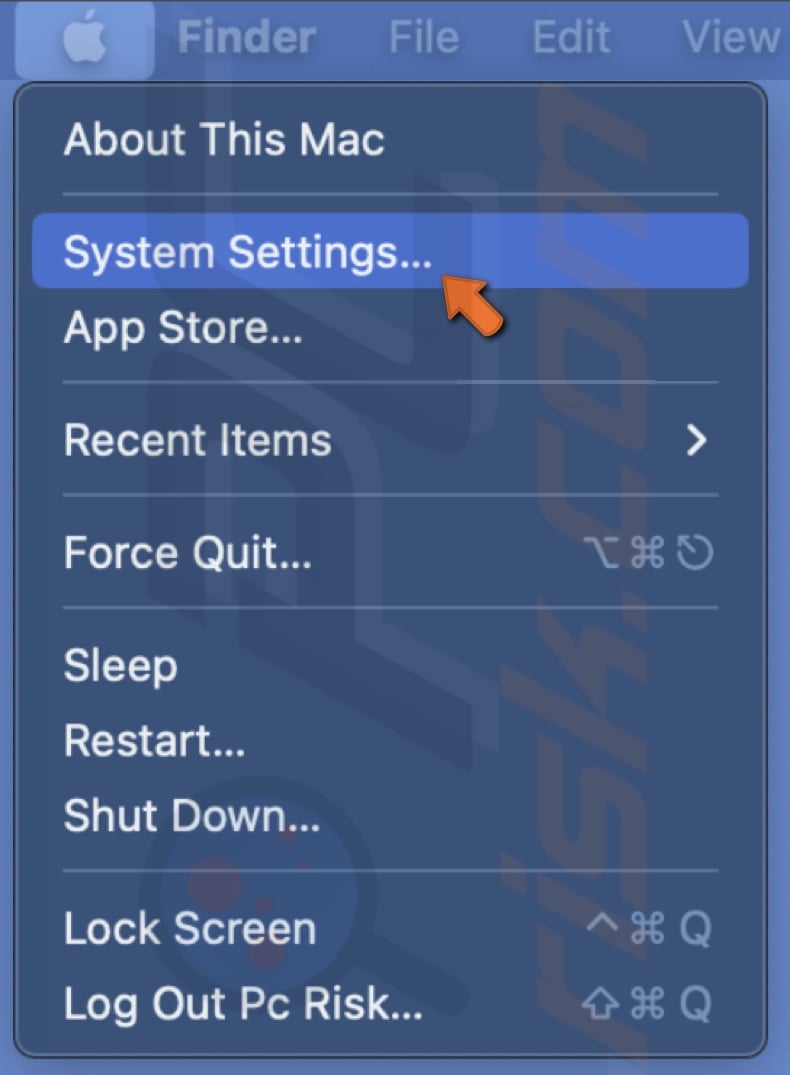
1. Click on the Apple menu in the top-left corner of your screen, then select "System Settings".
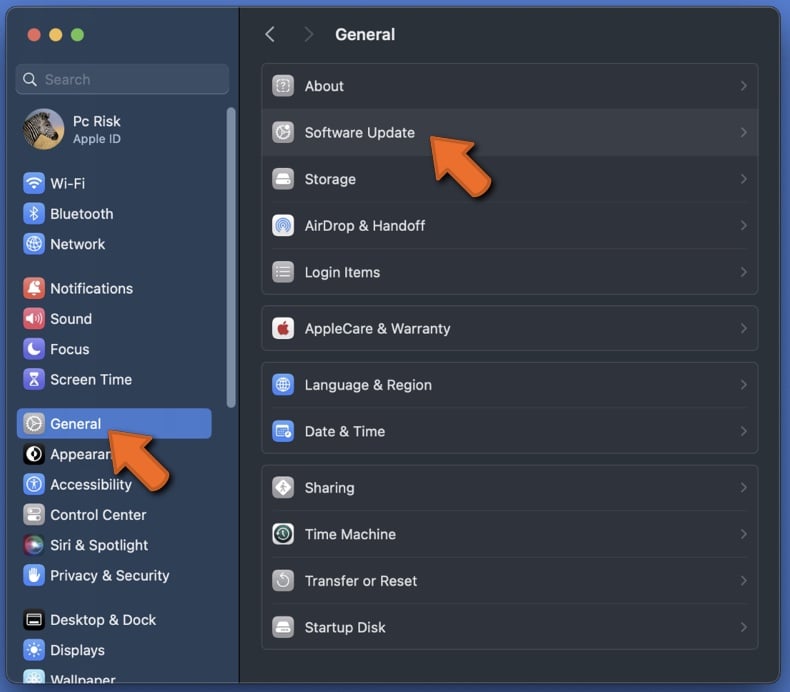
2. In the System Settings window, choose "General" and then click on "Software Update".
3. Your Mac will automatically check for any available updates.
4. If an update is found, follow the on-screen instructions to install it.
Updating your macOS can often fix problems and improve your Mac's performance.
Keep track of audio apps
If you still haven't fixed the issue, try checking your audio apps individually. This will help you find out if a specific app is causing the problem or if it's more widespread.
1. Open each audio app you use and see if the problem occurs.
2. Determine if the issue happens in just one app or in multiple apps.
3. If the problem is with just one app, check if there is an update available for that app.
4. If an update is available, install it. It might fix the issue.
By following these steps, you can pinpoint the source of the problem and potentially solve it by updating the problematic app.
Check for malware on your Mac
If your Mac starts using a lot more resources for simple tasks like playing audio, it might be infected with malware. To check for malware, you need a special tool. We recommend using Combo Cleaner's Malware Scanner.
It can find adware, ransomware, browser hijackers, and other types of malware. If it detects anything, it will notify you and help you remove it quickly. You can choose to run a quick, full, or custom scan.
Here's how to scan your Mac for viruses using Combo Cleaner:
1. Download and install Combo Cleaner from here.
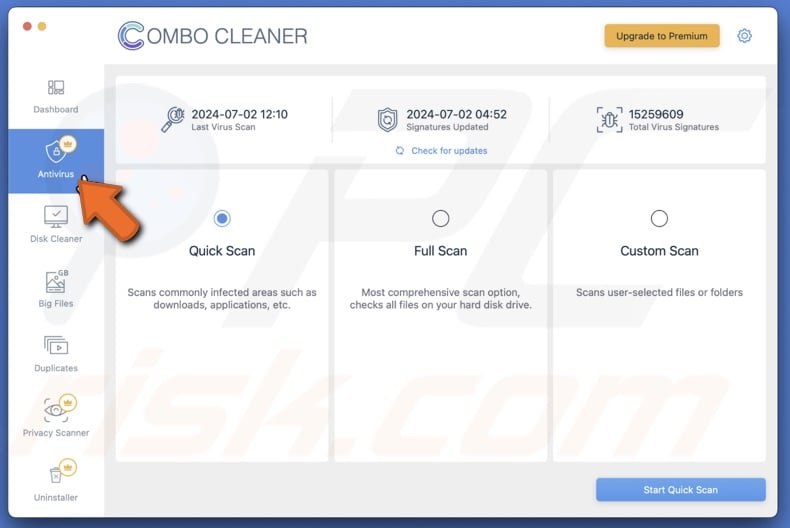
2. Open the app and go to the "Antivirus" tab.
3. Select which scan you want to do. You need to have a premium plan for the full and custom scans.
4. If malware is detected, click "Remove".
By following the steps outlined above, you can effectively identify and resolve most issues with coreaudiod on your Mac.
Share:

Karolina Peistariene
Author of how-to guides for Mac users
Responsible for collecting, analyzing, and presenting problem-solving solution articles related to macOS issues. Years of macOS experience combined with solid research and analyzing skills help Karolina provide readers with working and helpful solutions as well as introduce various features Mac has to offer.
▼ Show Discussion