The ultimate guide to fix your Mac's hard drive and recover data

Get Free Scanner and check your computer for errors
Fix It NowTo fix found issues, you have to purchase the full version of Combo Cleaner. Free trial available. Combo Cleaner is owned and operated by Rcs Lt, the parent company of PCRisk.com read more.
Check if your Mac's hard drive is corrupted and recover data
If you're worried your Mac's hard drive might have some issues, there are a few signs to look out for. These points will help you determine if there's a problem and what steps to take next.
• If getting to your files and information is becoming complex, it could be a sign something needs to be fixed.
• Do you Notice your Mac taking forever to start up, or do your apps and files keep loading without ever opening?
• Your Mac often stops responding, crashes out of nowhere, or needs to be restarted more than usual.
• Files keep vanishing or can't be opened.
• Your Mac won't start up at all.
• Everything on your Mac has slowed down – from booting up to running applications.
Recognizing these signs early on can help you take the proper steps to fix your Mac and keep your data safe.
Check for Backups
If your Mac's drive isn't working right, you'll first want to see if you have any backups saved. When you keep your data backed up regularly, you can breathe easy knowing your files are tucked away safely.
Sometimes, trying to get back lost files on your Mac can mess with the files you still have. So, checking for backups means you're ensuring all your current files are saved, no matter what happens when you try to fix or recover data.
Video on The ultimate guide to fix your Mac's hard drive and recover data
Table of Contents:
- Introduction
- Check Mac's hard drive for problems
- Repair disk with Terminal command
- Repair disk in Recovery Mode
- Recover data with Time Machine
- Can't see the external disk?
- Third-party data recovery software
- Video on The ultimate guide to fix your Mac's hard drive and recover data
Download Computer Malware Repair Tool
It is recommended to run a free scan with Combo Cleaner - a tool to detect viruses and malware on your device. You will need to purchase the full version to remove infections. Free trial available. Combo Cleaner is owned and operated by Rcs Lt, the parent company of PCRisk.com read more.
Check Mac's hard drive for problems
Before diving into complex fixes, let's check to see if there's really a problem with your drive.
Scan with Terminal
1. Open the Terminal app.
2. In the Terminal window, enter: diskutil list
This command shows you all the drives your Mac is using right now.
3. Look through the list for the drive you want to check. Each drive has an "IDENTIFIER" listed next to it - it's like a drive's nickname.
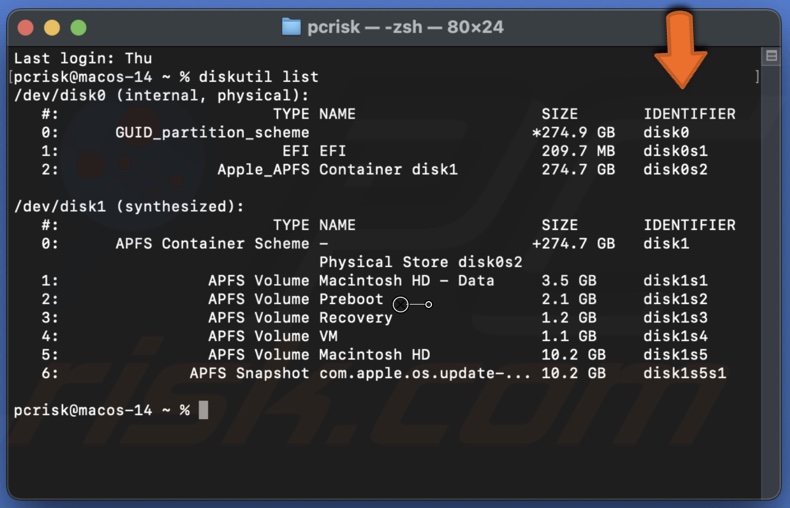
4. Write down or remember the drive's identifier you want to check.
5. Enter: diskutil verifyVolume /dev/drive identifier
Replace [drive identifier] with the actual identifier you noted. If you're checking your main hard drive, you can enter: diskutil verifyVolume /

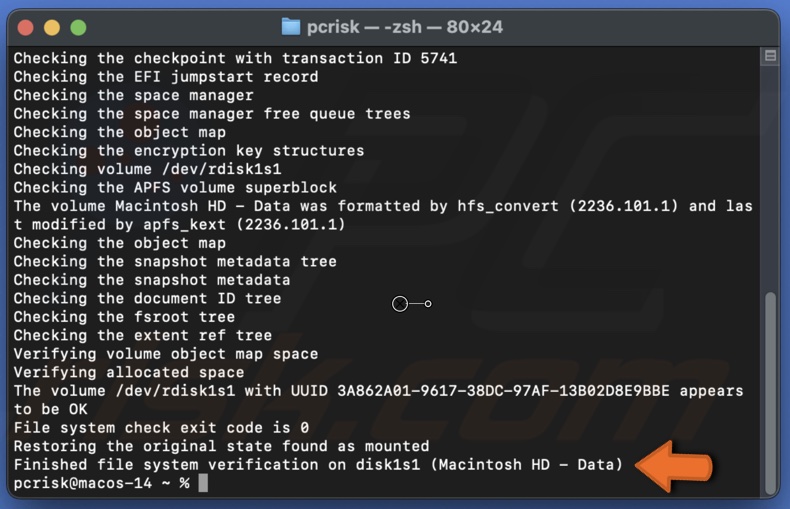
6. Wait for the scan to finish.
7. Once it's done, look at the last few lines of what it says in the Terminal. If it says your drive looks okay, great! If it says, "The volume is corrupt and needs repairing", then it's time to fix it.
Scan with Disk Utility
1. Open Disk Utility with Spotlight or the Launchpad.
2. Click "First Aid" at the top, then click "Run".
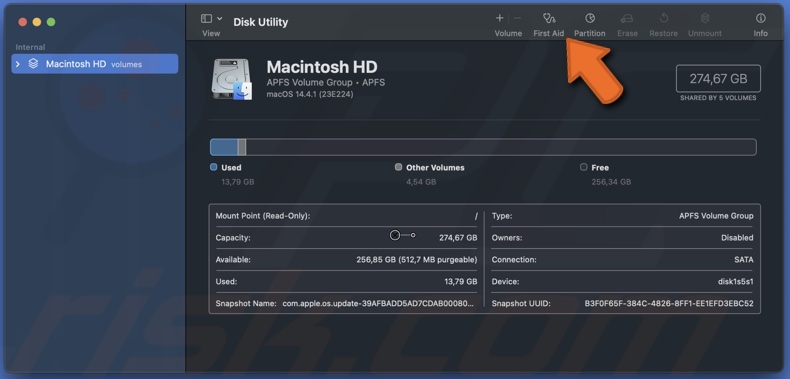
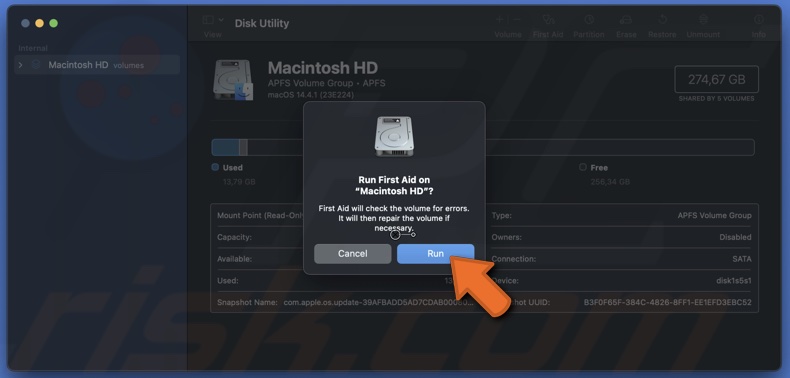
3. Confirm you want to run the tool.
4. Sit back while Disk Utility does its thing. It'll check your hard drive for any problems.
5. Disk Utility will let you know if it finds any errors on your hard drive after the scan.
Repair disk with Terminal command
Using Terminal is like giving precise instructions to your Mac, telling it exactly which drive is having issues and how to fix it. This method is effective because it goes straight to the source of the problem, often resolving it efficiently and restoring your computer's performance.
1. Open Terminal. This is where you'll type commands for your Mac to follow.
2. Once the Terminal is open, enter: diskutil list
3. Note the IDENTIFIER for the corrupted drive.
4. In Terminal, enter: diskutil repairVolume /dev/drive identifier
Replace [drive identifier] with the identifier you noted before telling your Mac exactly which drive to fix.

5. Your Mac will take a little time to do its magic.
6. Once Terminal says it's finished, that's it! You've successfully told your Mac to fix the drive. Usually, this will solve your problem and get things working smoothly again.
Keep in mind, though, that if your drive uses a newer system called APFS, and especially if it has something called Volumes and Containers, this method might not work as expected.
If that happens, don't worry! There's always another way to solve the problem, and it might be time to try a different method.
Repair disk in Recovery Mode
When your Mac starts up in Recovery Mode, it's like entering a safe area where you can make repairs without the standard operating system running. It means you can fix problems on the drive without the possibility of the operating system making things worse by trying to use the drive at the same time.
For Intel-based Macs:
1. Restart your Mac, and as it begins to restart, press and hold the Command + R keys together.
2. Keep holding these keys until you see a message that says "Loading startup options". Then, you can let go.
For Macs with an M1 chip:
1. Press and hold the Power button as you turn on your Mac. Keep holding it down.
2. Release the button once you see the "Loading startup options" message.
Once you've gotten into the startup options, here's how to use Disk Utility to fix problems with your drive:
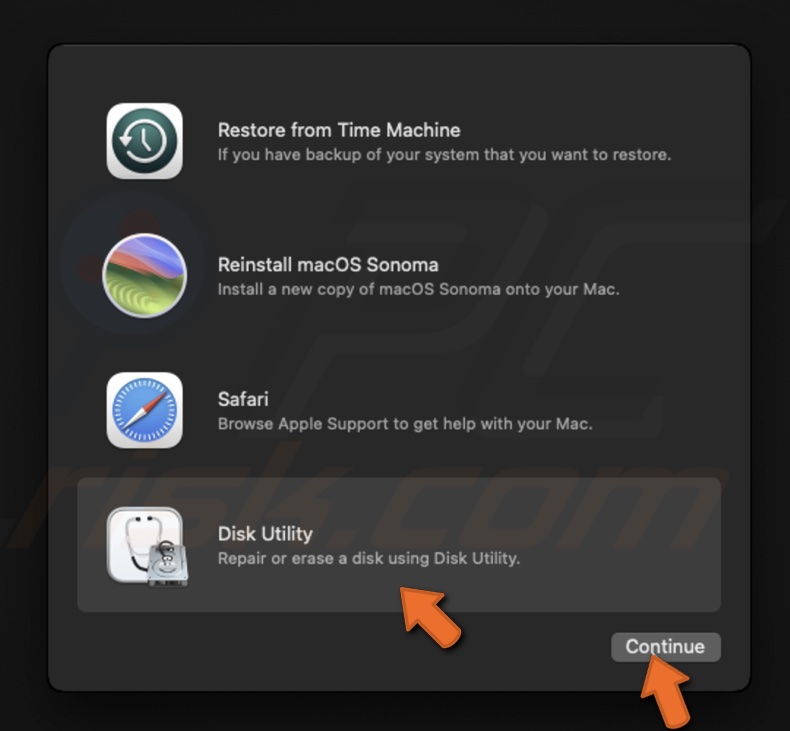
1. Choose "Disk Utility" from the menu on the screen, then click "Continue".
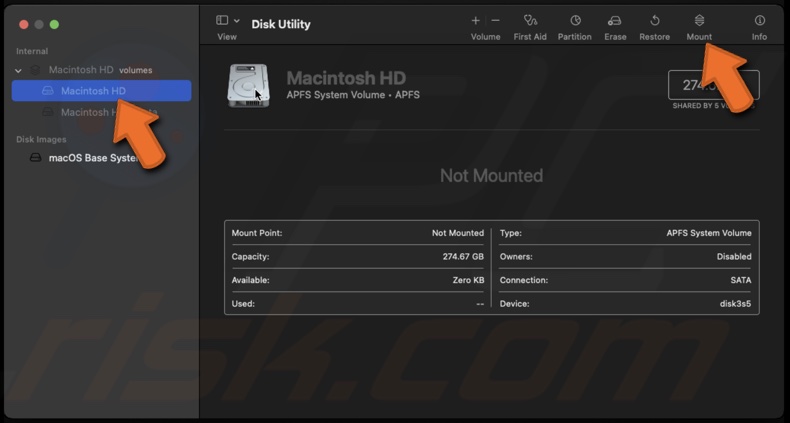
2. Find and select the drive you're having trouble with, then click the "Mount" button. It makes the drive accessible.
3. To exit Disk Utility, simultaneously press the Command + Q keys.
4. When you're back in the main menu, from the menu bar, select "Utilities" and then choose "Terminal".
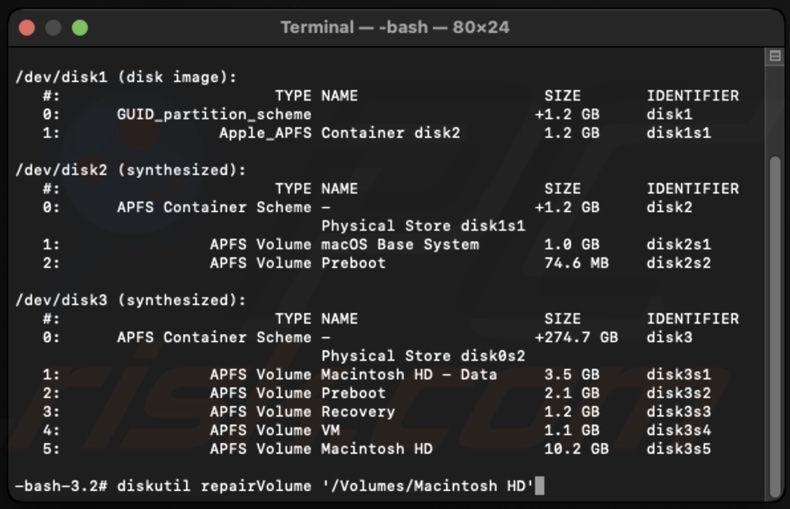
5. In the Terminal window, enter: diskutil list
6. Note down the name of the drive you want to fix.
7. In the Terminal window, enter: diskutil repairVolume '/Volumes/your drive name'
Replace [your drive name] with the actual name of your drive and press the Return key.
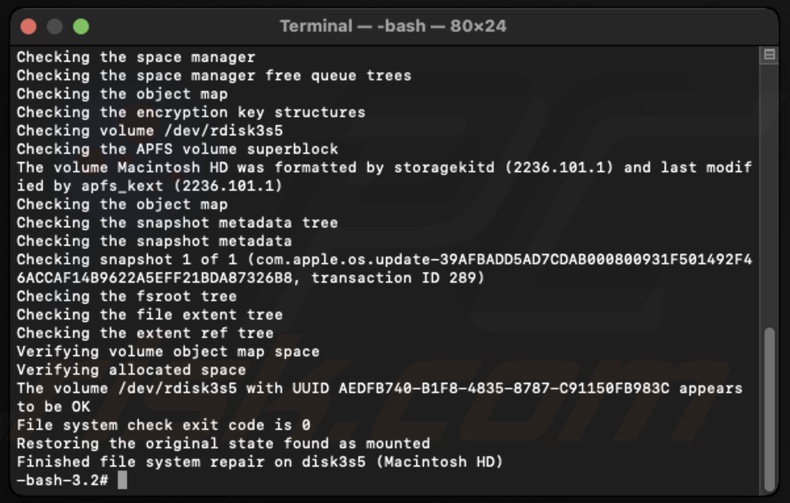
8. Once you see a message that says "Finished file system repair", your drive should be all set and ready to go!
9. Restart the Mac to exit the Recovery Mode.
Recover data with Time Machine
The Time Machine acts as a time-travel device for your files. If something goes wrong or your files get lost, you can return to a moment before all that happened. You can pick exactly what you want to bring back to the present. It's like having a safety net, making sure you can get your important files back exactly as they were.
1. Connect the external drive where your Time Machine backups are stored. If you use a Time Capsule or networked drive, ensure your Mac is connected to the same network.
2. Open Time Machine by clicking the Time Machine icon in your menu bar and selecting "Enter Time Machine".
3. Go back to a date before your files were lost or changed.
4. Once you've found the right point in time, use the Finder window to look for your files. You can open folders, search for file names, or use the space bar to preview items like you normally would.
5. When you've found the files or folders you want to bring back to the present, select them and click the "Restore" button.
6. After the restoration, you can exit Time Machine and find your recovered items in their original locations.
Can't see the external disk?
Enabling external disks to show on the desktop makes sure your Mac can see and interact with them. It's crucial for recovering data because if your Mac doesn't recognize these external storage devices, it can't access the lost files you're trying to recover.
1. Click the Finder icon to open the Finder window.
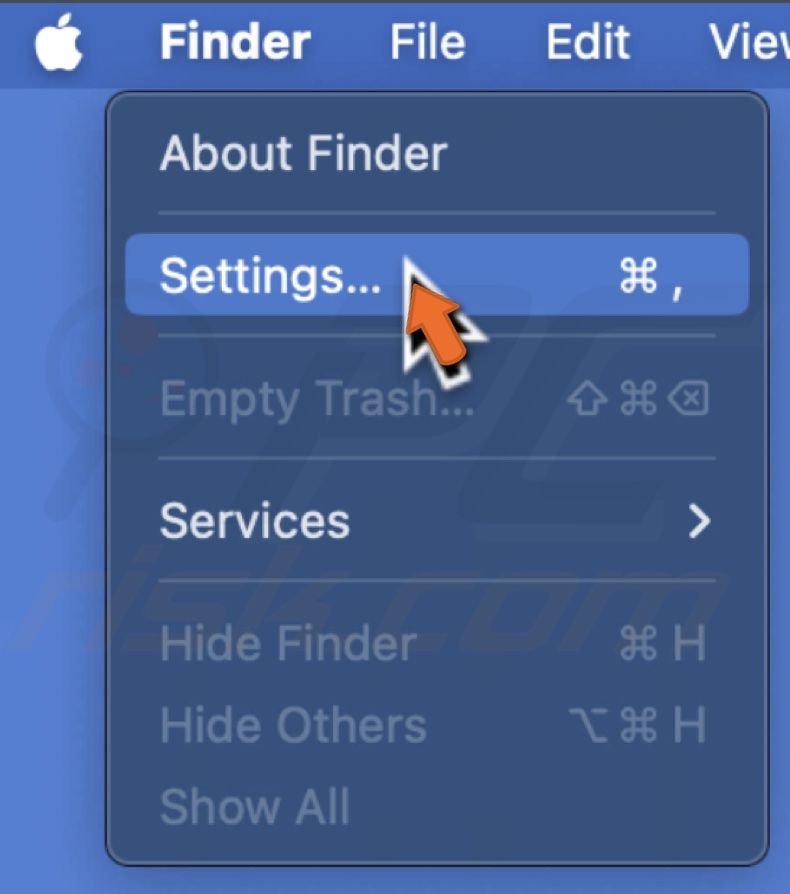
2. From the menu bar, click "Finder" and select "Settings".
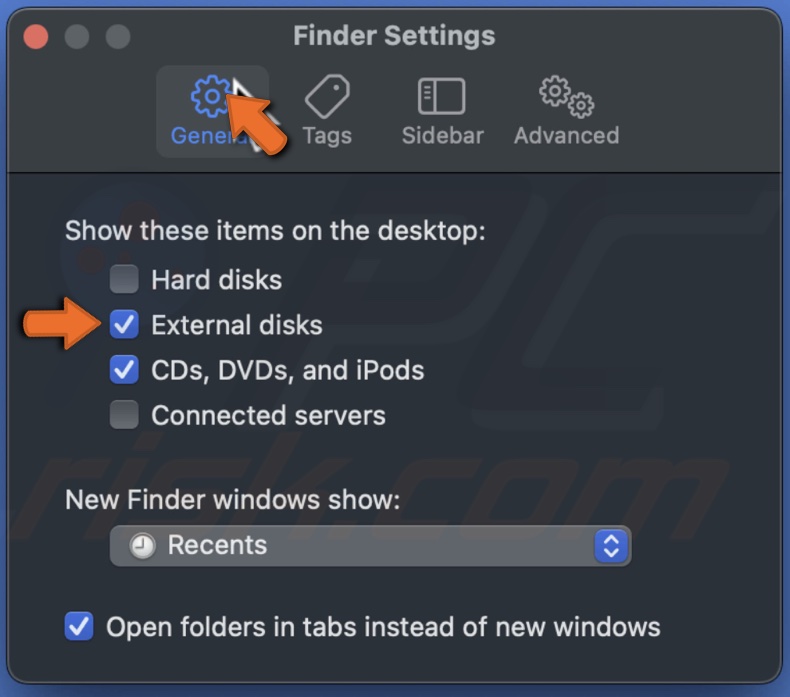
3. In the "General" tab, make sure the box next to "External Disks" is checked.
Third-party data recovery software
If tech stuff isn't really your thing, no worries! You can go the straightforward way with some top-notch data recovery programs. These tools are very user-friendly and well-liked by many.
The great thing about these programs is they're designed to be easy to navigate. It means you can get your files back from a broken hard drive without any hassle. Plus, you get to choose which files you want to bring back.
I hope the information in this guide was helpful. Remember, maintaining regular backups can significantly reduce the stress and potential data loss associated with hard drive issues.
If you have any questions, please leave a comment below or contact Apple support for further assistance.
Share:

Karolina Peistariene
Author of how-to guides for Mac users
Responsible for collecting, analyzing, and presenting problem-solving solution articles related to macOS issues. Years of macOS experience combined with solid research and analyzing skills help Karolina provide readers with working and helpful solutions as well as introduce various features Mac has to offer.
▼ Show Discussion