9 easy fixes when you can't empty the trash on Mac

Get Free Scanner and check your computer for errors
Fix It NowTo fix found issues, you have to purchase the full version of Combo Cleaner. Free trial available. Combo Cleaner is owned and operated by Rcs Lt, the parent company of PCRisk.com read more.
Can't empty Mac trash? Try these 9 fixes
Struggling to empty the trash on your Mac? You're not alone. This common issue can arise from various reasons, such as files being in use, locked files, or permissions errors.

Whether it's a document or an application you no longer need, the inability to clear your trash can clutter the system. It can also consume valuable storage space. Fortunately, there are several methods to troubleshoot and resolve this issue.
This guide is designed to help you navigate this problem with easy-to-follow steps. It ensures that whatever the root cause, you'll find a way to empty your trash successfully. So, let's dive into the 9-step guide to fixing the problem of a Trash bin that won't empty.
Video on 9 easy fixes when you can't empty the trash on Mac
Table of Contents:
- Introduction
- Method 1. Force quit Finder
- Method 2. Restart your Mac
- Method 3. Remove from login items
- Method 4. Use the "Delete Immediately" option
- Method 5. Use the Terminal to empty trash
- Method 6. Use Combo Cleaner
- Method 7. Empty trash in Safe Mode
- Method 8. Repair disk permissions
- Method 9. Empty trash in Recovery Mode
- Video on 9 easy fixes when you can't empty the trash on Mac
Download Computer Malware Repair Tool
It is recommended to run a free scan with Combo Cleaner - a tool to detect viruses and malware on your device. You will need to purchase the full version to remove infections. Free trial available. Combo Cleaner is owned and operated by Rcs Lt, the parent company of PCRisk.com read more.
Force quit Finder
Sometimes, Finder might get "confused" and think an item is still in use, even when it's not. This confusion can stop the trash from emptying properly. You're giving Finder a quick refresh by forcing it to restart.
This can clear up any misunderstandings it had about items in the trash, making it possible for you to empty the trash successfully after the restart.
To force quit Finder, follow the steps below:
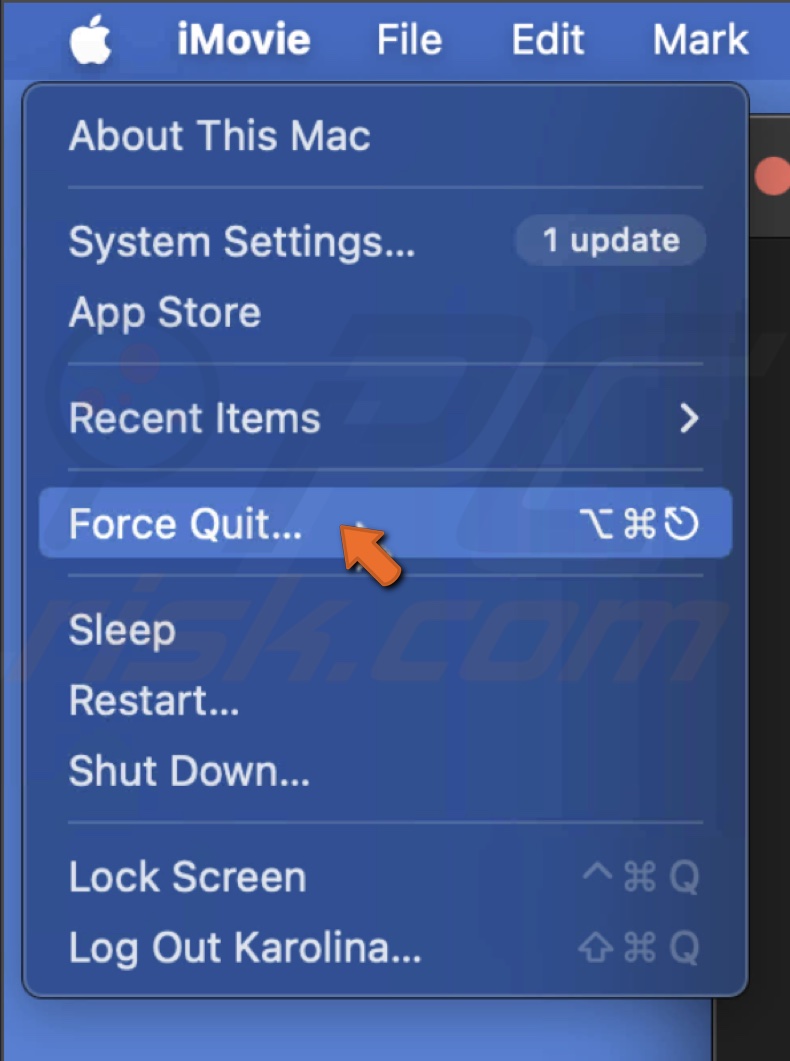
1. Click on the Apple logo in the top-left corner of your screen and select "Force Quit".
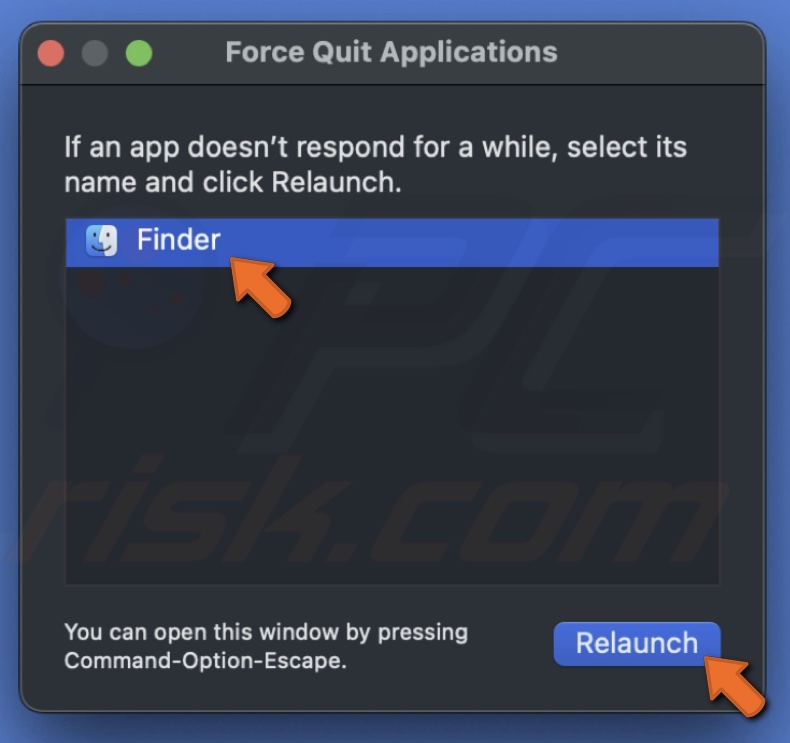
2. In the list of open applications, choose "Finder".
3. Click "Relaunch". This will restart Finder and may free up any files that were stuck.
Restart your Mac
Restarting your Mac can resolve many issues, including the inability to empty the trash. It refreshes the system and can clear up any temporary glitches preventing the trash from emptying.
To restart your Mac, follow the steps below:
1. Click on the Apple logo in the top left corner of your screen.
2. Select "Restart" from the drop-down menu.
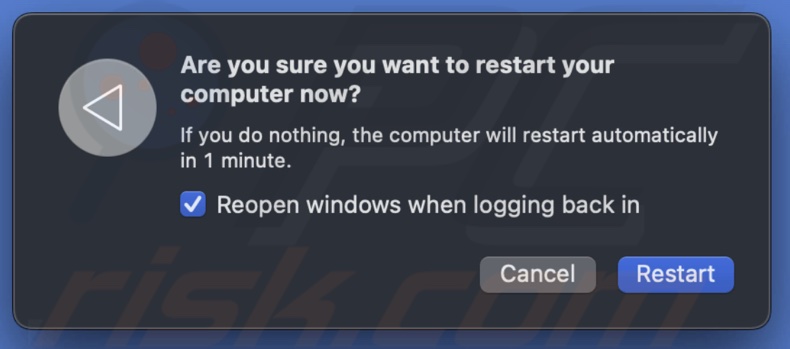
3. Wait for your Mac to reboot, then try emptying the trash again.
Remove from login items
Login items are applications and services that automatically start when logging into your Mac. If any of these are running in the background, they might have specific files open that you've previously placed in the trash. This can prevent your Mac from emptying the trash because the system sees those files still in use.
Removing these login items ensures that no applications are holding onto files in the trash. It makes it easier to delete the file without encountering errors.
To remove from login items, follow the steps below:
1. Close the file, folder, or app in use that you want to delete.
2. Go to "System Settings" from the Apple menu.
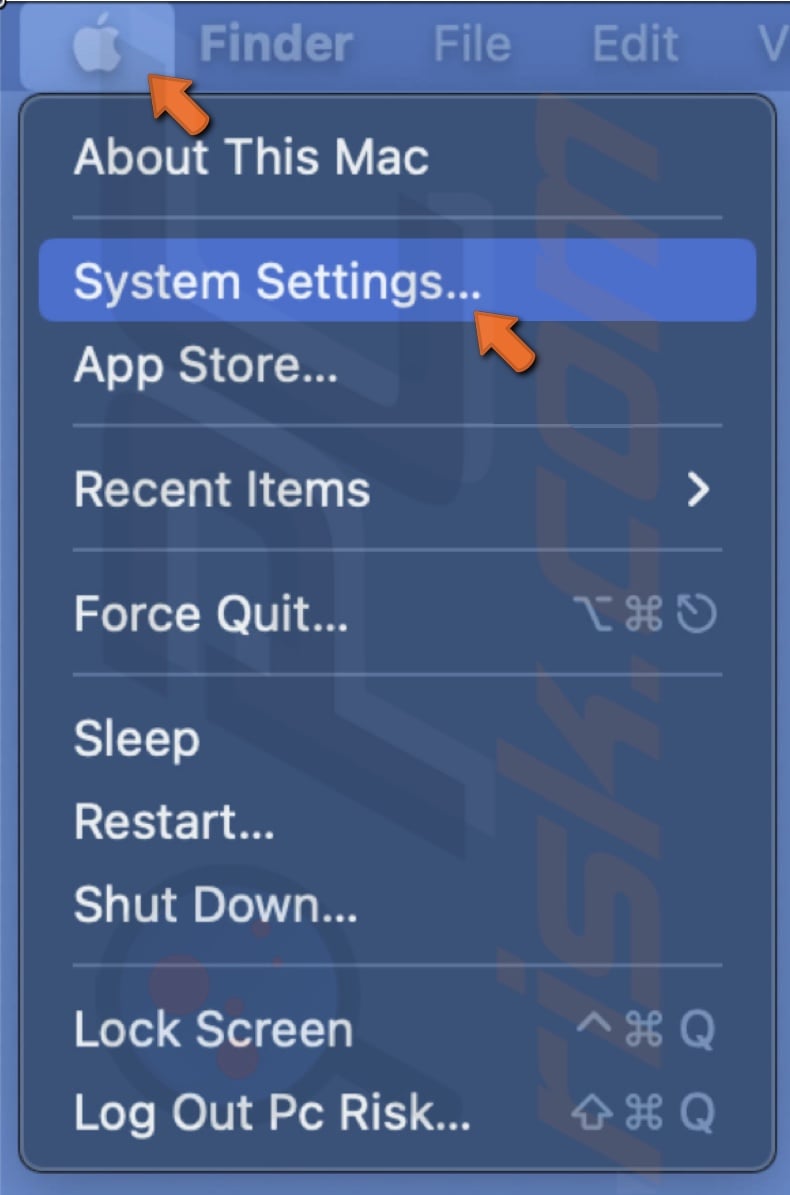
3. Select the "General" tab and click "Login Items".
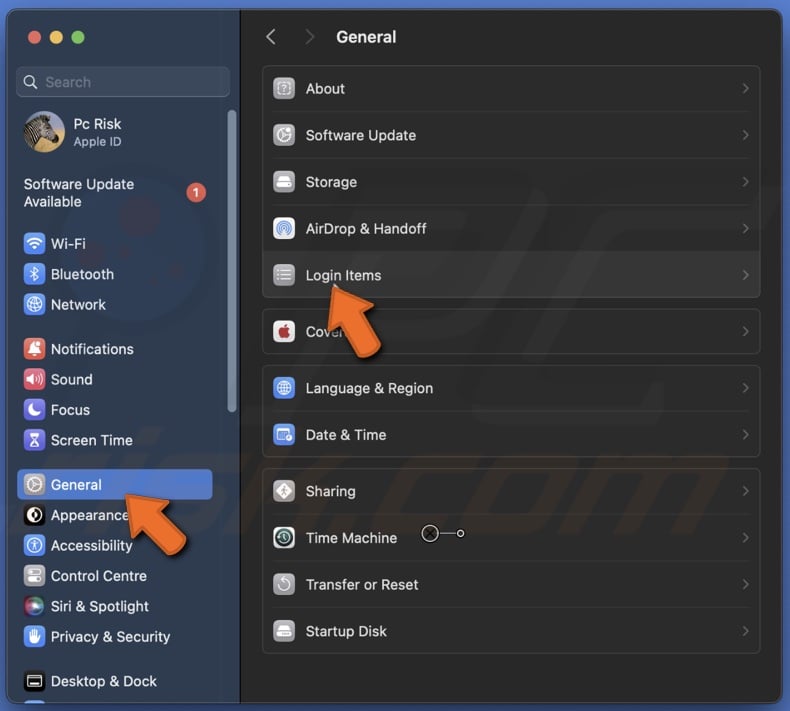
4. Choose the login item you're trying to delete and click the "-" button to remove it.
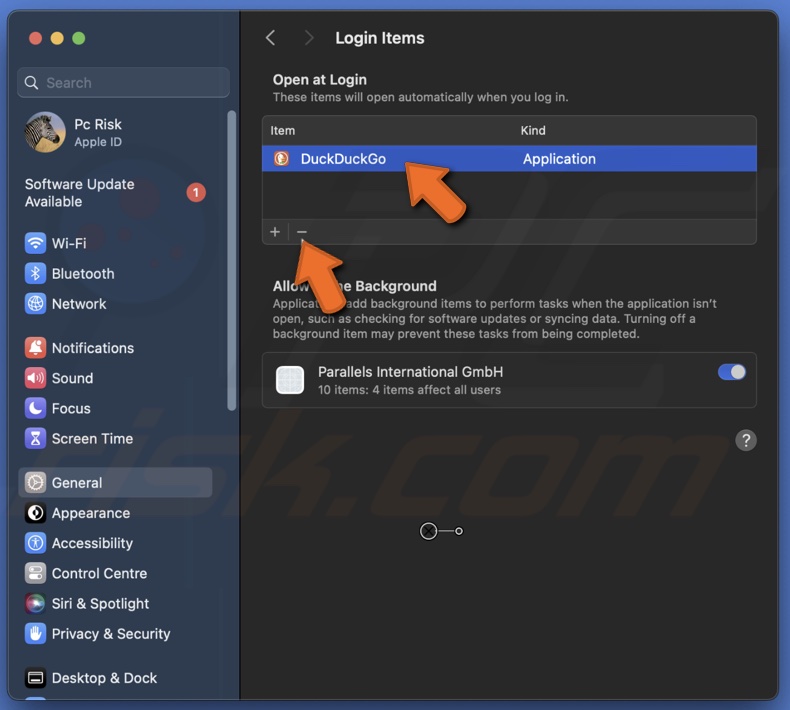
5. Restart the Mac and try to delete the item again.
Use the "Delete Immediately" option
The "Delete Immediately" feature allows you to select and delete specific files on the spot, so they don't need to go to the trash. It's a straightforward way to eliminate files you no longer need without any extra steps or potential errors.
To immediately delete items, follow the steps below:
1. Click on "Trash" to open the folder.
2. Right-click on the item you want to delete and select "Delete Immediately". If you want to delete multiple items, select them all and right-click.
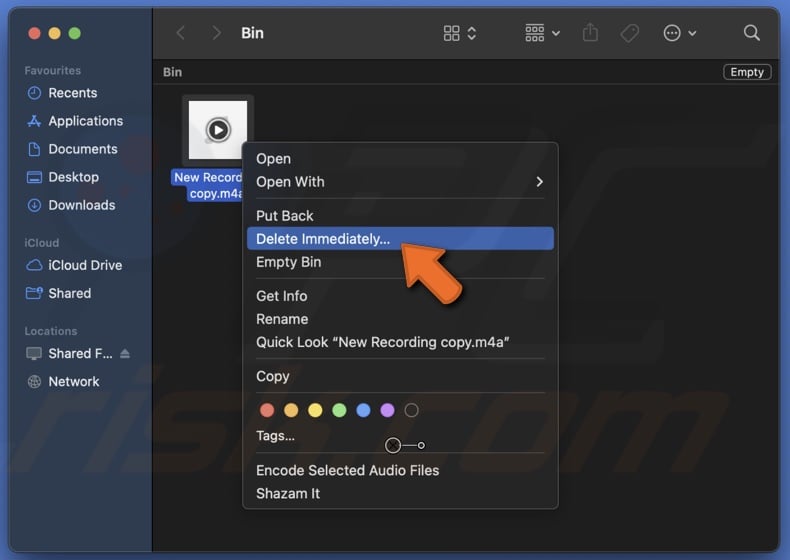
3. Confirm the action.
Use the Terminal to empty trash
Terminal commands can force your Mac to do things you can't do through standard methods. Sometimes, files in the trash won't be deleted because they're being used or locked by the system. When you use a Terminal command, it bypasses these normal checks and directly tells your Mac to delete those files no questions asked.
To empty the trash with Terminal, follow the steps below:
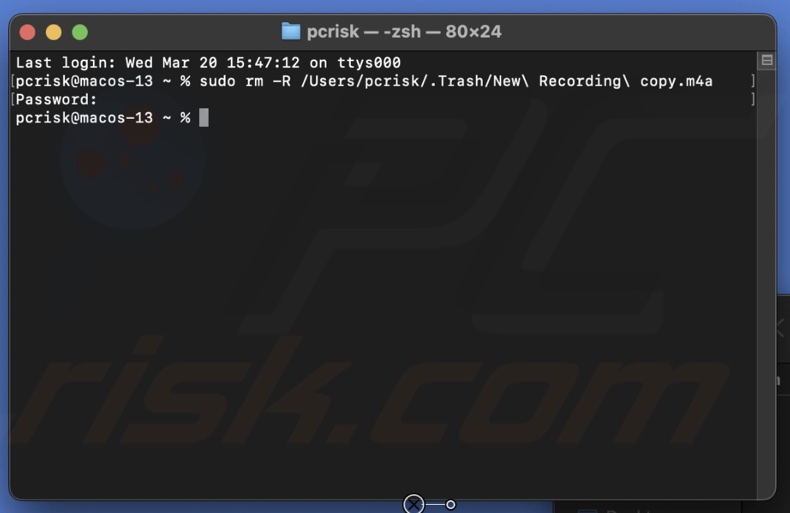
1. Open the Terminal application. You can find Terminal in the Utilities folder or open it using Spotlight.
2. Type in the command sudo rm -R followed by a space. Do not press Enter yet.
3. Open "Trash" and drag all items from the trash into the Terminal window. This action copies the paths of all files.
4. Press Enter, input your administrator password if prompted, and wait for the process to complete.
Use Combo Cleaner
Files get stuck in the trash because another application uses them or they have special permissions preventing deletion. Combo Cleaner can identify and remove these problematic files, saving you the hassle of figuring out why they won't delete and doing it manually.
It simplifies the process, making clearing up space on your Mac easier and faster without diving into complex troubleshooting steps.
On top of that, the Disk Cleaner feature is absolutely FREE.
To empty trash with Combo Cleaner, follow the steps below:
1. Download Combo Cleaner and install it.
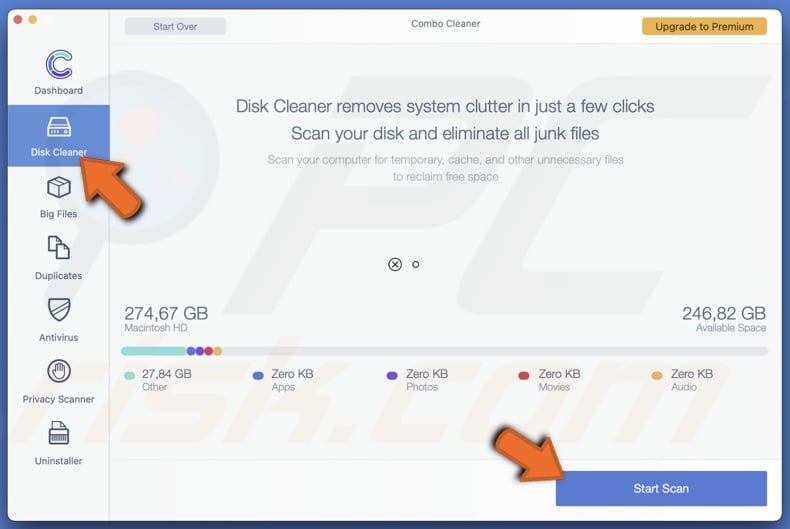
2. Open the app and select the "Disk Cleaner" tab.
3. Click "Start Scan".
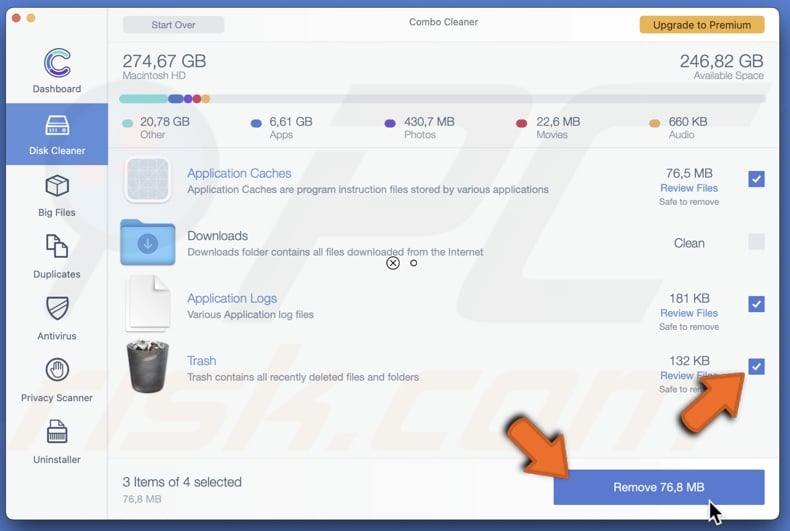
4. When the scan is done, check the box next to "Trash" and click "Remove".
Empty trash in Safe Mode
Safe Mode starts your Mac with only the essential system software. It doesn't load things that might be causing the problem, like faulty software or extensions. It also checks and repairs any disk issues preventing the trash from emptying.
Trying to empty the Trash in Safe Mode can work when other methods fail. It bypasses potential obstacles and fixes underlying issues, making getting rid of those stubborn files stuck in your trash easier.
To empty trash in Safe Mode, follow the steps below:
1. Restart your Mac and immediately press and hold the Shift key until the login window appears. "Safe Mode" should be written in the top corner of the screen.

2. You may need to log in twice if you have FileVault turned on.
3. Right-click on the Trash icon and select "Empty Trash".
4. Restart your Mac again, this time without pressing any keys, to exit Safe Mode.
Repair disk permissions
macOS uses a set of rules or "permissions" to determine who can read, write, or execute each file and folder. Sometimes, these permissions can get mixed up or corrupted. Your Mac might think you don't have the right to delete specific files.
Repairing disk permissions goes through your system and resets these rules according to what macOS expects, potentially resolving issues where files can't be deleted from the trash.
To repair disk permissions, follow the steps below:
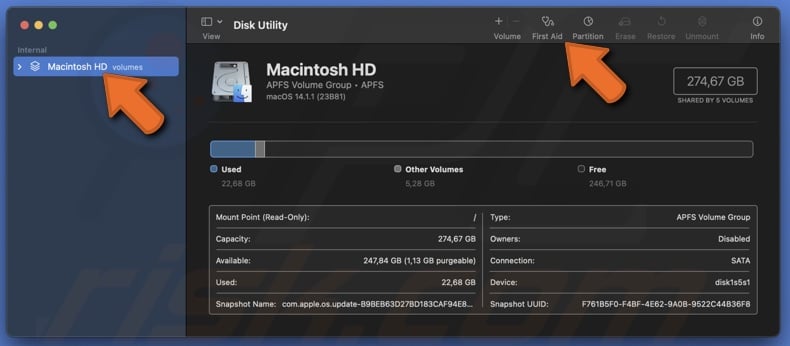
1. Open Spotlight and enter "Disk Utility".
2. Select the startup disk in the sidebar. It's usually "Macintosh HD".
3. Click the "First Aid" button and follow the prompts to repair disk permissions.
Empty trash in Recovery Mode
In Recovery Mode, your Mac is in a special state where it can perform repairs and remove files stuck in the trash. It can bypass errors or issues that don't allow you to delete them in the regular way.
It's a powerful tool to clean up your Mac and make sure it runs smoothly without unnecessary files taking up space.
To empty trash with Recovery Mode, follow the steps below:
1. Restart your Mac and hold Command + R to enter Recovery Mode.
2. Open Terminal from the Utilities menu.
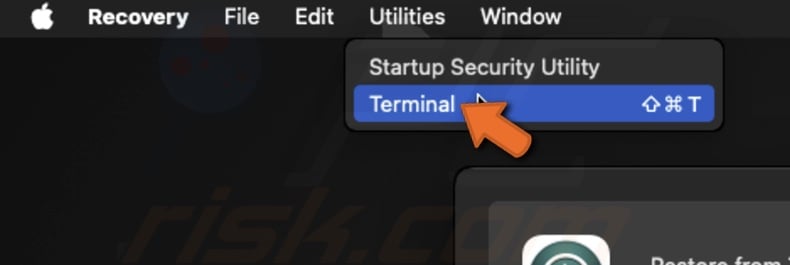
3. To disable System Integrity Protection (SIP), enter: csrutil disable
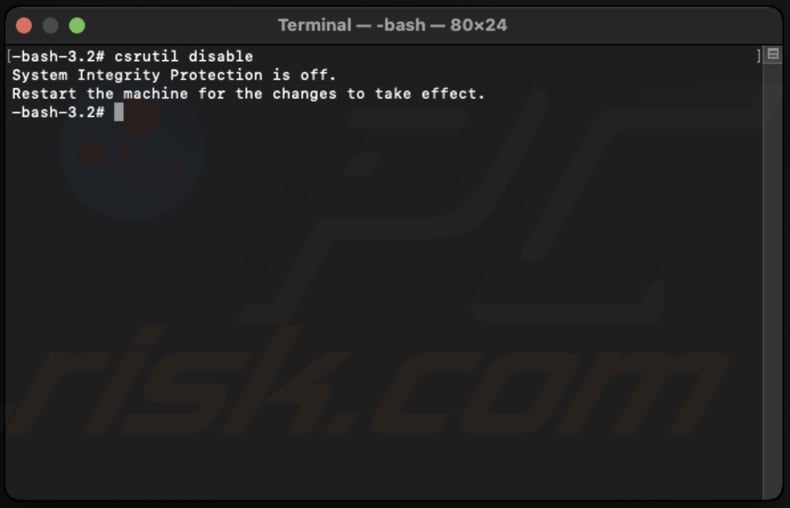
4. Restart your Mac and try to empty the trash.
5. To re-enable SIP, re-enter the Recovery Mode and enter in Terminal: csrutil enable
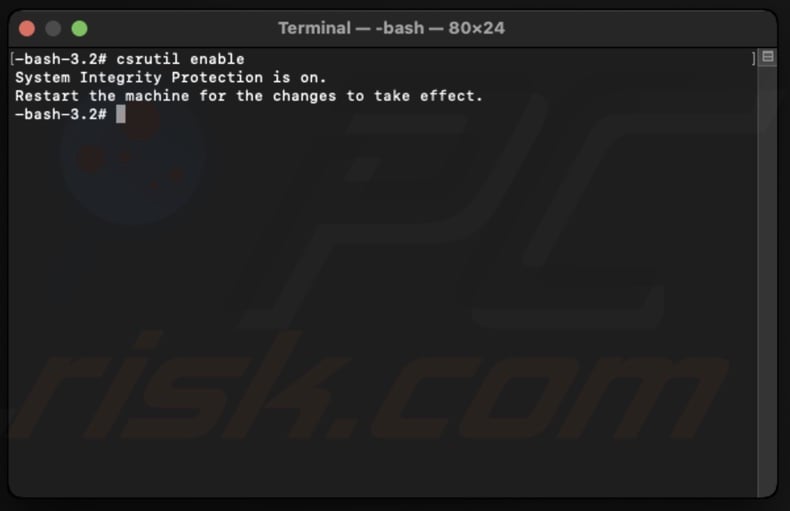
Following these steps can resolve most issues preventing you from emptying the trash.
If you've tried all these methods and still can't empty the trash, it might be time to contact Apple Support for further assistance.
Share:

Karolina Peistariene
Author of how-to guides for Mac users
Responsible for collecting, analyzing, and presenting problem-solving solution articles related to macOS issues. Years of macOS experience combined with solid research and analyzing skills help Karolina provide readers with working and helpful solutions as well as introduce various features Mac has to offer.
▼ Show Discussion