Fix IP Address conflicts on your Mac: 7 easy steps

Get Free Scanner and check your computer for errors
Fix It NowTo fix found issues, you have to purchase the full version of Combo Cleaner. Free trial available. Combo Cleaner is owned and operated by Rcs Lt, the parent company of PCRisk.com read more.
7 effective solutions to resolve IP Address conflicts on macOS Sonoma
Encountering an IP address conflict can be frustrating, as it disrupts your network connection and prevents you from accessing the internet or local network resources.

An IP address conflict happens when two devices on the same network are given the same IP address, leading to communication errors. If you're experiencing this issue, don't worry; there are several fixes you can try to resolve and restore your network connectivity.
In this guide, you'll explore seven effective solutions to fix IP address conflicts on macOS Sonoma. I'll take you through each solution so you can follow along easily and fix the issue yourself.
Video on Fix IP Address conflicts on your Mac: 7 easy steps
Table of Contents:
- Introduction
- Method 1. Restart your router and devices
- Method 2. Renew DHCP Lease
- Method 3. Configure DHCP settings manually
- Method 4. Flush DNS cache
- Method 5. Use Wireless Diagnostics
- Method 6. Update network drivers
- Method 7. Reset network settings
- Video on Fix IP Address conflicts on your Mac: 7 easy steps
Download Computer Malware Repair Tool
It is recommended to run a free scan with Combo Cleaner - a tool to detect viruses and malware on your device. You will need to purchase the full version to remove infections. Free trial available. Combo Cleaner is owned and operated by Rcs Lt, the parent company of PCRisk.com read more.
Restart your router and devices
A simple restart can resolve network issues by resetting the connection and clearing any temporary glitches. It can often help fix this issue by requesting new IP addresses from the router and ensuring each network device has a unique IP address.
To restart your router and devices, follow the steps below:
1. Power off your router by unplugging it from the power source.
2. Turn off your Mac and any other devices connected to the network.
3. Wait a few minutes to ensure all devices are fully powered down.
4. Plug in your router and wait to boot up fully.
5. Turn on your Mac and other devices.
6. Check to see if the IP address conflict has been resolved.
Renew DHCP Lease
By releasing your current IP address and requesting a new one, you can avoid IP address conflicts and regain network connectivity. This process can also help fix issues with slow or unstable connections on your Mac.
To renew your DHCP Lease, follow the steps below:
1. Click the Apple logo and go to "System Settings".
2. Select "Network".
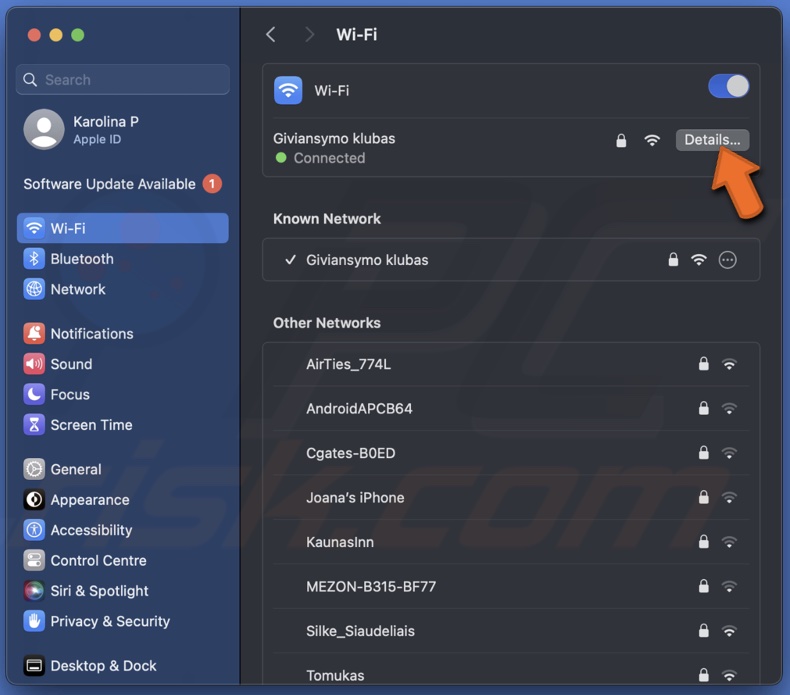
3. Choose your active network connection, whether Wi-Fi or Ethernet.
4. Click on the "Details" button.
5. Go to the "TCP/IP" tab.
6. Click on "Renew DHCP Lease" and wait for the process to complete.
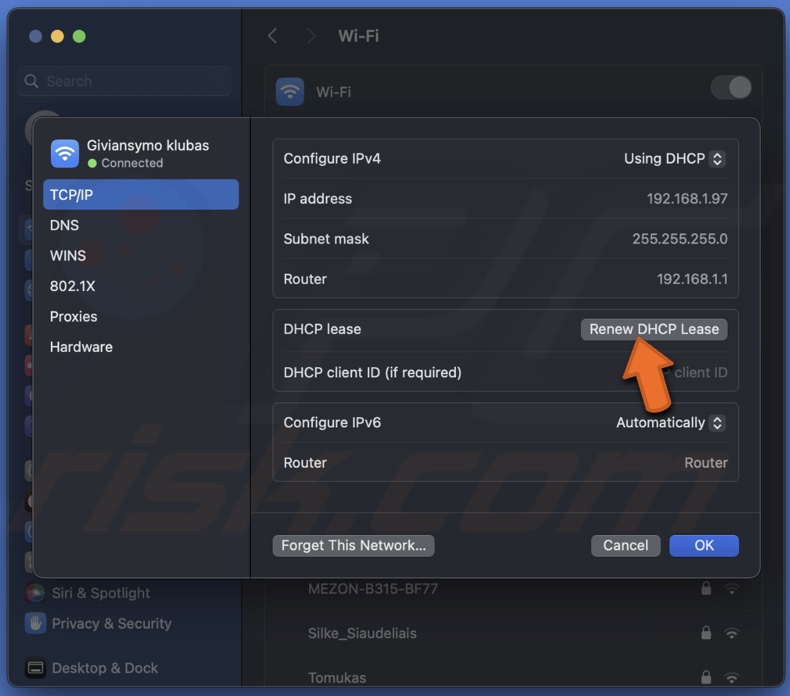
7. Check if the IP address conflict persists.
Configure DHCP settings manually
Manually configuring DHCP settings can help you avoid conflicts with other devices on your network and ensure that your Mac is assigned a unique IP address.
Additionally, manual configuration can help you troubleshoot issues related to DHCP, as you will have complete control over the settings used to assign IP addresses within your network.
To configure DHCP settings manually, follow the steps below:
1. Open "System Settings" on your Mac.
2. Click on "Network."
3. Choose your active network connection and click on the "Details" button next to it.
4. Go to the "TCP/IP" tab and next to "Configure IPv4" select the drop-down menu.
5. Choose "Using DHCP with manual address".
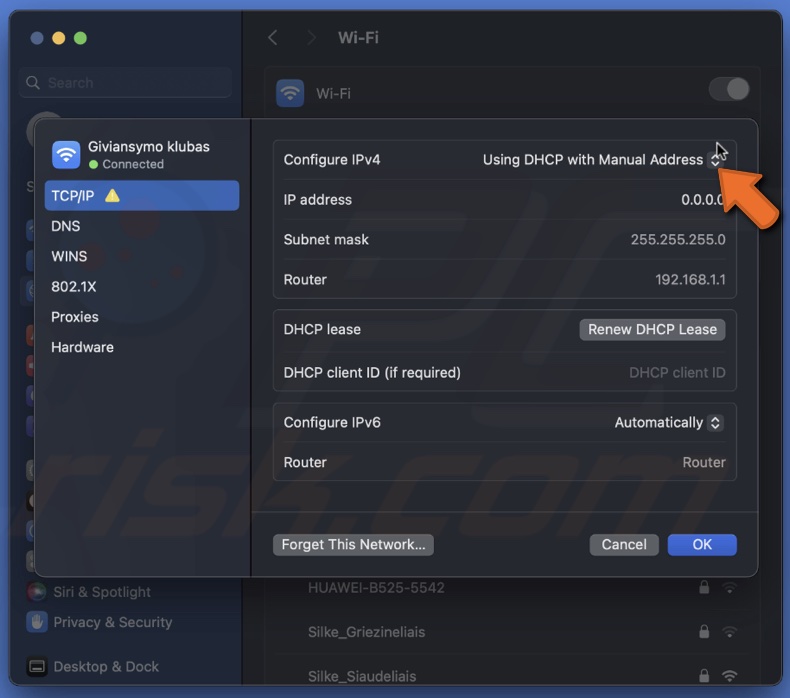
6. Enter a unique IP address, subnet mask and router.
7. The go to the "DNS" tab and enter DNS server address.

8. Click "OK" to save the changes.
9. Restart the Mac and verify if the IP address conflict is resolved.
Flush DNS cache
When you visit a website, your Mac stores its IP address in its DNS cache. If there is an IP address conflict, the DNS cache may contain outdated information that could be causing the issue. Flushing the DNS cache will clear out this information and force your computer to look up the IP address again, which can help resolve the conflict.
To flush the DNS cache, follow the steps below:
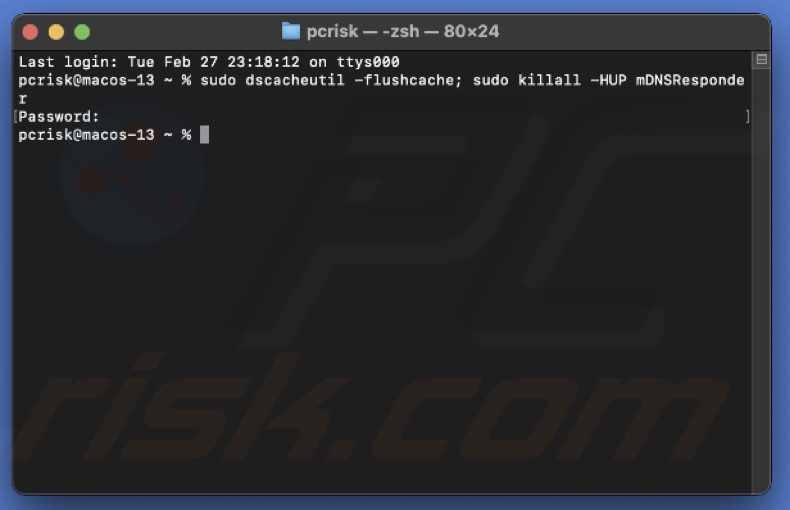
1. Open the Terminal app.
2. Enter the command: sudo dscacheutil -flushcache; sudo killall -HUP mDNSResponder
3. Enter your administrator password when prompted.
4. Wait for the command to execute and the DNS cache to be flushed.
5. Restart Mac.
6. Check if the IP address conflict has been resolved.
Use Wireless Diagnostics
Network Diagnostics can automatically detect and troubleshoot network connectivity issues, including conflicts with IP addresses.
To use network diagnostics, follow the steps below:
1. Hold the Option key on your keyboard and click the network icon in the top right corner.
2. Release the key and click "Open Wireless Diagnostics".
3. Follow the on-screen instructions to run diagnostics.

4. Review the diagnostic results and follow any suggested fixes.
Update network drivers
Updating your network drivers can help resolve IP address conflicts on your Mac, as outdated drivers can lead to connectivity issues and other network problems. By updating your drivers, you ensure that your network adapter functions correctly and can communicate with other devices on your network without any conflicts.
To update network drivers, follow the steps below:
1. Open the Apple menu and select "System Settings."
2. Go to "General" settings and click "Software Update".
3. Check if there are any available updates.
4. If an update is available, click "Update Now" next to it.
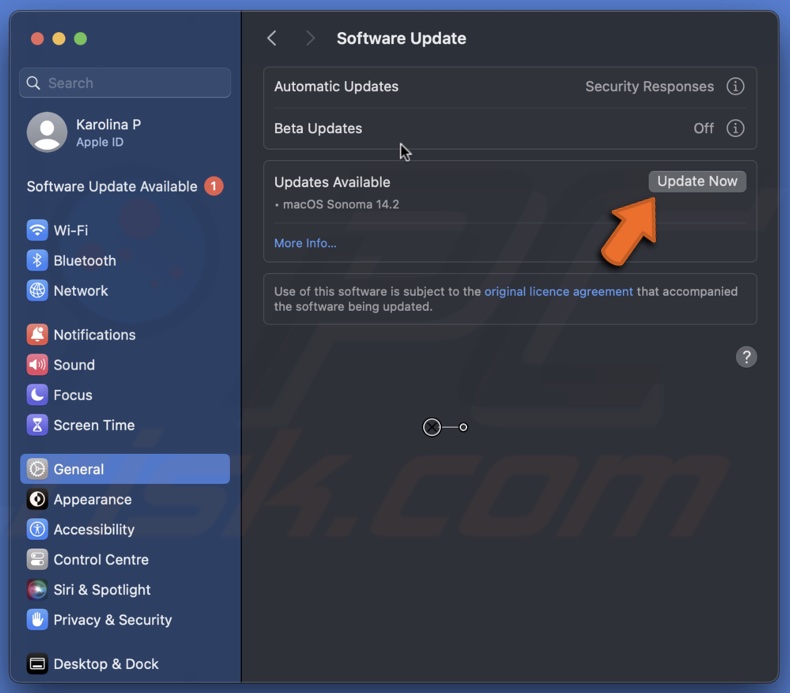
5. Wait for the update to download and install.
6. After the update is complete, check if the IP address conflict persists.
Reset network settings
Resetting network settings can help resolve IP address conflicts on your Mac by clearing out any conflicting IP addresses, resetting network configurations, and allowing your Mac to obtain a new IP address from your network.
However, network settings reset will erase all saved Wi-Fi passwords, DNS settings, and other network-related preferences, so you'll need to set them up again after resetting.
To reset network settings, follow the steps below:
1. Open "System Settings" on macOS.
2. Click on "Network" and select your active network.
3. Next to your internet connection, click the three-dot button and choose "Forget This Network" and confirm the action.
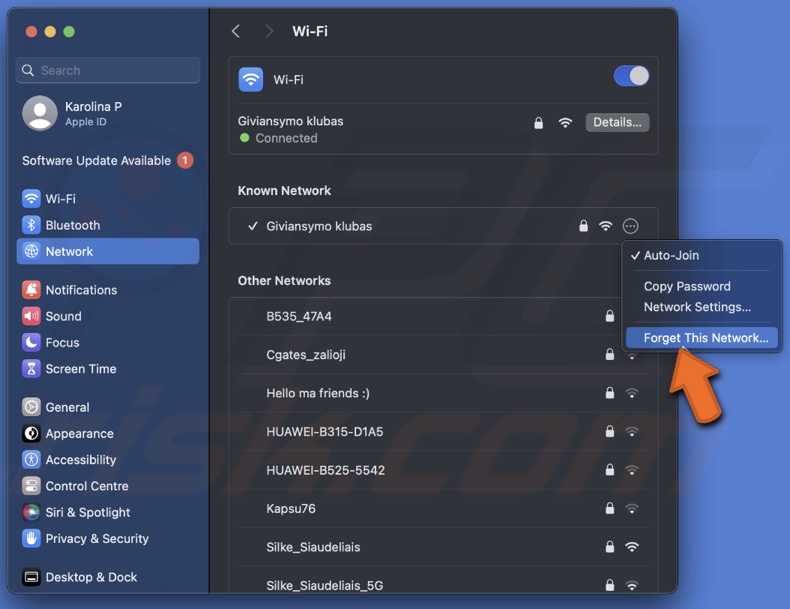
4. Then, connect again.
These solutions can help resolve IP address conflicts on your macOS Sonoma and restore network connectivity. If the issue persists despite trying these solutions, contact your network administrator or Internet Service Provider (ISP) for further assistance.
Share:

Karolina Peistariene
Author of how-to guides for Mac users
Responsible for collecting, analyzing, and presenting problem-solving solution articles related to macOS issues. Years of macOS experience combined with solid research and analyzing skills help Karolina provide readers with working and helpful solutions as well as introduce various features Mac has to offer.
▼ Show Discussion