6 ways to reduce image size on your iPhone or iPad

Get Free Scanner and check your computer for errors
Fix It NowTo fix found issues, you have to purchase the full version of Combo Cleaner. Free trial available. Combo Cleaner is owned and operated by Rcs Lt, the parent company of PCRisk.com read more.
Effortlessly resize your images with these 6 easy methods!
Managing your iPhone or iPad's photo library can be challenging in this age of high-quality photos and expanding storage demands. Whether you're a photo enthusiast or just looking to free up space, reducing image size has never been more relevant.
In this easy-to-follow guide, I'll walk you through six practical and easy methods to effortlessly reduce the size of your images. Discover simple techniques to optimize your photo collection, ensuring your device stays creative and functional.
Let's dive into the world of image resizing, helping you reclaim storage space without compromising your special memories.
Video on 6 ways to reduce image size on your iPhone or iPad
Table of Contents:
- Introduction
- Use the built-in Photos app
- Capture pictures in a different format
- Use a third-party app
- Create your photo resize shortcut
- Use the Mail app
- Use a messaging app
- Video on 6 ways to reduce image size on your iPhone or iPad
Download Computer Malware Repair Tool
It is recommended to run a free scan with Combo Cleaner - a tool to detect viruses and malware on your device. You will need to purchase the full version to remove infections. Free trial available. Combo Cleaner is owned and operated by Rcs Lt, the parent company of PCRisk.com read more.
Use the built-in Photos app
The Photos app is an option if you're looking for a quick and easy way to resize your images. If you crop the image, you might get it slightly compressed. Crop it manually or select an aspect ratio.
To compress an image using the Photos app, follow the steps below:
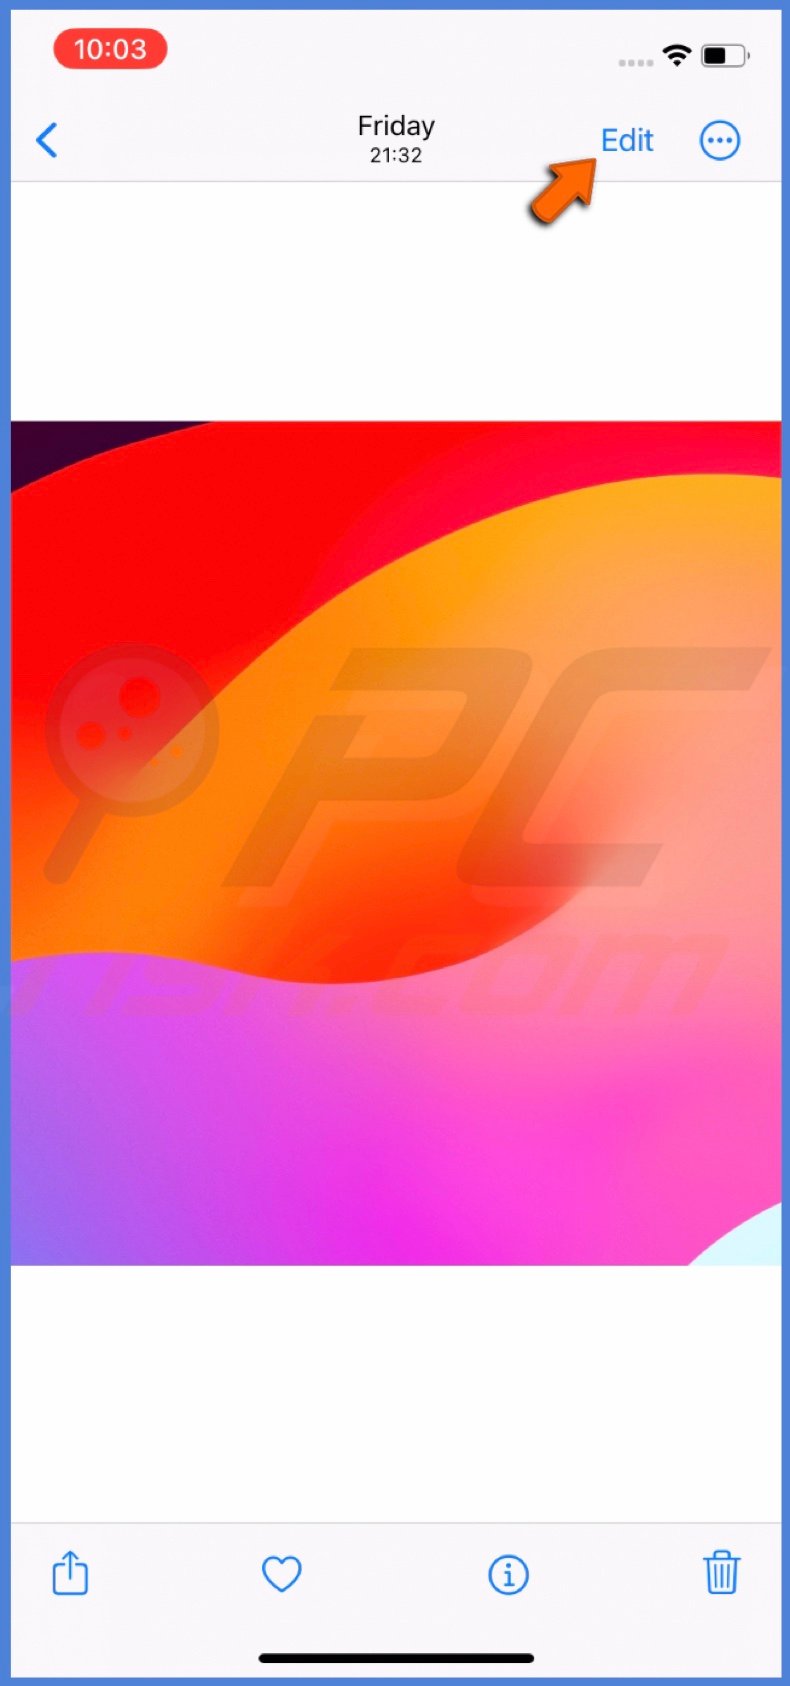
1. Go to the Photos app and choose the image you want to resize.
2. Tap the "Edit" button.
3. Select "Crop & Rotate" and adjust the image size by pinching the screen.
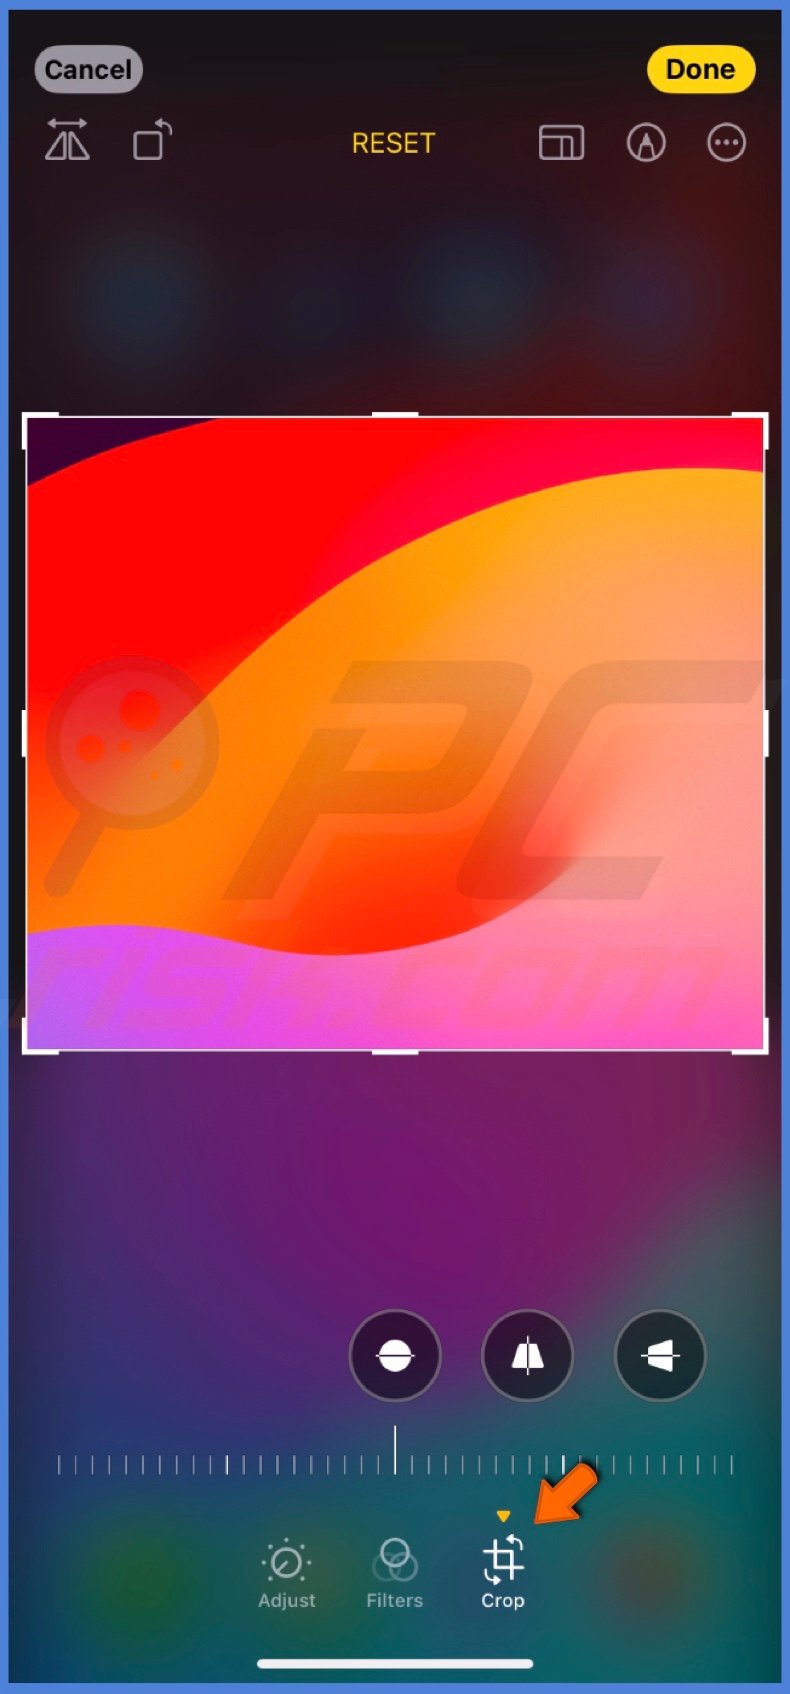
4. Tap "Done" and save the edited image.
Capture pictures in a different format
Instead of compressing photos after they're taken, you can choose a format in the Camera settings to capture them in the format that doesn't require extra hassle.
iPhones with iOS 11 and later automatically take high-efficiency image format (HEIF) photos. HEIF keeps the photo quality but makes the file smaller than the JPEG format.
If you're not sure which format is selected for your camera, you can check it by following these steps:
1. Open the Settings app and go to "Camera".
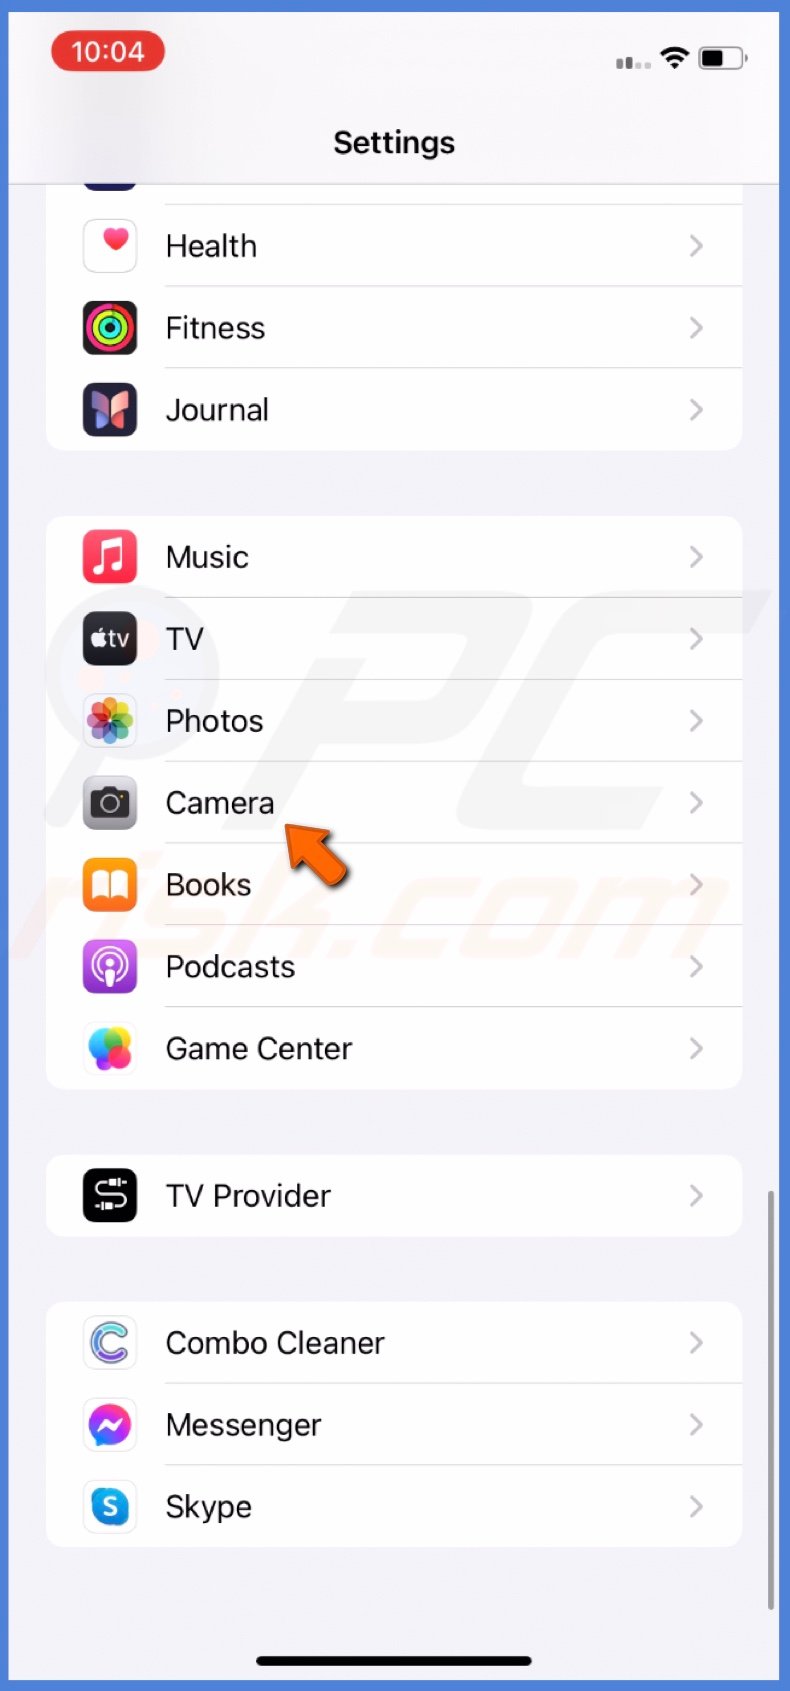
2. Tap the "Formats" option.
3. Choose "High-Efficiency".

Use a third-party app
For more advanced image compression features, third-party apps like "Image Size" or "Reduce Photo Size" can be great options. These apps offer a range of tools for resizing your images, allowing you to customize the compression settings to your liking.
To compress an image using a third-party app, follow the steps below:
1. Download a third-party image resize app.
2. Open the app and tap the image you want to resize.
3. Adjust the image size using the app's tools.
4. Save the resized image.
Create your photo resize shortcut
If you find yourself frequently resizing your images, creating a photo resize shortcut can save you time and effort. This method lets you quickly and easily resize your images with just a few taps.
Creating the shortcut will take some time, but once you do, the resizing part will be very quick and simple.
To create your photo resize shortcut, follow the steps below:
1. Open the Shortcuts app and tap the + button.
![]()
2. Tap "Add Action".
3. In the "Categories" tab, select "Media".
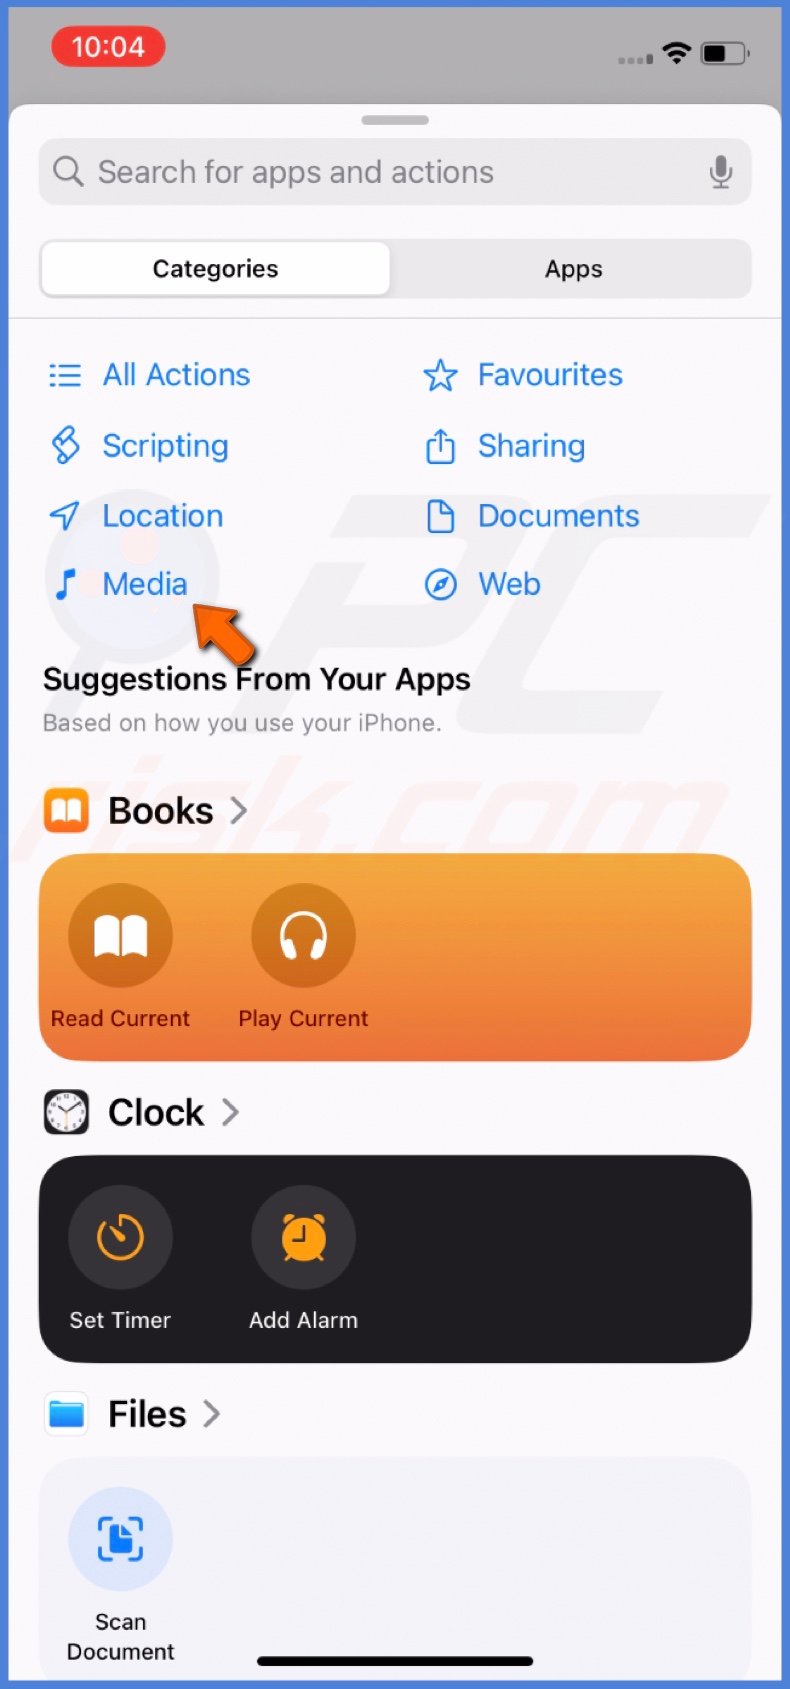
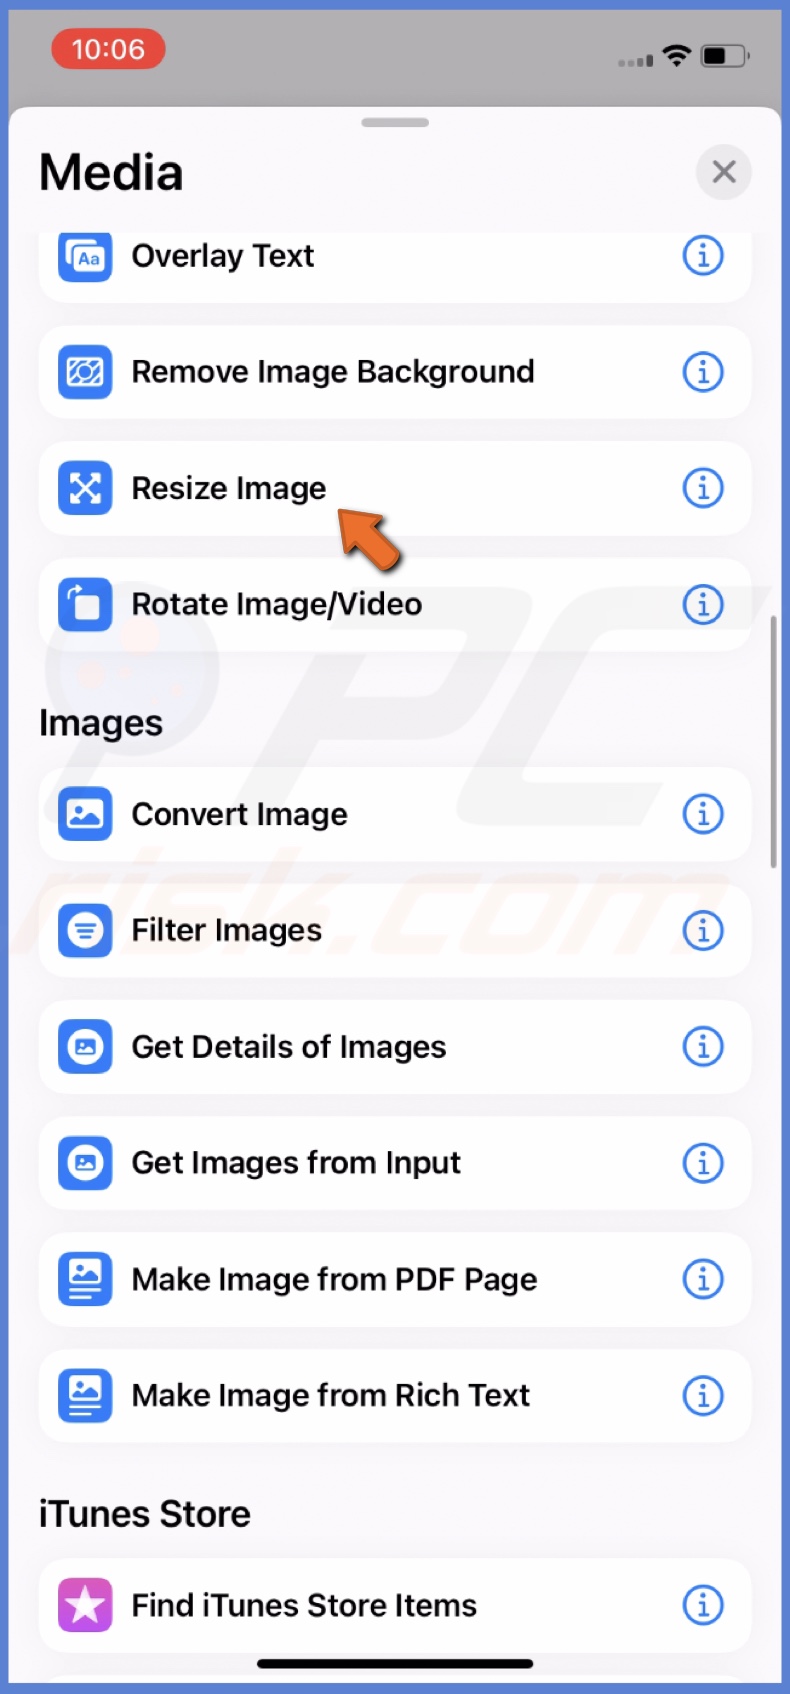
4. Scroll down to the "Images" section and tap Resize Image".
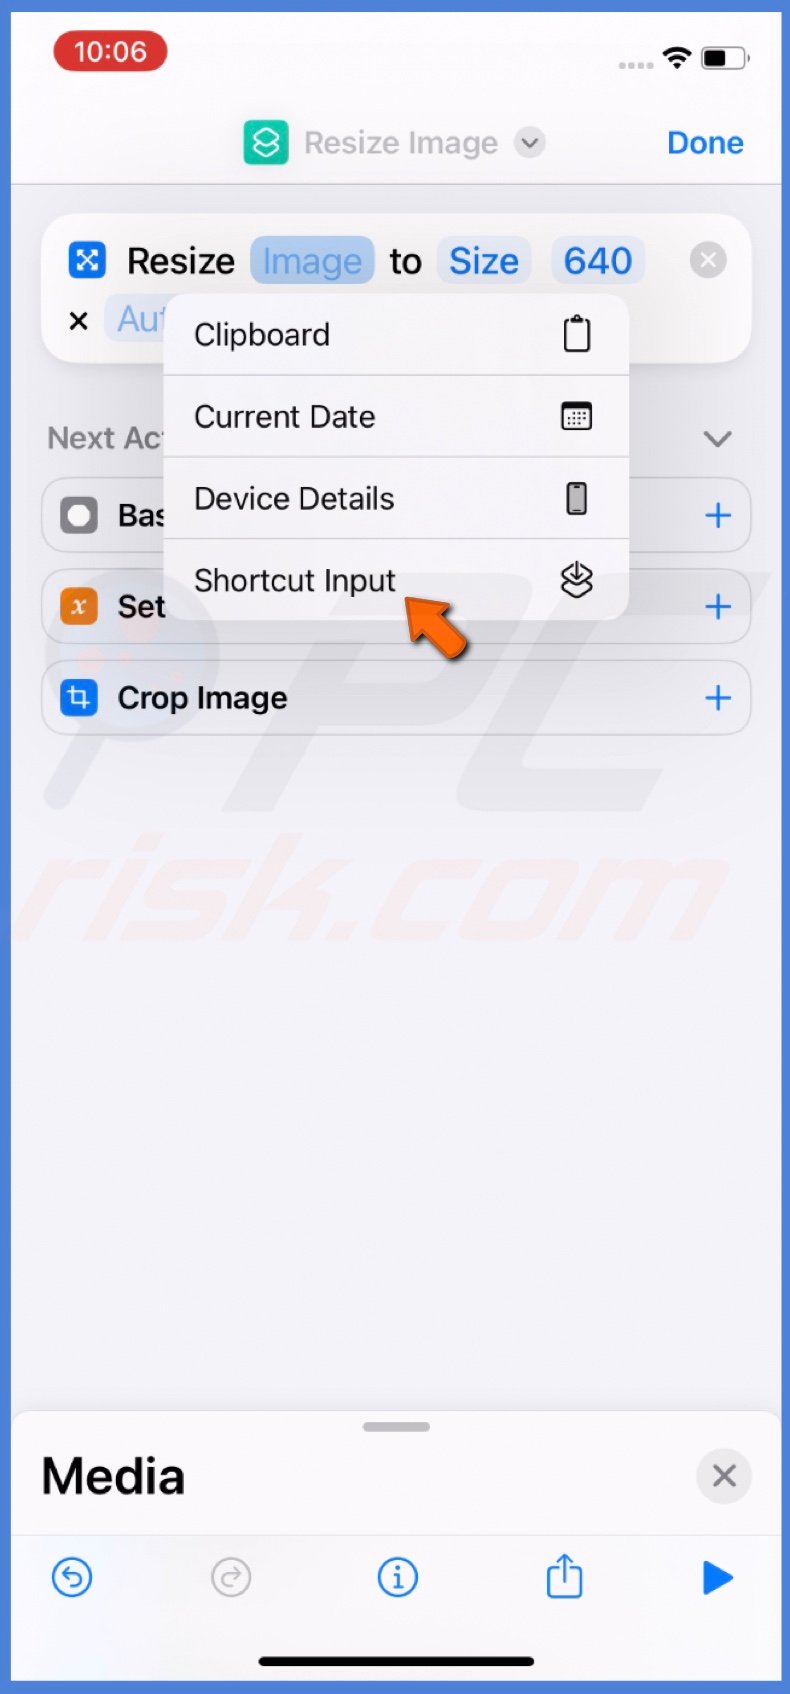
5. Tap the "Image" option and select "Shortcut Input".
6. Now, select "Size" and edit the resize parameters or choose "Ask Each Time".
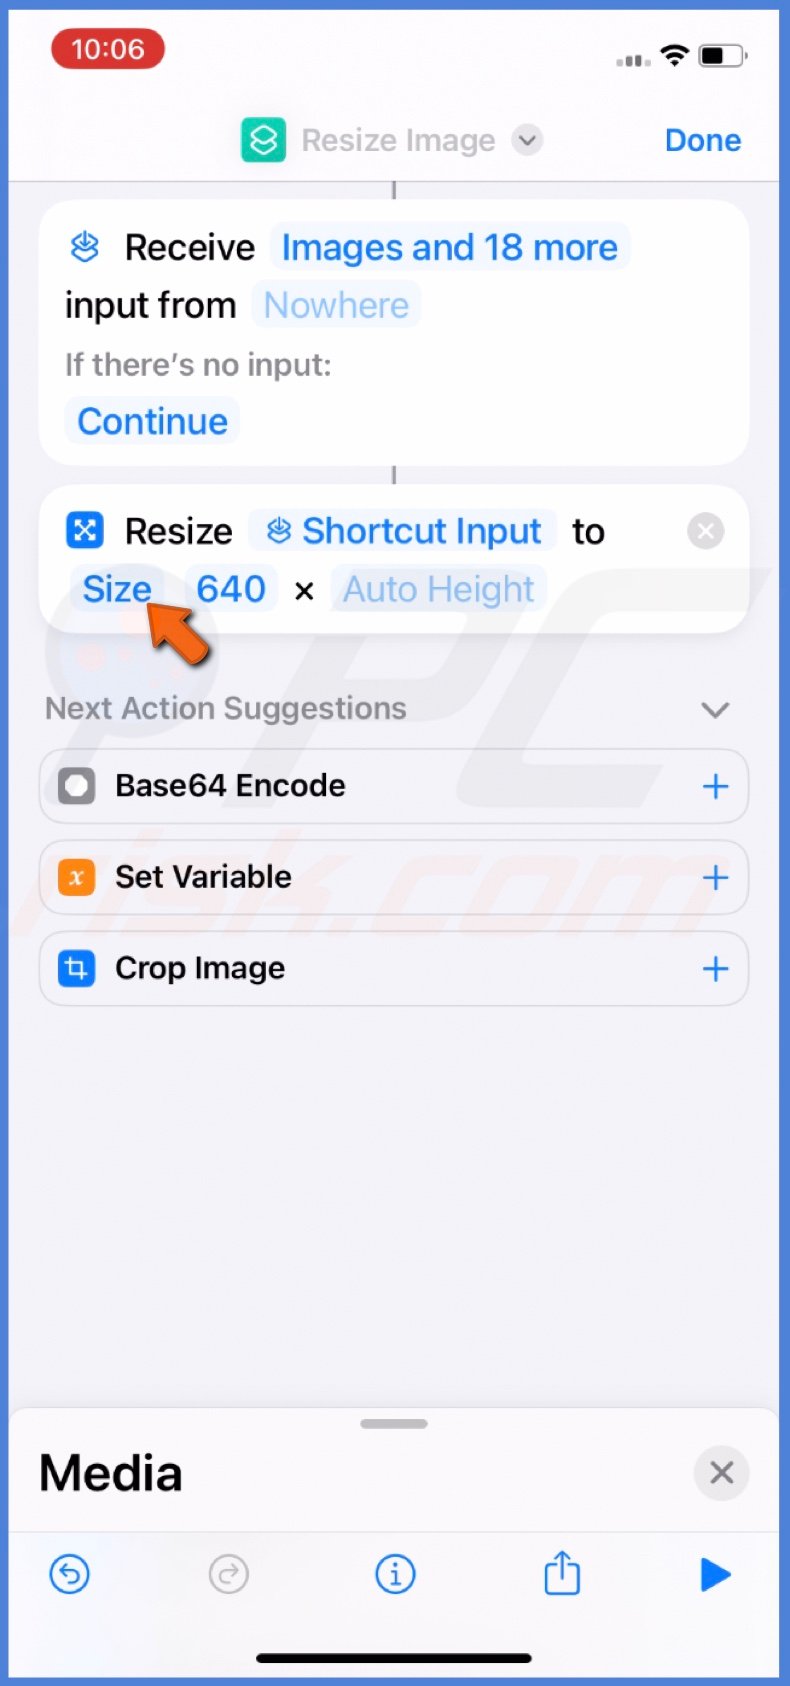
7. Tap "640" and change it to the preferred width.
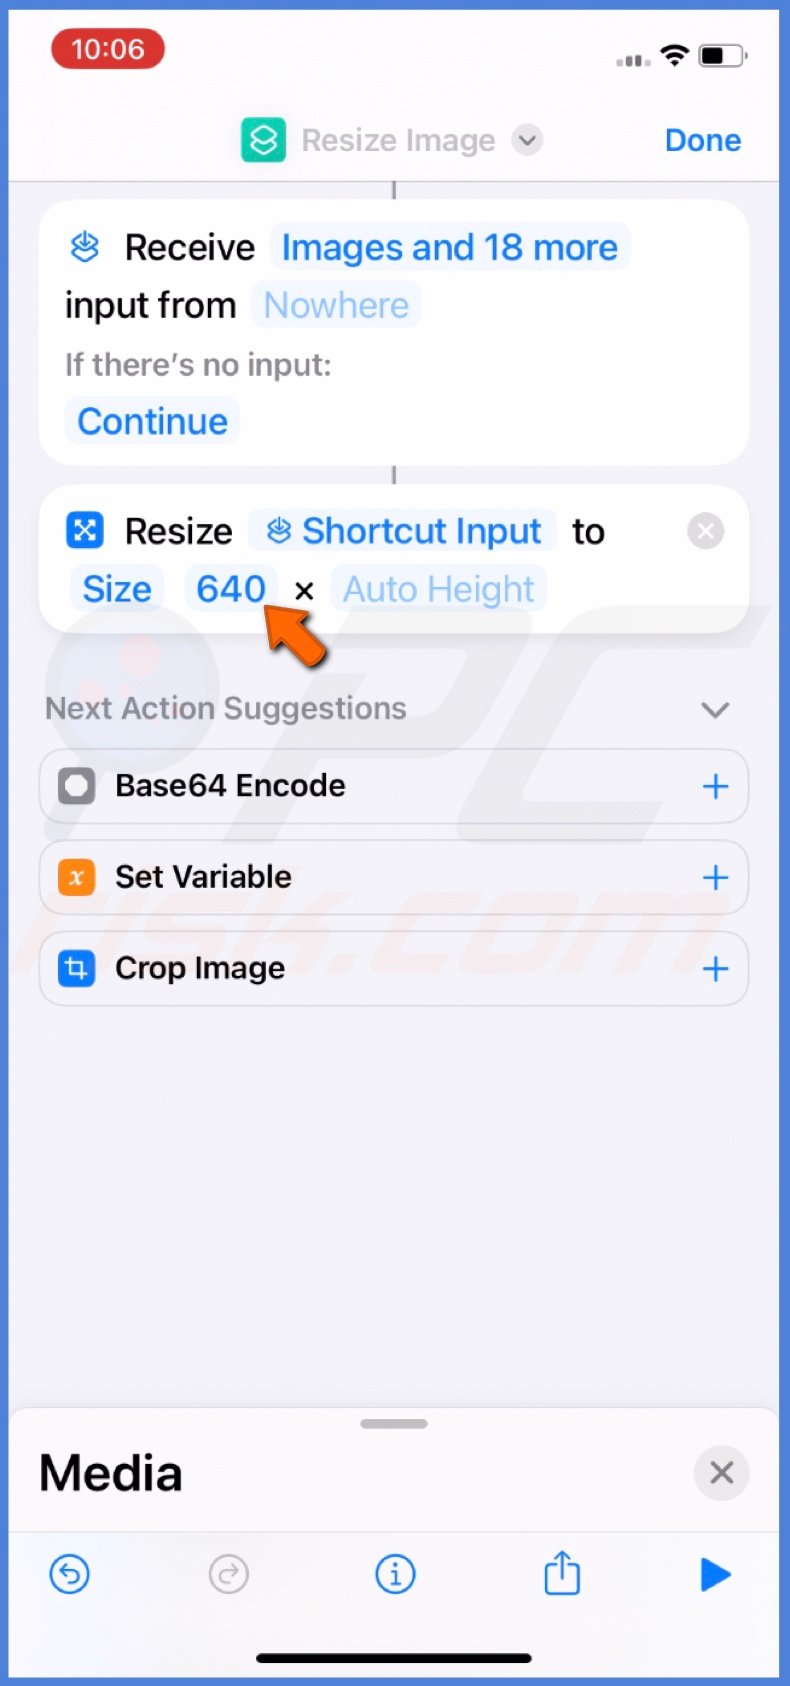
8. Leave "Auto Height" as it is.
9. Drag the "Media" selection and tap "Save to Photo Album".
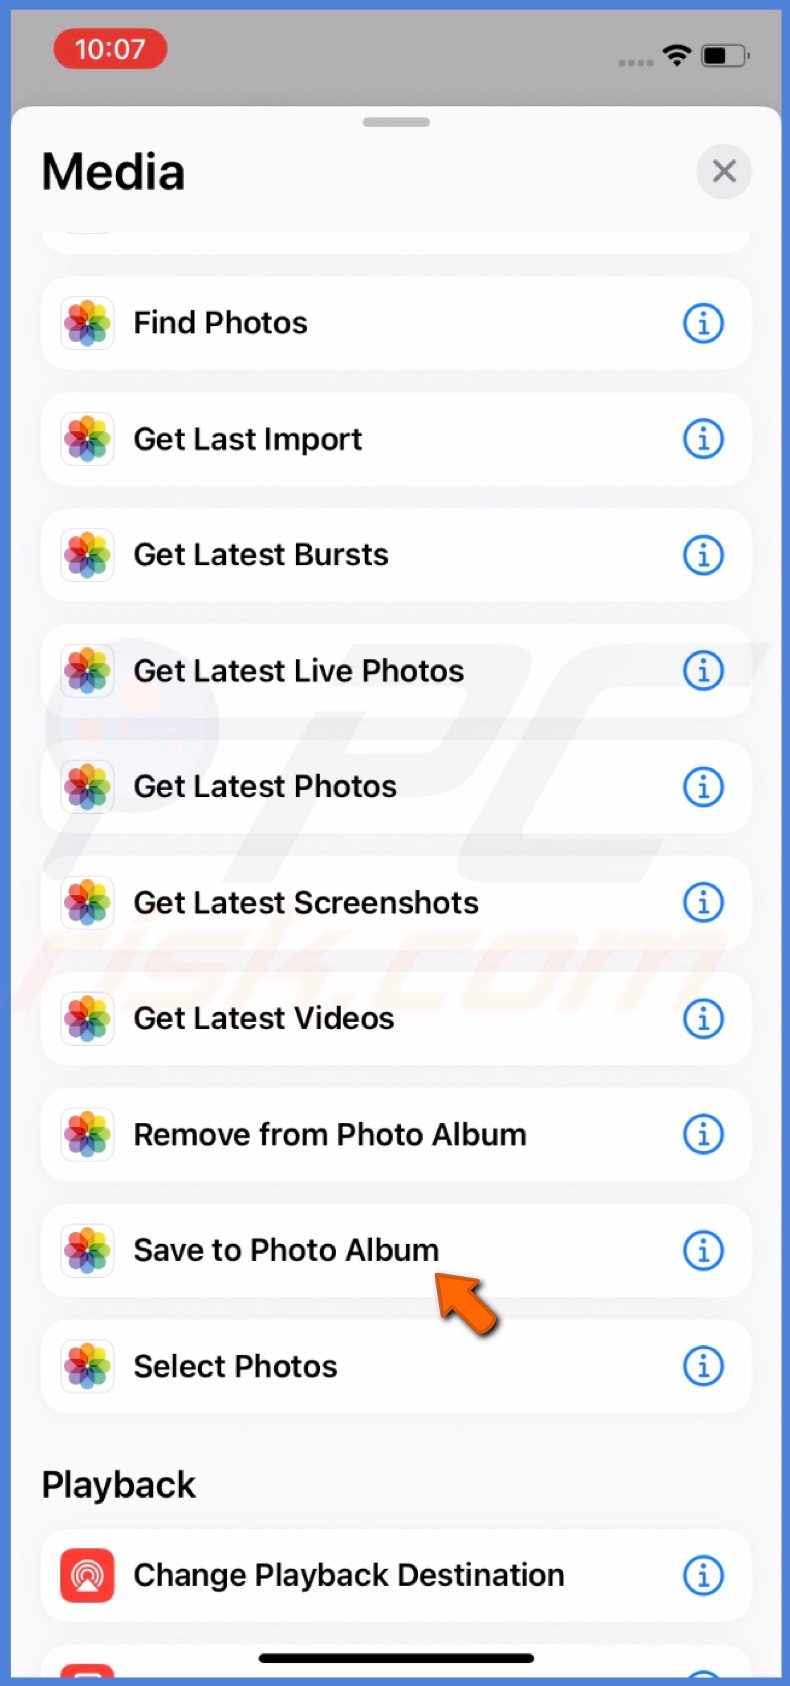
The resized images will be saved to Recents. You can change the location by tapping "Recents" and selecting a folder.
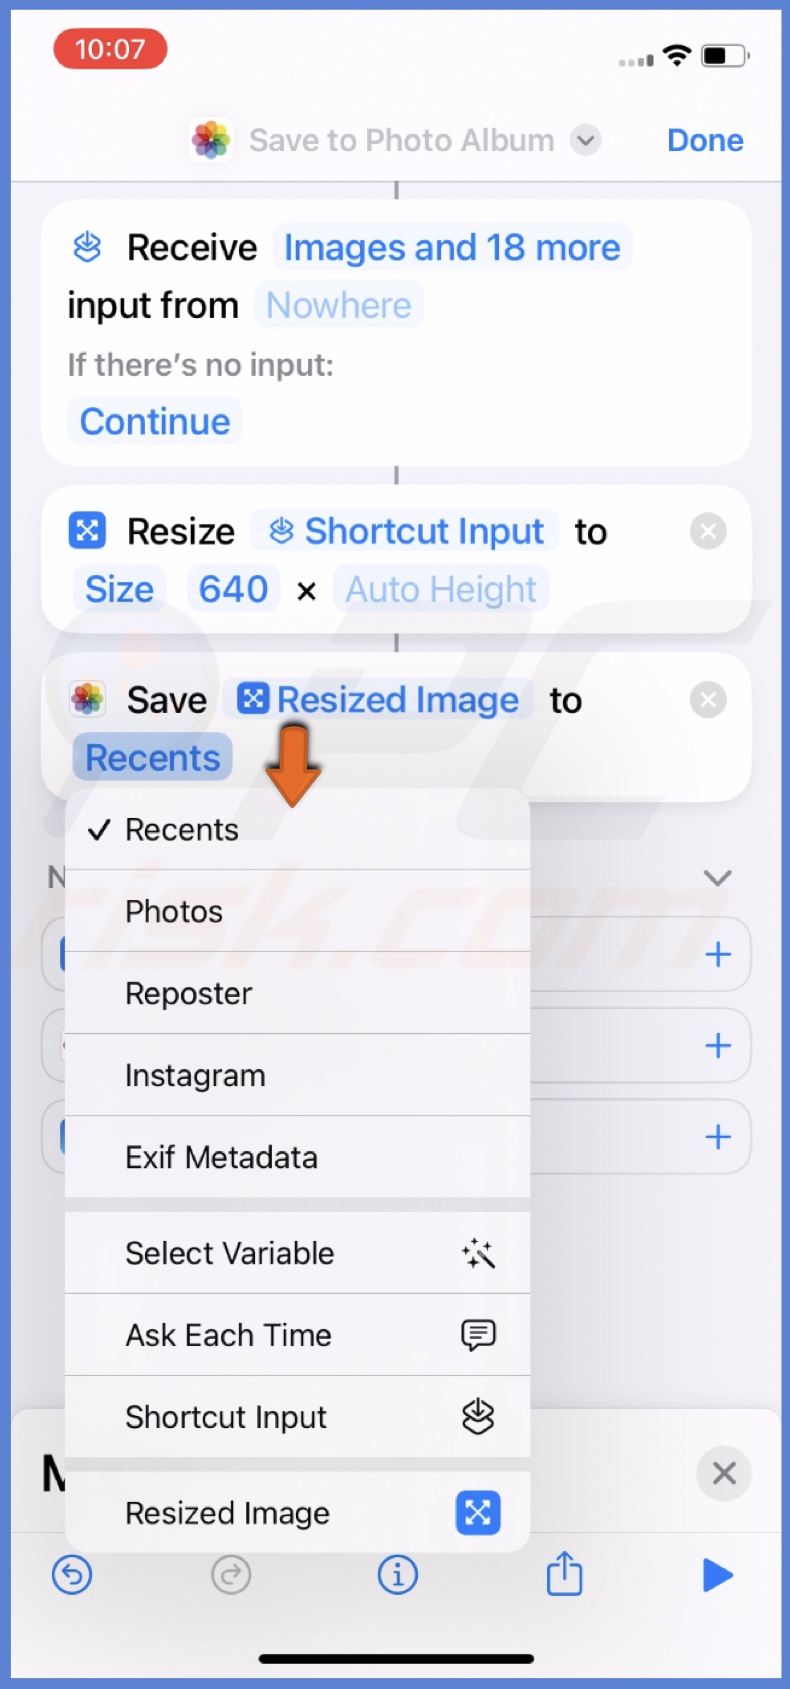
10. Rename the shortcut to "Resize Photos" or something similar.
11. When finished, tap on "Done".
12. Now tap and hold the created shortcut to see the quick menu.
13. Tap "Details".
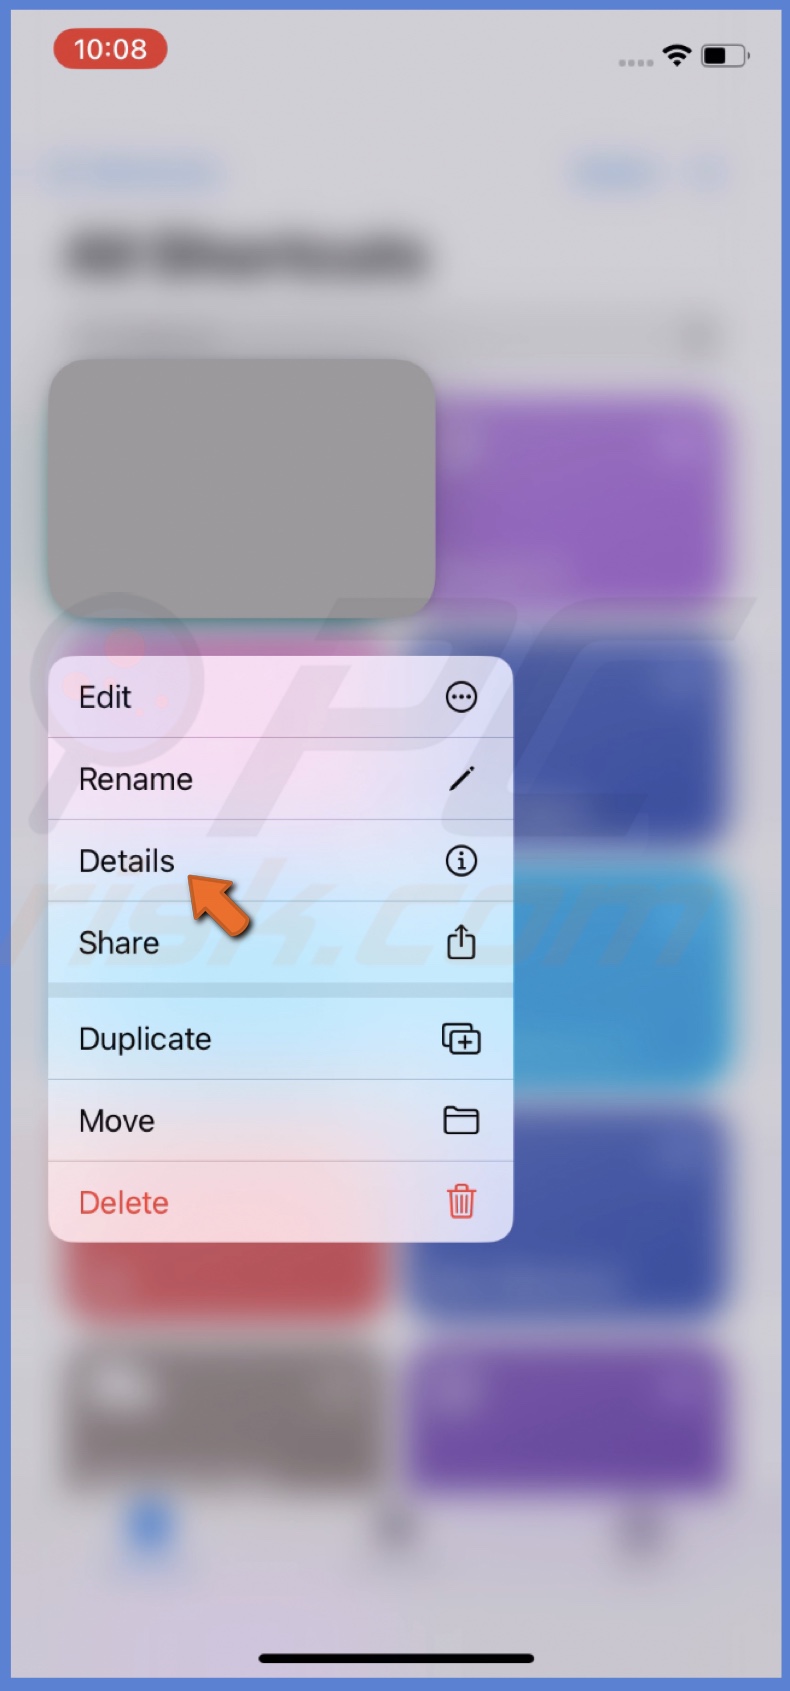
14. Enable the "Show in Share Sheet" option and tap "Done".
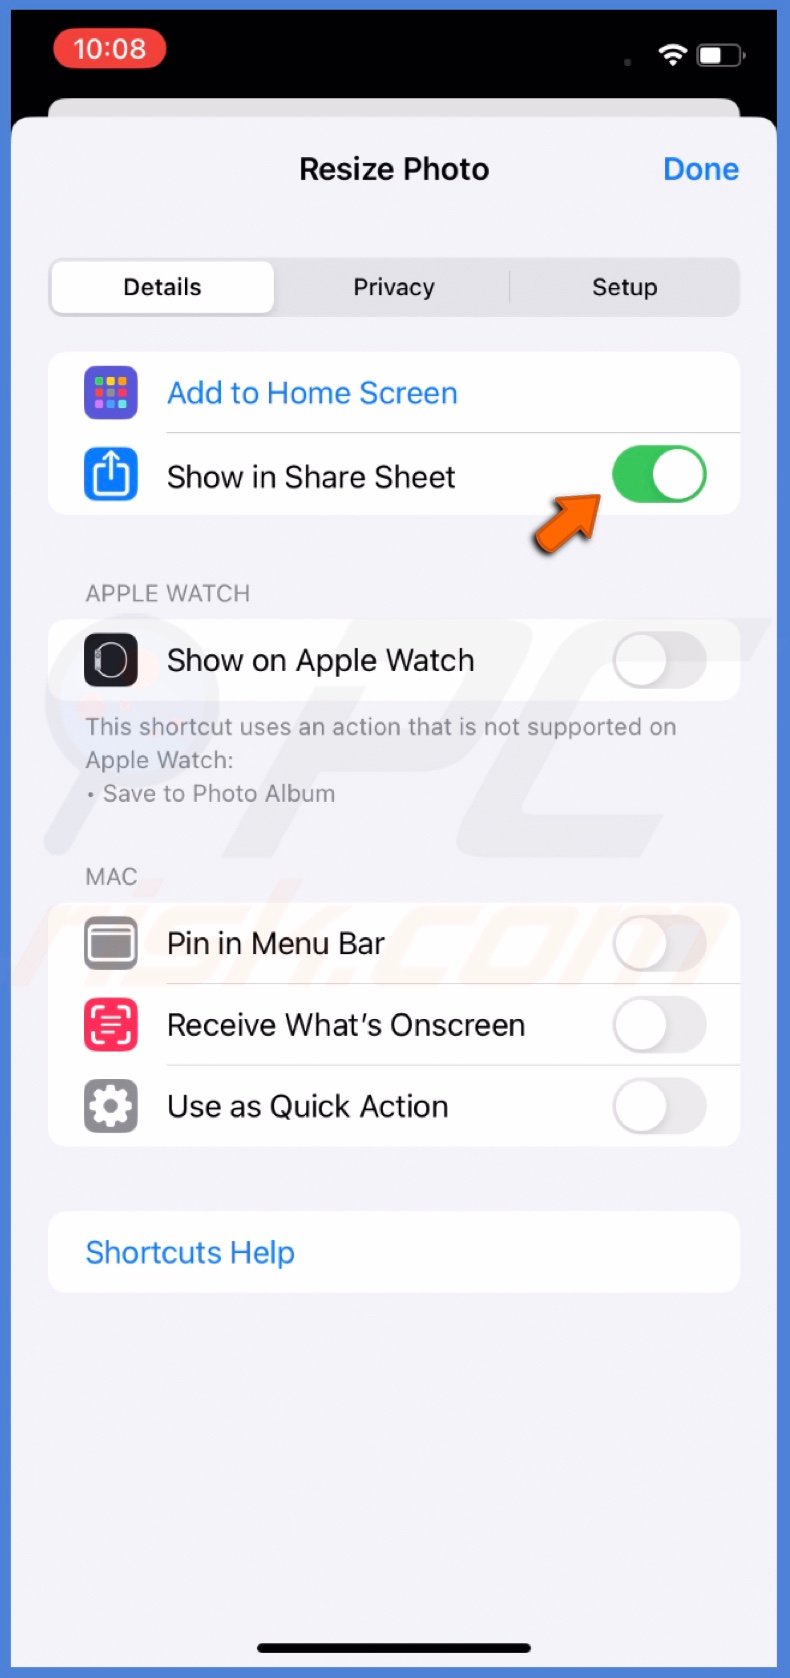
To use the shortcut, follow the steps below:
1. Go to the "Photo Library" and select an image.
2. Tap the "Share" icon.
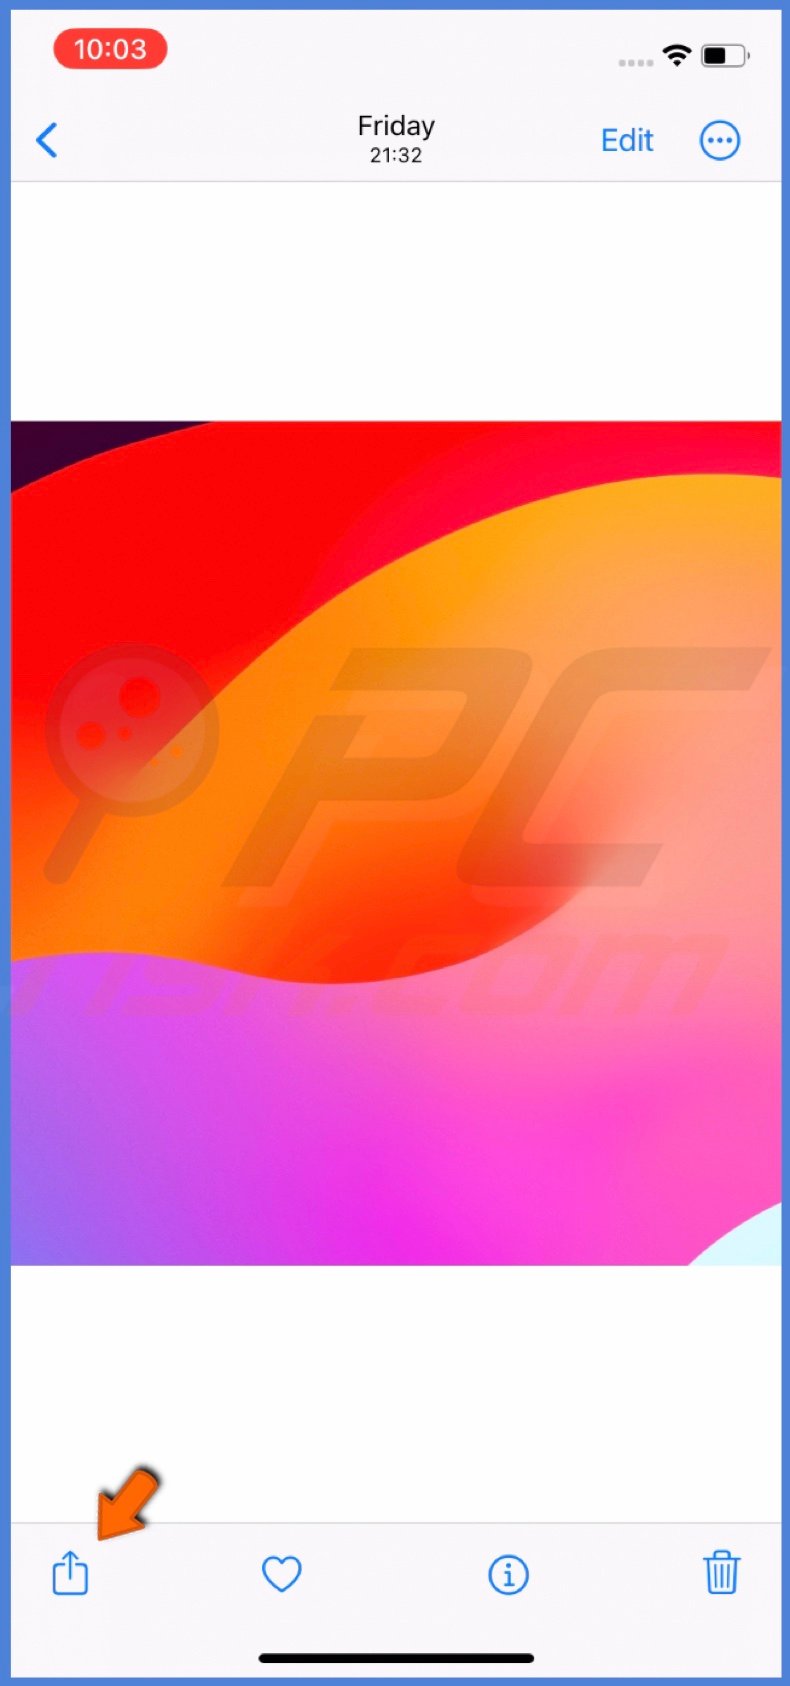
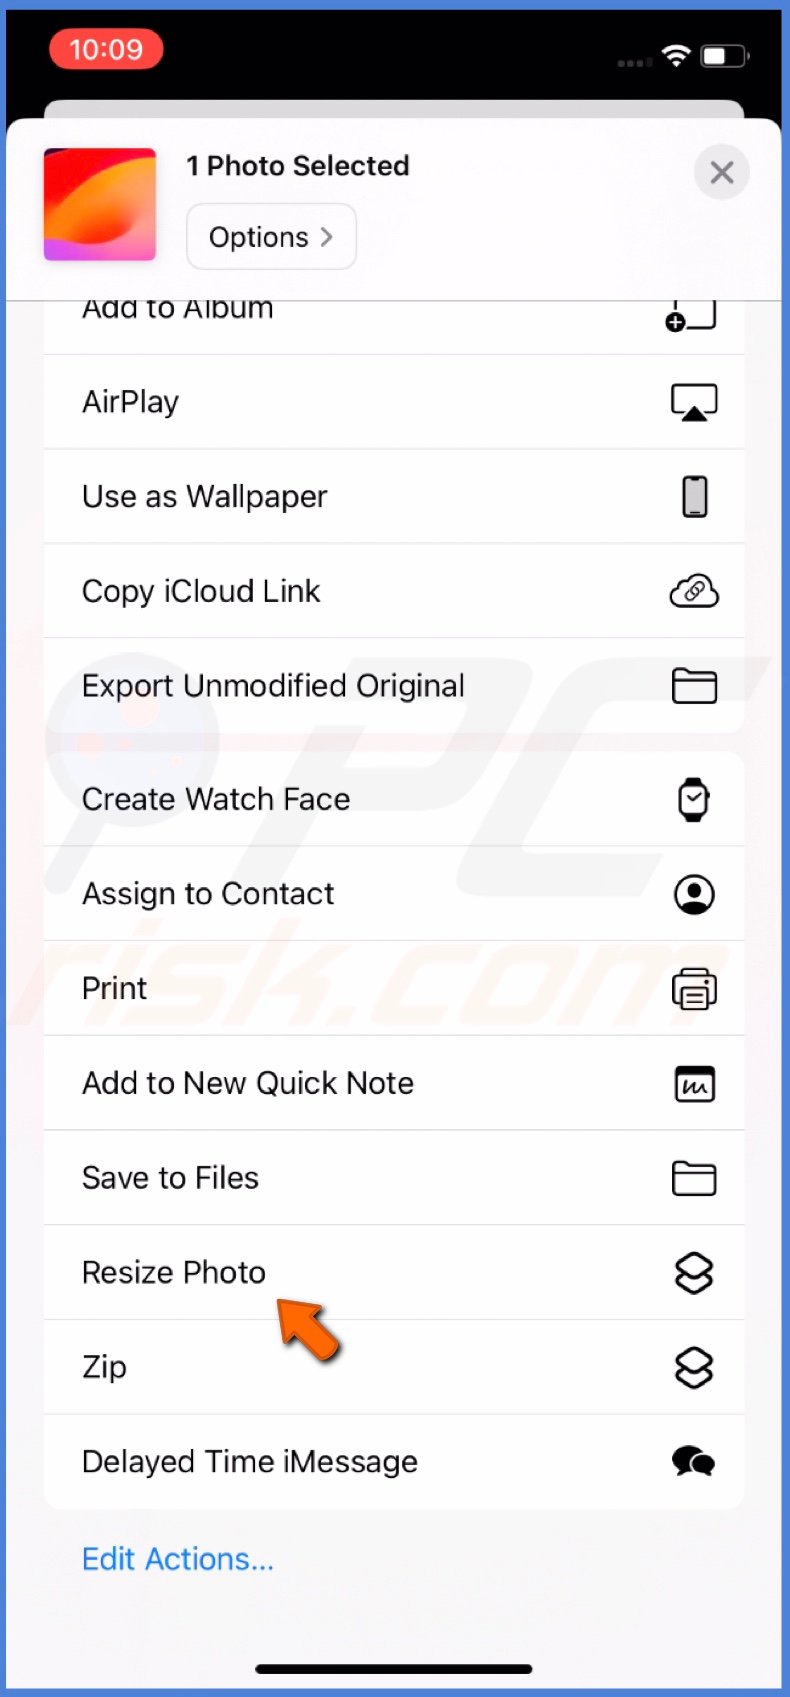
3. Scroll to the bottom and select your created shortcut to resize the image.
Use the Mail app
The Mail app can also be used to resize your images. This method allows you to send your photo to your email in a compressed format.
To reduce a photo with the Mail app, follow the steps below:
1. Select the photo you want to resize in the Photos app.
2. Tap the Share icon and select "Mail".
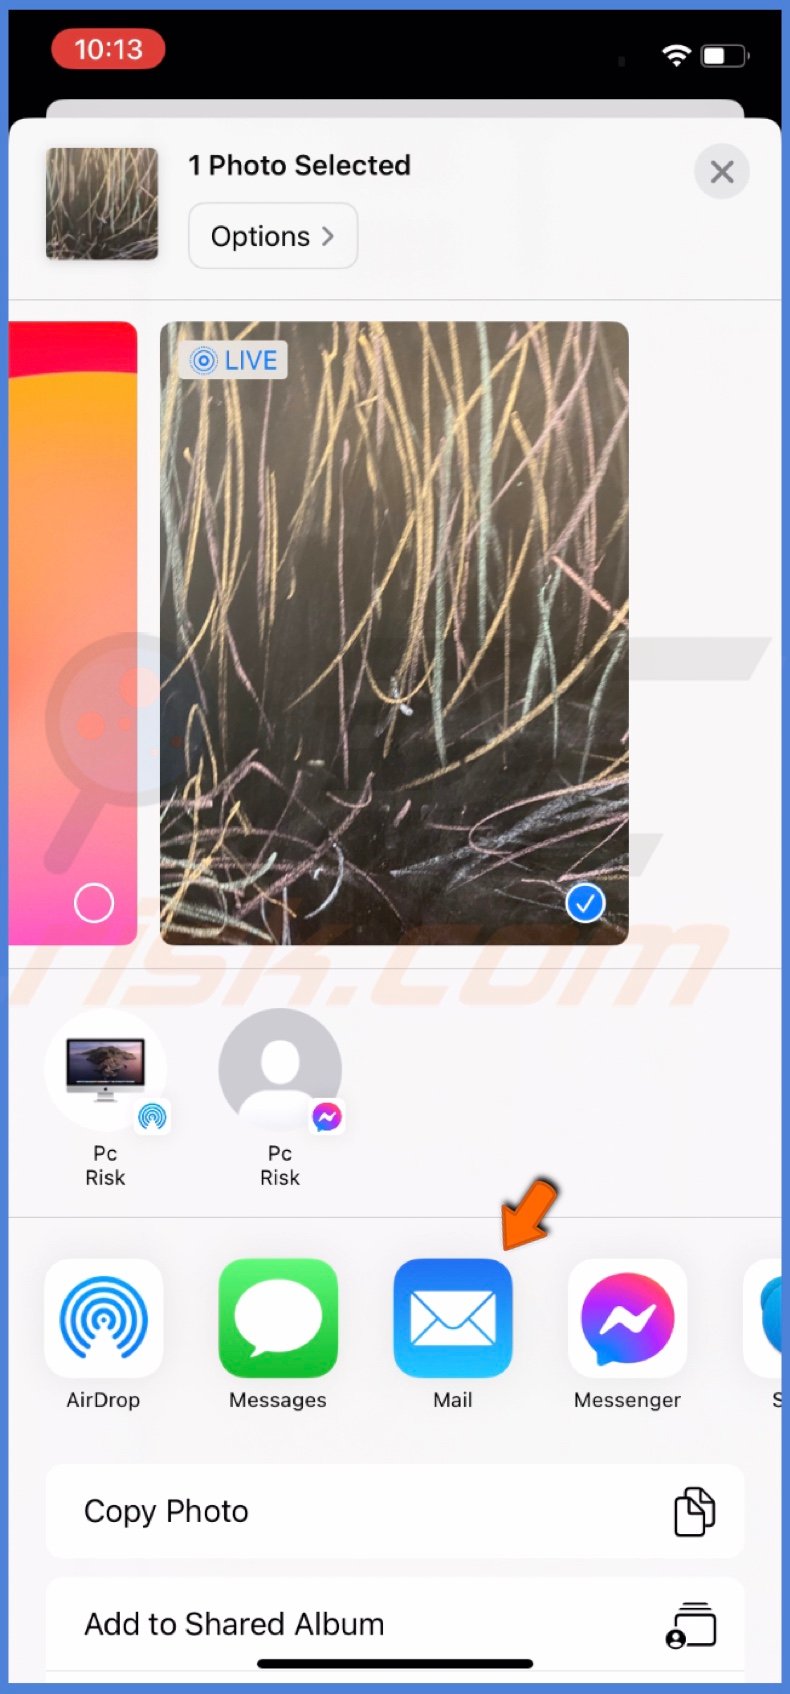
3. Enter your email address and tap "Send".
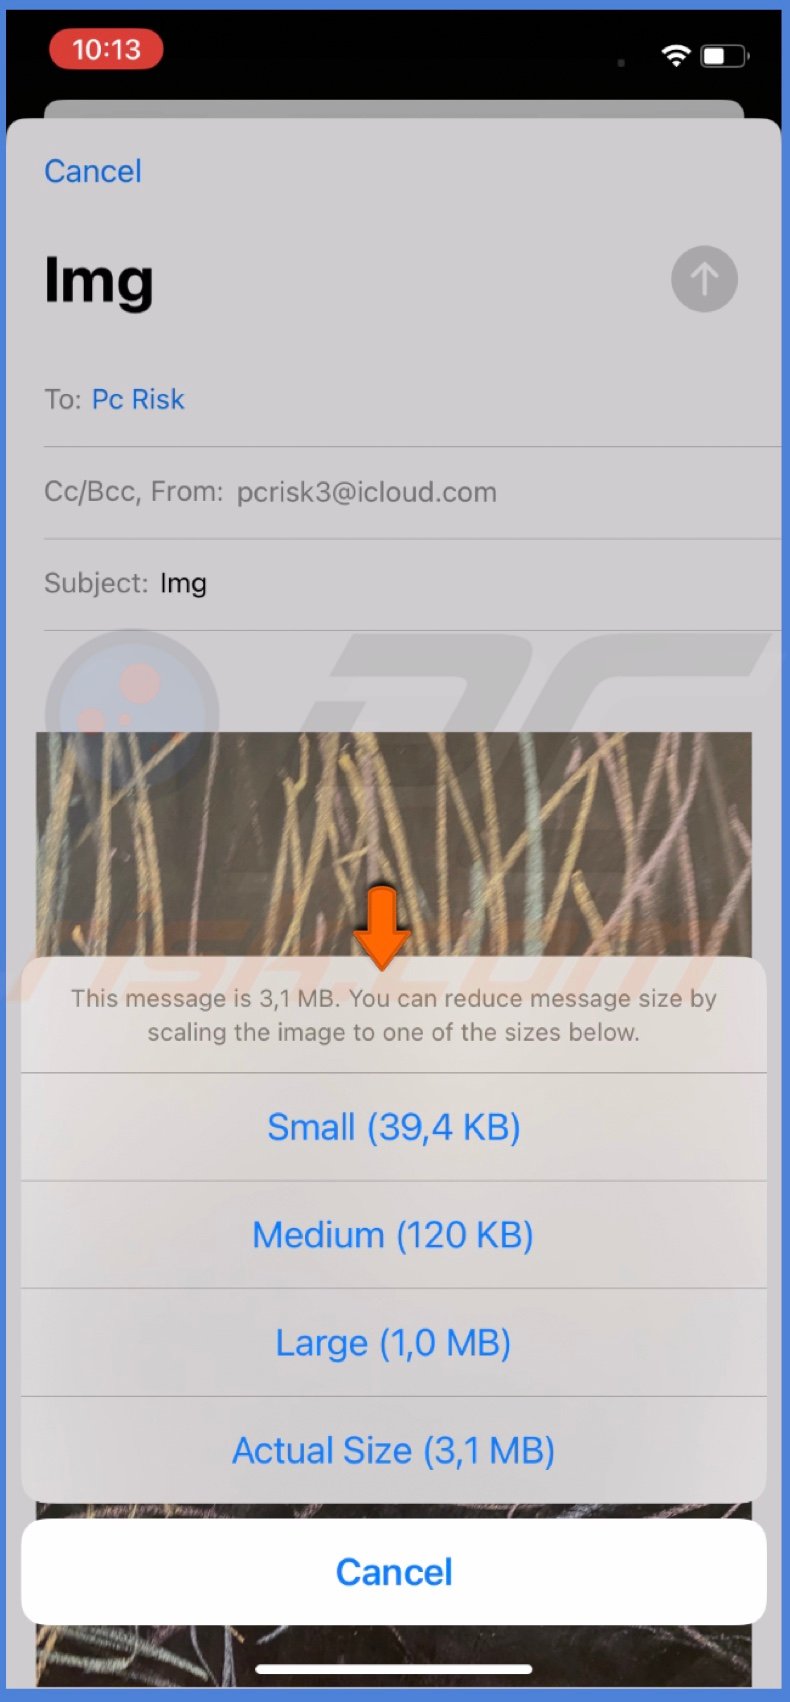
4. In the pop-up window, choose which size you want your photo to be. The resized image will then be sent to your email.
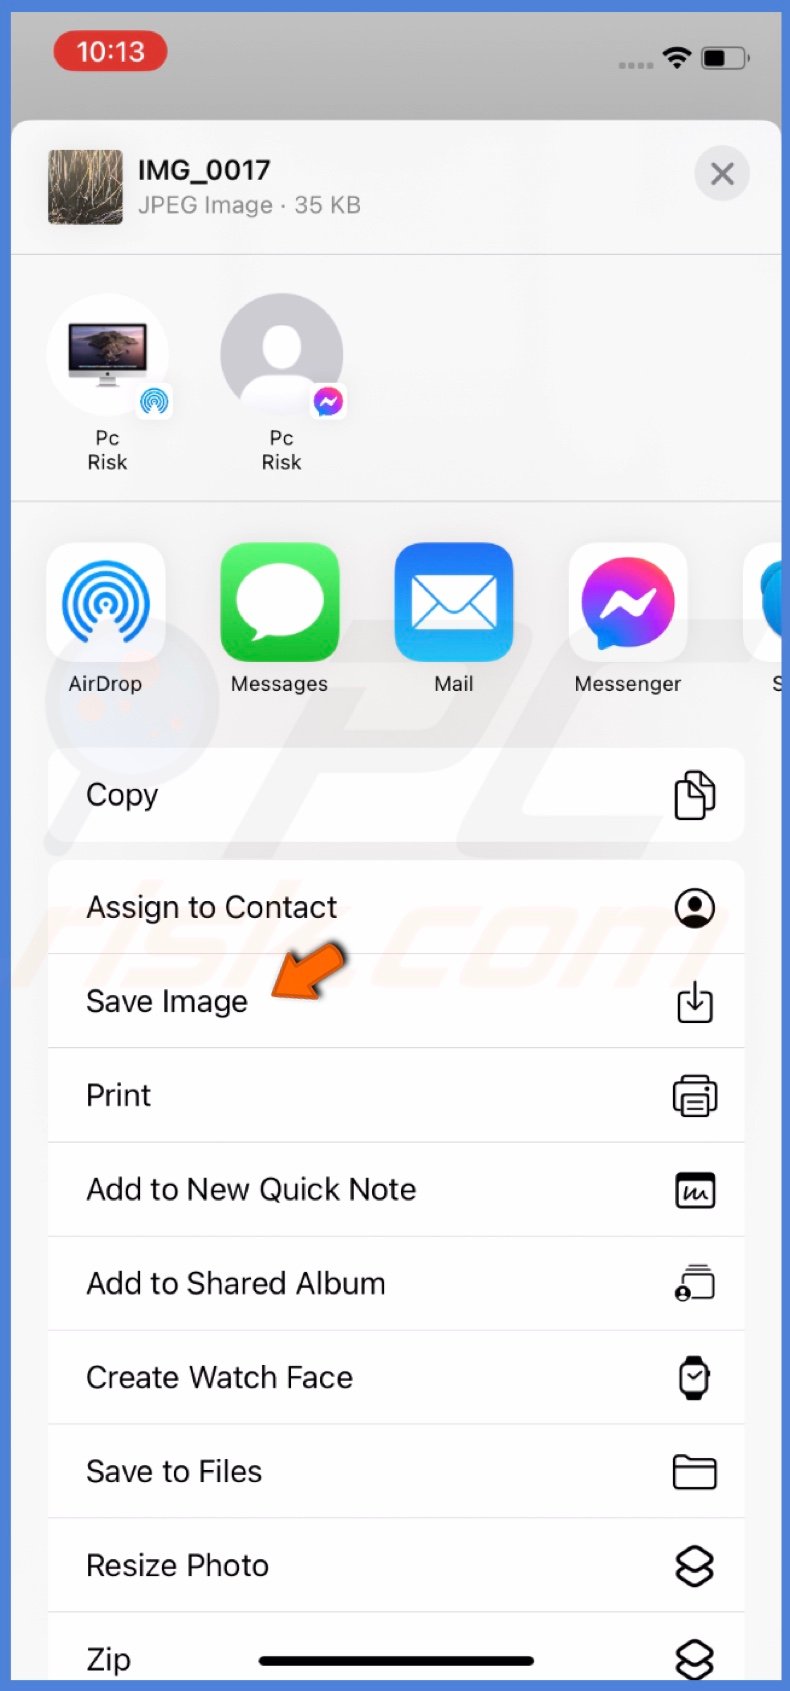
5. Open the Mail app and download the photo from the email you sent yourself. Tap on the photo, select the Share icon, and choose "Save Image".
Use a messaging app
Similar to the Mail app method, messaging apps like Messenger, WhatsApp, Telegram, etc, can also help reduce the size of your photographs. You can download the image in a smaller size by sending it to yourself.
To resize a photo in a messaging app, follow the steps below:
1. Open a messaging app like Messenger, WhatsApp, Telegram, or other.
2. Search for yourself or tap to create a new message and select yourself.
3. Send the photo you want to resize to yourself.

4. Then, select the image.
5. Tap on the "More" option and choose "Save".

Let me know which methods you've chosen for photo resizing in the comment section below.
If you have any questions, don't hesitate to ask!
Share:

Karolina Peistariene
Author of how-to guides for Mac users
Responsible for collecting, analyzing, and presenting problem-solving solution articles related to macOS issues. Years of macOS experience combined with solid research and analyzing skills help Karolina provide readers with working and helpful solutions as well as introduce various features Mac has to offer.
▼ Show Discussion