Fix 'SOS Only' issue on iPhone with these quick tips

Get Free Scanner and check your computer for errors
Fix It NowTo fix found issues, you have to purchase the full version of Combo Cleaner. Free trial available. Combo Cleaner is owned and operated by Rcs Lt, the parent company of PCRisk.com read more.
10 tips to get back cellular service when 'SOS Only' message appears
Do you see the 'SOS Only' message at your iPhone screen's top right or left corner? That means your network services are blocked. You won't be able to make calls (except emergency calls), send messages, or access the internet.

This problem usually occurs when you're outside your provider area, the cellular plan has expired, you have terrible reception, or the old iPhone is no longer supported.
Follow this guide step-by-step to learn how to fix the 'SOS Only' problem.
Video on Fix 'SOS Only' issue on iPhone with these quick tips
Table of Contents:
- Introduction
- Method 1. Turn on roaming
- Method 2. Update carrier settings
- Method 3. Re-enable Mobile Data
- Method 4. Restart your iPhone
- Method 5. Switch your network mode
- Method 6. Reset network connection
- Method 7. Re-enable automatic network selection
- Method 8. Reset Network Settings
- Method 9. Reinsert the SIM card
- Method 10. Update your iPhone
- Video on Fix 'SOS Only' issue on iPhone with these quick tips
Download Computer Malware Repair Tool
It is recommended to run a free scan with Combo Cleaner - a tool to detect viruses and malware on your device. You will need to purchase the full version to remove infections. Free trial available. Combo Cleaner is owned and operated by Rcs Lt, the parent company of PCRisk.com read more.
Turn on roaming
If you're abroad, turn on the Data Roaming function to eliminate the 'SOS Only' problem. It will provide a network connection outside your network's boundaries, allowing you to make calls, use the internet, and send texts.
Depending on your provider and the contract you signed, you may get charged for data roaming. If you don't know, make sure which case it is so you don't end up with a hefty bill at the end of your trip.
To enable roaming, follow the steps below:
1. Open the Settings app and go to "Mobile Data".
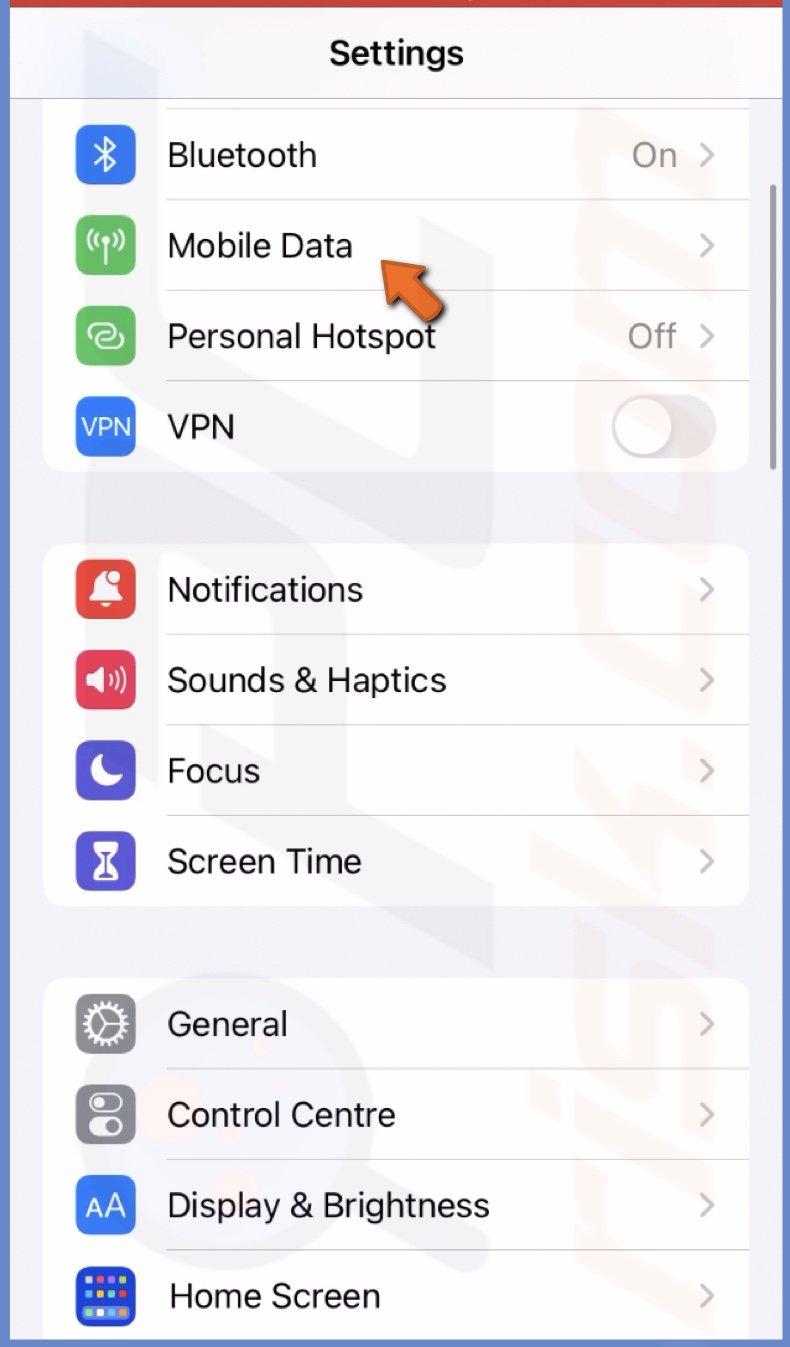
2. Then, tap on "Mobile Data Options".
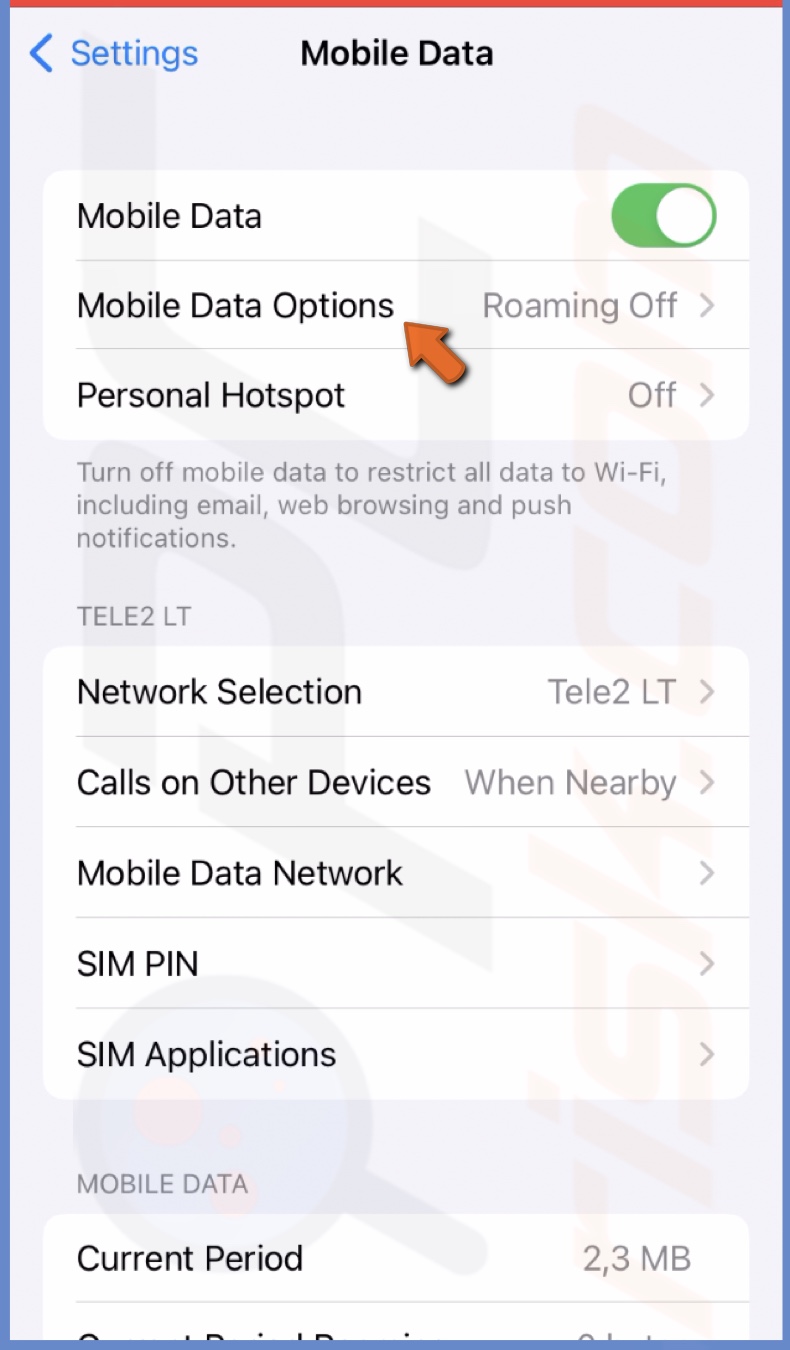
3. Next to "Data Roaming", toggle the slider to turn on the feature.
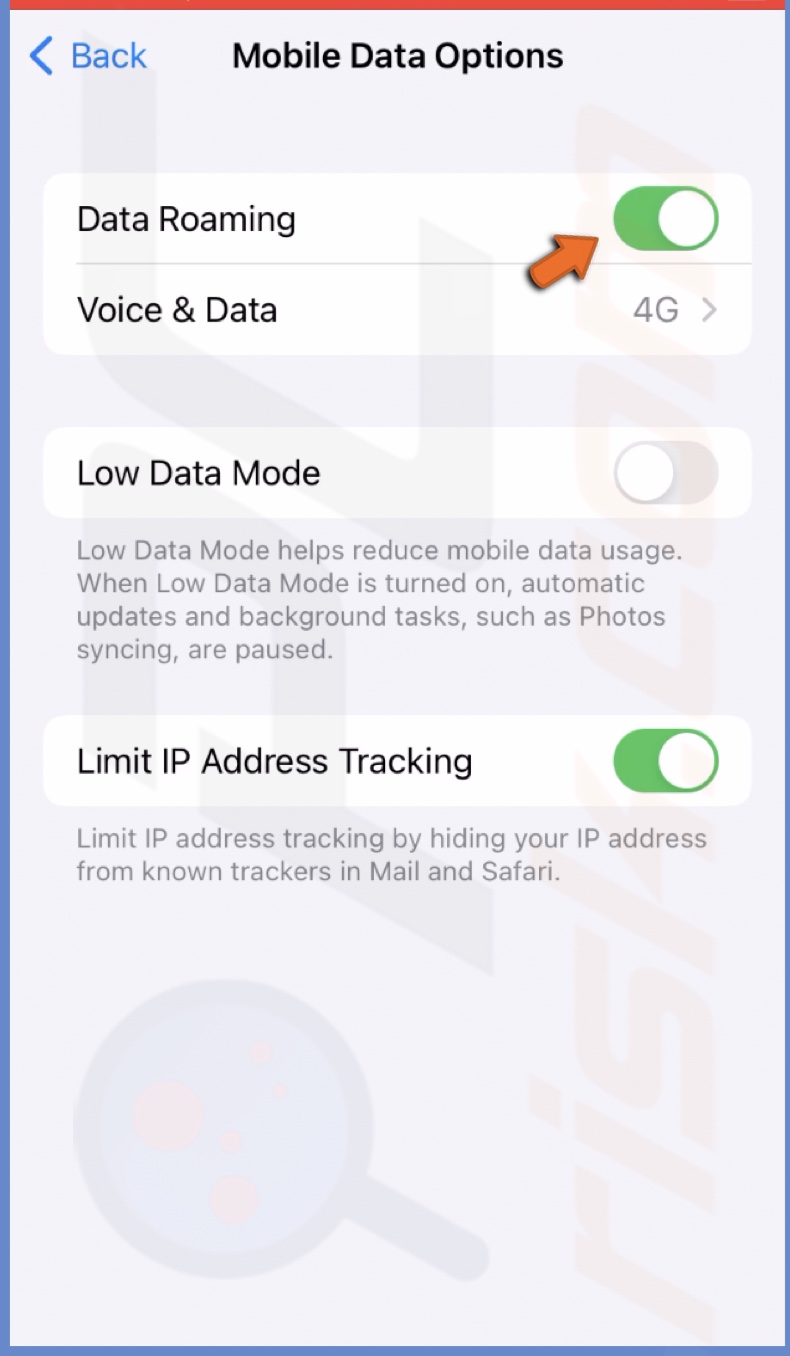
To stop Data Roaming, follow the same steps.
Update carrier settings
Occasionally, your carrier sends updates to improve mobile data connectivity and performance. The settings update automatically, but you can also update them manually.
To update carrier settings, follow the steps below:
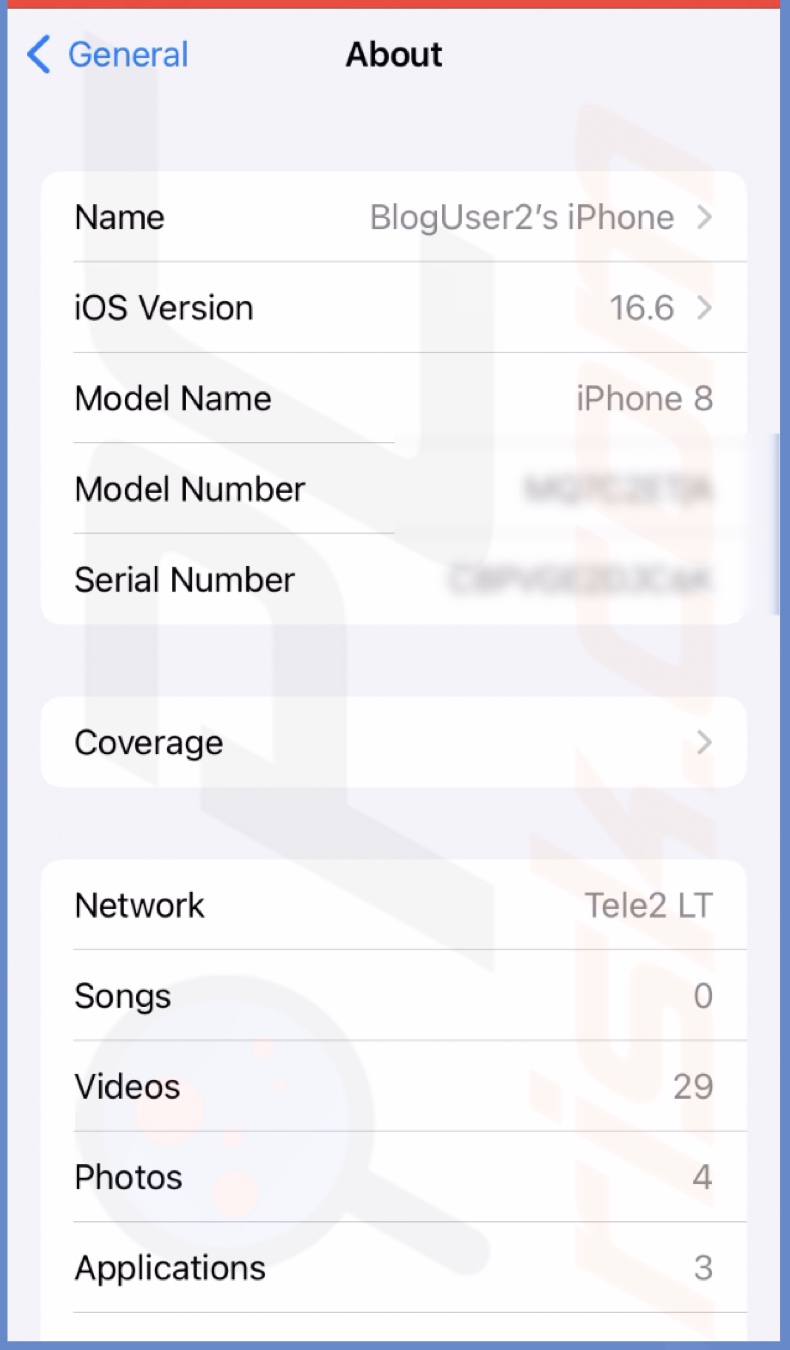
1. Open the Settings app and go to "General" settings.
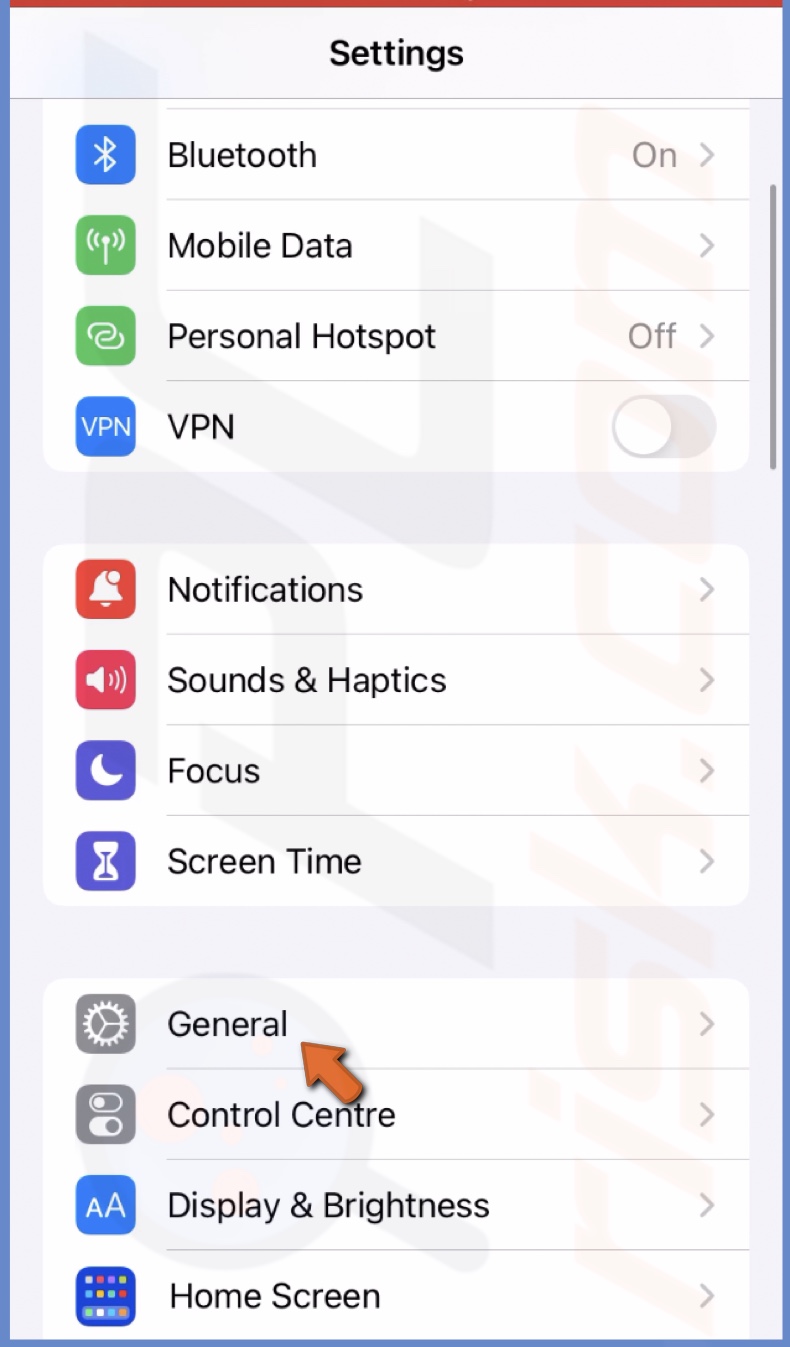
2. Tap on "About".
3. If an update is available, a prompt will pop up asking if you want to update the carrier settings. Tap on "Update".
After the update, check if the network connectivity is back.
Re-enable Mobile Data
Restart your Mobile Data connection by turning it off and on. This step will refresh the connection and hopefully remove the problem.
To re-enable Mobile Data from the Settings app, follow the steps below:
1. Go to the iPhone settings.
2. Tap on "Mobile data" and turn off "Mobile Data".
3. Wait a few seconds and turn on "Mobile Data" again.
To re-enable Mobile Data from the Control Center, follow the steps below:
1. On iPhones with Face ID, swipe up from the top right corner.
On iPhones with a Home button, swipe up from the middle bottom.
2. Tap on the "Mobile Data" icon to turn it off.
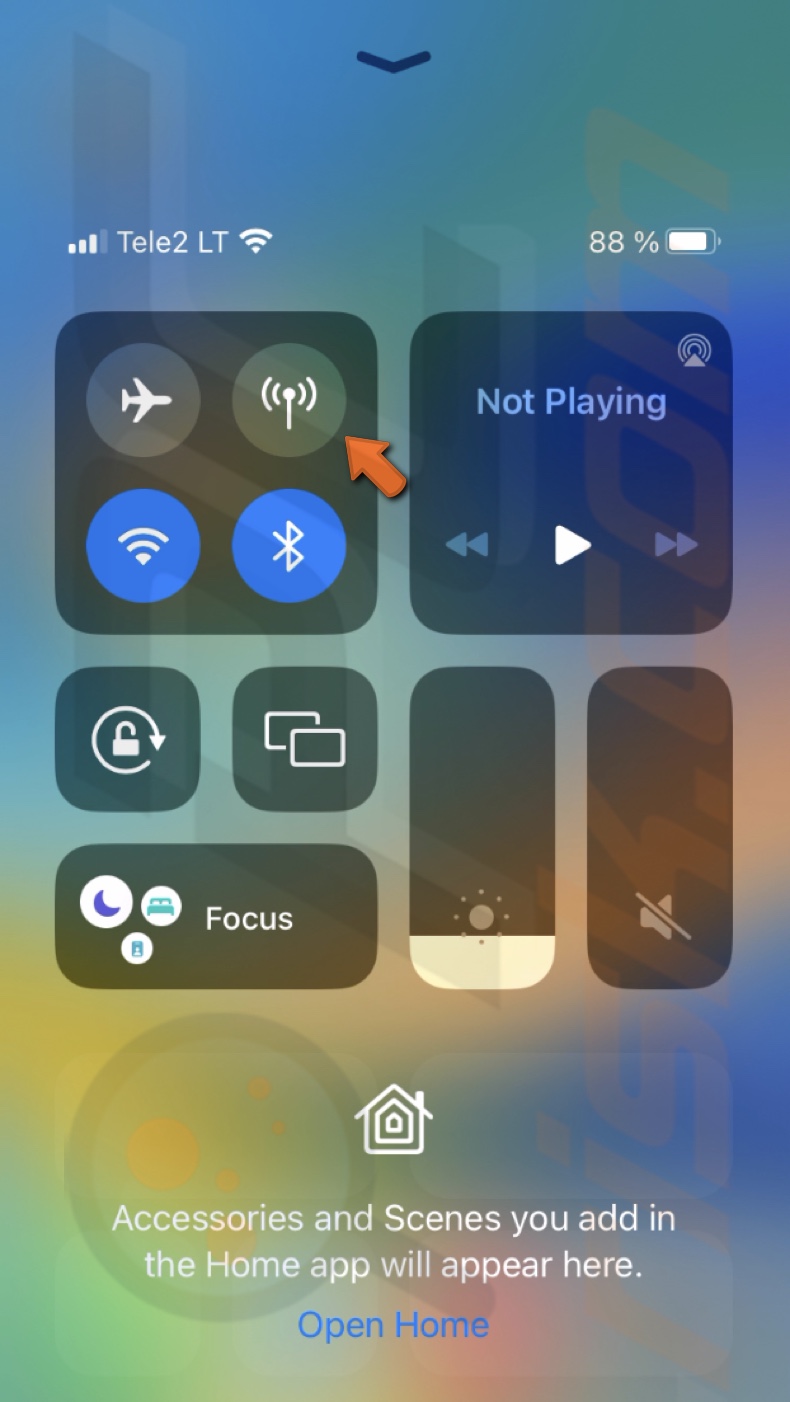
3. Wait for a few seconds and turn it on again.
Restart your iPhone
Restart your iPhone to reset the system and remove bugs or glitches that can be responsible for the 'SOS Only' issue.
To restart an iPhone X, 11, 12, 13, or later, follow the steps below:
1. Hold the volume up or down button and the side button until you see a "slide to power off" option.
2. Slide on the power-off and wait while your device turns off.
3. Press the side button until you see the Apple logo.
To restart an older iPhone, follow the steps in this how-to guide by Apple.
Switch your network mode
If you recently switched your network to 5G, and suddenly there's no service on your iPhone, consider switching back to 4G or Auto Mode. It might be too early for your device to use the 5G connection. That's why the 'SOS Only' message appears.
To switch your network mode, follow the steps below:
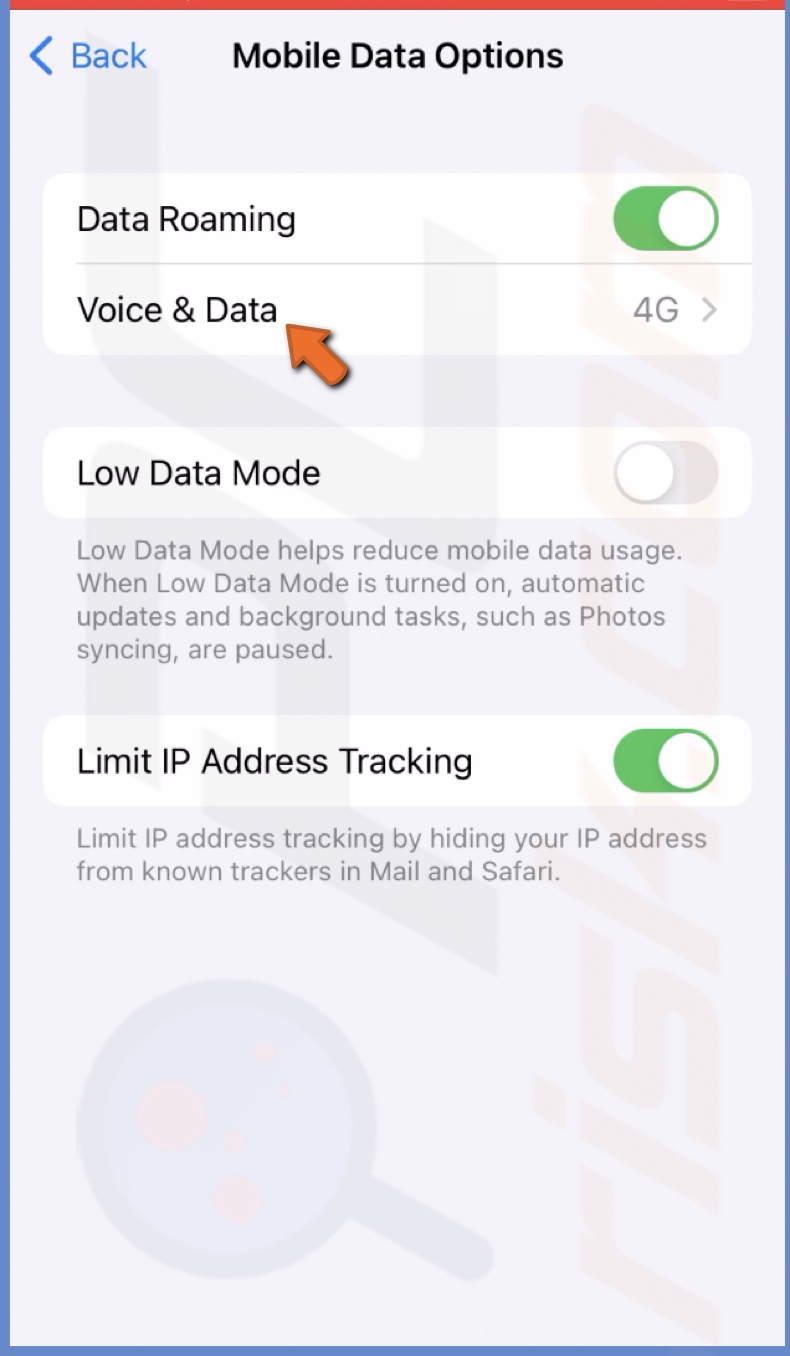
1. Open the Settings app and go to "Mobile Data".
2. Select "Mobile Data Options".
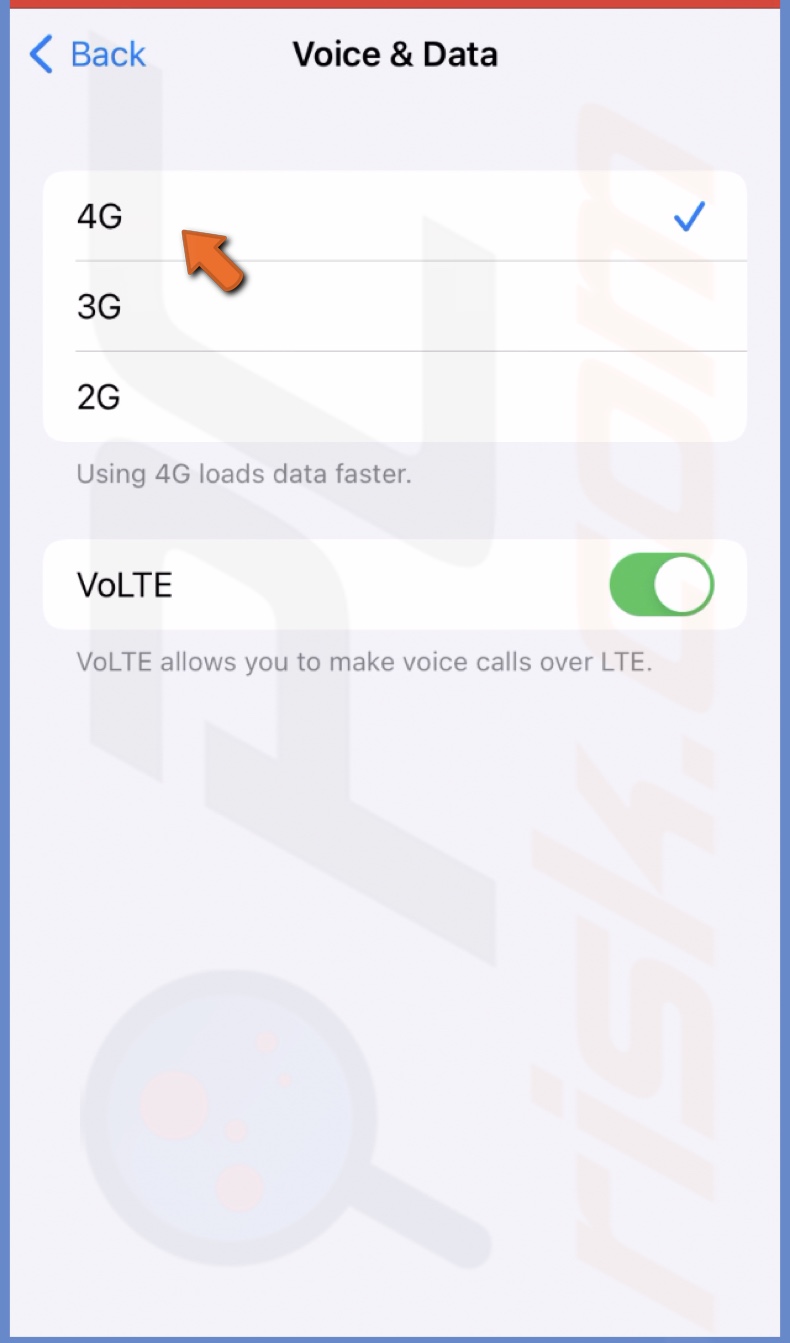
3. Tap on "Voice & Data".
4. Select "4G".
Reset network connection
If the problem persists, reset your network connection.
To reset your network connection, follow the steps below:
1. On iPhones with Face ID, swipe down from the top right corner of the screen.
On iPhones with the Home button, swipe up from the middle bottom.
2. Tap on the Airplane icon to turn it on.
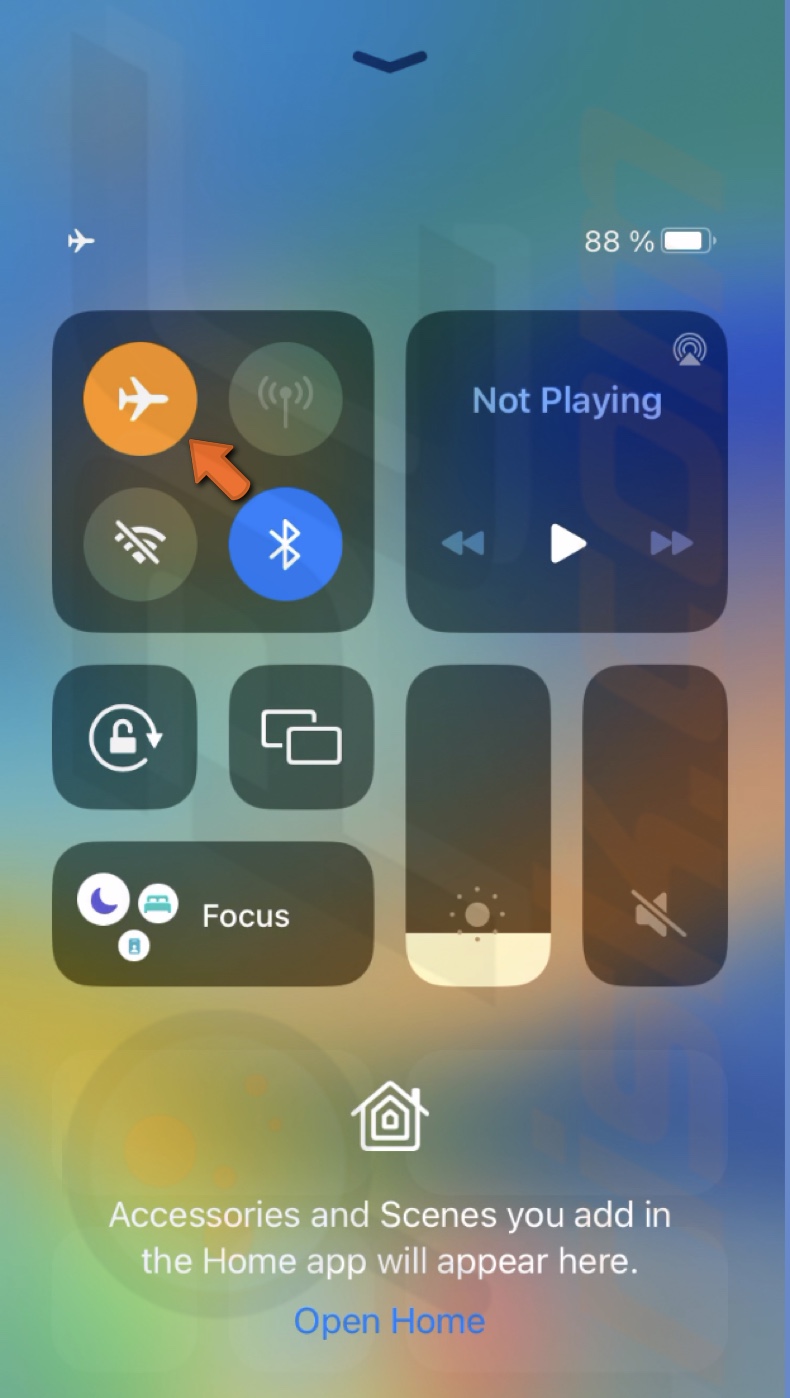
3. Wait for a few seconds and turn off the feature.
You can turn on and off the Airplane Mode also in the Settings app.
Re-enable automatic network selection
If the network selection is set to "Automatic", turn off and on the option. It will reestablish the connection to the right network.
To turn on or off automatic network selection, follow the steps below:
1. Go to your iPhone settings.
2. Tap on "Mobile Data".
3. Select "Network Selection".
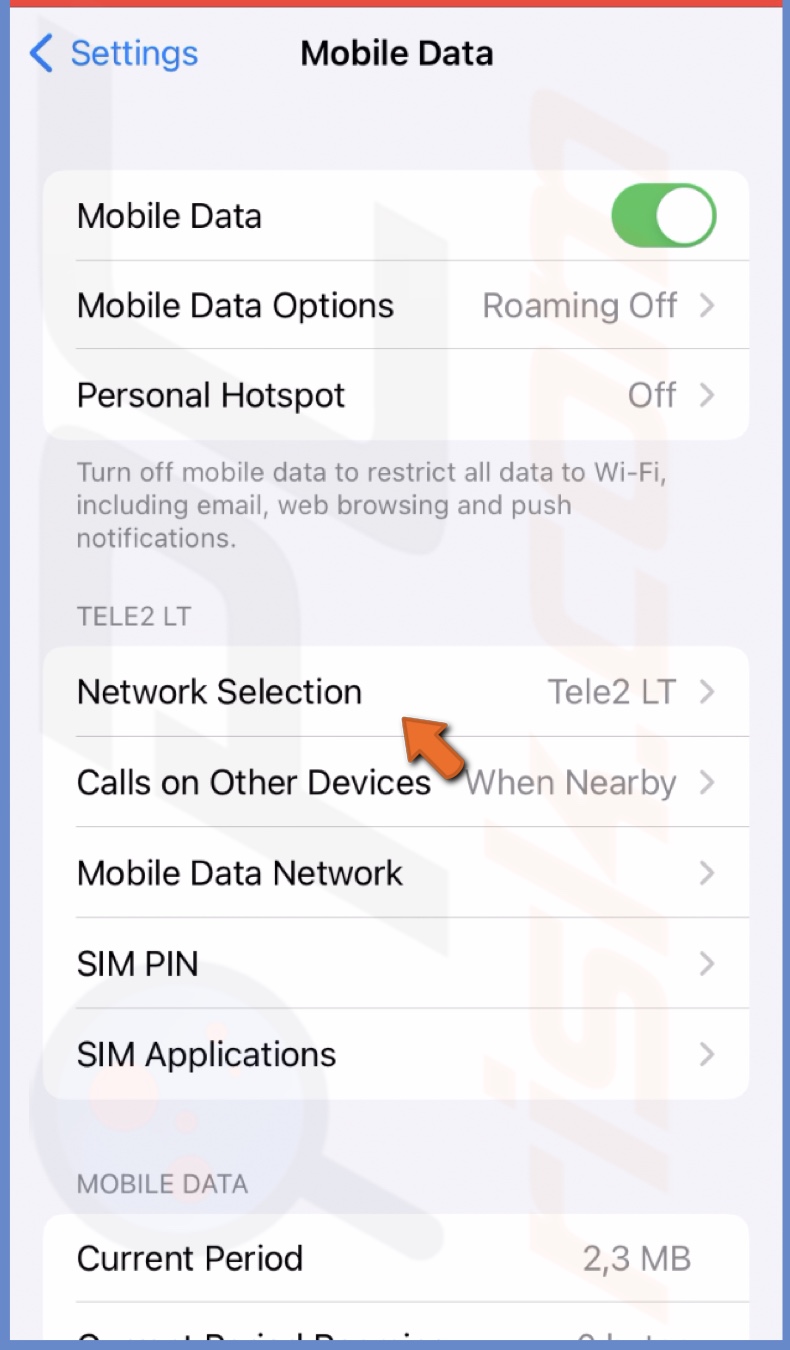
4. If the "Automatic" selection is enabled, turn it off, and after a few seconds, turn it on again. If not, enable "Automatic" network selection.

Reset Network Settings
A network settings reset will remove all Wi-Fi and Bluetooth connections, as well as VPN configurations and other network settings. After the reset, you'll have to reestablish all connections you were previously using.
To reset network settings, follow the steps below:
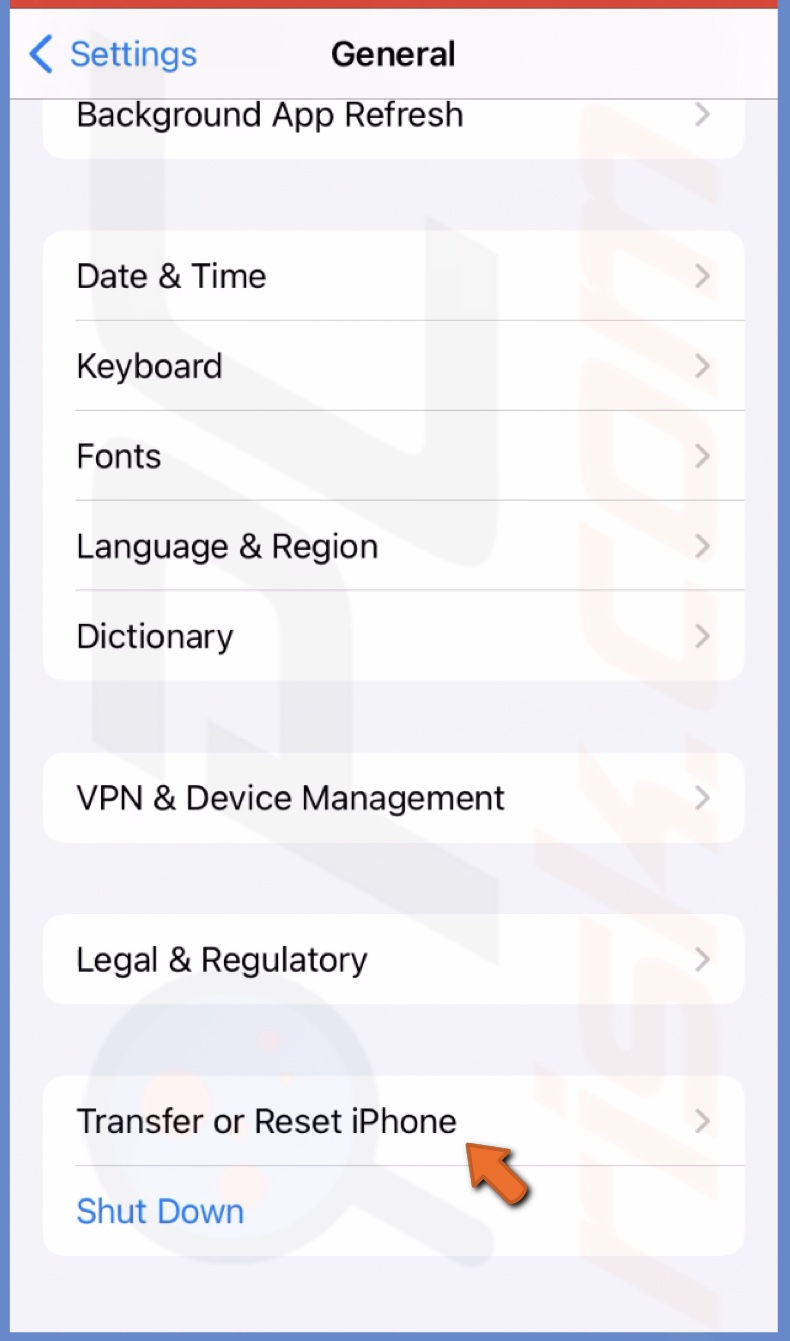
1. Open the Settings app and go to "General" settings.
2. Scroll to the bottom and tap "Transfer or Reset iPhone".
3. Select "Reset" and tap "Reset Network Settings".
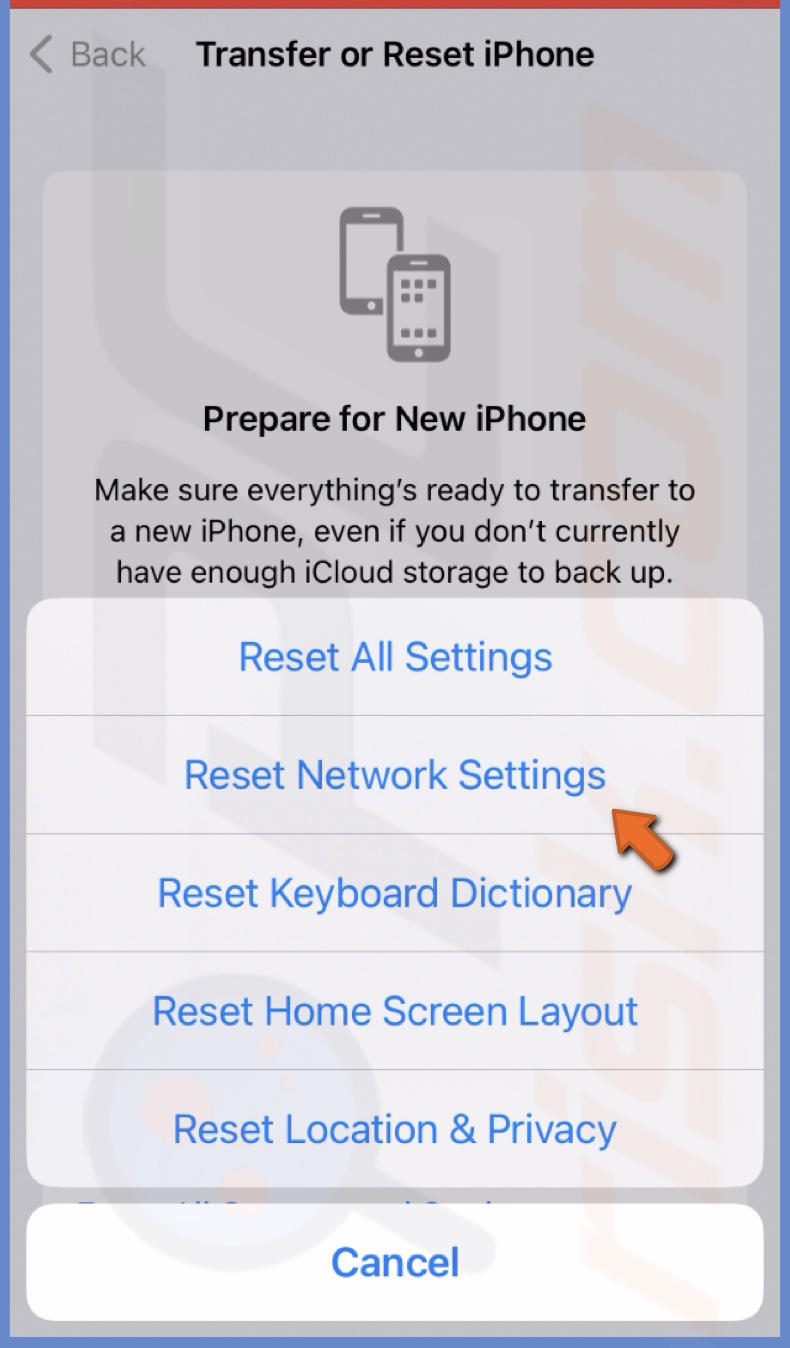
4. Enter the passcode and confirm the action.
After the reset, check if you have service and the 'SOS Only' message is gone.
Reinsert the SIM card
Sometimes, the connectivity problem can also be caused by your SIM card. If nothing helps, reinsert the card into your iPhone and check if the problem is gone.
To reinsert your SIM, follow the steps below:
1. Turn off your device.
2. Take out your SIM card.
3. Then, put it back in and turn on the iPhone.
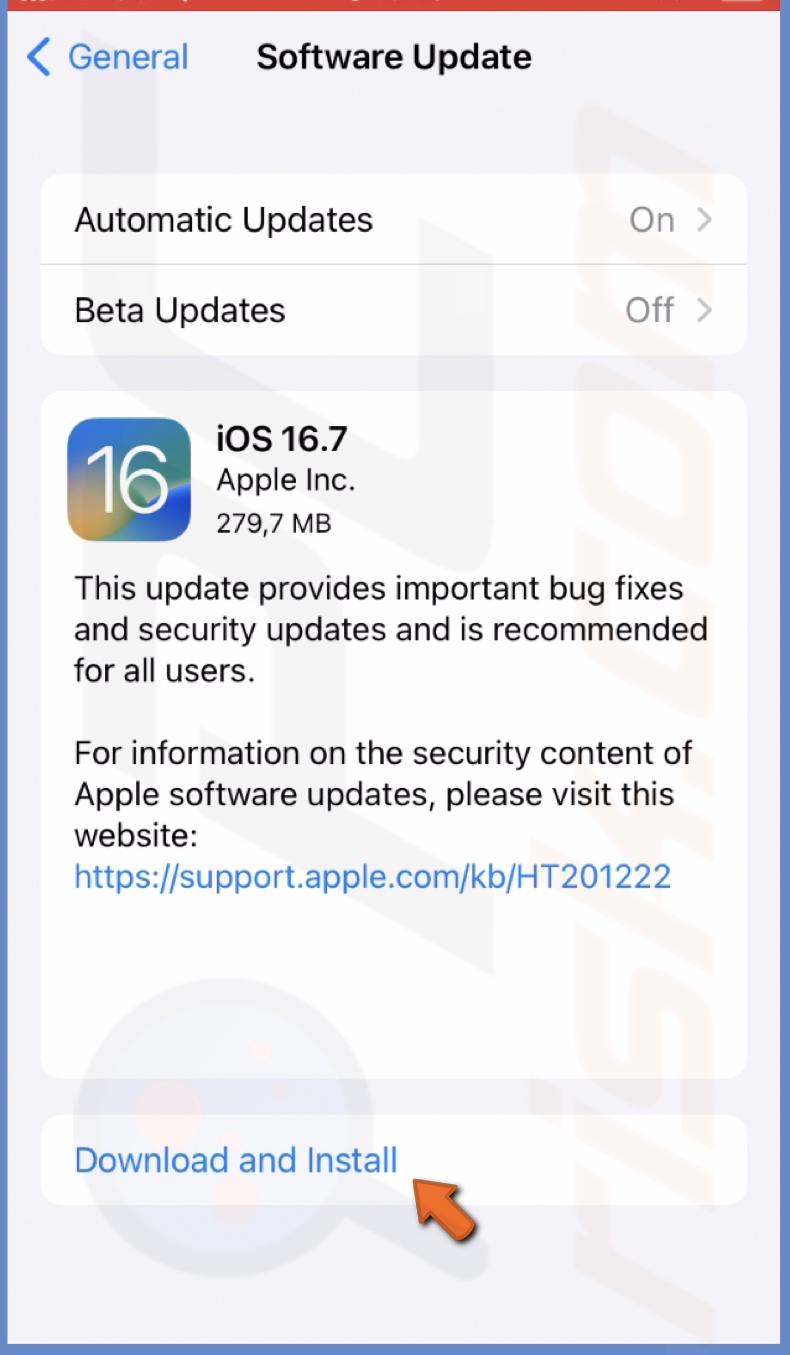
Update your iPhone
The issue can be due to a bug or an error in the whole system. An iOS update might remove the 'SOS Only' problem.
To update your iPhone, follow the steps below:
1. Open the Settings app.
2. Select "General" and tap on "Software Update".

3. Wait while the system searches for updates. If an update is available, upgrade the iOS.
If nothing helps, contact Apple customer service for further assistance. If you have any questions, feel free to leave a comment below!
Share:

Karolina Peistariene
Author of how-to guides for Mac users
Responsible for collecting, analyzing, and presenting problem-solving solution articles related to macOS issues. Years of macOS experience combined with solid research and analyzing skills help Karolina provide readers with working and helpful solutions as well as introduce various features Mac has to offer.
▼ Show Discussion