A complete guide to disabling Auto-Join Wi-Fi on your iPhone, iPad, and Mac

Get Free Scanner and check your computer for errors
Fix It NowTo fix found issues, you have to purchase the full version of Combo Cleaner. Free trial available. Combo Cleaner is owned and operated by Rcs Lt, the parent company of PCRisk.com read more.
Turn off Auto-Join and remove saved network from your device
When you connect to a Wi-Fi network for the first time, it gets added to your known networks. When your device is in that Wi-Fi area again, it connects automatically without your permission, and sometimes it's not a good thing.

Auto-Join is convenient when you need to connect to the same network every day, like in your home or office. However, automatically connecting to public networks can pose a security threat to your data.
Your device may also try to connect to multiple networks simultaneously. If you've enabled mobile data, the connection might get disturbed as your device tries to connect to Wi-Fi networks if the Wi-Fi is turned on.
In this guide, you'll learn how to disable Auto-Join on unwanted Wi-Fi networks and how to forget a saved network.
Video on A complete guide to disabling Auto-Join Wi-Fi on your iPhone, iPad, and Mac
Table of Contents:
- Introduction
- iPhone and iPad
- Turn off Auto-Join
- Forget Wi-Fi network
- Mac
- Turn off Auto-Join (Ventura or later)
- Forget Wi-Fi network (Ventura or later)
- Turn off Auto-Join (Monterey and older)
- Forget Wi-Fi network (Monterey and older)
- Video on A complete guide to disabling Auto-Join Wi-Fi on your iPhone, iPad, and Mac
Download Computer Malware Repair Tool
It is recommended to run a free scan with Combo Cleaner - a tool to detect viruses and malware on your device. You will need to purchase the full version to remove infections. Free trial available. Combo Cleaner is owned and operated by Rcs Lt, the parent company of PCRisk.com read more.
iPhone and iPad
Disable Wi-Fi Auto-Join and learn how to forget a network on your iPhone and iPad.
Turn off Auto-Join
To disable Auto-Join, follow the steps below:
1. Open the Settings app.
2. Tap on "Wi-Fi".
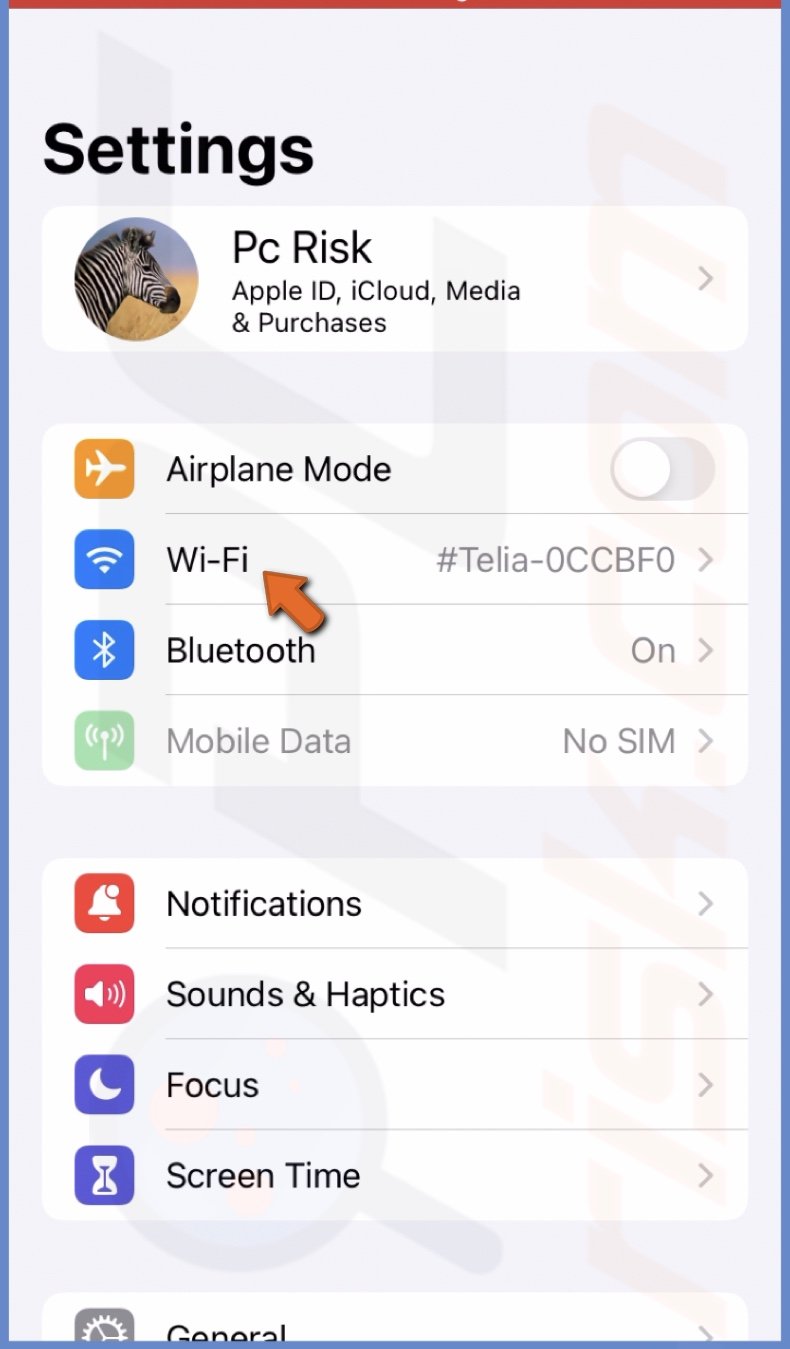
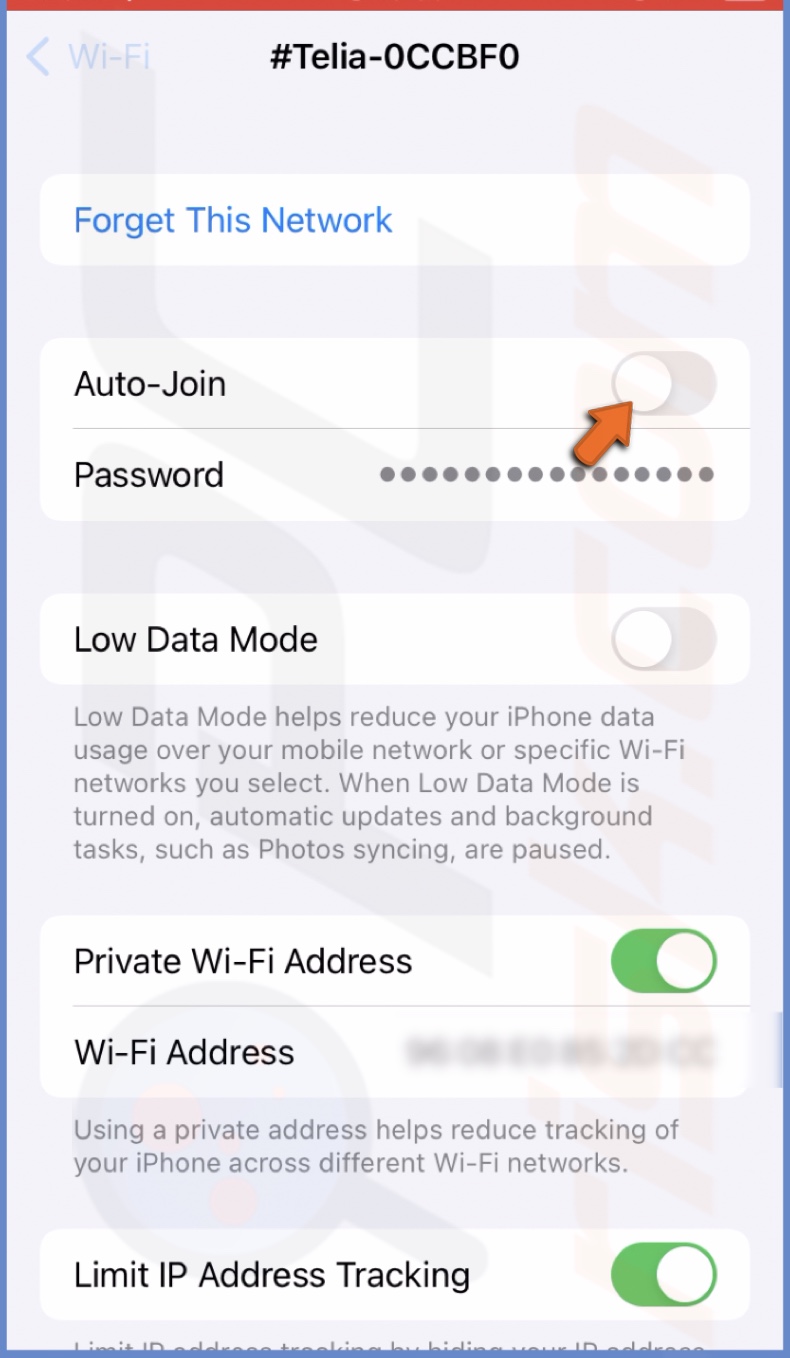
3. Next to a network name, tap on the info icon.
![]()
4. Toggle the switch to turn off Auto-Join.
Forget Wi-Fi network
To forget a network, follow the steps below:
1. Open the Settings app.
2. Tap on "Wi-Fi".
3. At the top right corner, tap on "Edit".
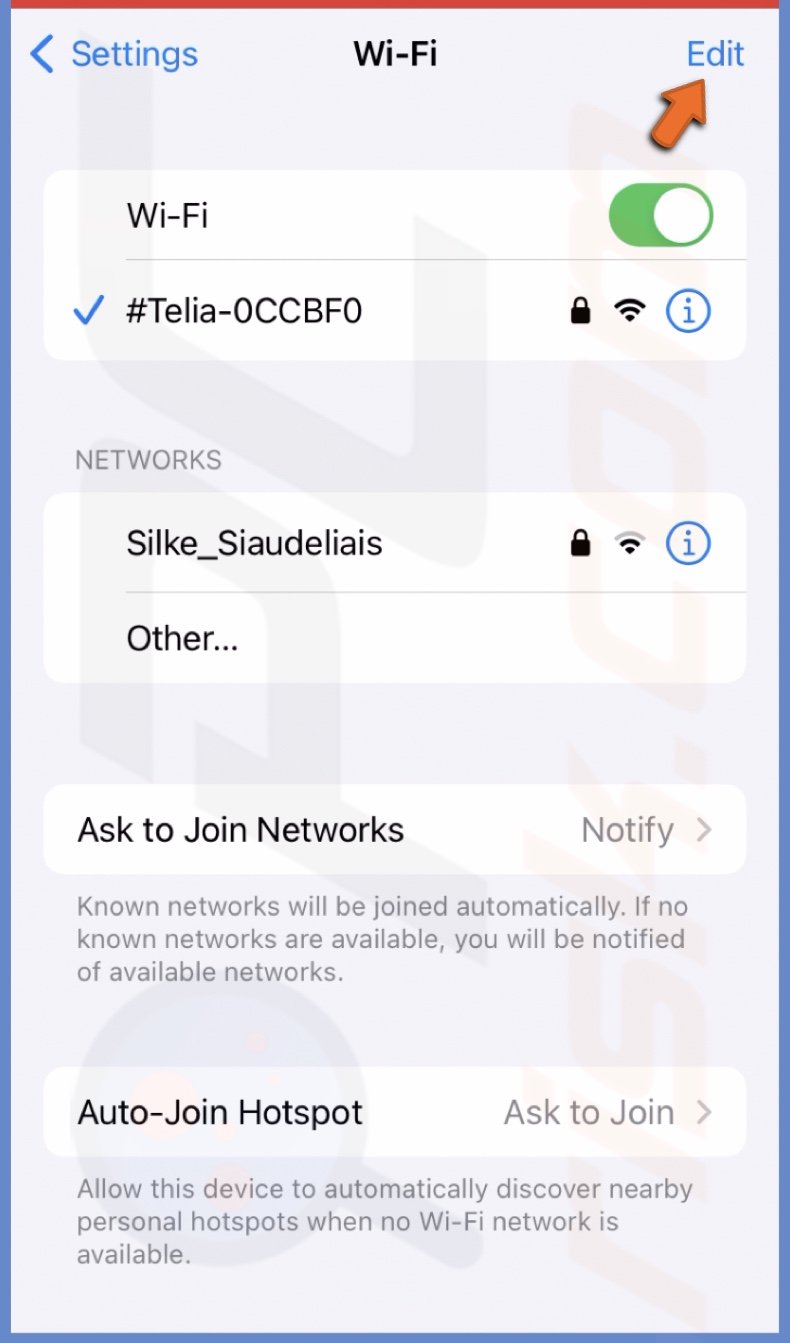
4. Enter your iPhone or iPad passcode.
5. Next to a network you want to forget, tap on the minus (-) icon and "Delete".
![]()
6. At the top right corner, tap on "Done".
7. Finally, tap on "Remove".
Mac
Depending on the operating system of your Mac, turn off Wi-Fi Auto-Join and find out how to forget a network.
Turn off Auto-Join (Ventura or later)
To disable Auto-Join, follow the steps below:
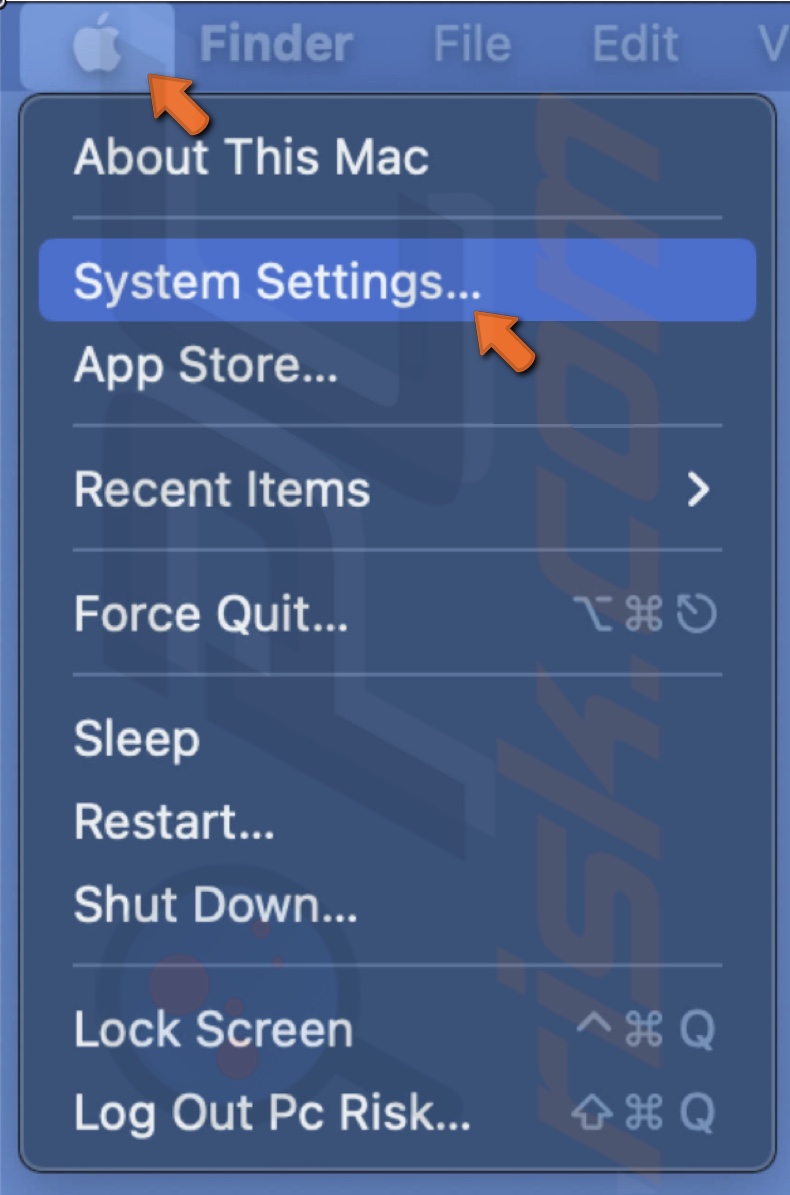
1. Click on the Apple logo and select "System Settings".
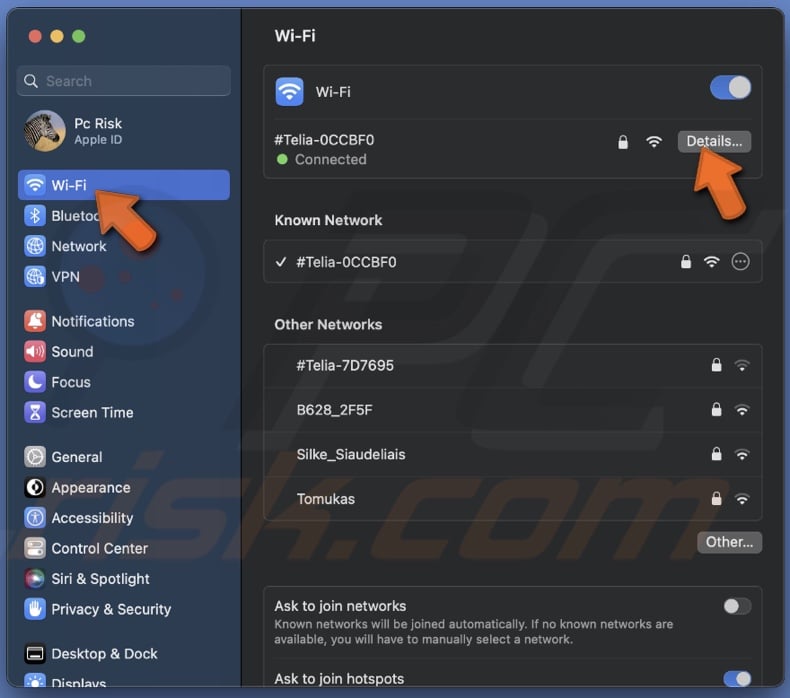
2. Click on "Wi-Fi" from the sidebar.
3. Next to the connected Wi-Fi, click on "Details".
4. Next to "Automatically join this network", toggle the switch to turn off the feature.
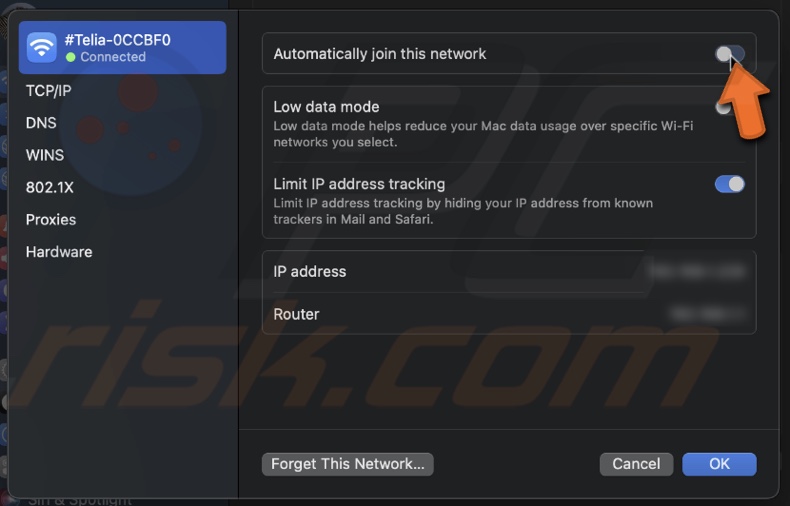
5. When ready, click on "OK".
6. If needed, enter your Mac's password.
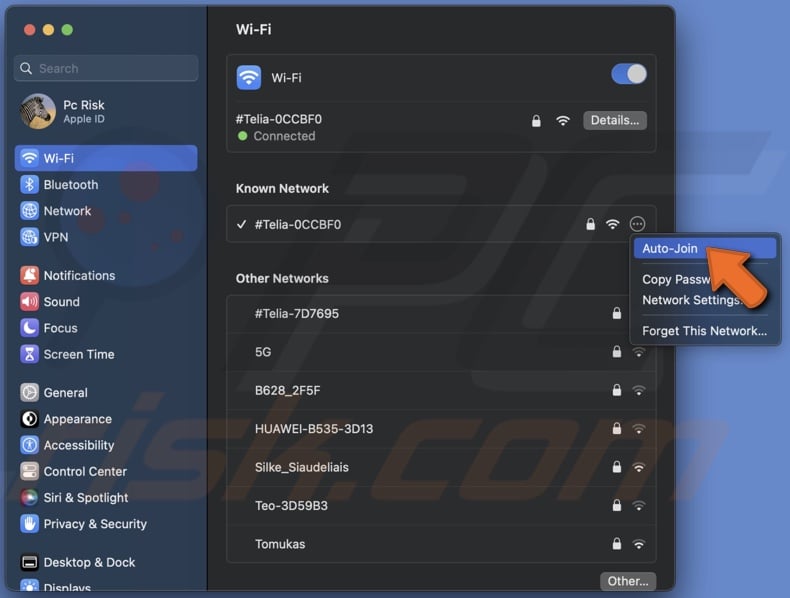
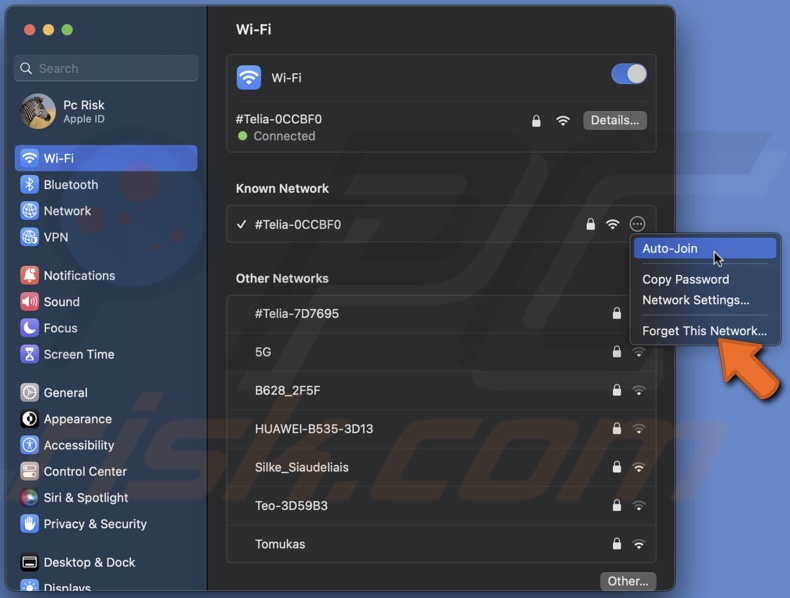
7. If there are other networks you want to stop Auto-Join, click on the three-dot icon next to the name and uncheck the "Auto-Join" option.
Forget Wi-Fi network (Ventura or later)
To forget a network, follow the steps below:
1. Click on the Apple logo and select "System Settings".
2. Click on "Wi-Fi" from the sidebar.
3. Next to the connected Wi-Fi, click on "Details".
4. Click "Forget This Network" at the bottom left corner.
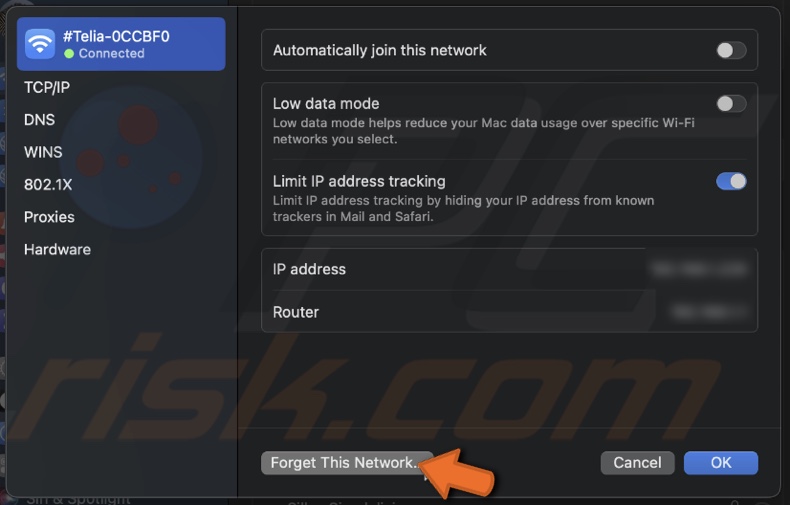
5. Finally, click on "Remove".
6. If there are other networks you want to forget, click on the three-dot icon next to the network name and click on "Forget This Network".
Turn off Auto-Join (Monterey and older)
To disable Auto-Join, follow the steps below:
1. Click on the Apple logo and select "System Preferences".
2. Click on "Network".
3. Next to "Network Name", click the drop-down menu to access the full list and select a network.
4. Uncheck the box next to "Automatically join this network".
5. Then, click on "Apply".
To disable Auto-Join for multiple networks at once, follow the steps below:
1. Click on the Apple logo and select "System Preferences".
2. Click on "Network".
3. At the bottom right corner, click on "Advanced".
4. Next to a network you want to forget, uncheck the Auto-Join box.
5. When ready, click "OK" and then "Apply".
Forget Wi-Fi network (Monterey and older)
To forget a network, follow the steps below:
1. Click on the Apple logo and select "System Preferences".
2. Click on "Network".
3. At the bottom right corner, click on "Advanced".
4. Select the Wi-Fi you want to forget from the list and click the minus (-) icon.
5. When ready, click "OK" and then "Apply".
If you have any questions, feel free to leave a comment below!
Share:

Karolina Peistariene
Author of how-to guides for Mac users
Responsible for collecting, analyzing, and presenting problem-solving solution articles related to macOS issues. Years of macOS experience combined with solid research and analyzing skills help Karolina provide readers with working and helpful solutions as well as introduce various features Mac has to offer.
▼ Show Discussion