How to perform Device Firmware Update on your iPhone and iPad?

Get Free Scanner and check your computer for errors
Fix It NowTo fix found issues, you have to purchase the full version of Combo Cleaner. Free trial available. Combo Cleaner is owned and operated by Rcs Lt, the parent company of PCRisk.com read more.
How to enter and exit the DFU mode on iPhone and iPad?
Did your iPhone or iPad encounter issues that you couldn't solve with an update or a restart? The solution is the DFU Mode. DFU stands for Device Firmware Updates. It's a deeper restore mode that will reinstall your device's software and firmware. It will eliminate bugs, glitches, and other errors that prevent your device from working correctly.

The process of entering the DFU Mode is different for iPhone and iPad models. It depends on when the model was released and if it has a Face ID feature or the Home button. Find the section you're device belongs to and carefully follow the steps to enter the DFU mode. It's crucial that you don't hold the buttons longer than stated.
Video on How to perform Device Firmware Update on your iPhone and iPad?
Table of Contents:
- Introduction
- Things to know before updating iPhone firmware
- Perform DFU on iPhone 11, 12, 13, and SE
- Perform DFU on iPhone 7 and 7 Plus
- Perform DFU on iPhone 6 and older
- Perform DFU on iPad with Face ID
- Perform DFU on iPad with the Home button
- Exit DFU on all iPhones and iPads
- Video on How to perform Device Firmware Update on your iPhone and iPad?
Download Computer Malware Repair Tool
It is recommended to run a free scan with Combo Cleaner - a tool to detect viruses and malware on your device. You will need to purchase the full version to remove infections. Free trial available. Combo Cleaner is owned and operated by Rcs Lt, the parent company of PCRisk.com read more.
Things to know before updating iPhone firmware
Before performing a device firmware update (DFU), make sure you do and know these things:
1. Make sure to back up all important data in case anything goes wrong.
2. After the firmware update, your device software will be updated to the latest one.
3. If your device was damaged by water, don't perform DFU. The update can cause even more damage.
4. To restore your device's firmware, use Finder or iTunes.
Perform DFU on iPhone 11, 12, 13, and SE
To perform DFU on iPhone 11, 12, 13, and SE, follow the steps below:
1. Connect your device to a PC or a Mac.
2. Press the Volume Up button and release it. Then quickly press and release the Volume Down button.
3. Now, press and hold the Side button for about 10 seconds until you're screen goes black. Don't release the Side button!
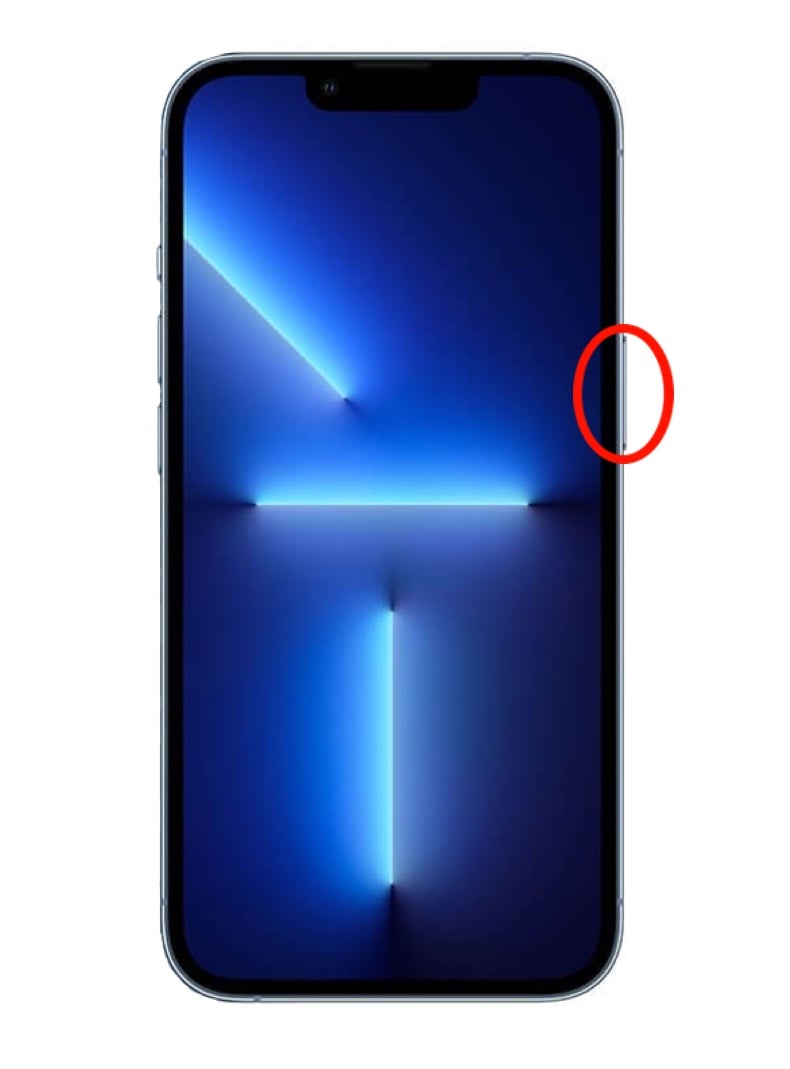
4. Keep holding the Side button and press the Volume Down button for about 5 seconds.
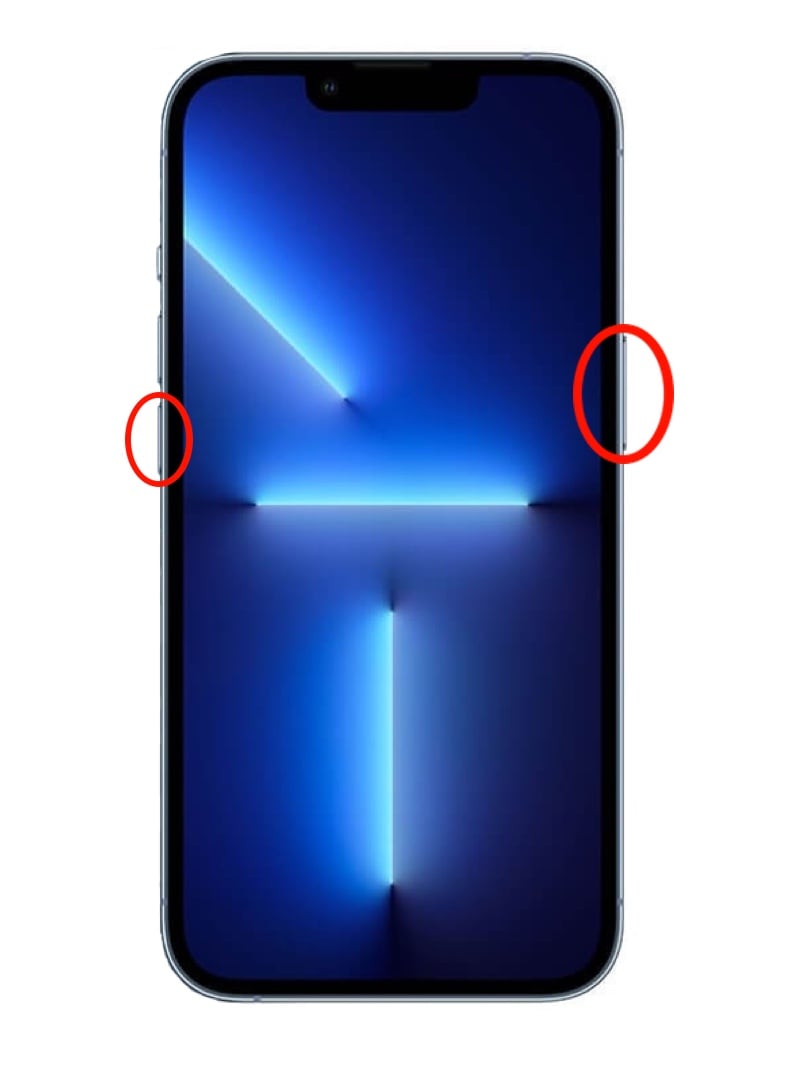
5. After 5 seconds, release the Side button, but keep holding the Volume Down button for 10 seconds.
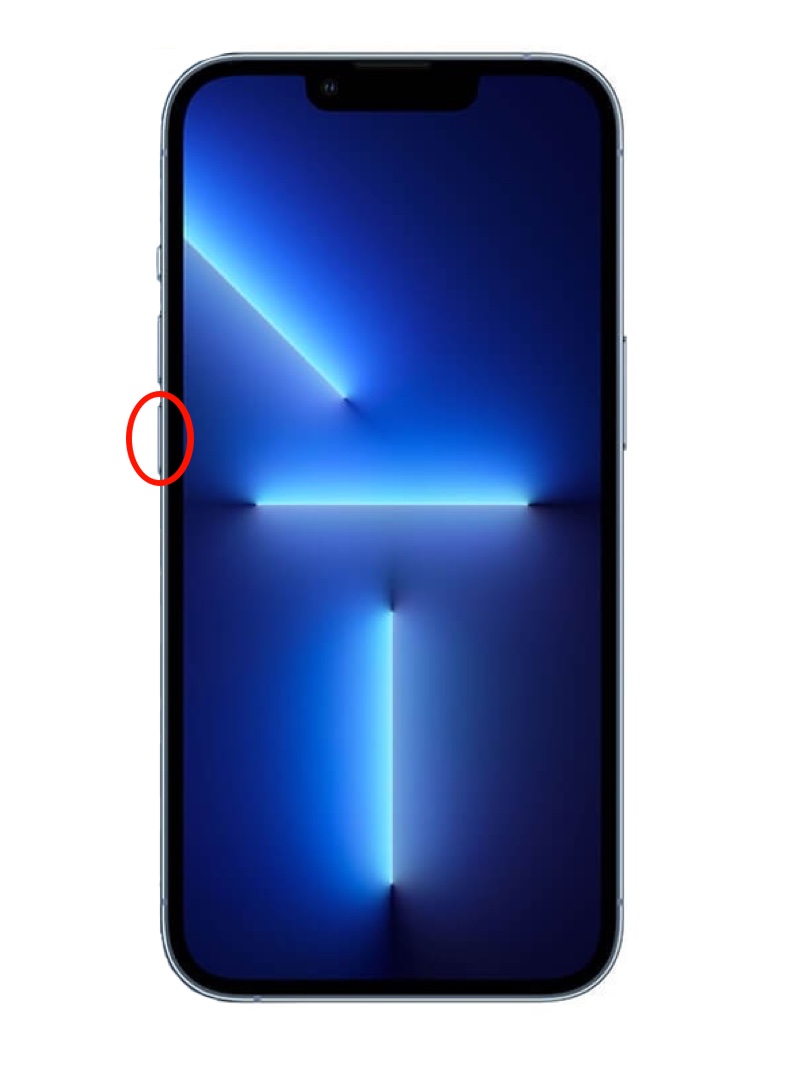
6. When you see a "Your computer has detected an iPhone in recovery mode. You must restore this iPhone before it can be used" message in Finder or iTunes, release the Volume Down button.
7. Click on "OK" and select "Restore iPhone".
If you see an Apple logo or your iPhone restarts in the process, something went wrong. Carefully follow all the steps again.
Perform DFU on iPhone 7 and 7 Plus
To perform DFU on iPhone 7 and 7 Plus, follow the steps below:
1. Connect your device to a PC or a Mac.
2. Press and hold the Side button for 3 seconds. Then press the Volume Down button. Don't release the Side button!
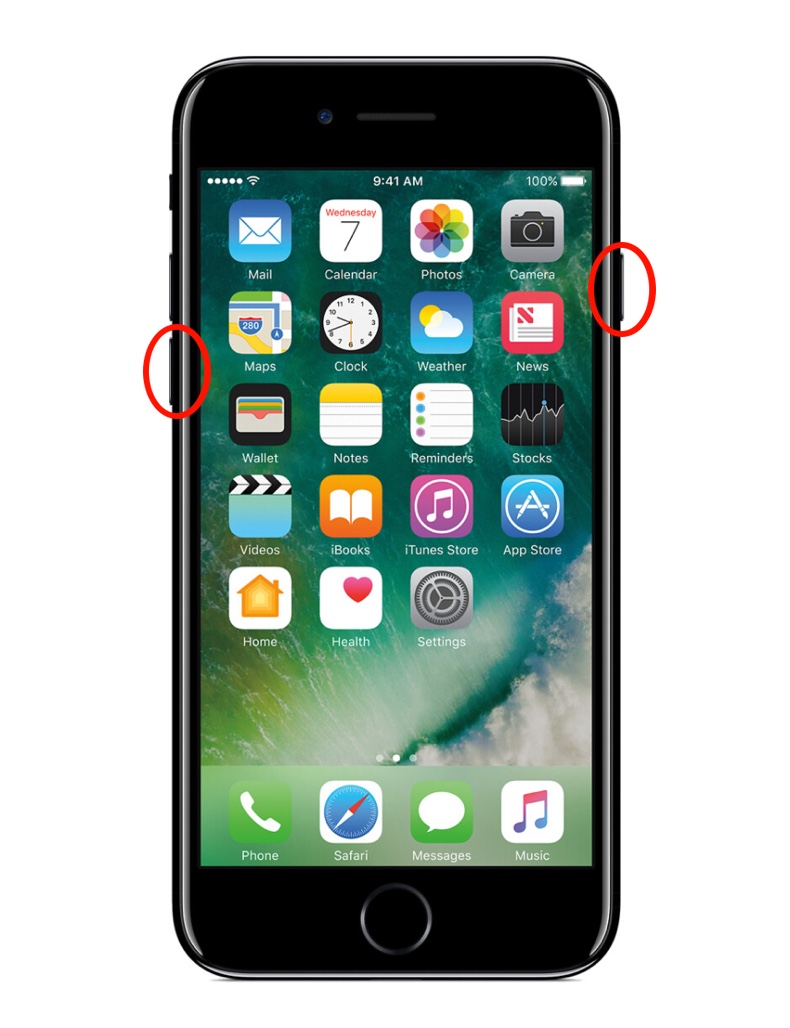
3. Now, keep pressing and holding both buttons for 10 seconds. If you're iPhone starts restarting, repeat the process again.
4. Now release the Side button but keep holding the Volume Down button for 5 more seconds.
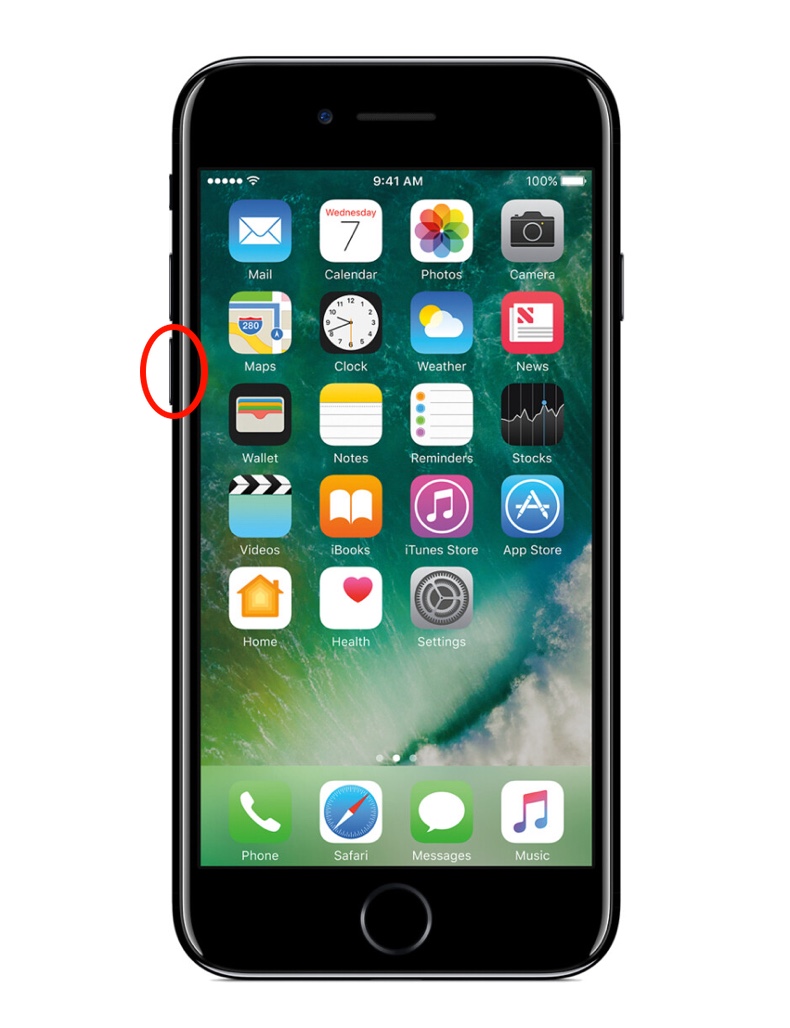
5. Your iPhone should then enter the DFU mode. Click on "Restore iPhone" on your PC or Mac.
Perform DFU on iPhone 6 and older
To perform DFU on iPhone 6 and older models, follow the steps below:
1. Connect your device to a PC or a Mac.
2. Press and hold the Side button for 3 seconds. Then press the Home button.
3. Now, keep pressing and holding both buttons for 10 seconds. If you're iPhone starts restarting, repeat the process again.
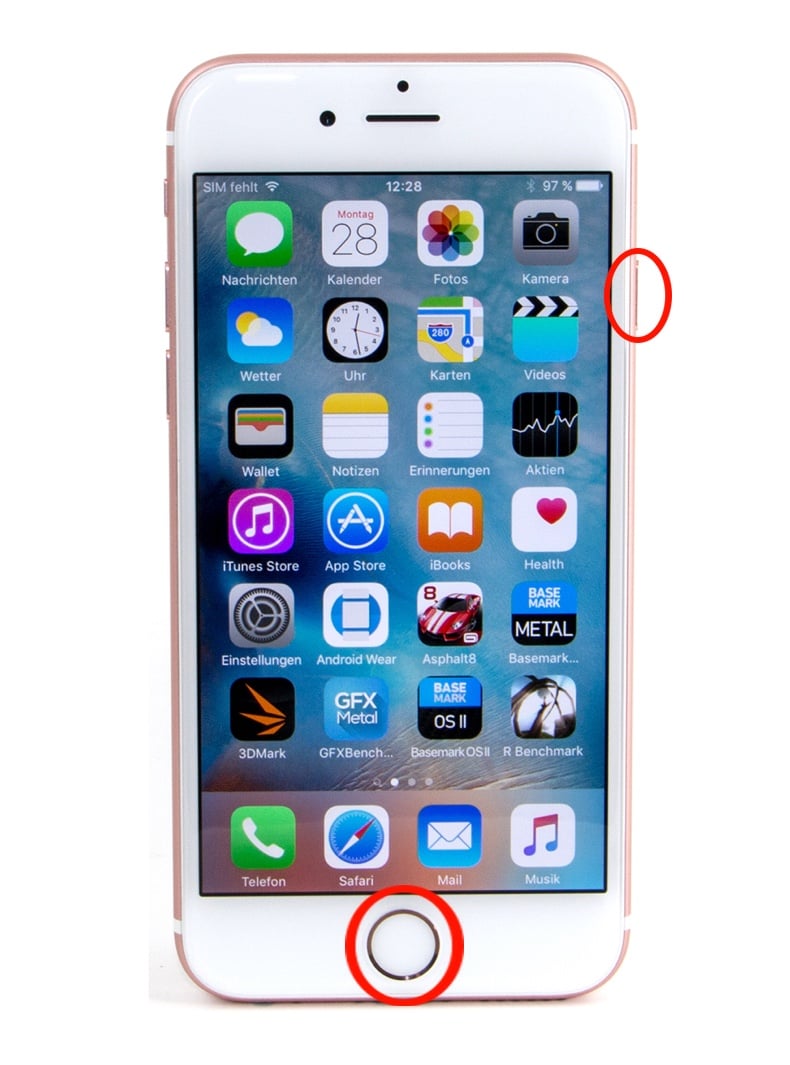
4. Now release the Side button but keep holding the Home button for 5 more seconds.
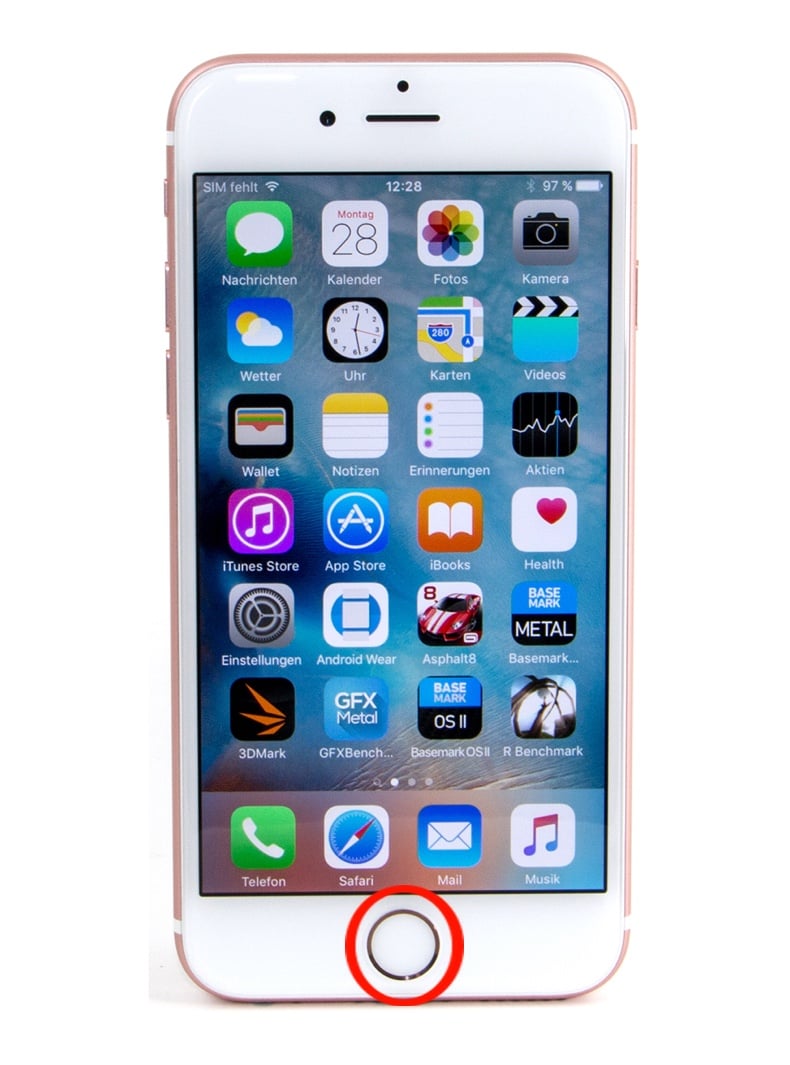
5. Your iPhone should then enter the DFU mode. The screen will be black.
6. You should see a message appear on your PC or Mac asking to restore your device. Click on "Restore iPhone".
Perform DFU on iPad with Face ID
To perform DFU on an iPad with Face ID, follow the steps below:
1. Connect your device to a PC or a Mac.
2. Press and hold the Power button for 3 seconds. Then press the Volume Down button. Don't release the Power button!
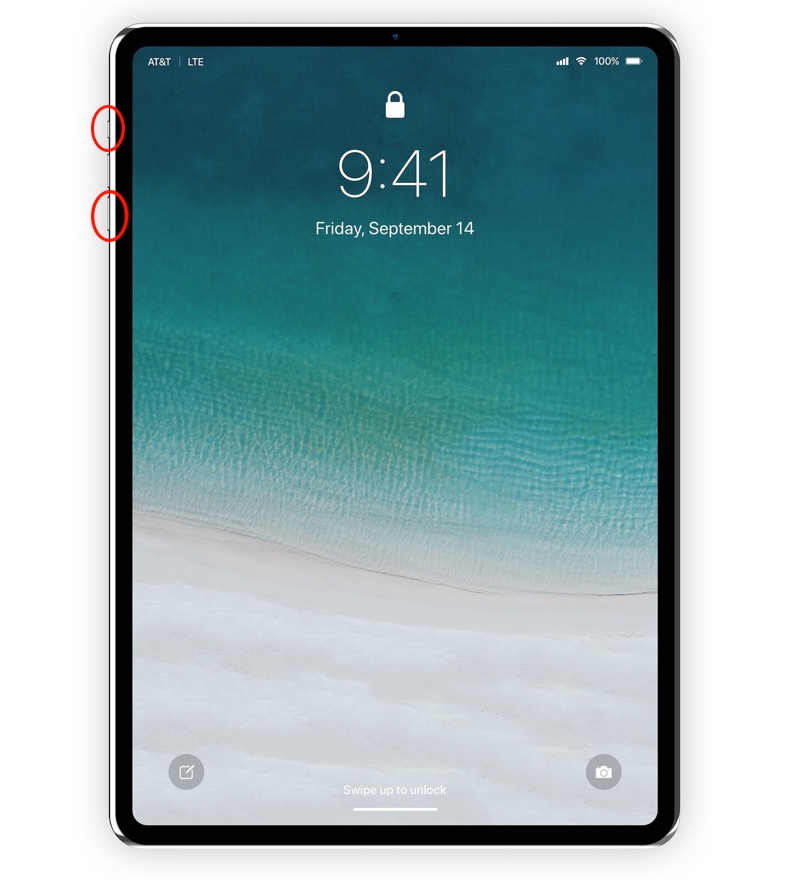
3. Now, keep pressing and holding both buttons for 10 seconds. If you're iPad starts restarting, repeat the process again.
4. Now release the Power button but keep holding the Volume Down button for 5 more seconds.
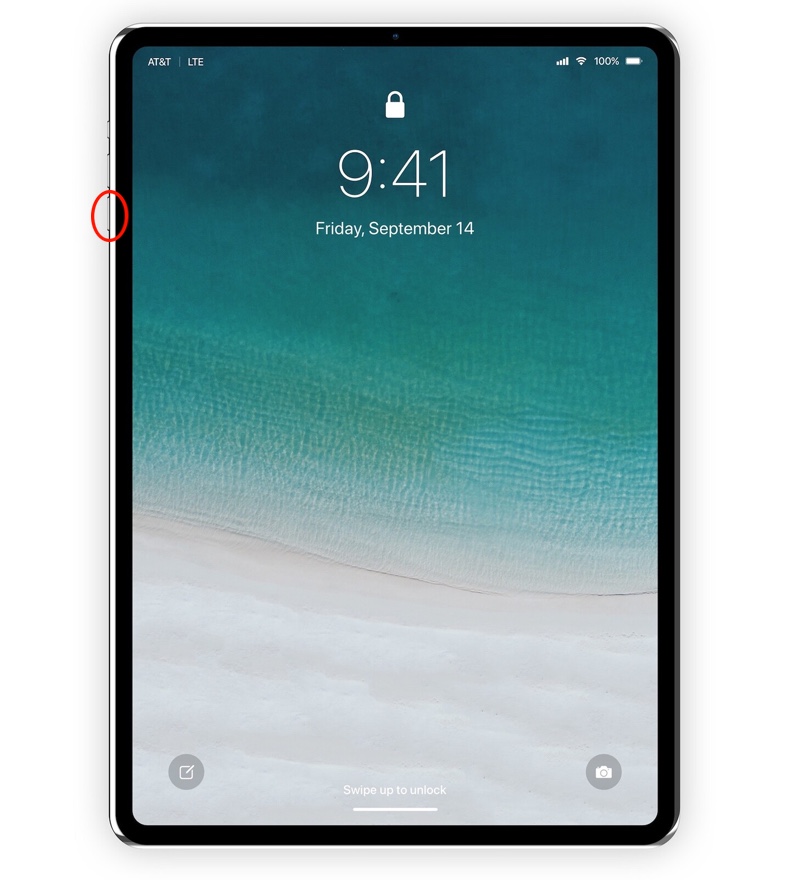
5. Your iPad should then enter the DFU mode. Click on "Restore iPad" on your PC or Mac.
To perform DFU on an iPad with the Home button, follow the steps below:
1. Connect your device to a PC or a Mac.
2. Press and hold the Power button for 3 seconds. Then press the Home button. Don't release the Power button!

3. Keep pressing and holding both buttons for 10 seconds. If you're iPhone starts restarting, repeat the process again.
4. Now release the Power button but keep holding the Home button for 5 more seconds.

5. Your iPad should then enter the DFU mode. The screen will be black.
6. You should see a message appear on your PC or Mac asking to restore your device. Click on "Restore iPad".
Exit DFU on all iPhones and iPads
To exit DFU on iPhone 11, 12, 13, SE, and iPad with Face ID, follow the steps below:
1. Press the Volume Up button and release it. Then quickly press and release the Volume Down button.
2. Then, press and hold the Side button on iPhone or the Power button on the iPad until you see the Apple logo.
To exit DFU on iPhone 7 and 7 Plus, follow the steps below:
1. Simultaneously press and hold the Side button and the Volume Down button.
2. Release the buttons when the Apple logo appears.
To exit DFU on iPhone 6s and older and iPads with the Home button, follow the steps below:
1. Simultaneously press and hold the Home button and the Side button for iPhones, and the Power button for iPads.
2. Release the buttons when you see the Apple logo.
We hope this guide provided you with the information you were looking for, and you now know how to perform DFU on your iPhone and iPad.
Share:

Karolina Peistariene
Author of how-to guides for Mac users
Responsible for collecting, analyzing, and presenting problem-solving solution articles related to macOS issues. Years of macOS experience combined with solid research and analyzing skills help Karolina provide readers with working and helpful solutions as well as introduce various features Mac has to offer.
▼ Show Discussion