10 ways to fix the delayed notifications problem on your iPhone

Get Free Scanner and check your computer for errors
Fix It NowTo fix found issues, you have to purchase the full version of Combo Cleaner. Free trial available. Combo Cleaner is owned and operated by Rcs Lt, the parent company of PCRisk.com read more.
How to fix delayed notifications on your iPhone?
Notifications allow us to keep track of activity in the app without constantly tracking everything ourselves. The alerts also notify us when someone is trying to reach us by text, social media, or other ways. Getting notifications in real-time can be crucial if you're waiting for an important email. So what to do when suddenly your notifications keep on getting delayed?
The issue can be as simple as a bug in the operating system that a restart can easily solve or an enabled feature that limits alerts and app background activity. The reason can also be as complicated as an error in the settings, network issues, or operating system problems.
By carefully following this guide step by step, you should be able to fix the delayed notification issue.
Video on 10 ways to fix the delayed notifications problem on your iPhone
Table of Contents:
- Introduction
- Method 1. Disable Notification Summary
- Method 2. Disable the Do Not Disturb Mode
- Method 3. Enable notifications
- Method 4. Reboot your iPhone
- Method 5. Check your network connection
- Method 6. Turn off the Low Power Mode
- Method 7. Turn off the Low Data Mode
- Method 8. Update your apps
- Method 9. Reset network settings
- Method 10. Update your iPhone
- Video on 10 ways to fix the delayed notifications problem on your iPhone
Download Computer Malware Repair Tool
It is recommended to run a free scan with Combo Cleaner - a tool to detect viruses and malware on your device. You will need to purchase the full version to remove infections. Free trial available. Combo Cleaner is owned and operated by Rcs Lt, the parent company of PCRisk.com read more.
Disable Notification Summary
The Notification Summary feature is precisely what the name says. It's a summary of the notifications you get throughout the day. With this feature, you can schedule a time when you want to get the summary and look through your notifications when it's convenient for you.
Disabling this feature is the first thing you should do if notifications are delayed.
To turn off the Notification Summary, follow the steps below:
1. Open the Settings app.
2. Go to "Notifications".
3. At the top, tap on "Scheduled Summary".
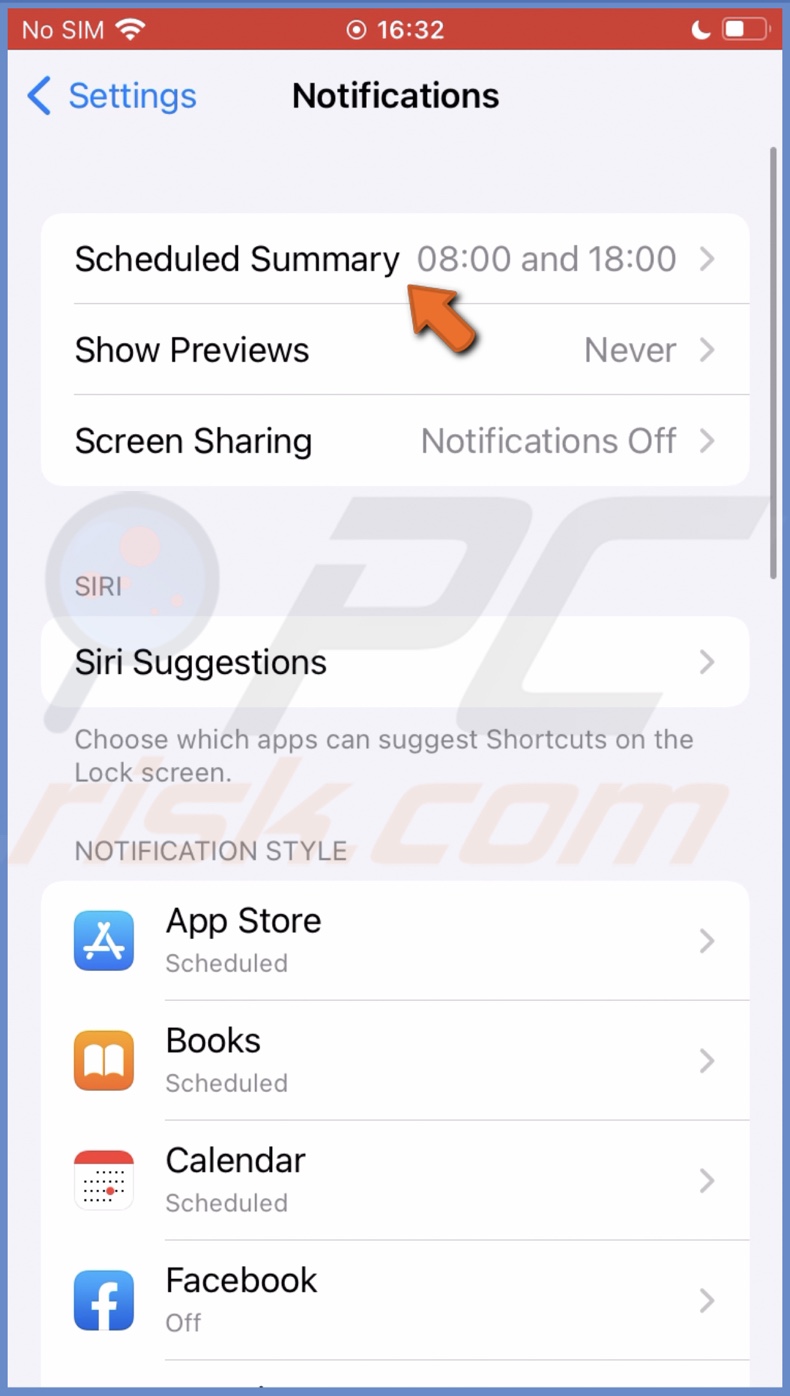
4. Next to "Scheduled Summary", toggle the switch to disable the feature.

If the feature was not turned on or didn't solve the problem, proceed to the following method.
Disable the Do Not Disturb Mode
The Do Not Disturb mode is meant to keep you focused on your work. When the feature is turned on, the notifications won't reach you. Disable the Do Not Disturb Mode to receive notifications in real-time.
To turn off Do Not Disturb Mode in settings, follow the steps below:
1. Open the Settings app.
2. Go to "Focus".
3. At the top, tap on "Do Not Disturb".
4. Next to "Do Not Disturb", toggle the switch to disable the feature.
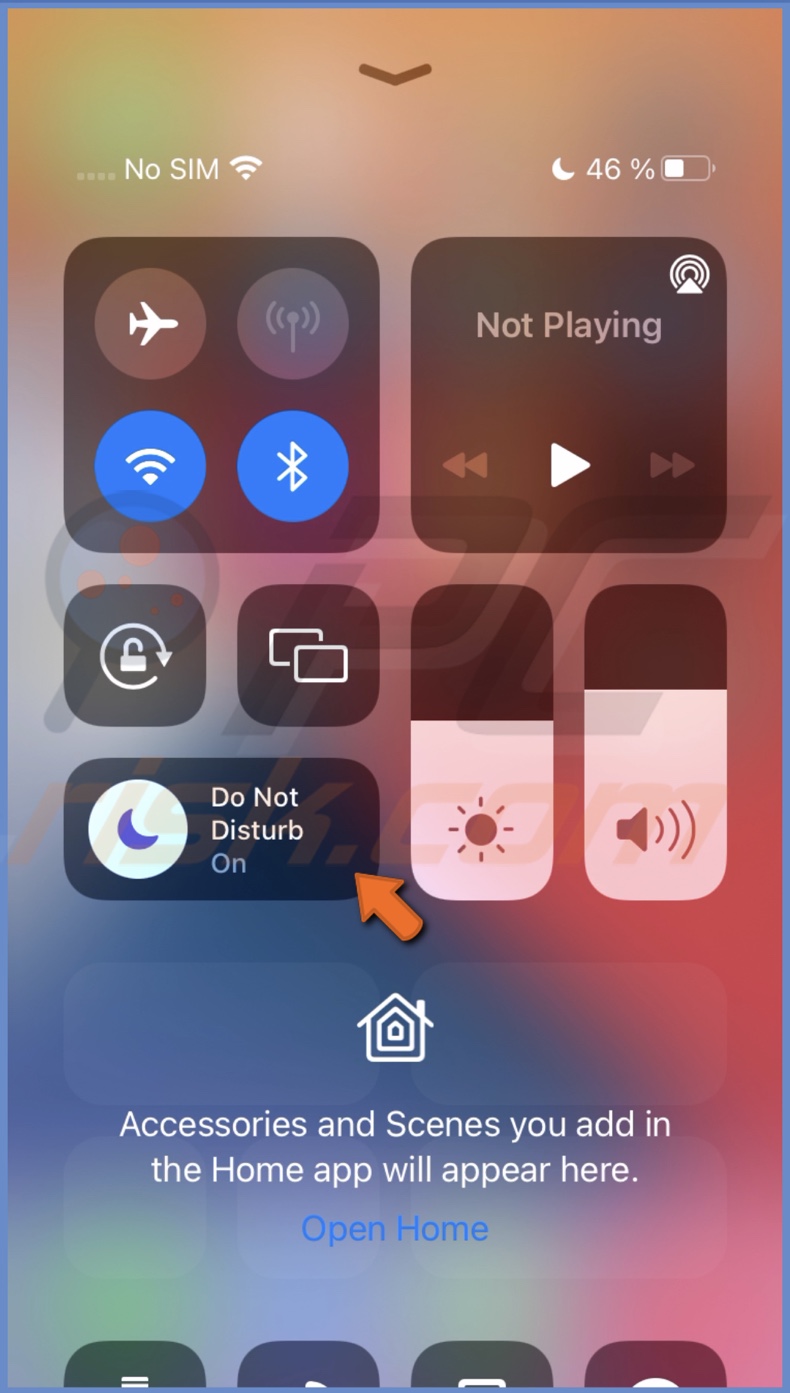
To turn off Do Not Disturb Mode in Control Center, follow the steps below:
1. On iPhone with Face ID, swipe down from the top right corner.
On iPhones with the Home button, swipe up from the middle bottom.
2. Locate the "Do Not Disturb" icon and tap on it to disable the feature.
Enable notifications
If the notifications are turned on, no wonder you're not getting them. Check if the feature is turned off and enable it to get notifications.
To turn on notifications, follow the steps below:
1. Go to your iPhone settings.
2. Tap on "Notifications".
3. Go to "Show Previews".
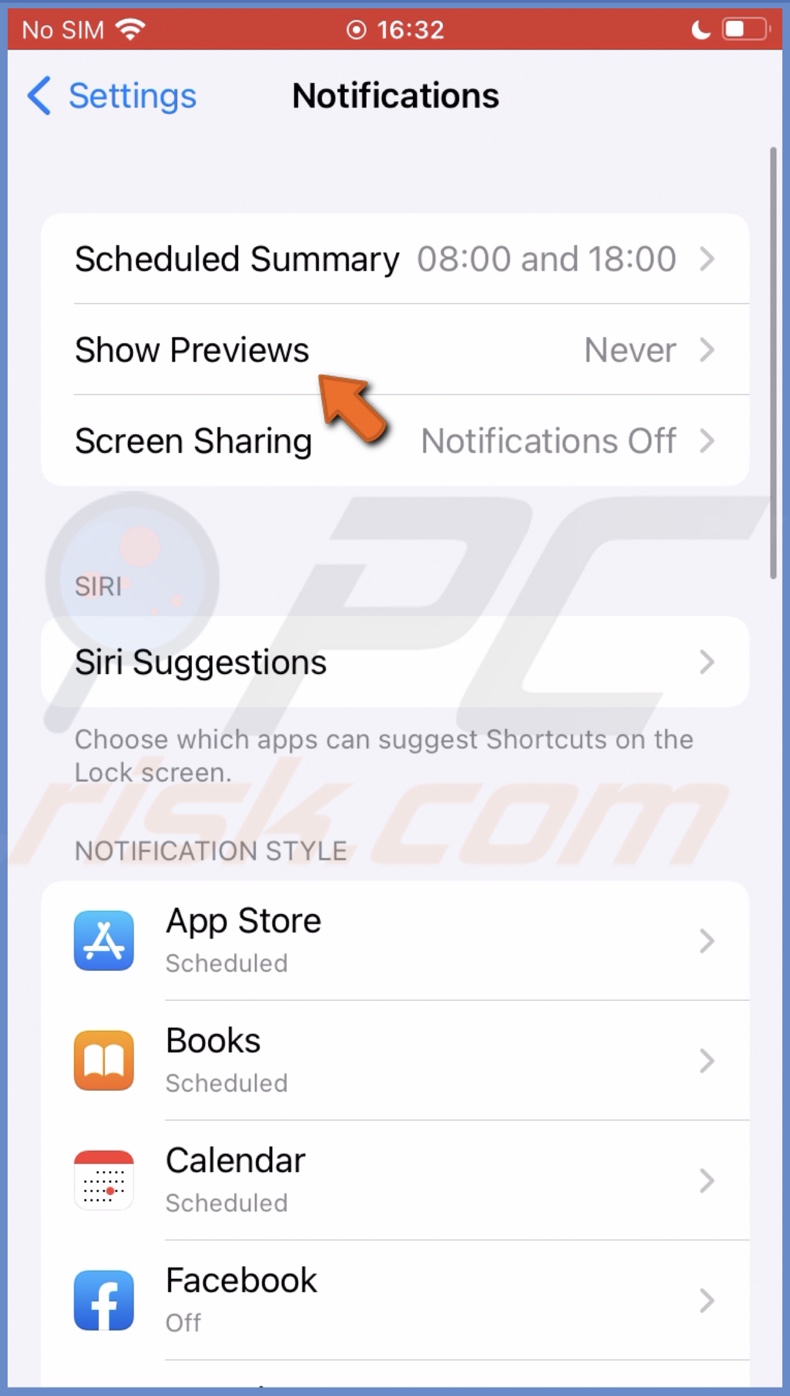
4. Then, select the "Always" or "When Unlocked" option.

5. Go back and under "Notification Style", select the app with delayed notifications.
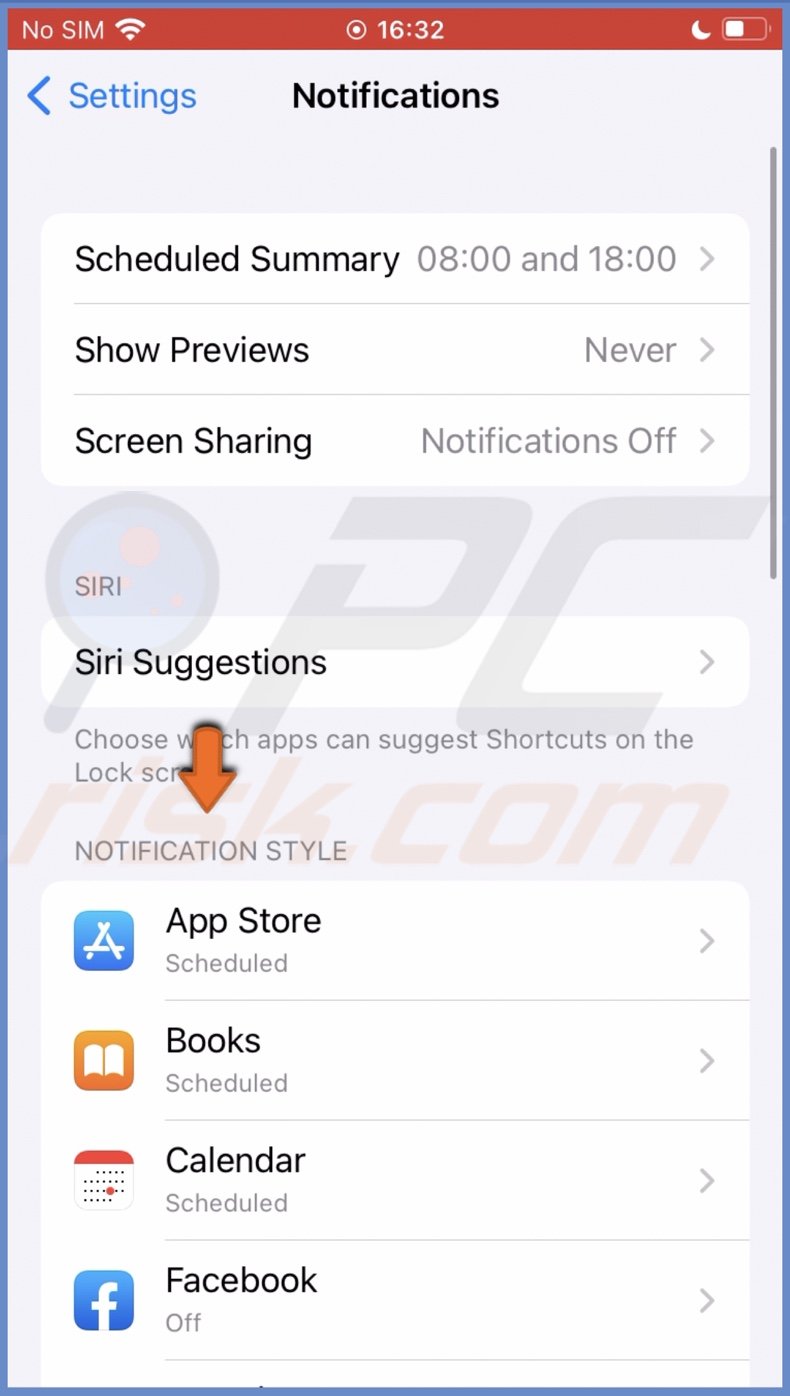
6. Next to "Allow Notifications", toggle the switch to enable the feature.
7. Under "Alerts", select the notification style.
Reboot your iPhone
Another thing you can do is reset your iPhone. The reset will give your device a fresh start and eliminate any minor bugs and glitches that could've occurred during the session. Many times a simple restart solves the problem.
Go here if you don't know how to restart your iPhone model.
Check your network connection
For your apps to work correctly and send you notifications in real-time, you need to have a stable internet connection. Otherwise, the connection can keep on reconnecting, thus delaying notification alerts. Make sure you're connected either to a stable Wi-Fi or your Mobile Data.
Turn off the Low Power Mode
The Low Power Mode is needed when your battery is low, and you need it to last longer than usual. The feature reduces app activity in the background, and you might not get all the notifications. Disable the feature not to miss alerts, but keep in mind that the battery will get drained faster.
To disable the Low Power Mode, follow the steps below:
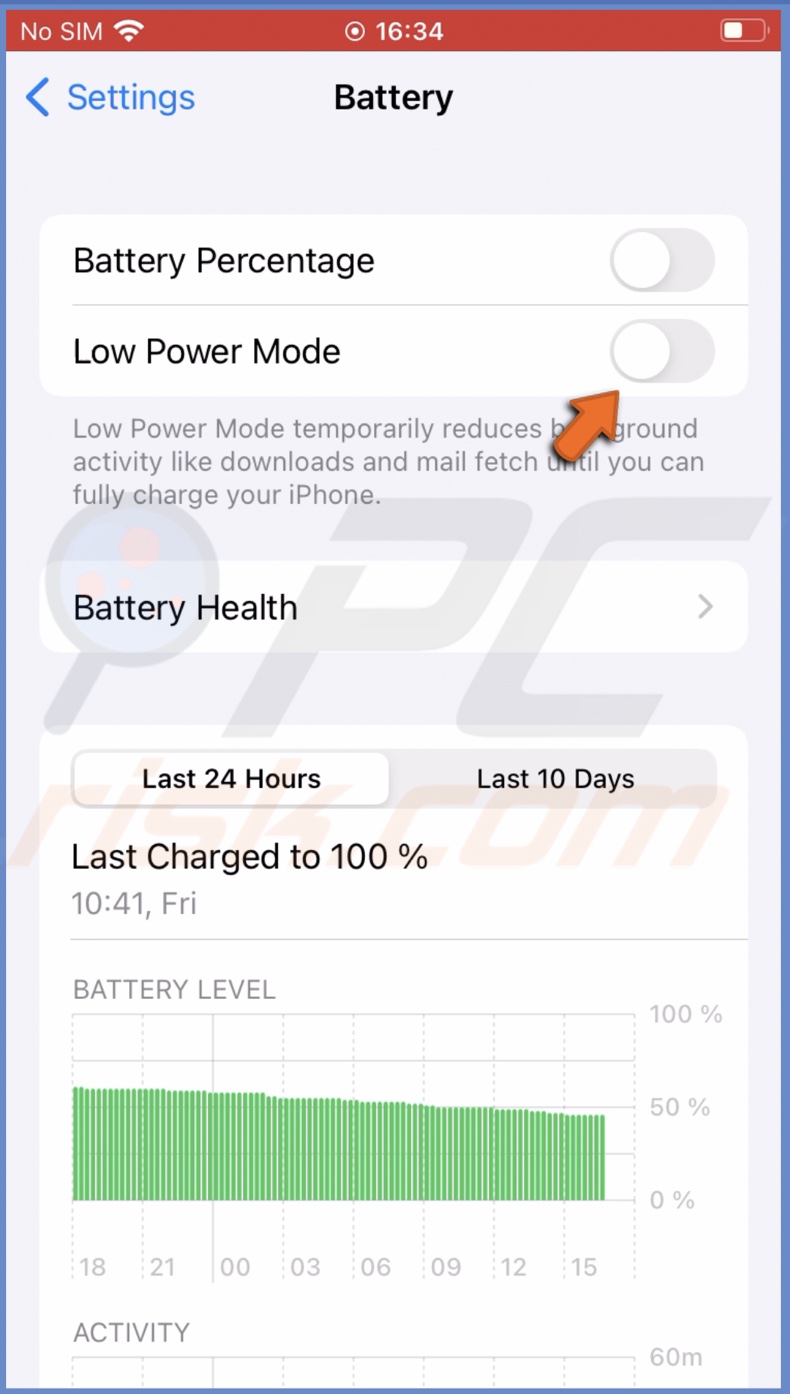
1. Open the Settings app.
2. Scroll down and tap on "Battery".
3. Next to "Low Power Mode", toggle the switch to turn off the feature.
Turn off the Low Data Mode
The Low Data Mode limits the internet data by pausing app background activity. If your notifications are delayed, check if this feature is turned on. If it is, disable it.
To disable the Low Data Mode for Wi-Fi, follow the steps below:
1. Go to your device settings.
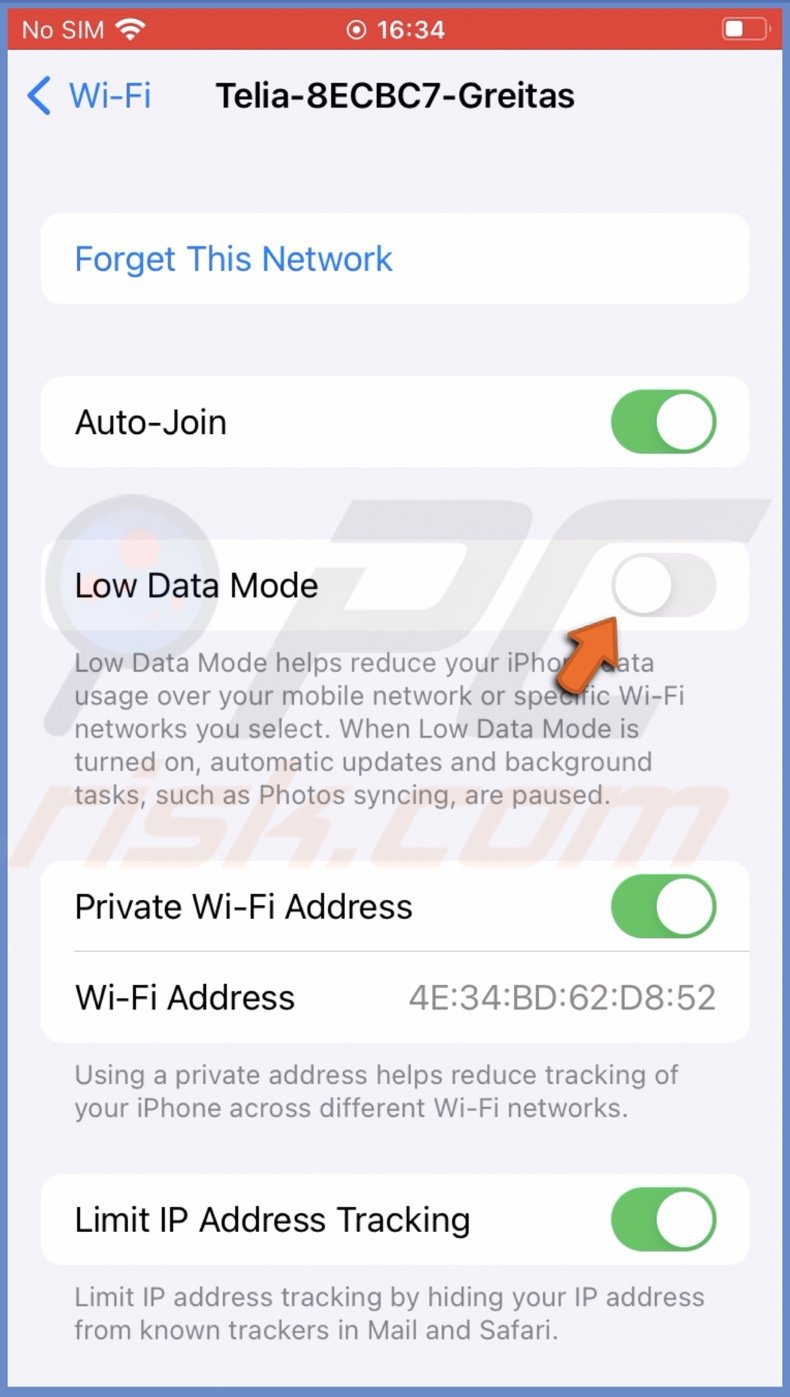
2. Tap on "Wi-Fi".
3. Next to your network, tap on the information (i) icon.
![]()
4. Next to "Low Data Mode", toggle the slider to turn off the feature.
To disable the Low Data Mode for Mobile Data, follow the steps below:
1. Go to your device settings.
2. Tap on "Mobile Data" or "Cellular".
3. Go to "Mobile Data Options" or "Cellular Data".
4. Next to "Low Data Mode", toggle the slider to turn off the feature.
Update your apps
You can experience delayed notifications if your app is outdated or has experienced software issues. Check if any updates are available to get rid of any errors.
To update your app(s), follow the steps below:
1. Open the App Store.
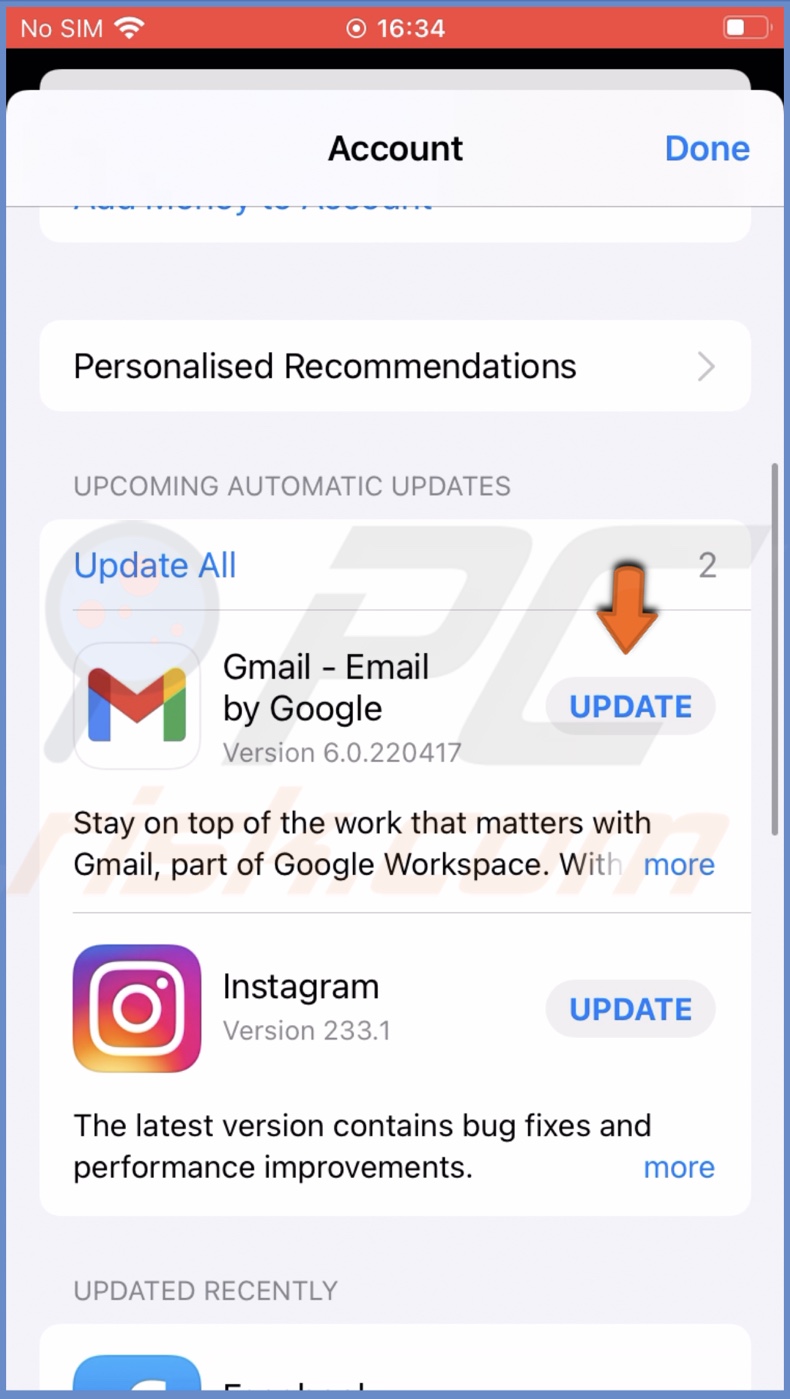
2. Tap on your profile icon.
![]()
3. Scroll down to "Upcoming Automatic Updates" and tap on "Update" next to an app or tap on "Update All".
Reset network settings
If nothing helps, we recommend resetting network settings. The reset will disconnect you from the network and eliminate any minor bugs that might've appeared in the settings.
To update network settings, follow the steps below:
1. Open the Settings app.
2. Go to "General" settings.
3. Scroll down to the bottom and tap on "Transfer or Reset iPhone".
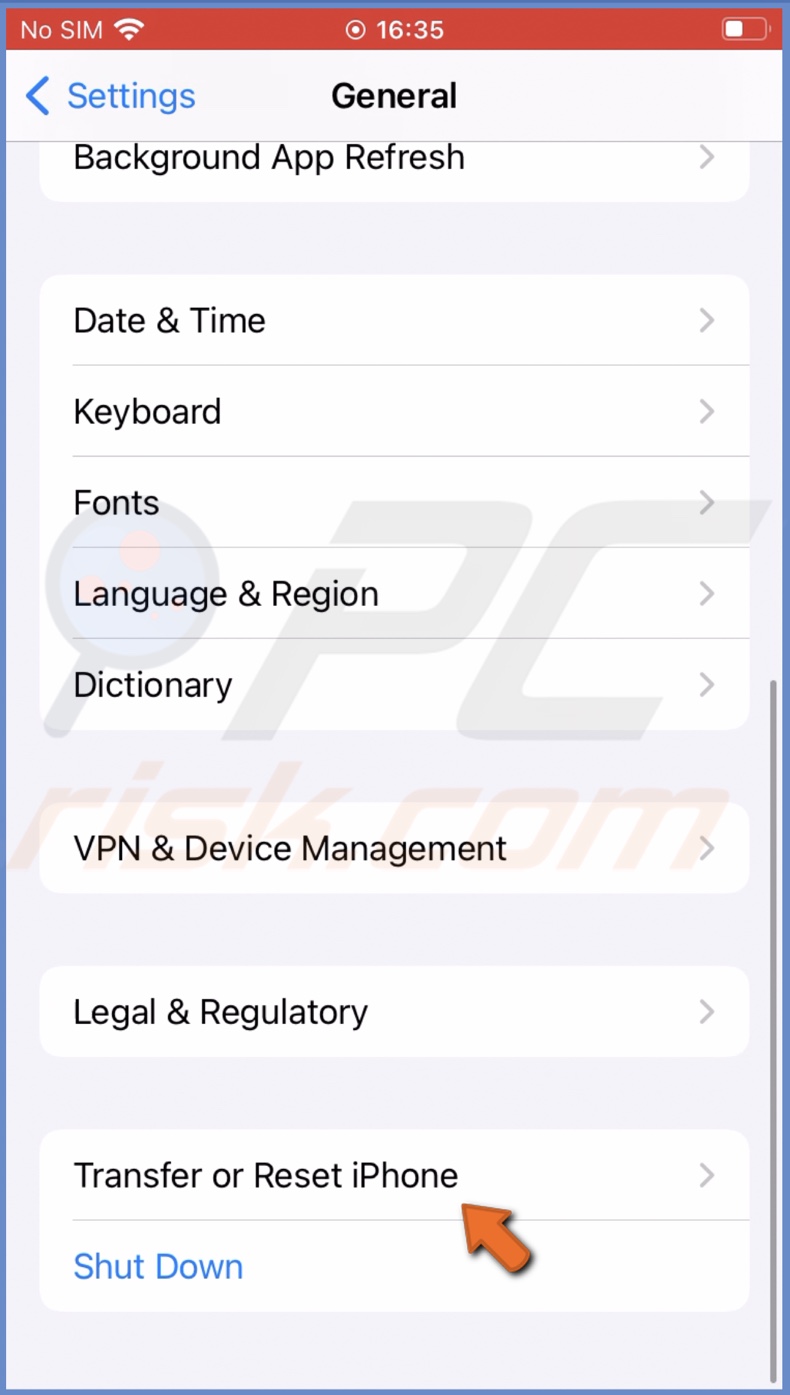
4. Tap on "Reset" and select "Reset Network Settings".
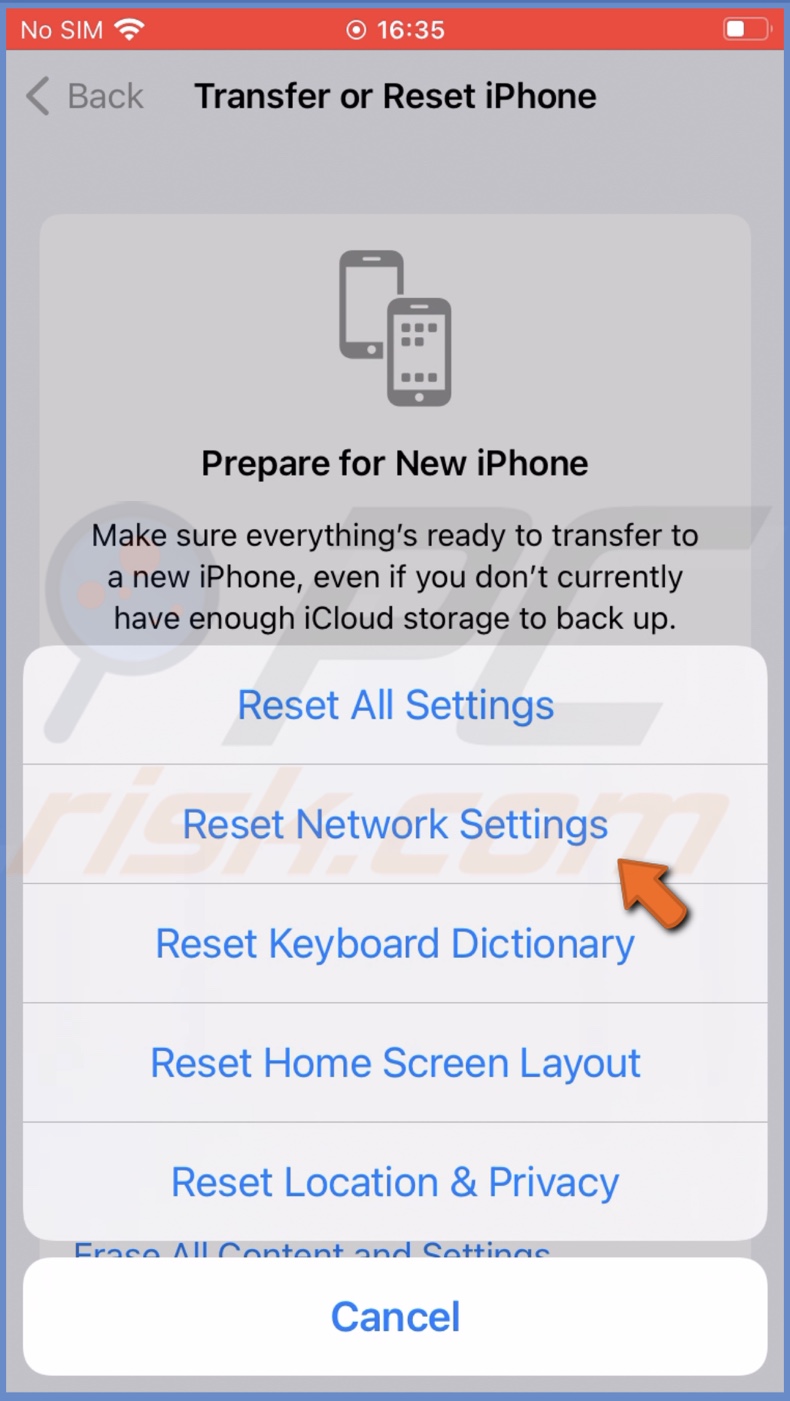
5. Enter the passcode and confirm the action.
Update your iPhone
The last thing you can do is update your iPhone's operating system. The issue can also be due to problems with the device software.
To update your iPhone, follow the steps below:
1. Open the Settings app.
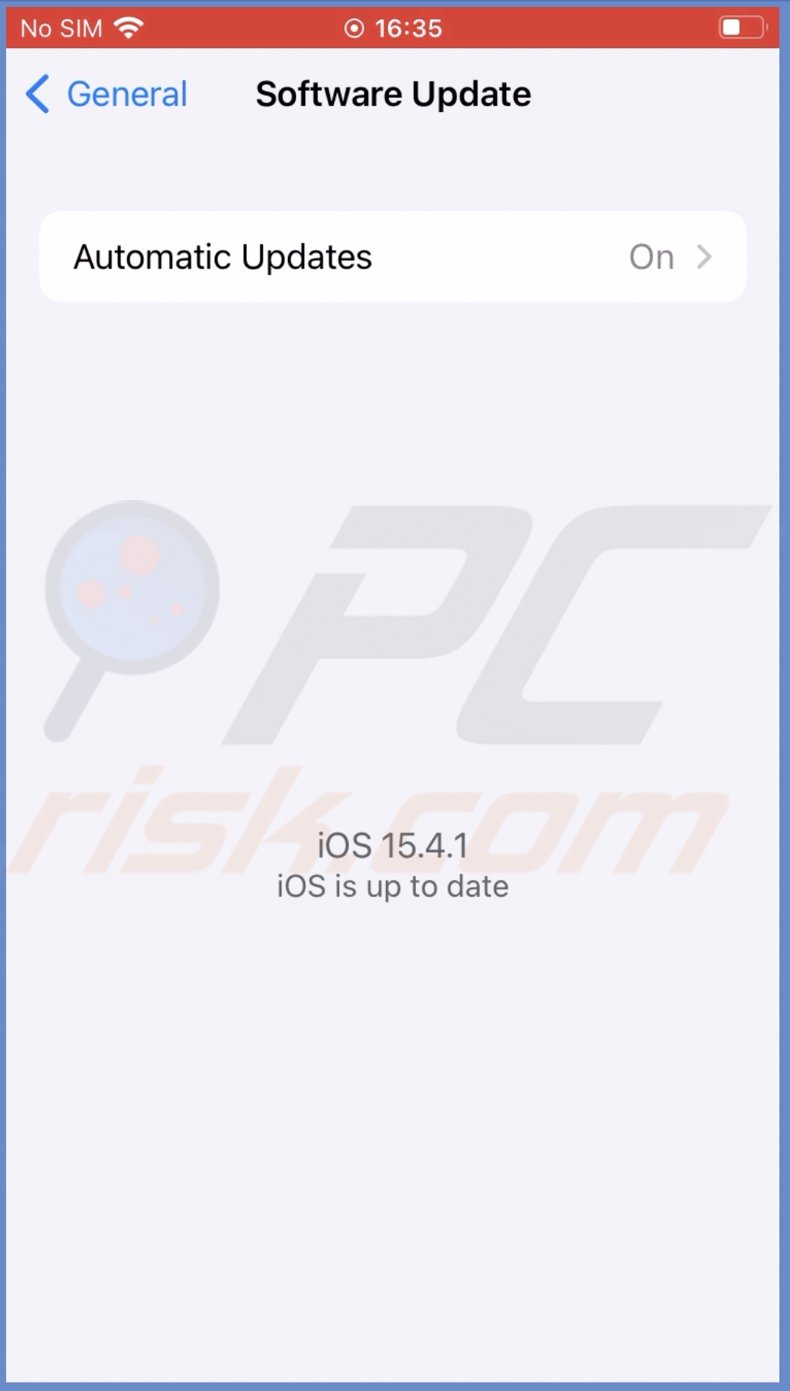
2. Go to "General" settings.
3. Tap on "Software Update".
4. Wait for your iPhone to search for updates. If found any, tap on "Download and Install".
We hope this guide provided you with the information you were looking for and it helped you fix the delayed notification issue on your iPhone.
Share:

Karolina Peistariene
Author of how-to guides for Mac users
Responsible for collecting, analyzing, and presenting problem-solving solution articles related to macOS issues. Years of macOS experience combined with solid research and analyzing skills help Karolina provide readers with working and helpful solutions as well as introduce various features Mac has to offer.
▼ Show Discussion