How to send large files for free from your iPhone, iPad, and Mac?

Get Free Scanner and check your computer for errors
Fix It NowTo fix found issues, you have to purchase the full version of Combo Cleaner. Free trial available. Combo Cleaner is owned and operated by Rcs Lt, the parent company of PCRisk.com read more.
6 ways to send large files on iPhone, iPad, and Mac
Sending large files can be a struggle, especially when the quality of videos, images and document files is getting better and better. Which means the size of the files also gets bigger. So what to do when you need to send a big file?
Well, Apple users have a few options to choose from when it comes to sending files. You can choose a method depending on what device the receiver is using, the proximity of both devices as well as the set file size limit.
In this guide, you'll find 6 ways you can send large files and the rules and limits of each method.
Video on How to send large files for free from your iPhone, iPad, and Mac?
Table of Contents:
- Introduction
- Send files using AirDrop
- Send files using Mail Drop
- Send files using Image Capture
- Send files using iTunes or Finder
- Send files using Telegram
- Send files using iCloud or other cloud services
- Video on How to send large files for free from your iPhone, iPad, and Mac?
Download Computer Malware Repair Tool
It is recommended to run a free scan with Combo Cleaner - a tool to detect viruses and malware on your device. You will need to purchase the full version to remove infections. Free trial available. Combo Cleaner is owned and operated by Rcs Lt, the parent company of PCRisk.com read more.
Send files using AirDrop
With AirDrop, you can send files only to other Apple devices, and both devices need to be in near proximity. What's great is that AirDrop doesn't have a file size limit, but the send time will vary depending on the size of the file.
To send files using AirDrop on Mac, follow the steps below:
1. Open Finder.
2. Click on the "AirDrop" option on the left sidebar.
3. Then, on the right side, you'll see all discoverable devices that you're able to send files.
4. Drag your file on the device you want to send the file to and release it.
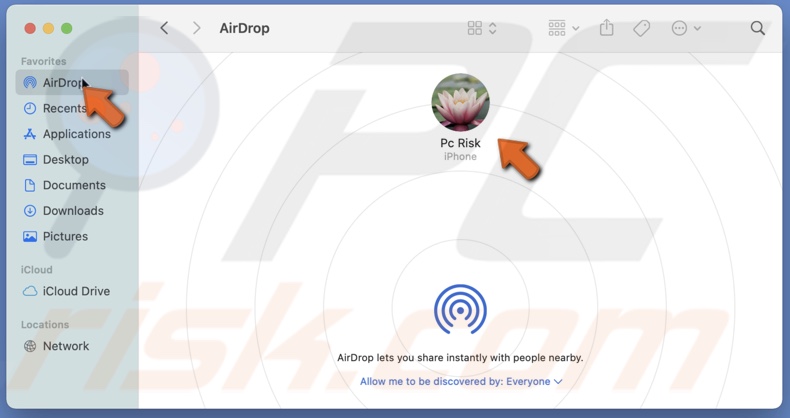
5. When the other person accepts the files, it will start the download process.
To send files using AirDrop on iPhone and iPad, follow the steps below:
1. Navigate to the file you want to send on your device.
2. Tap on it and tap on the "Share" icon.

3. Then, tap on "AirDrop".
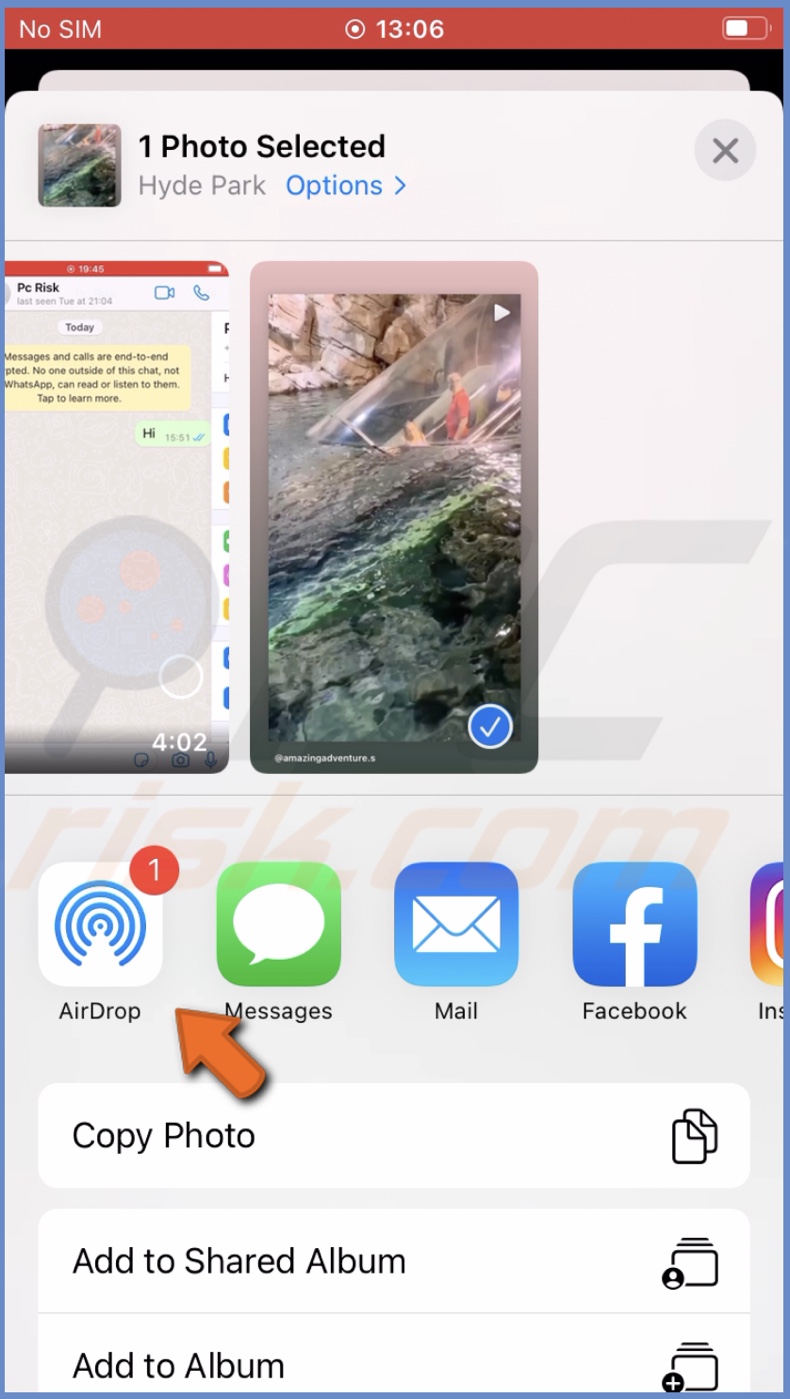
.4. A window will appear with all visible devices. Tap on the device you want to send the file to and wait until the other person accepts the file.
Send files using Mail Drop
Mail Drop allows you to send attachments not bigger than 5 GB without any problem as it uses iCloud to send the files. It uploads them to iCloud, and the recipient gets only the attachment link. When the link is opened, they can download the file.
You can send files using Mail Drop from your iPhone, iPad, Mac, and iCloud Mail. The feature works with all email services providers as long as your account is added to the Mail app or you're using iCloud Mail.
You can find out how to send files using Mail Drop by visiting our guide on What is Mail Drop and how to send big files with it on iOS and macOS?
Send files using Image Capture
With Image Capture, you can send large files from Your iPhone, iPad, or other cameras to Mac. Both devices need to be connected with a cable.
To send files using Image Capture on iPhone and iPad, follow the steps below:
1. Connect your iPhone or iPad to Mac with a lightning cable.
2. Open the Image Capture app.
3. Then, unlock your iPhone or iPad to see your photos in the Image Capture window.
4. On your keyboard, press the Command key and select all images you want to save to the Mac.
5. When done, click on the "Import" or "Download" button. Or you can click on "Import All" or "Download All" to download all images.
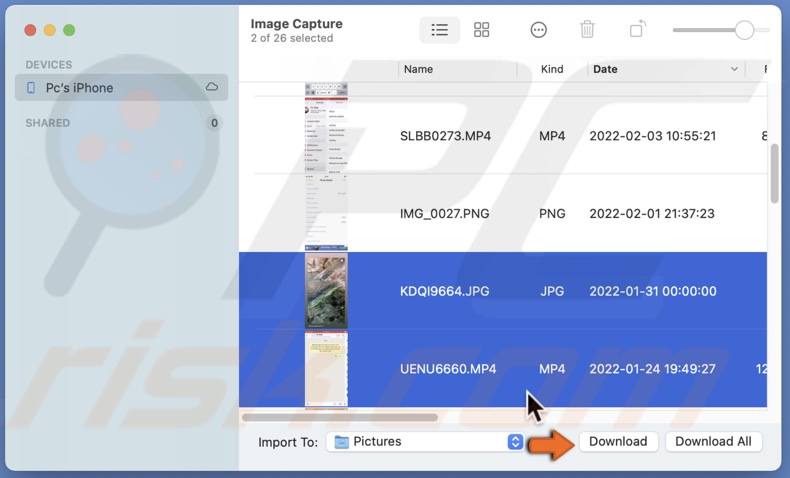
6. The photos will be saved to the "Downloads" folder.
Send files using iTunes or Finder
With iTunes and Finder, you can send large files from your iOS device to a Mac or a Windows computer. In this case, both devices need to be connected with a cable or connected to the same internet.
To send files using iTunes or Finder, follow the steps below:
1. Connect your iOS device to a Mac or a Windows computer with an appropriate cable.
2. On Mac, running Catalina or a later OS, open Finder. On older Macs and PCs, open iTunes.
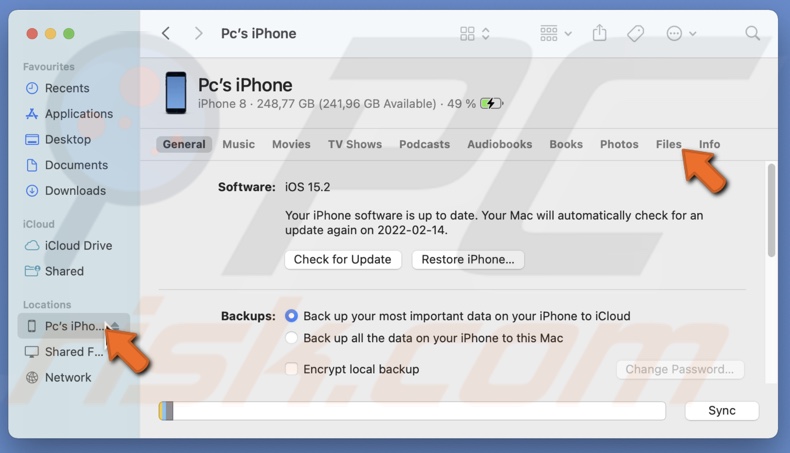
3. In the Finder window, on the left sidebar, click on your iPhones name. On iTunes, click on the phone icon and select your device.
4. If you're connecting the iPhone or iPad to the computer for the first time, click on "Trust" when asked.
5. Then, go to the "Files" tab.
6. Depending on the files you want to import, click on the arrow next to the app that the file is in.
7. Locate the file, select, and drag it to the Mac or Windows desktop. You can then save it where you want.
To import files from your iPhone or iPad to Mac or a PC using Wi-Fi, go to the "General" tab and select "Show this iPhone when on Wi-Fi".
Send files using Telegram
Telegram is a messaging app that allows you to send files up to 2GB. With the app, you can send files from your Apple device to any other device that has Telegram as well.
The file sending process is quite simple. It's the same as sending a message. All you need to do is attach your image, video, or any other file that doesn't exceed the size limit.

Send files using iCloud or other cloud services
Sending files is very simple with iCloud. You can send a big file from your iPhone, iPad, or Mac to any device. The devices don't need to be close to each other or connected with a cable. This option is only available with an internet connection.
To send files using iCloud, follow the steps below:
1. Go to your iCloud Drive.
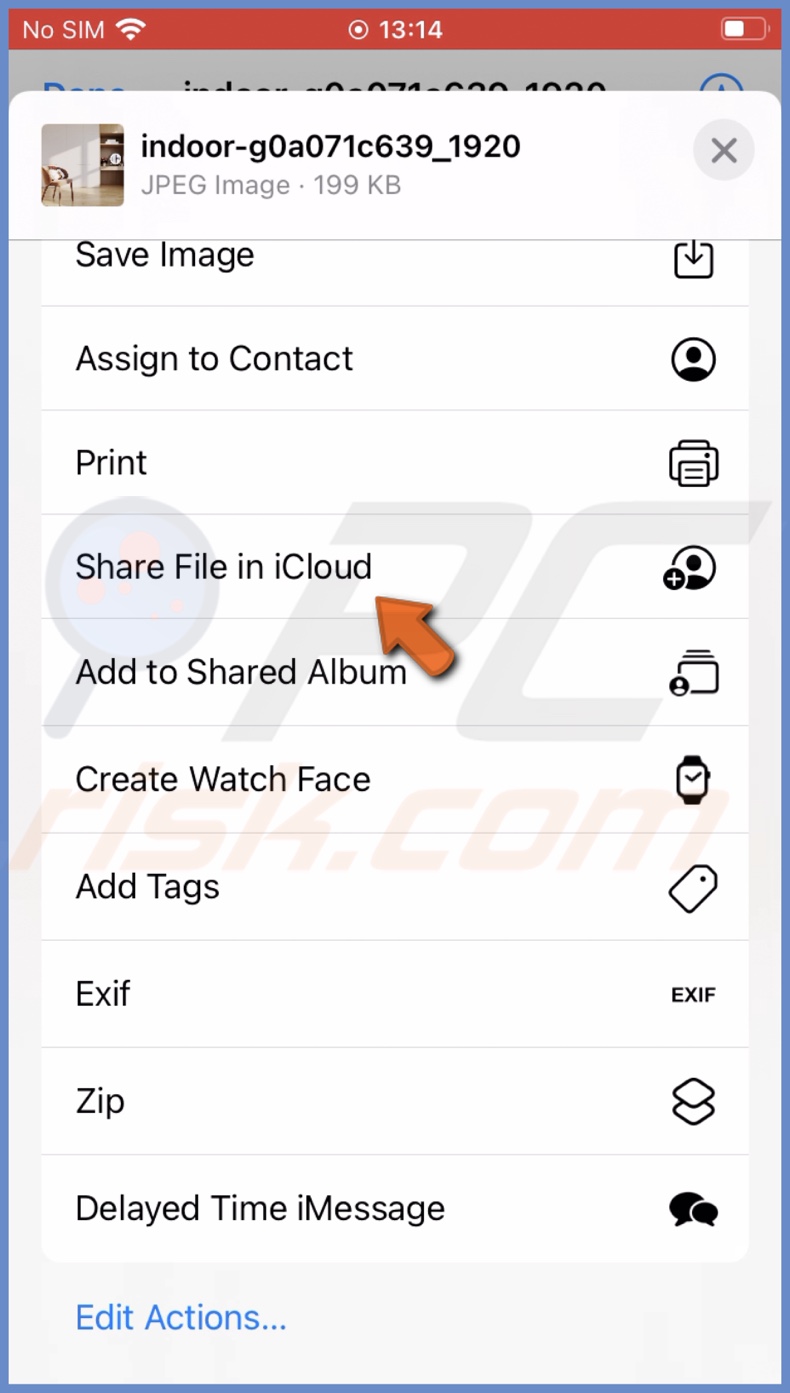
2. Locate the file you want to send and tap on it.
3. Then, tap on the "Share" icon and select "Share File in iCloud".
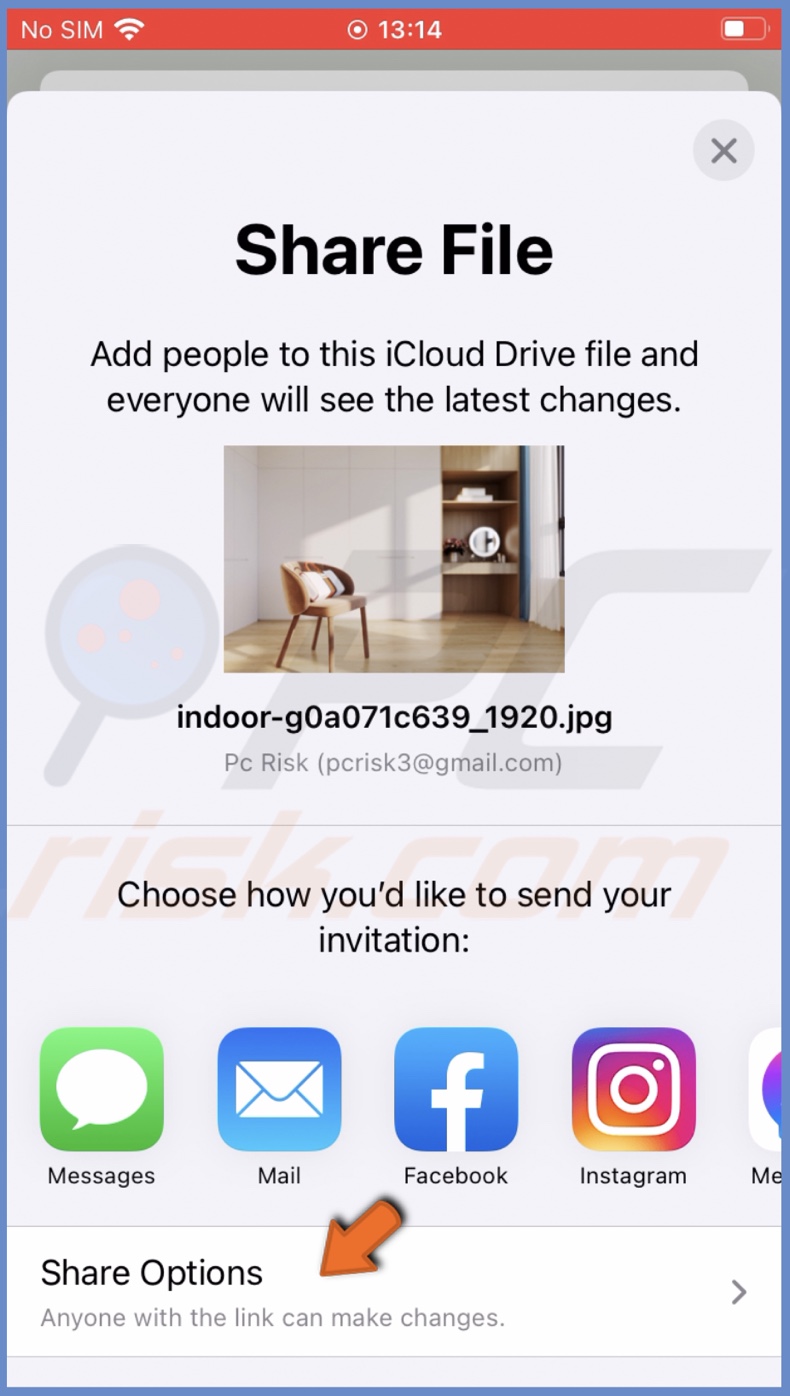
4. Tap on "Share Options", select the permission you prefer and go back. With the "Anyone with the link" option, others won't have to have an Apple ID to download the file. With the "Only people you invite" option, the receiver will have to have an Apple ID.
5. Select an app you want to send the file link in.
6. The receiver can download the file by tapping on the link.
When you want to stop sharing the link, you can deactivate it.
To stop sharing the file link, follow the steps below:
1. Tap on file in your iCloud Drive and tap on the "Share" icon.
2. Then, tap on "Manage Shared File".
3. Tap on "Stop Sharing".
To share large files, you can also use other cloud services like Google Drive, OneDrive, Dropbox, etc. The size limit of the file depends on the cloud storage service you're going to use.
We hope this guide provided you with the information you were looking for and now know the options you have when sending large files.
Share:

Karolina Peistariene
Author of how-to guides for Mac users
Responsible for collecting, analyzing, and presenting problem-solving solution articles related to macOS issues. Years of macOS experience combined with solid research and analyzing skills help Karolina provide readers with working and helpful solutions as well as introduce various features Mac has to offer.
▼ Show Discussion