Learn to Scan and Sign Documents From the Notes App on Your iPhone and iPad

Get Free Scanner and check your computer for errors
Fix It NowTo fix found issues, you have to purchase the full version of Combo Cleaner. Free trial available. Combo Cleaner is owned and operated by Rcs Lt, the parent company of PCRisk.com read more.
Scan and Sign Your Documents Using the Free Notes App on iPhone and iPad
Even if you don't work with documents every day, there will come a day when you'll be asked to send a scanned document. There are many reasons why you can get asked that, and you are probably reading this article because you already need to scan some documents.
Finding a third-party app that could scan your documents without annoying ads popping up and without needing to pay a monthly subscription is most likely impossible. So why waste your time when you can use the document scanner located in the Notes app. It's already integrated into your device and won't charge you or show you ads.
If you want to learn how to scan and sign documents with the Notes app on your iPhone and iPad, you've come to the right place. Keep on reading to find out more.
Video on Scan and Sign Your Documents Using the Free Notes App on iPhone and iPad
Table of Contents:
- Introduction
- Scan a Document Using the Notes App on iPhone and iPad
- Sign a Document Using the Notes App on iPhone and iPad
- Video on Scan and Sign Your Documents Using the Free Notes App on iPhone and iPad
Download Computer Malware Repair Tool
It is recommended to run a free scan with Combo Cleaner - a tool to detect viruses and malware on your device. You will need to purchase the full version to remove infections. Free trial available. Combo Cleaner is owned and operated by Rcs Lt, the parent company of PCRisk.com read more.
Scan a Document Using the Notes App on iPhone and iPad
You don't need to use third-party scanner apps because the Notes app has one integrated. With a few clicks, you'll scan your documents and convert them to PDF.
To scan documents using the Notes app, follow the steps below:
1. Open the Notes app.
2. You can either create a new note or select an already created one and add the document to it.
3. Then, tap on the "Camera" icon.
4. When a quick menu appears, tap on "Scan Documents".

5. When the camera opens, point it to the document and wait for the scanner to scan it automatically. If it doesn't scan automatically, tap on the shutter button to scan it automatically.
6. If you don't like how the document was scanned, tap on the "Retake" button in the bottom left corner and scan it again.
7. To scan another document, tap on the "Keep Scan" button in the bottom right corner
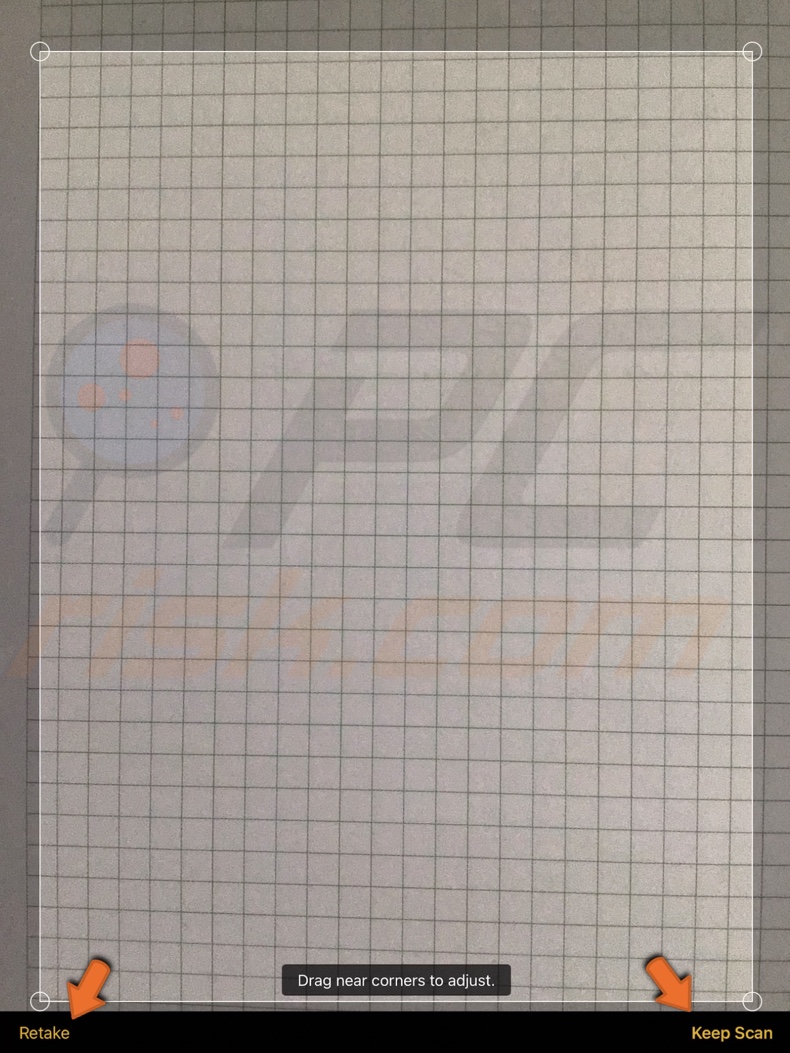
7. When you have finished scanning all documents, at the bottom right corner, tap on "Save".
8. The scanned document(s) will appear in your note.
9. Tap on the document preview.
10. Then, tap on the "Share" icon.
11. From the menu, select "Save to Files".
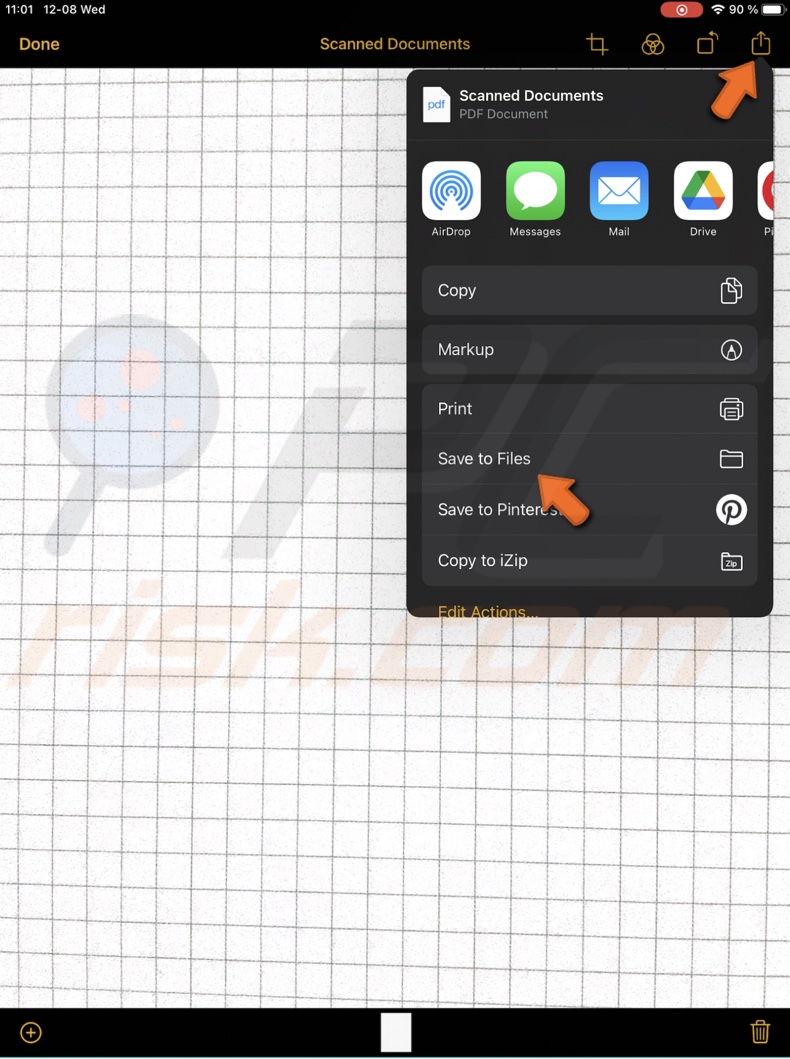
12. The PDF file will be saved in the Files app.
Now you know how to scan documents with the Notes app. It's pretty easy and quick.
Sign a Document Using the Notes App on iPhone and iPad
When you scan your document in the Notes app, you can also sign it. It's quite a straightforward process.
To sign a document using the Notes app, follow the steps below:
1. Open the Notes app.
2. Go to the note where your scan document is.
3. Tap on the document preview.
4. Then, tap on the "Share" icon.
5. When a menu appears, tap on the "Markup" option.
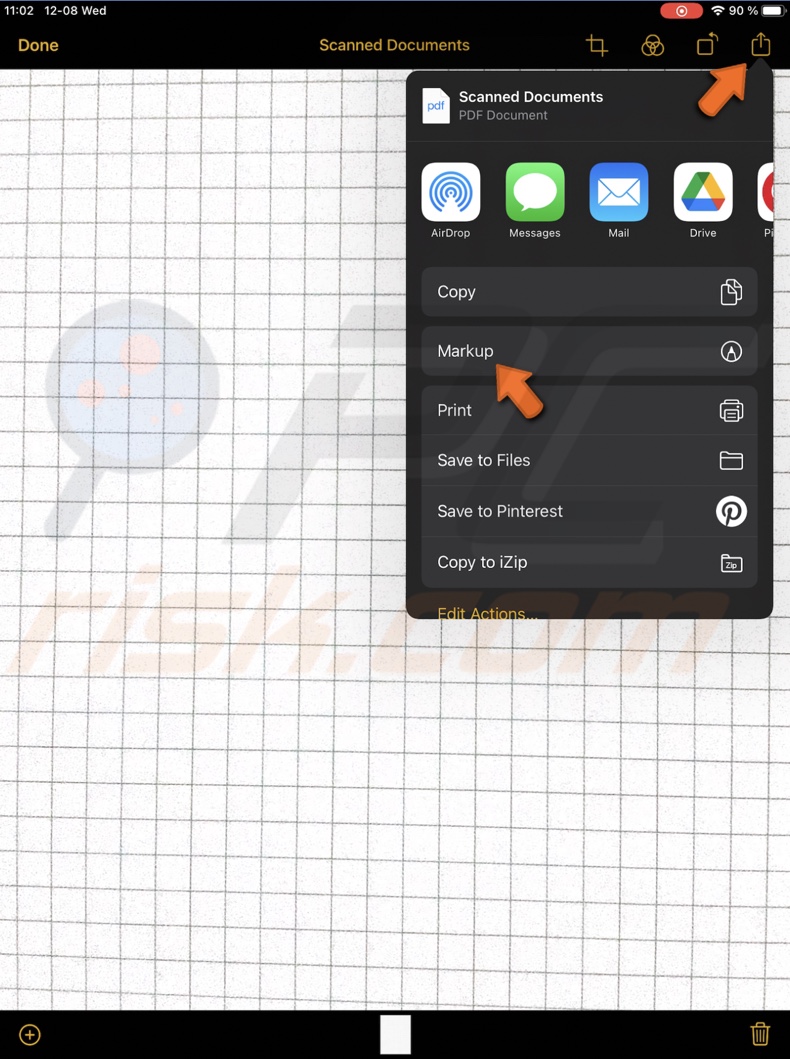
6. A pencil icon will appear in the bottom left corner. Tap on it.
7. Next to the color selection, you'll see a plus button. Tap on it and select "Signature".
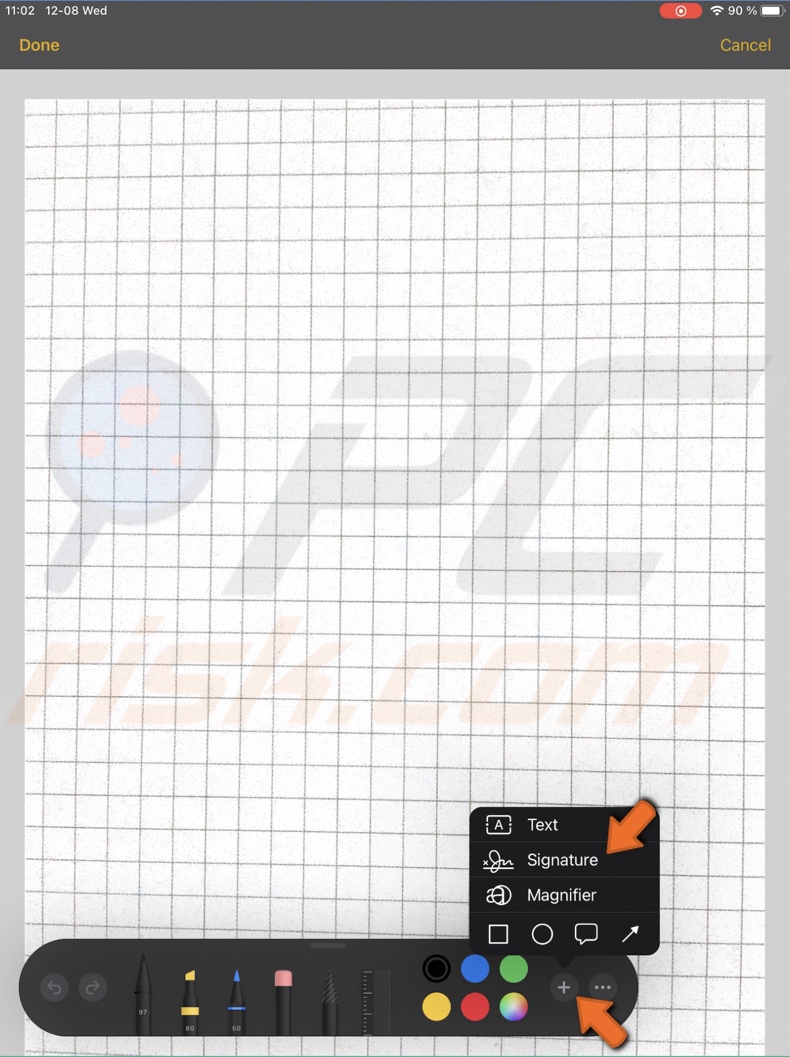
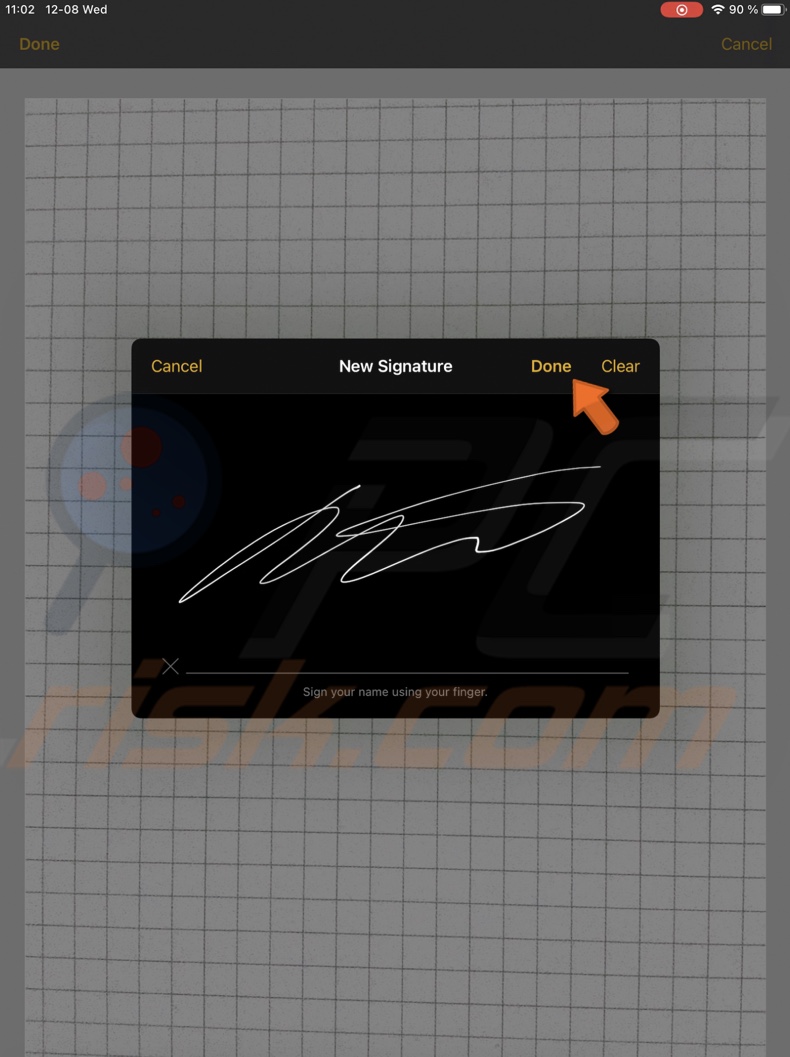
8. A box will appear asking you to write your signature.
9. When done, tap on "Done".
10. Your signature will appear on the document. You can now position it where you need. You can also resize it as you please.
11. When you'll want to add the signature again, instead of creating a new one, tap on your already created one.
If your signature changes or you don't like how it turned out, you can remove it and add another one.
We hope this guide provided you with the information you were looking for, and you learned a new feature that your iPhone/iPad has to offer.
Share:

Karolina Peistariene
Author of how-to guides for Mac users
Responsible for collecting, analyzing, and presenting problem-solving solution articles related to macOS issues. Years of macOS experience combined with solid research and analyzing skills help Karolina provide readers with working and helpful solutions as well as introduce various features Mac has to offer.
▼ Show Discussion