No More FaceTime Lags During Calls on Mac! Follow These Easy Steps

Get Free Scanner and check your computer for errors
Fix It NowTo fix found issues, you have to purchase the full version of Combo Cleaner. Free trial available. Combo Cleaner is owned and operated by Rcs Lt, the parent company of PCRisk.com read more.
Fix FaceTime Lagging on Mac With These 8 Ways!
To communicate with friends and family members, all you need to do is make a few clicks with your mouse, and you can see another person on the screen of your Mac. FaceTime is one of those apps that makes it possible. But what to do when FaceTime starts lagging like crazy?

FaceTime, like any other application, can encounter various issues. Some problems you can fix yourself, and others are out of your hands. FaceTime can start lagging when your Mac is almost out of battery, many apps are opened at once, network settings are changed, and so on. These are the issue you can fix yourself by following this guide.
Error in the operating system, FaceTime server not working, and others are the errors you can't fix and can only wait while Apple fixes them for you.
Video on No More FaceTime Lags During Calls on Mac! Follow These Easy Steps
Table of Contents:
- Introduction
- Method 1. Keep Your Mac on Power Supply
- Method 2. Check FaceTime Server
- Method 3. Close All Other Apps
- Method 4. Restart Mac
- Method 5. Check Your Network Connection
- Method 6. Clear Out Mac Storage
- Method 7. Change the DNS Settings
- Method 8. Update the Operating System
- Video on No More FaceTime Lags During Calls on Mac! Follow These Easy Steps
Download Computer Malware Repair Tool
It is recommended to run a free scan with Combo Cleaner - a tool to detect viruses and malware on your device. You will need to purchase the full version to remove infections. Free trial available. Combo Cleaner is owned and operated by Rcs Lt, the parent company of PCRisk.com read more.
Keep Your Mac on Power Supply
If FaceTime is lagging and you notice that your Mac has a low battery, plug it into a power source. This might have an influence on FaceTime, although it's unlikely. But it won't hurt to try.
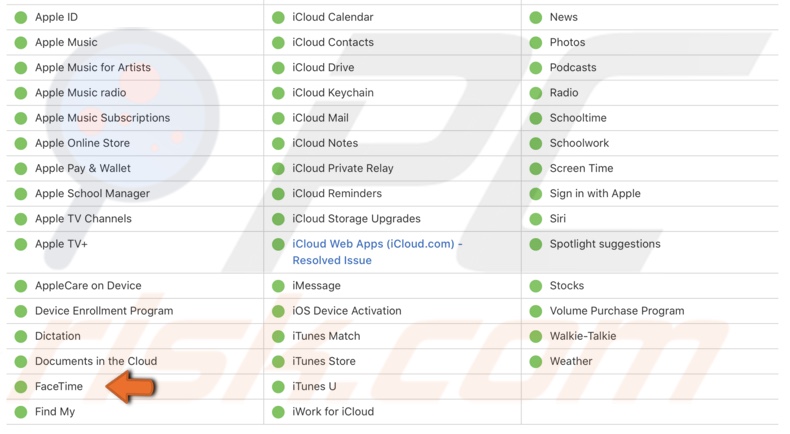
Check FaceTime Server
The second thing you can do is to check if the Apple FaceTime server is active. Sometimes, various problems can cause the server to stop working. Usually, Apple reacts quickly and tries to fix it as fast as possible.
In this case, there's nothing you can do but wait until the server is back to work.
Visit the Apple System Status webpage to check the server status.
Close All Other Apps
FaceTime uses quite a lot of your computer's recourses. If you have other apps running in the background while using FaceTime, it can slow everything down.
For example, if you're in a FaceTime call and at the same time watching a movie using Chrome or any other fast browser, it will probably cause the FaceTime app to lag. This can happen if you have an older Mac that can't handle a lot of action.
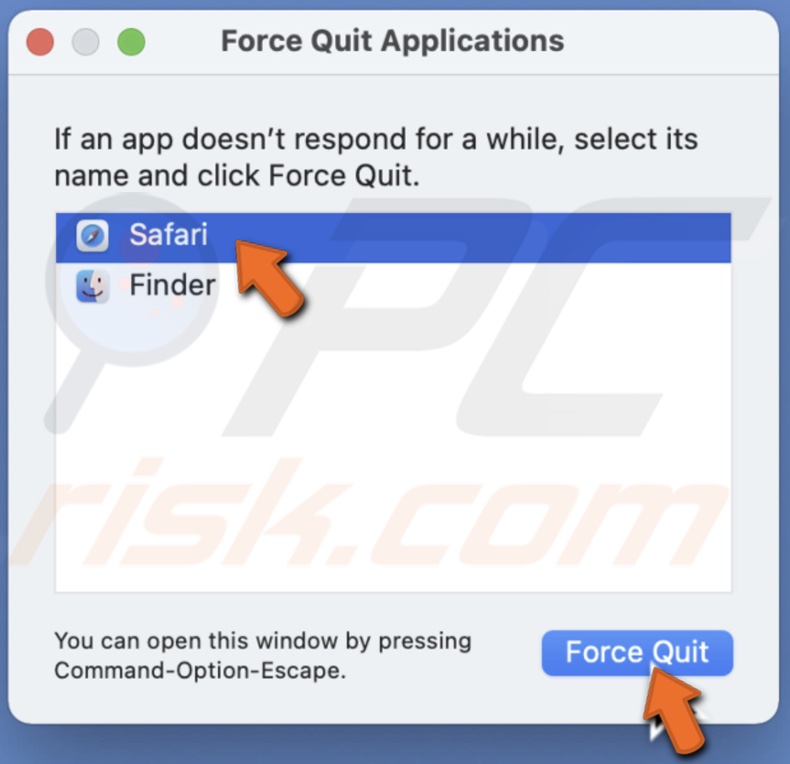
To quickly close all apps press the Command + Option + Esc keys on your keyboard. From the Force Quit menu select an app and click on "Force Quit".
Restart Mac
If you're not sure you closed all the apps running in the background, you can restart your Mac. The restart will close all open apps as well as eliminate any minor error the system might have encountered.
Check Your Network Connection
For FaceTime to not lag, it requires a fast internet connection and good bandwidth. That's because it needs to stream both audio and video at the same time. That being said, try to move the router closer. If that's not possible, move next to it yourself.
If you have a lot of family members using the network, it can also slow down your Wi-Fi. If you're on an important call, ask others to stop using the network until you're done.
Another thing you can do is restart the router itself. It should have a power button somewhere on the side or back. To restart the router, turn it off and wait for a minute. Then, turn it back on.
If that doesn't help, you can try to reset network settings. Sometimes, a small error can influence your network connection in a bad way. You can check out our guide on how to reset network settings on your Mac here.
If you think your internet might just be slow, you can check its speed on a website like Speedtest. If the speed of your network is slower than the service provider had promised you, you need to have a little chat with them.
Clear Out Mac Storage
It's possible to encounter network issues if your Mac is running low on space. We recommend cleaning out your storage from time to time.
To check how much storage space you have, follow the step below:
1. Click on the Apple logo.
2. Then, click on "About This Mac".
3. Go to the "Storage" tab.
4. Here, you'll see how much space you have left.
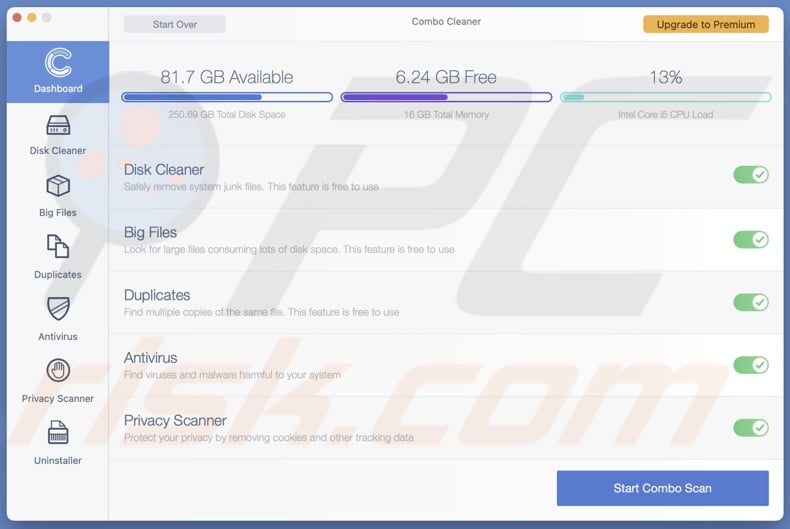
To quickly clean out your Mac storage, we recommend using Combo Cleaner. It will scan your Mac for cache, trash, big and other files. You can learn more here.
Change the DNS Settings
Try to change your DNS settings. If the server that your Internet Service Provider (ISP) has chosen doesn't satisfy you, you can actually change it. This method can be a little complicated, so if you haven't done this, make sure to follow everything step by step.
To change DNS settings, follow the steps below:
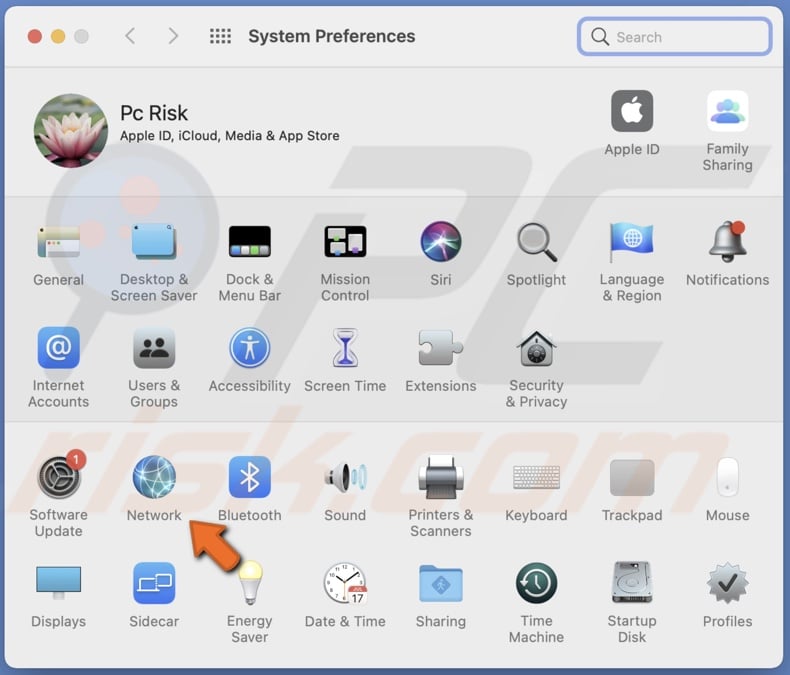
1. Click on the Apple logo.
2. From the menu, select "System Preferences".
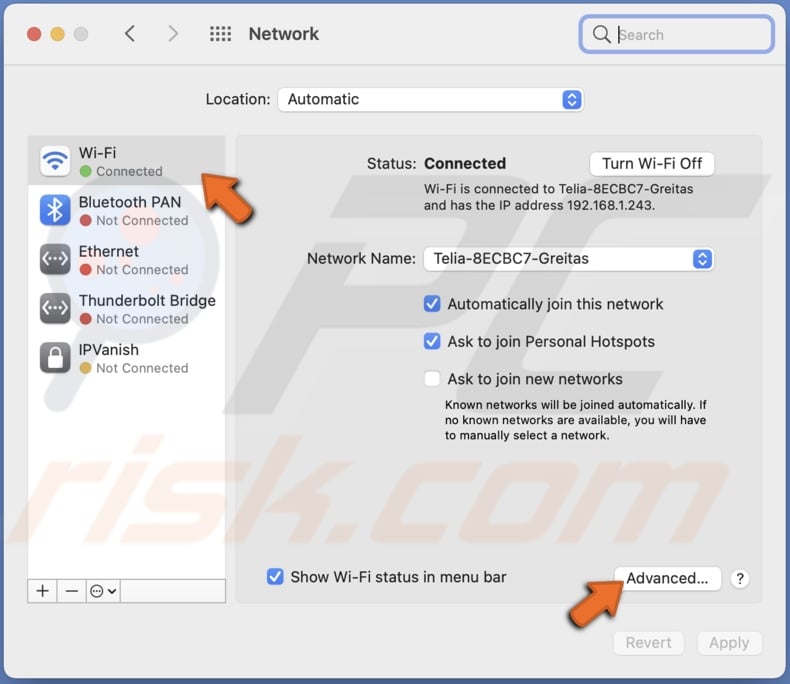
3. Go to "Network".
4. From the left sidebar select "Wi-Fi" and click on "Advanced".
5. Go to the "DNS" tab and click on the "+" button to enter: 8.8.8.8
6. Click on the "+" button again and enter: 8.8.4.4
7. When done, click on "OK".
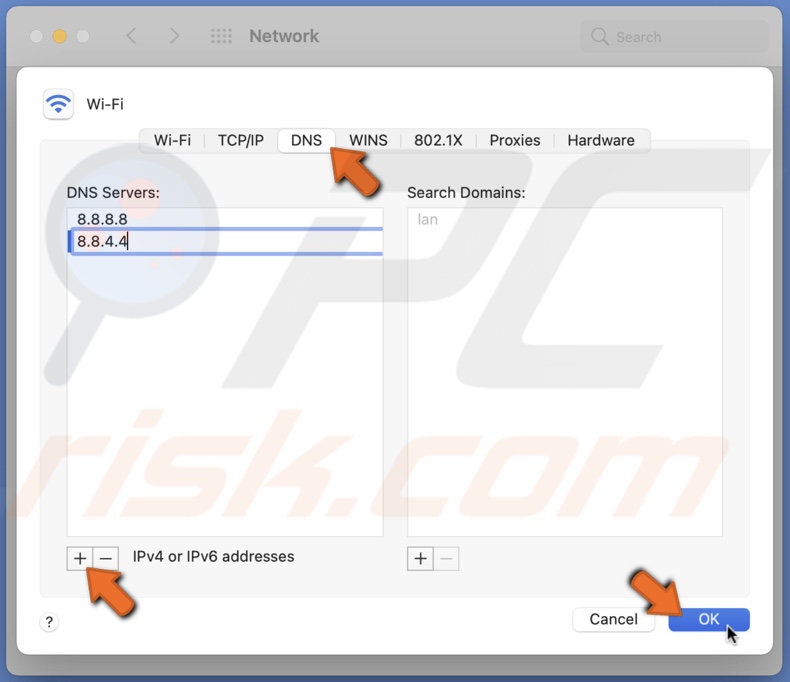
8. When exiting Network settings, click on "Apply" for the changes to take place.
The 8.8.8.8 and 8.8.4.4 are Google's DNS.
Another thing you can do is to clear out the DNS cache. It is pretty helpful in fixing issues with your network.
To flush DNS caches, follow the steps below:
1. Open the Terminal app. You can either open it from Spotlight, Launchpad, or the Utilities folder from Finder.
2. In the Terminal window, enter the command: sudo dscacheutil -flushcache; sudo killall -HUP mDNSResponder
3. Enter your admin account password. Terminal won't show the password characters.

Update the Operating System
If nothing helps, try to update the operating system. The update will eliminate any bugs or errors within the macOS. You see, sometimes network, FaceTime, and other problems are related directly to the OS, and there's nothing you can do but wait for the update.
To update your Mac, follow the steps below:
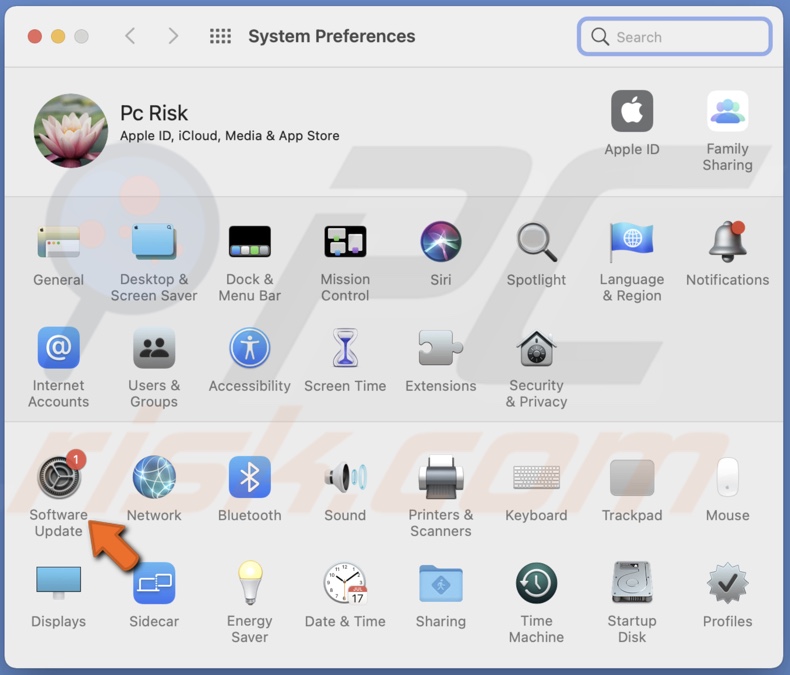
1. Click on the Apple logo.
2. Then, select "System Preferences".
3. When the preference window appears, click on "Software Update".
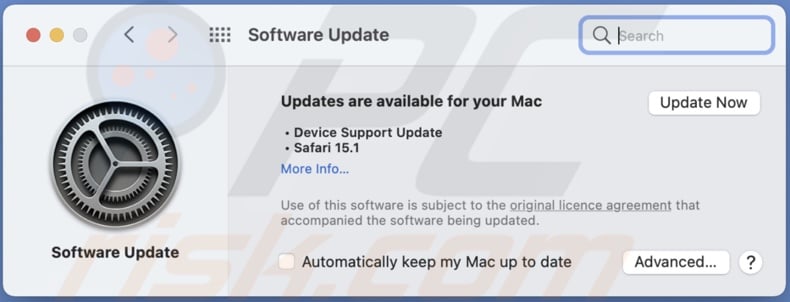
4. Wait while the system looks for updates. If found any, update your Mac.
We hope the information in this guide was helpful. Don't forget to check out the video at the beginning of the guide.
Share:

Karolina Peistariene
Author of how-to guides for Mac users
Responsible for collecting, analyzing, and presenting problem-solving solution articles related to macOS issues. Years of macOS experience combined with solid research and analyzing skills help Karolina provide readers with working and helpful solutions as well as introduce various features Mac has to offer.
▼ Show Discussion