Here's How You Can Zip and Unzip Files on Your iPhone and iPad

(updated)
Get Free Scanner and check your computer for errors
Fix It NowTo fix found issues, you have to purchase the full version of Combo Cleaner. Free trial available. Combo Cleaner is owned and operated by Rcs Lt, the parent company of PCRisk.com read more.
2 Ways You Can Zip and Unzip Files on iPhone and iPad
File compression is an important part of the digital world. It allows us to send big files faster and without any problems. The "zip" compression format, which stands for "speed", is a very popular format used by many businesses and everyday users.
The zip format is popular because it's simple to use and great for compressing many files. While the files are compressed in a zip format, their size is reduced, which allows you to send many big files without any issues. When the zip file is unzipped, the files inside get restored to their original size.
If you're having a hard time getting the hang of how to zip or unzip files on your iPhone or iPad, you came to the right place. In this article, you'll find out how to compress and uncompress files in two ways. Pick the one that's best for you and follow the steps.
Video on 2 Ways You Can Zip and Unzip Files on iPhone and iPad
Table of Contents:
- Introduction
- How to Make a Zip File on iPhone and iPad
- How to Unzip Files on iPhone and iPad
- How to Zip and Unzip Files Using the Shortcuts App on iPhone and iPad
- Video on 2 Ways You Can Zip and Unzip Files on iPhone and iPad
Download Computer Malware Repair Tool
It is recommended to run a free scan with Combo Cleaner - a tool to detect viruses and malware on your device. You will need to purchase the full version to remove infections. Free trial available. Combo Cleaner is owned and operated by Rcs Lt, the parent company of PCRisk.com read more.
How to Make a Zip File on iPhone and iPad
Before creating a zip file, make sure you save your files that will be in the zip file in the "File" app.
To zip multiple files, follow the steps below:
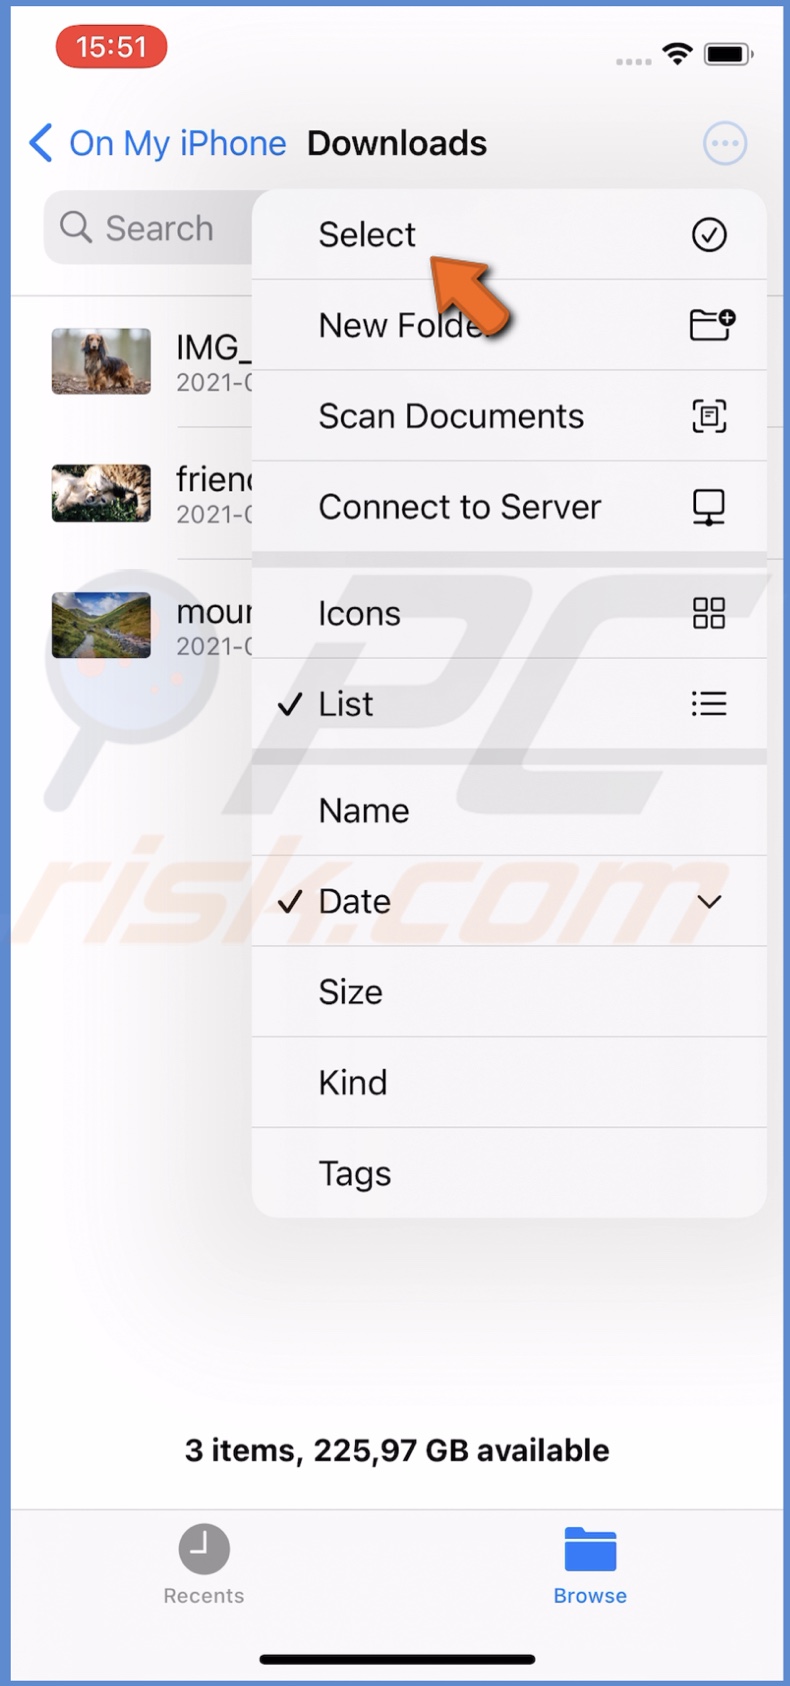
1. Open the "Files" app on your device.
2. Navigate to where the files you want to zip are.
3. In the top right corner, tap on three dots and tap on "Select".
4. Select the files you want to zip.
5. When you've selected all files, tap on the three dots, located at the bottom right corner and tap on "Compress".
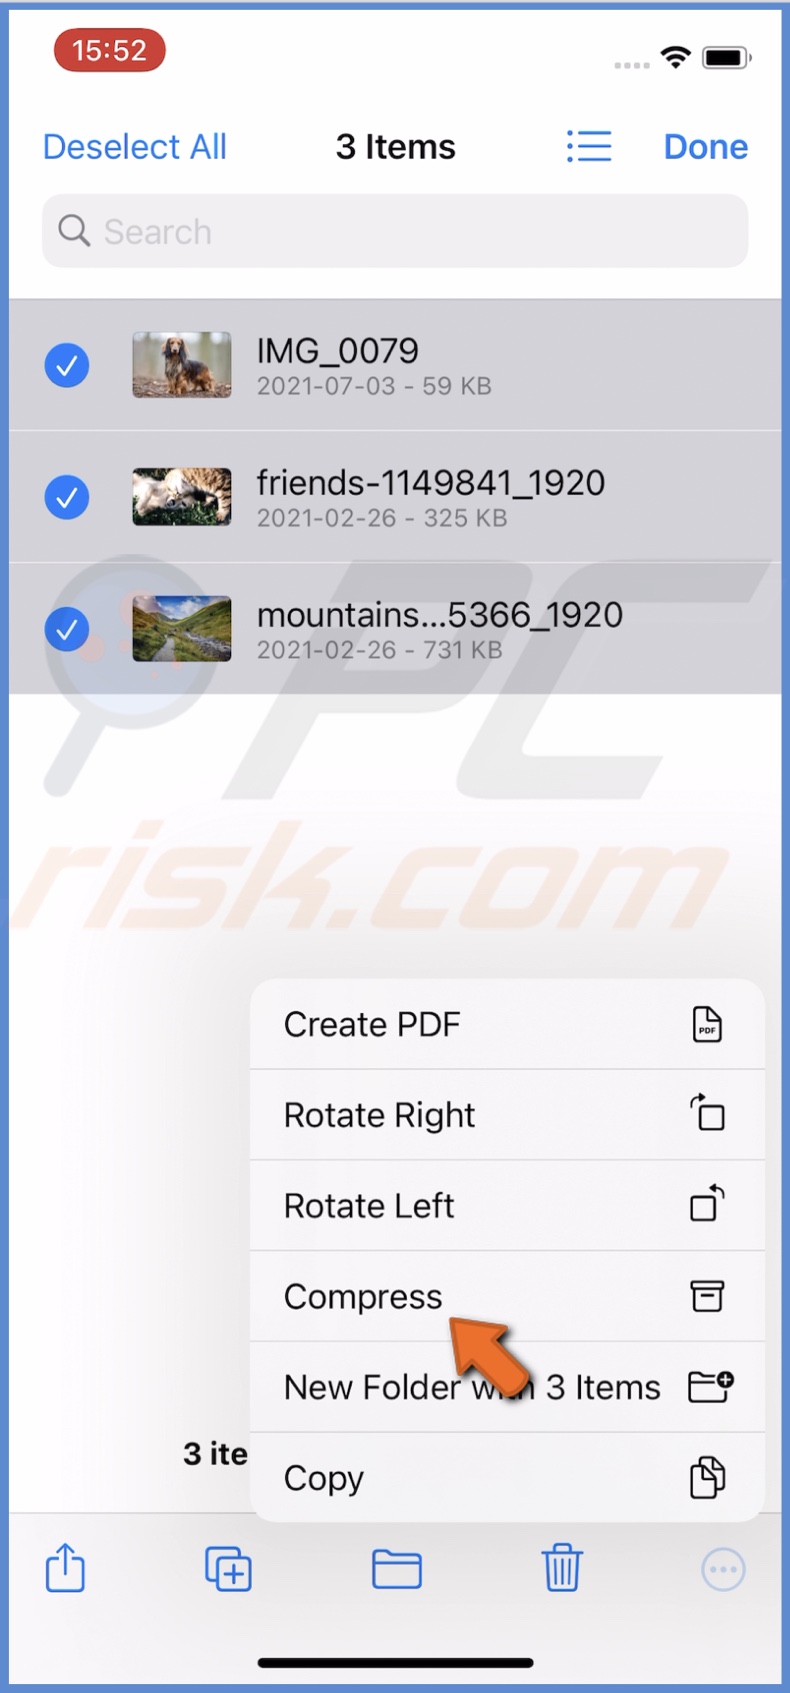
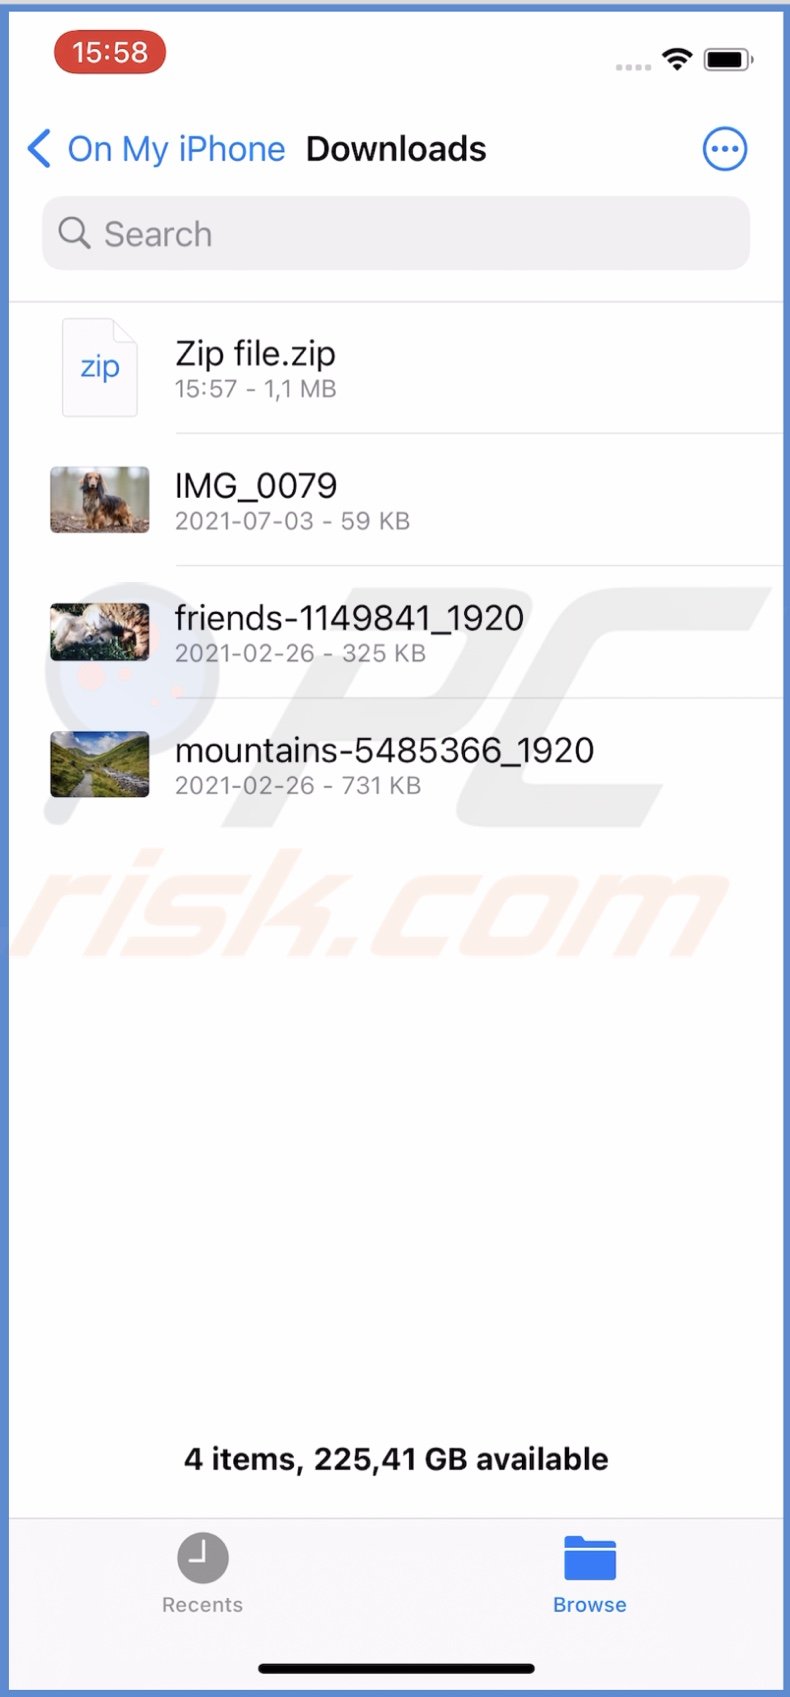
A zip file will be created and placed in the same place as your zipped files.
How to Unzip Files on iPhone and iPad
To unzip files, you'll be using the File folder as well.
To unzip files, follow the steps below:
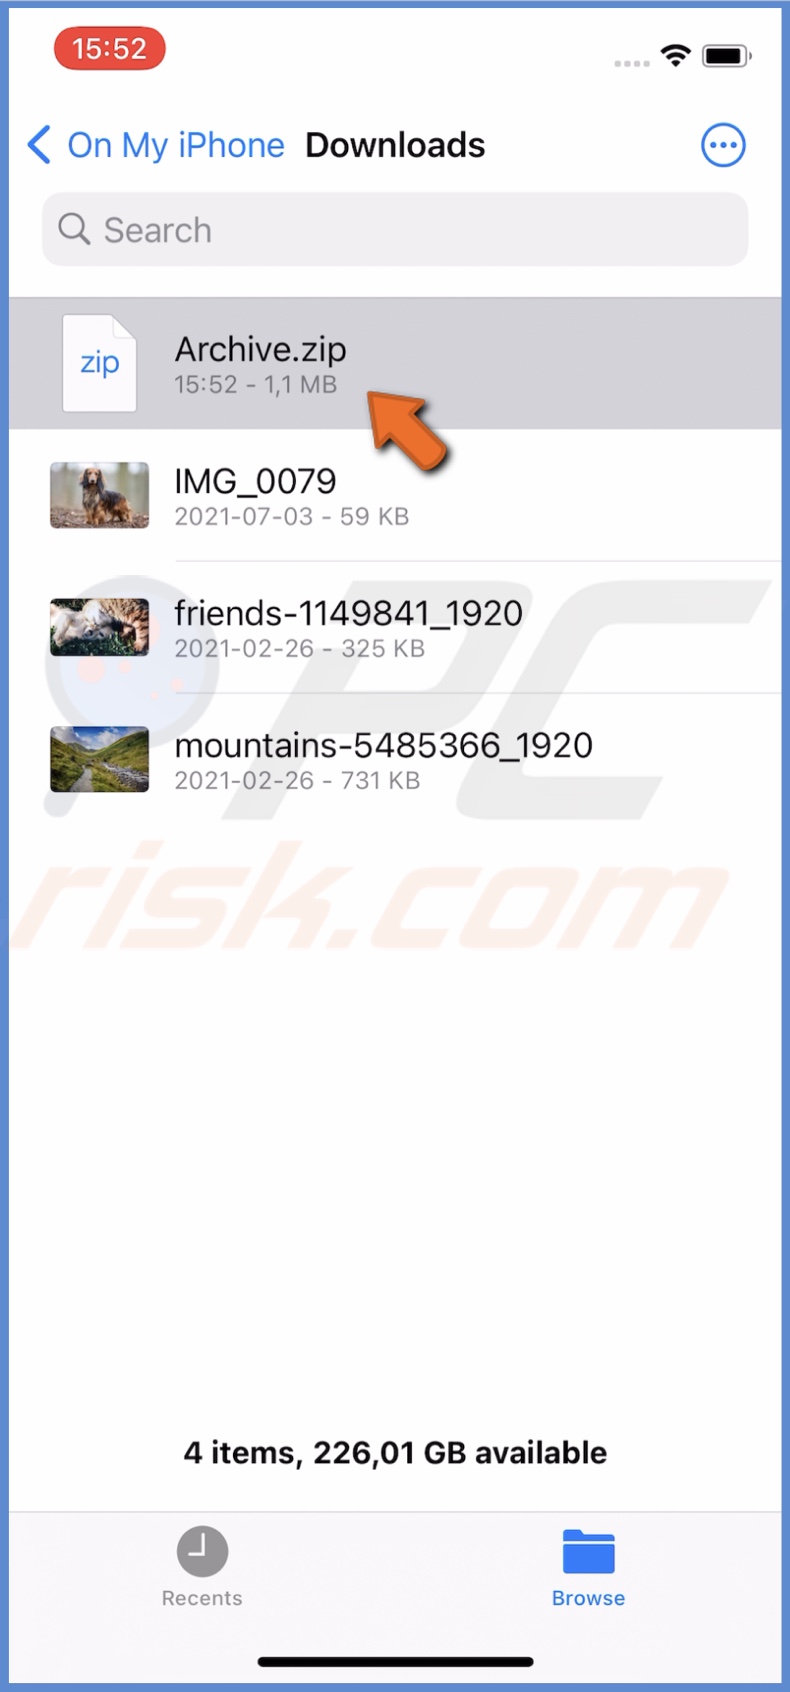
1. Open the "Files" app on your device.
2. Navigate to where the zipped file is located.
3. Tap on the zip file.
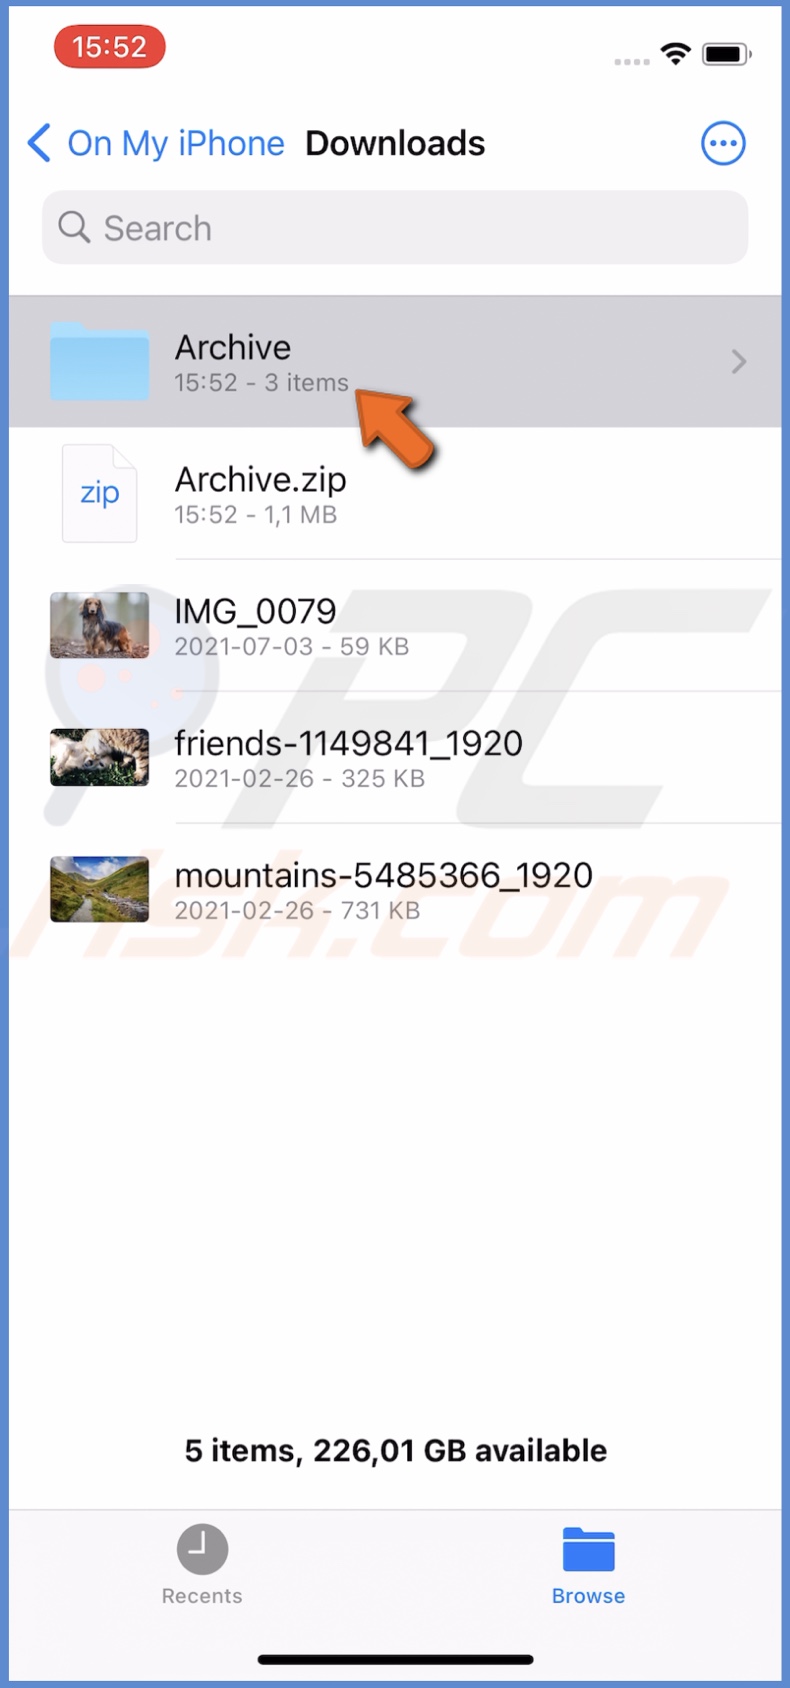
4. A new folder with the same name as the zip file will be created. Tap on it to open and view all the zipped files.
It's simple as that.
How to Zip and Unzip Files Using the Shortcuts App on iPhone and iPad
The Shortcuts app is another excellent way to zip and unzip files on your iPhone. First, you'll need to create a shortcut for zipping files. Then, using that shortcut zip and unzip files. You can download the Shortcuts app from the App Store.
To create a shortcut to zip files, follow the steps below:
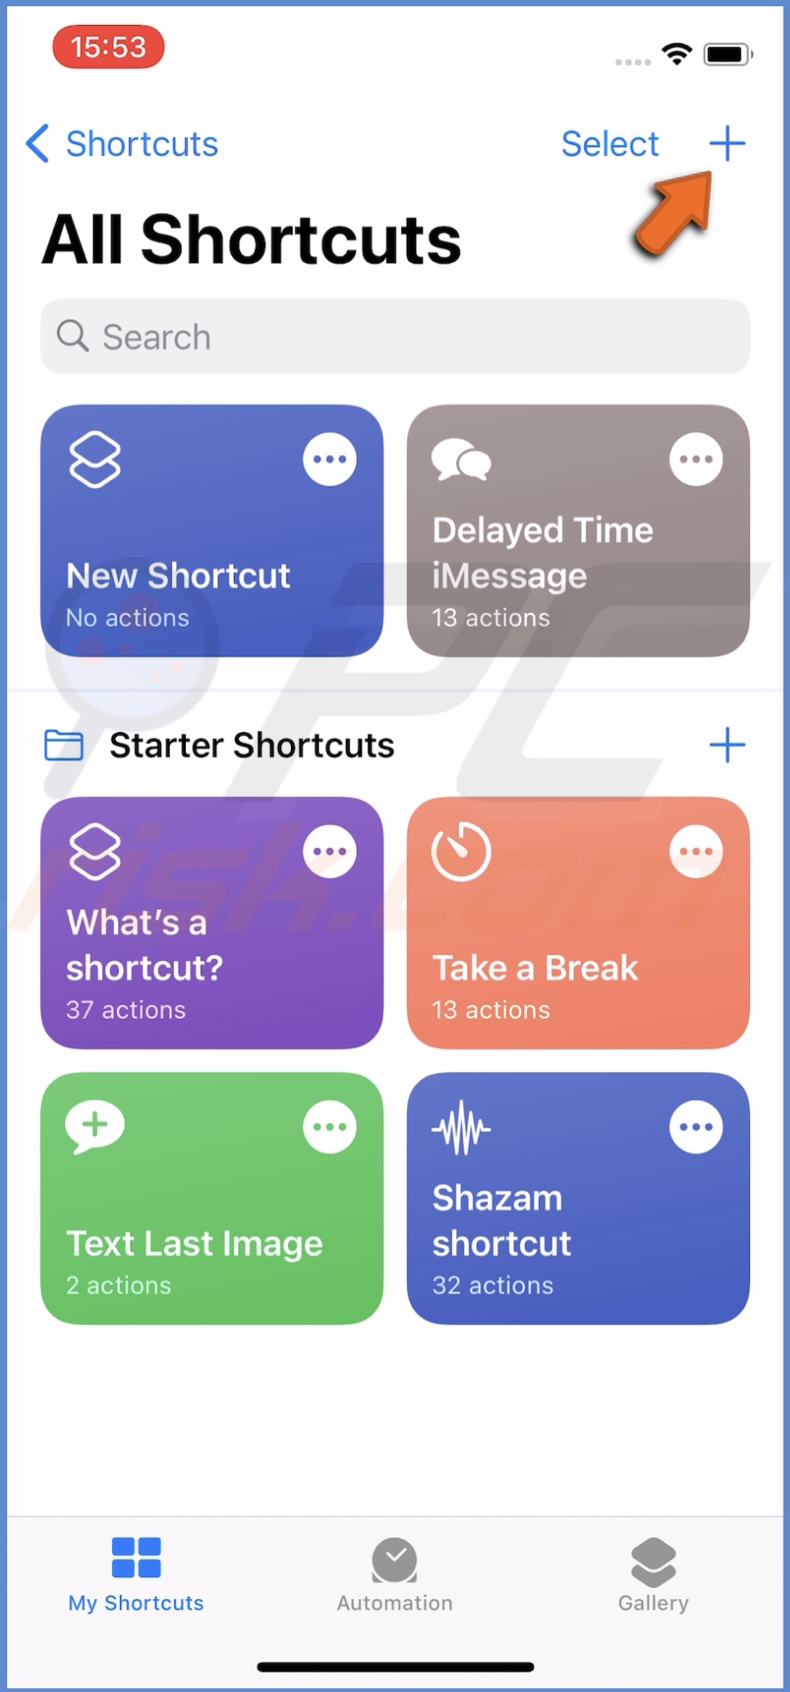
1. Open the "Shortcuts" app.
2. At the top right corner, tap on the "+" button.
3. Then, tap on "Add Action".
4. In the search field, type in "Make Archive" and then tap on the result.
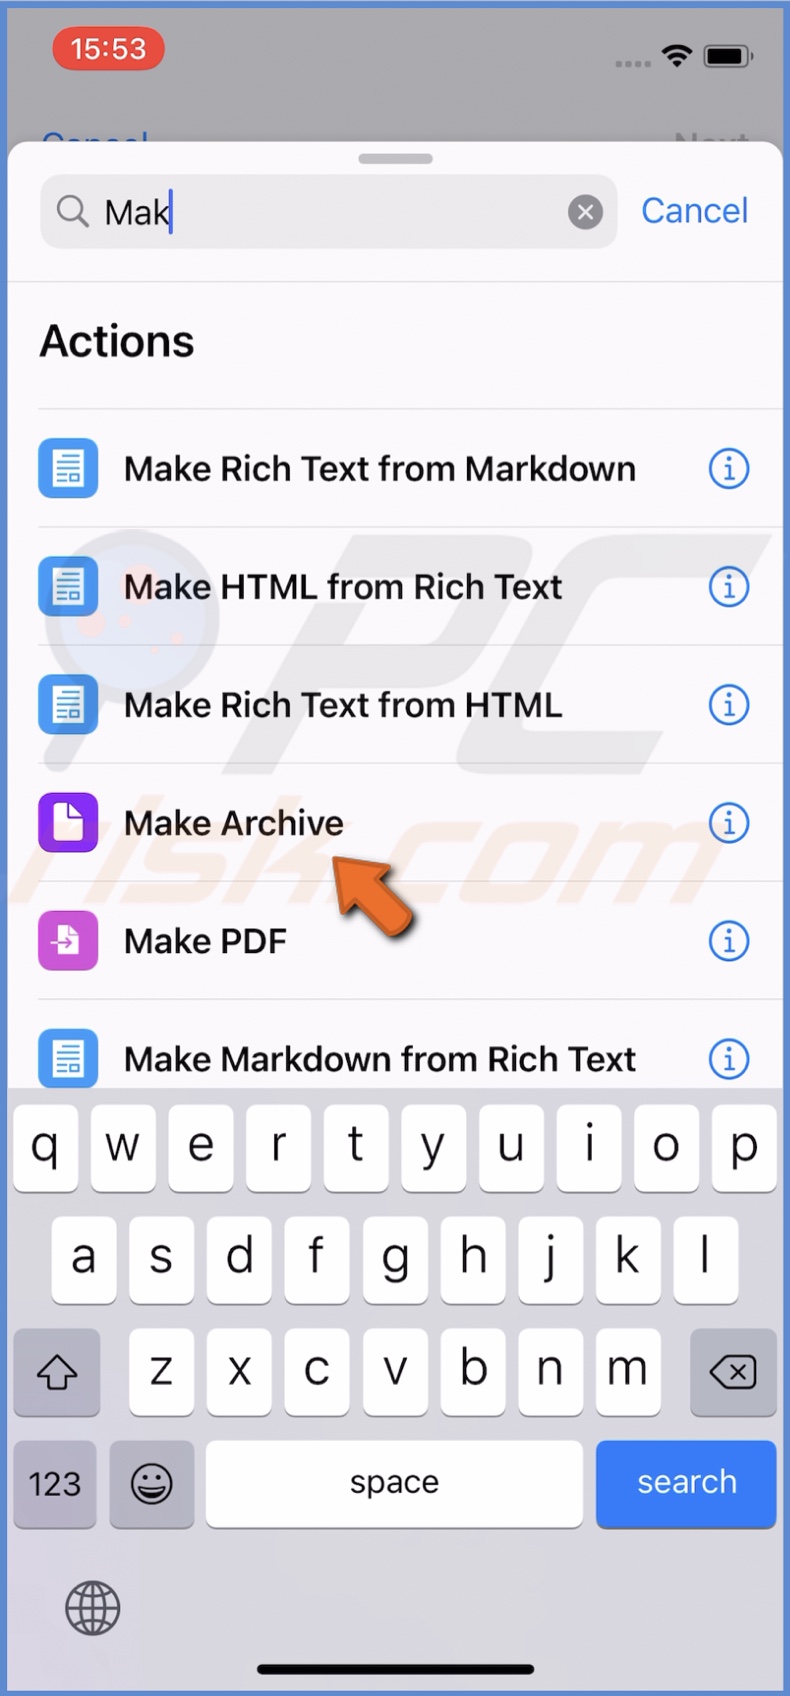
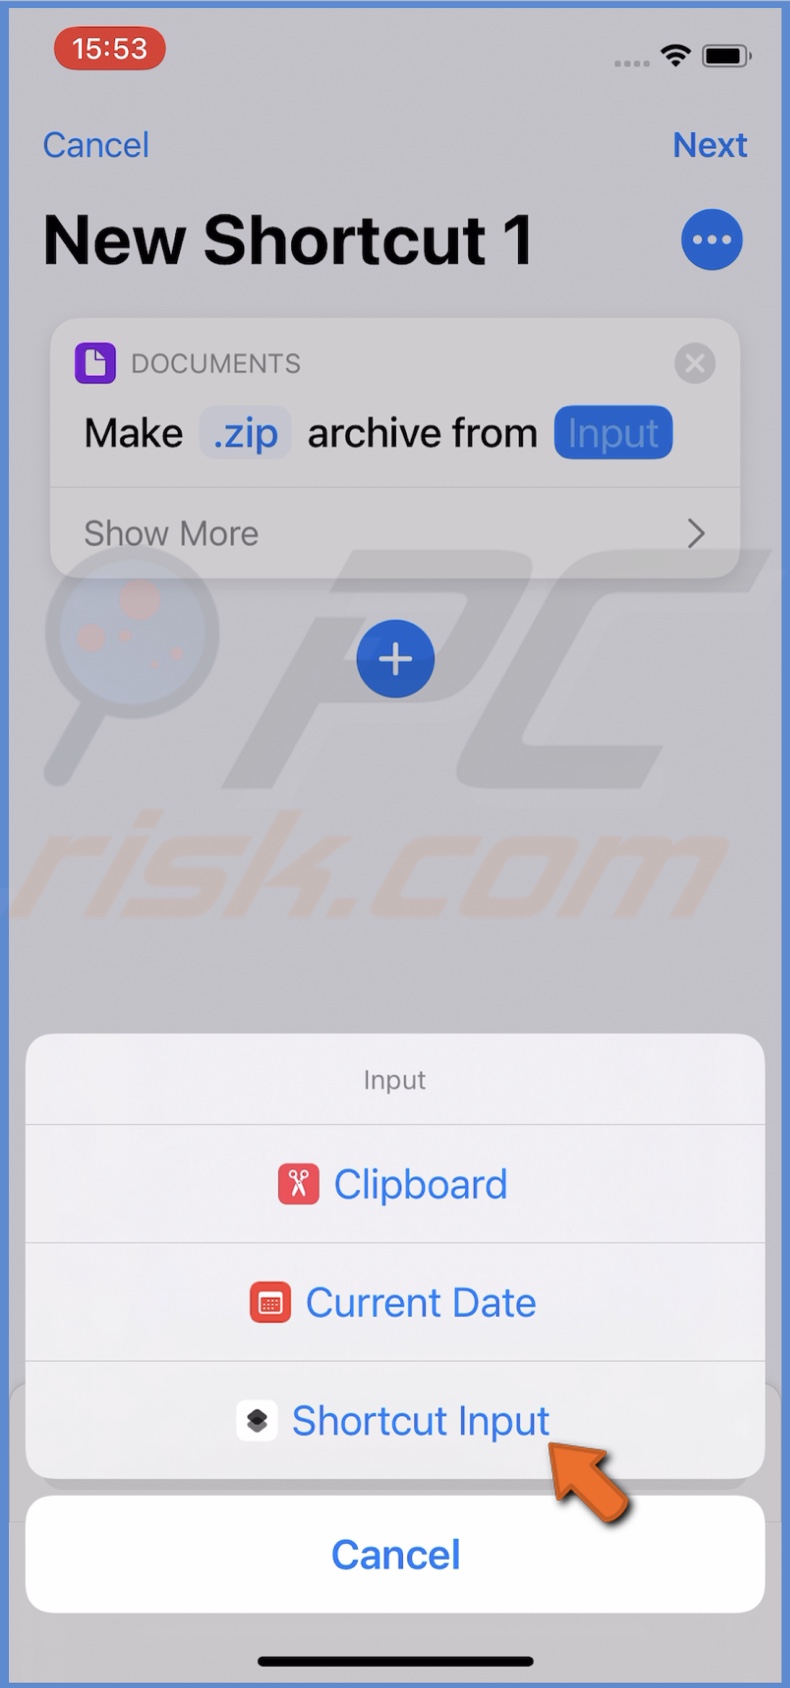
5. Then, tap on "Input" and select "Shortcut Input".
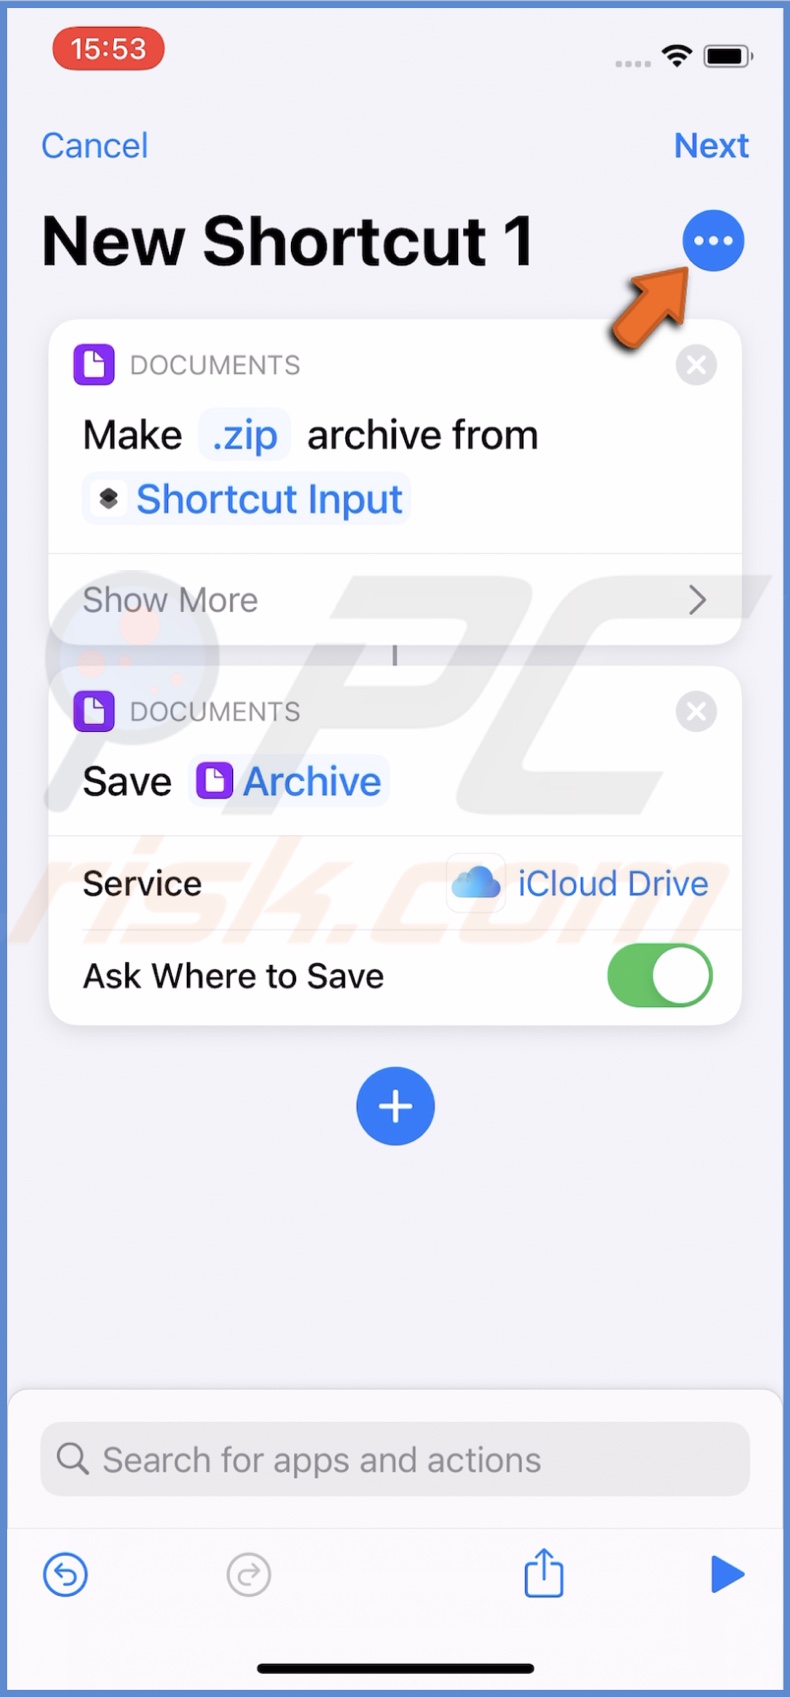
6. Now, tap on the "+" button.
7. In the search field, type in "Save File" and then tap it.

8. Tap on "Service" and choose where you want to save the zip file.
9. In the top right corner, tap on the three dots. Name the shortcut to "Zip".
10. Next to "Show in Share Sheet", toggle the switch to enable the option.
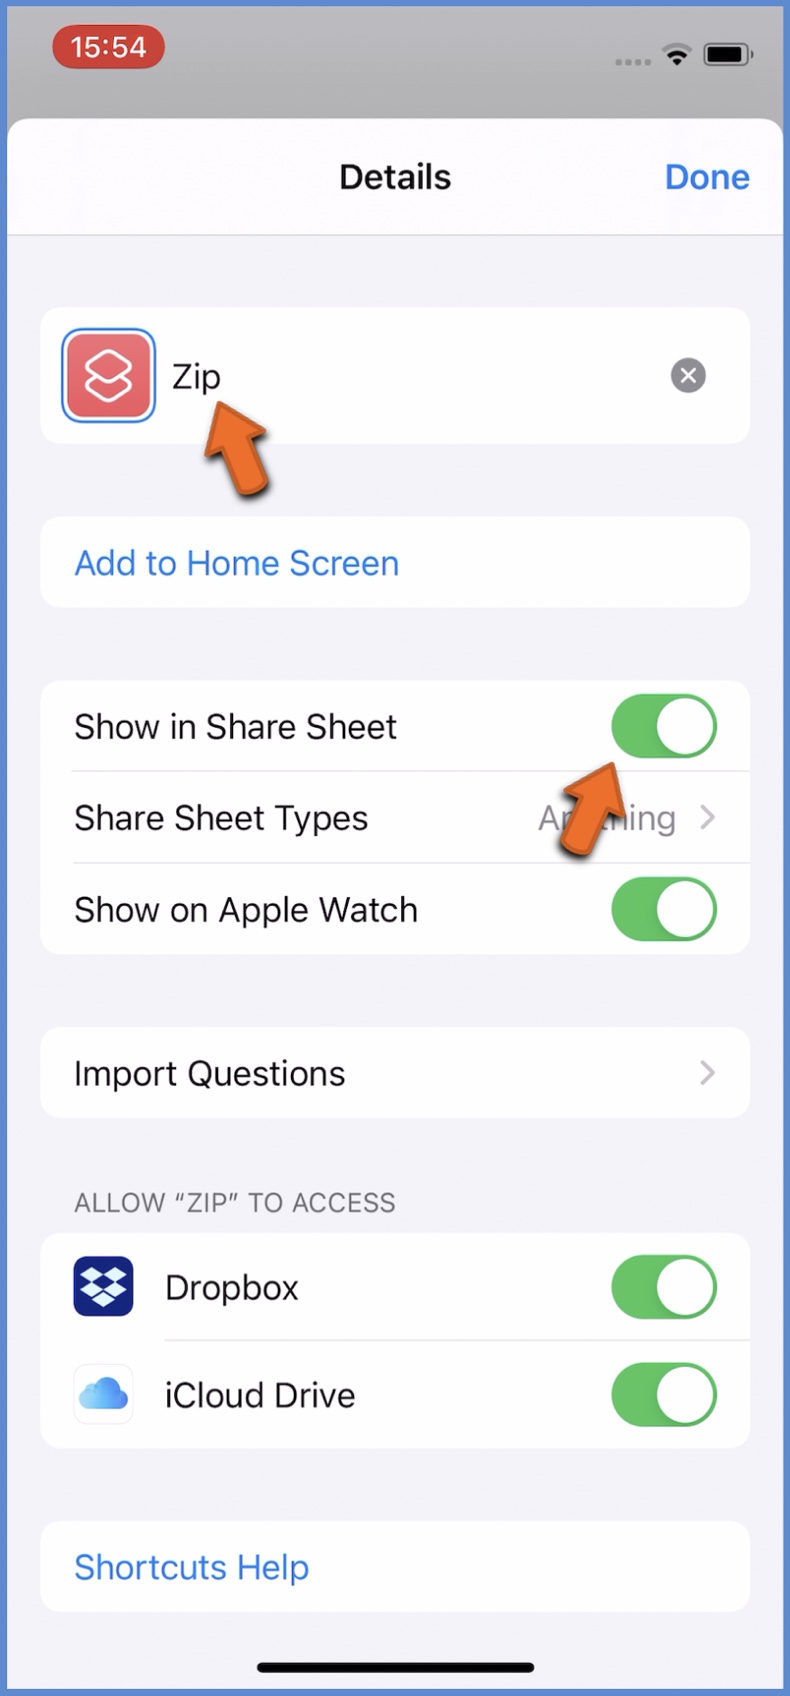
11. If you want to add the shortcut to the Home screen, tap on "Add to Home Screen".
12. When done, tap on "Done".
For unzipping files, follow the same steps above, but instead of adding "Make Archive", add "Extract Archive".
To use the shortcut for zipping files, follow the steps below:
1. Open the "Files" app.
2. Navigate to where the files you want to zip are.
3. At the top right corner, tap on the three dots and on "Select".
4. Select the files you will zip, and at the bottom left corner, tap on the "Share" button.
5. From the list, tap on the "Zip" shortcut and select the location where you want to save the file.
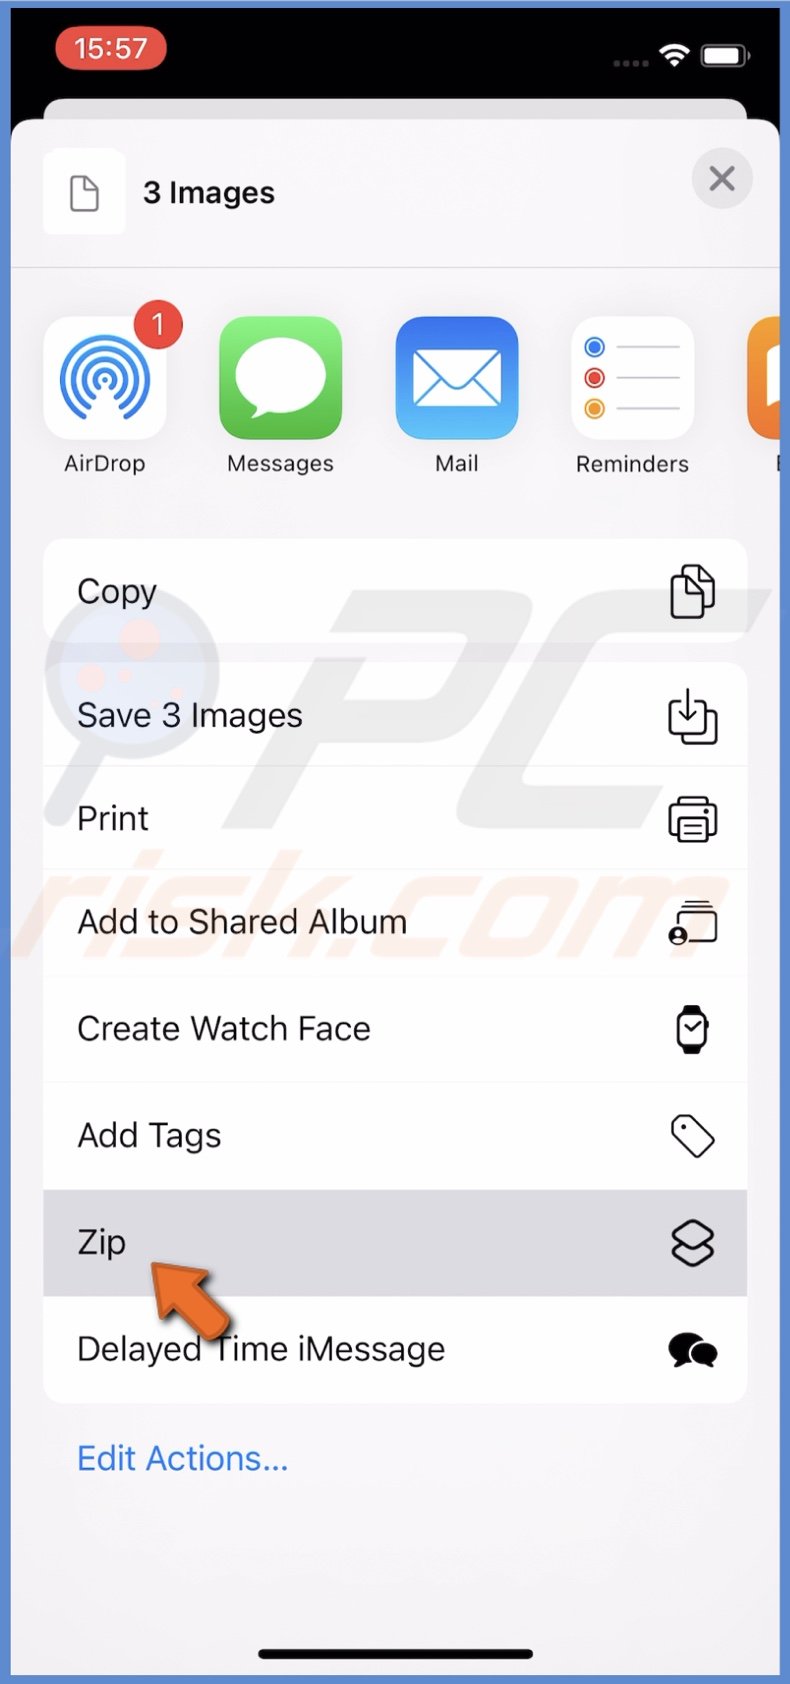
6. Tap on the file name and rename it.
7. When done, at the top right corner, tap on "Save".
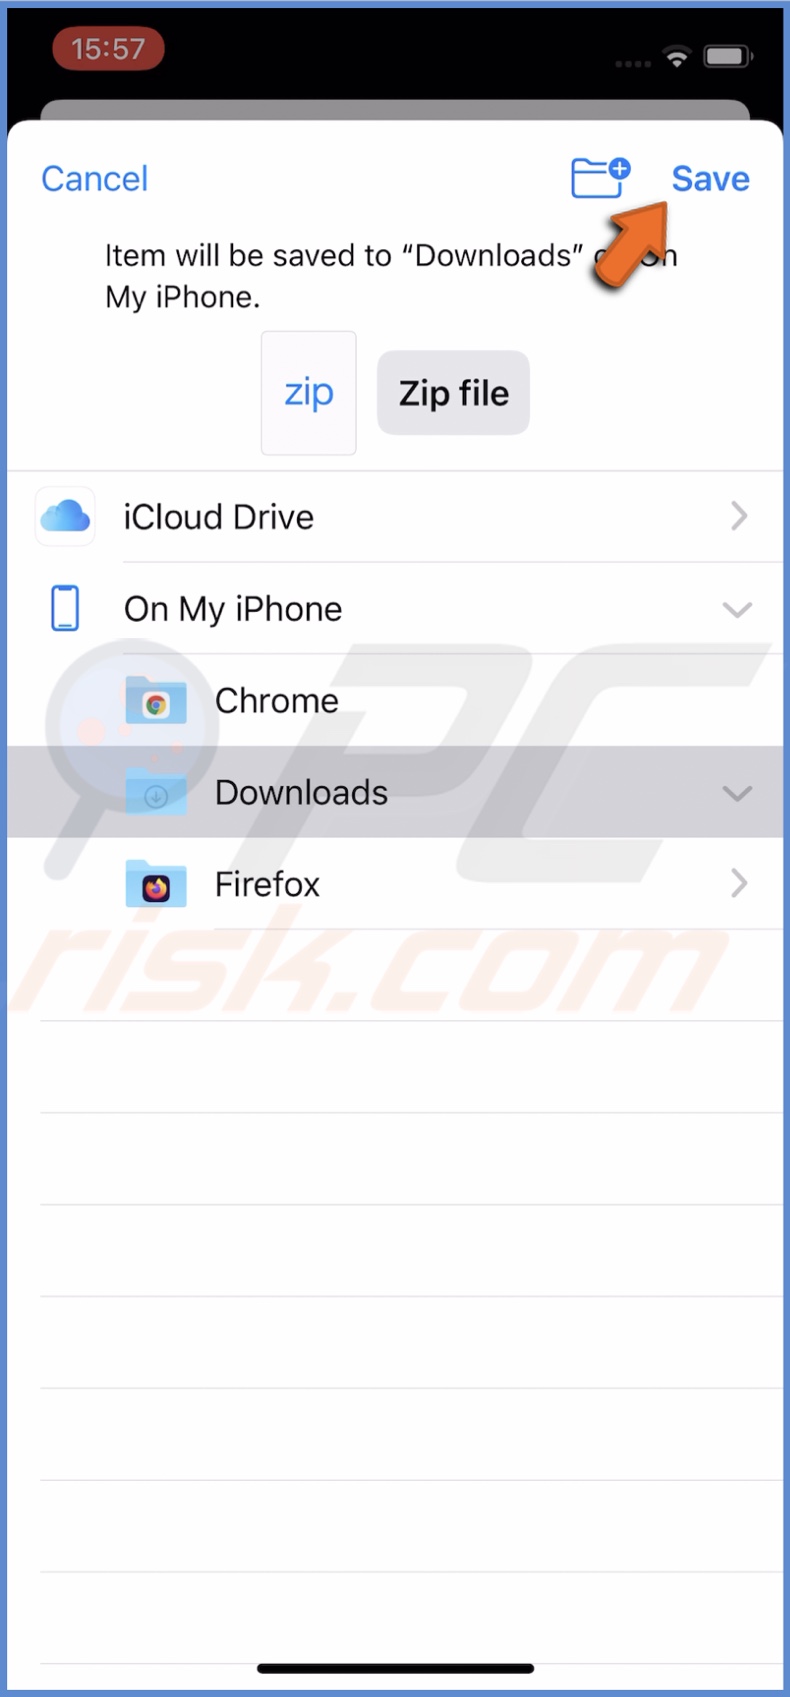
8. Tap on the "X" icon to remove the share sheet from your device screen, and then tap on "Done". The zip file will be created.
Use the Unzip Shortcut to unzip files from the "Files" folder. Or simply tap on the zip file like in the first method.
Want to know more tips and tricks for your Apple device? Check out our How-To Guides for Mac users in the Blog section.
Share:

Karolina Peistariene
Author of how-to guides for Mac users
Responsible for collecting, analyzing, and presenting problem-solving solution articles related to macOS issues. Years of macOS experience combined with solid research and analyzing skills help Karolina provide readers with working and helpful solutions as well as introduce various features Mac has to offer.
▼ Show Discussion