How to Use a Third-Party Mouse With Trackpad Gestures on Mac?

(updated)
Get Free Scanner and check your computer for errors
Fix It NowTo fix found issues, you have to purchase the full version of Combo Cleaner. Free trial available. Combo Cleaner is owned and operated by Rcs Lt, the parent company of PCRisk.com read more.
How to Use Trackpad Gestures With a Third-Party Mouse on Mac?
Apple's Magic Mouse, like all Apple products, is very different from other available mouses. So don't worry; if you don't like the Magic Mouse, you can use your standard one with your Mac as well.
When the third-party mouse is connected to your Mac, you need to adjust basic mouse settings accordingly, as the same settings won't necessarily fit the Windows mouse. What you need to do is to tweak the tracking, scrolling, and double-click speeds.
Although the standard mouse is more comfortable for you, the downside of using a standard Windows mouse with your Mac is you lose the trackpad gestures like swiping left or right. But, fortunately, there's a way you can use your Windows mouse and still have those gestures available.
To use Magic Mouse gestures with your standard one, you need to create them. You can easily do that with the help of the xGestures program and a few AppleScripts. You'll find all links and step-by-step explanations and how to do each step in the methods below.
Video on How to Use Trackpad Gestures With a Third-Party Mouse on Mac?
Table of Contents:
- Introduction
- How to Connect a Third-Party Mouse on Your Mac
- How to Modify Basic Mouse Settings on Your Mac
- How to Enable Spring-Loading Delay
- How to Use Trackpad Gestures With the Third-Party Mouse on Your Mac
- Video on How to Use Trackpad Gestures With a Third-Party Mouse on Mac?
Download Computer Malware Repair Tool
It is recommended to run a free scan with Combo Cleaner - a tool to detect viruses and malware on your device. You will need to purchase the full version to remove infections. Free trial available. Combo Cleaner is owned and operated by Rcs Lt, the parent company of PCRisk.com read more.
How to Connect a Third-Party Mouse on Your Mac
Almost all mouses will work both on Windows and macOS. Even those that say they're compatible with Windows. All it needs to do is to connect with Bluetooth or USB port.
To connect a Bluetooth mouse to Mac, follow the steps below:
1. Turn on the Bluetooth on the mouse.
2. On your Mac, from the menu bar, tap on the Apple logo.
3. Select "System Preferences".
4. Then, click on "Bluetooth". If Bluetooth is disabled, turn it on.
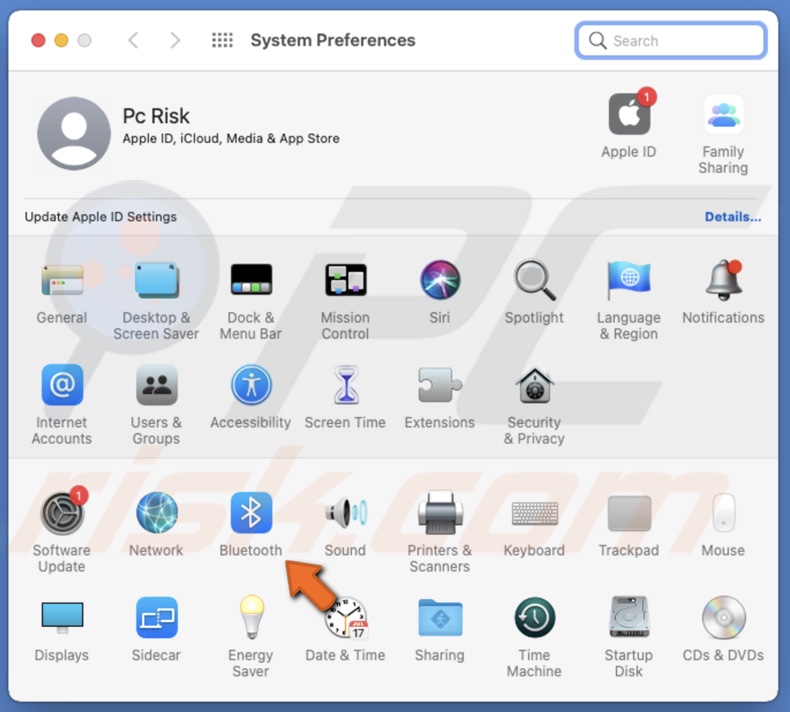
5. Wait for your Mac to find the mouse. When it does, click on it to connect the mouse to your Mac.
If Mac can't find your mouse, enable the pairing mode on it.
To connect a USB mouse to Mac, follow the steps below:
1. Insert the USB cable into the USB port on your Mac.
2. Wait while the mouse is detected automatically. The necessary drivers will be installed automatically in the background.
If your Mac doesn't detect the mouse, remove the cable or the stick and insert it in a different USB port.
How to Modify Basic Mouse Settings on Your Mac
When the new mouse gets connected, the first thing you need to do is to go through the settings and tweak them accordingly. We recommend turning off natural scrolling, changing tracking, scrolling, and double-click speed settings.
To disable natural scrolling, follow the steps below:
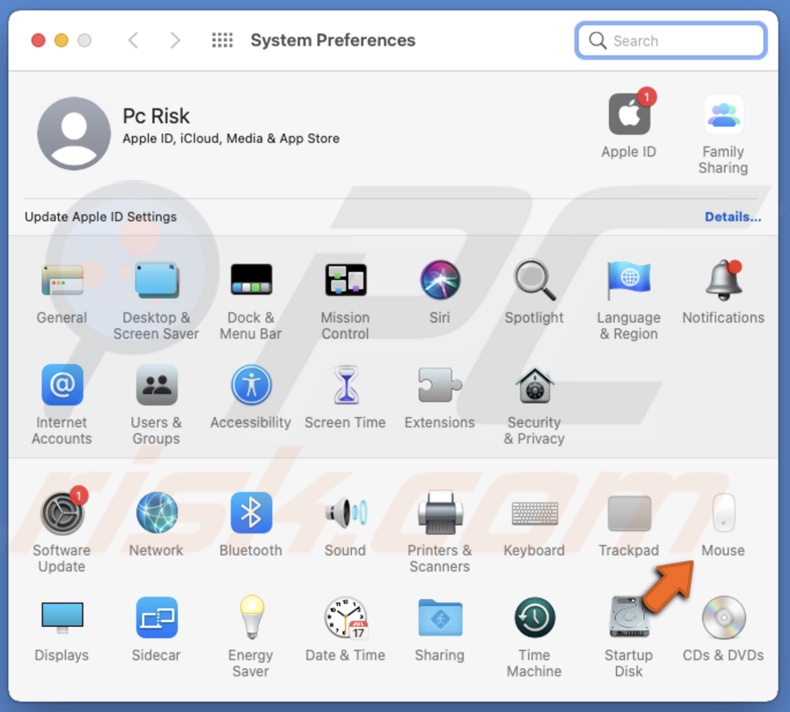
1. From the menu bar, click on the Apple logo.
2. Go to "System Preferences".
3. Then, go to "Mouse" settings.
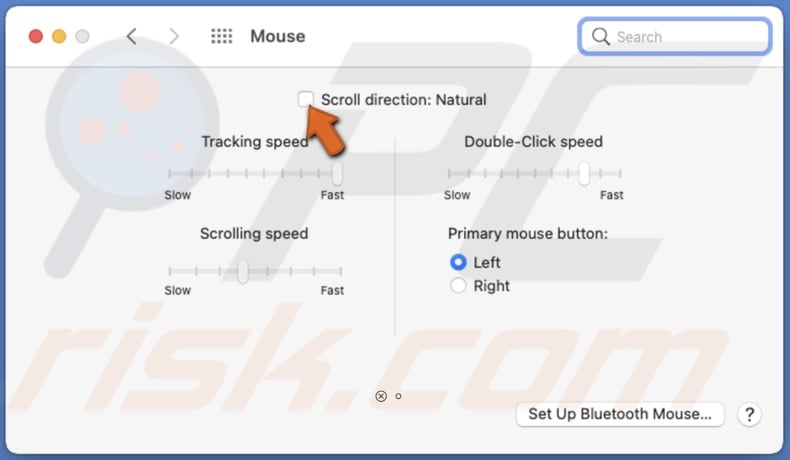
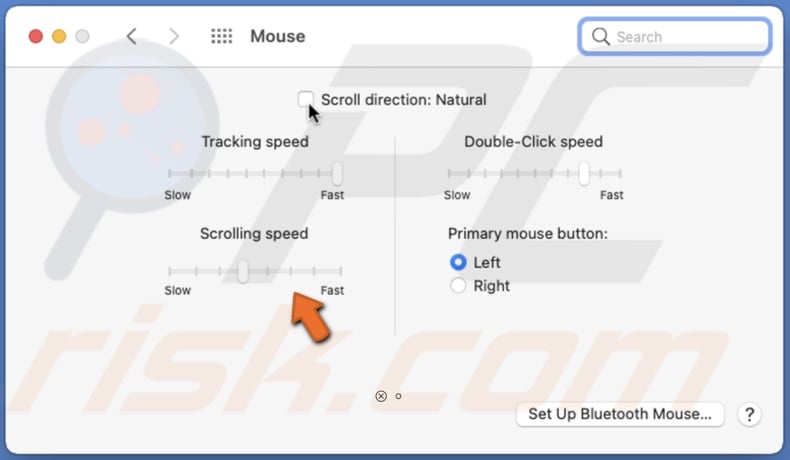
4. Uncheck the box next to "Scroll direction: Natural".
To change the tracking speed, follow the steps below:
1. From the menu bar, click on the Apple logo.
2. Go to "System Preferences".
3. Then, go to "Mouse" settings.
4. Under "Tracking speed", move the slider to find the most comfortable mouse moving speed.
![]()
To change the scrolling speed, follow the steps below:
1. From the menu bar, click on the Apple logo.
2. Go to "System Preferences".
3. Then, go to "Mouse" settings.
4. Under "Scrolling speed", move the slider to find the most comfortable mouse scrolling speed.
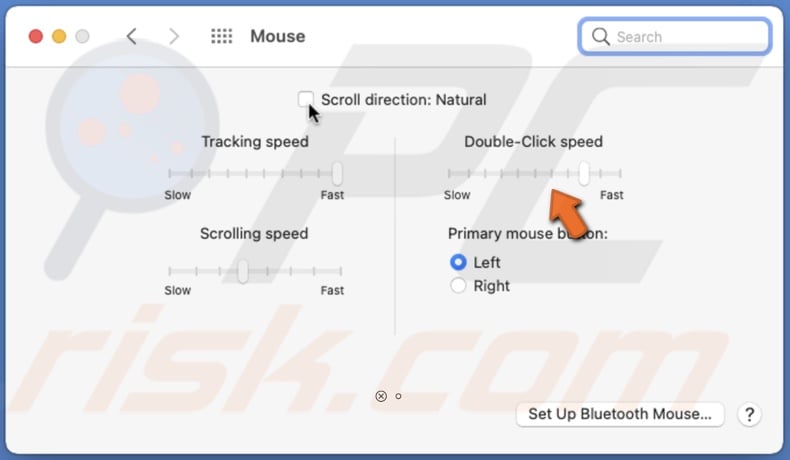
To change the double-click speed, follow the steps below:
1. From the menu bar, click on the Apple logo.
2. Go to "System Preferences".
3. Then, go to "Mouse" settings.
4. Under "Double-click speed", move the slider to find the most comfortable mouse double-click speed.
How to Enable Spring-Loading Delay on Your Mac
The spring-loading delay is the feature that opens a folder when you hold a file over it. When you connect a third-party mouse, this feature turns off. Fortunately, you can enable it and use it with your connected mouse.
To turn on the spring-loading delay, follow the steps below:
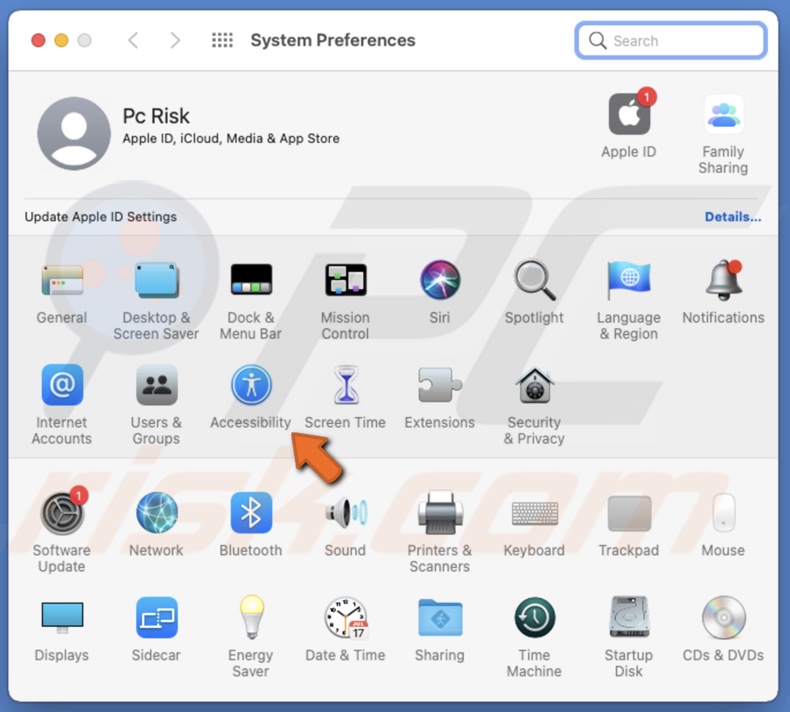
1. From the menu bar, click on the Apple logo.
2. Go to "System Preferences".
3. Click on "Accessibility".
4. Under the "Motor" section, select "Point Control".
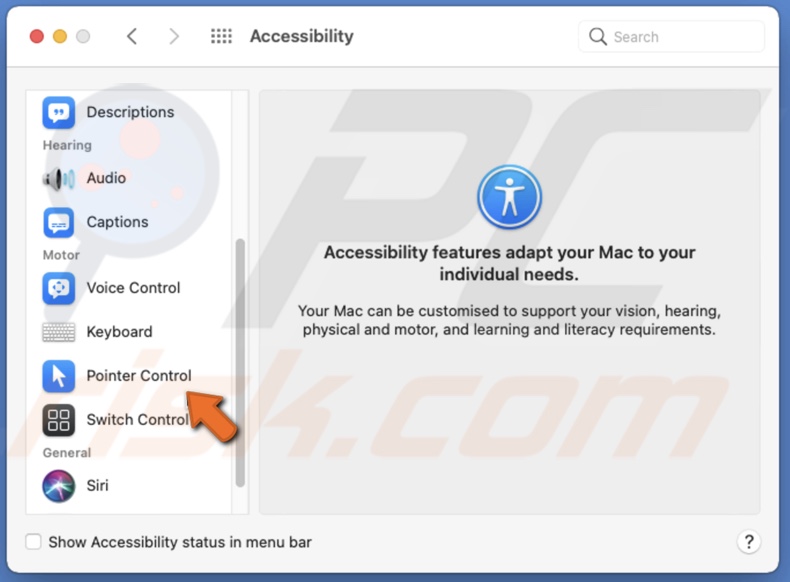
5. Then, in the "Mouse & Trackpad" tab, check the box next to "Spring-loading-delay".
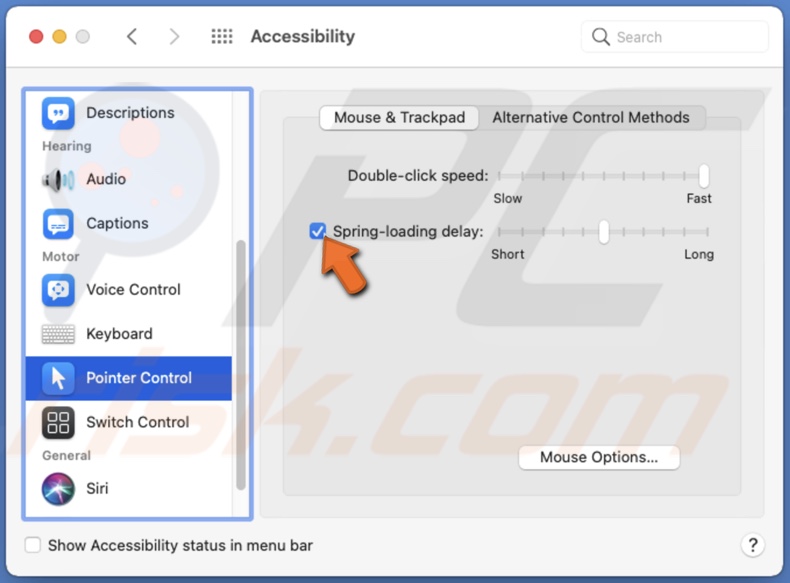
The shorter the spring-loading is, the faster the folder will open. With long spring-loading is the opposite.
How to Use Trackpad Gestures With the Third-Party Mouse on Your Mac
When using a third-party mouse on Mac, you can't use the trackpad gestures that you would with the Magic mouse. But, what if we told you there was a way? With the help of xGestures, you'll be able to use the same gestures you would with the original Apple mouse. It's a free app that anyone can use.
To use trackpad gesture with a third-party mouse, follow the steps below:
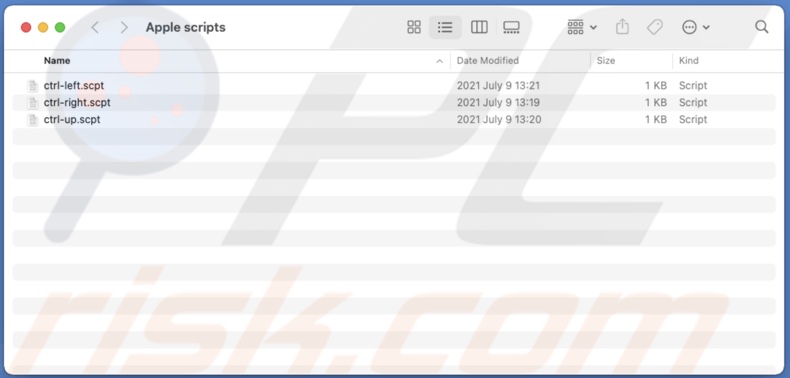
1. Download xGestures to your Mac.
2. Then, download these Apple scripts. These scripts will allow you to use the three-finger windows switch and the three-finger swipe up to see the Mission Control gestures with the third-party mouse.
3. Save the Apple scrips in a separate folder and keep them.
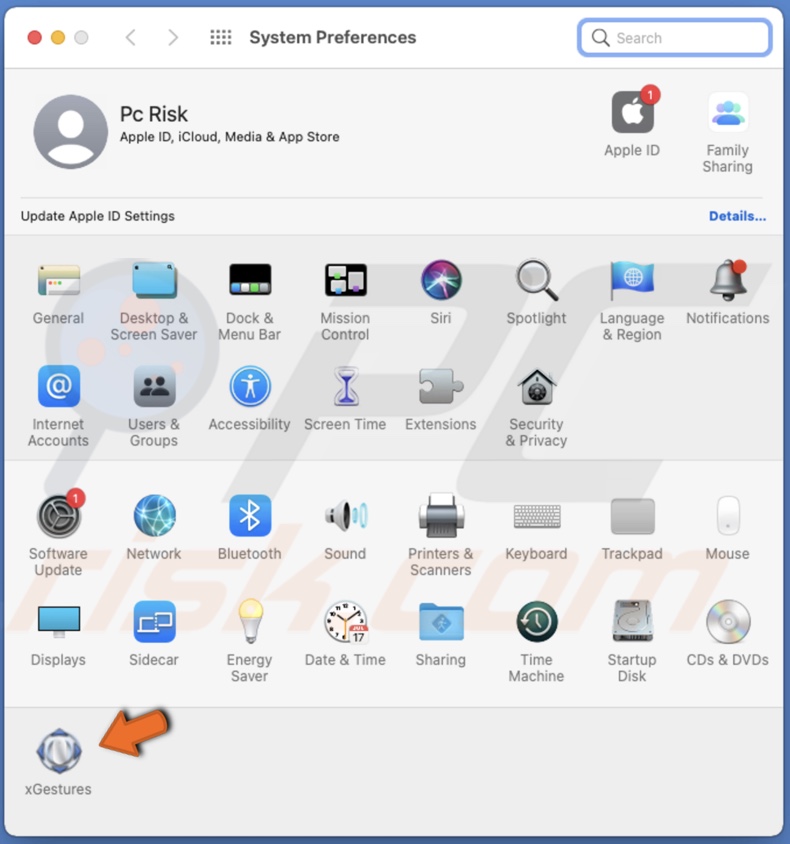
4. From the menu bar, click on the Apple logo.
5. Go to "System Preferences".
6. Click on "xGestures".
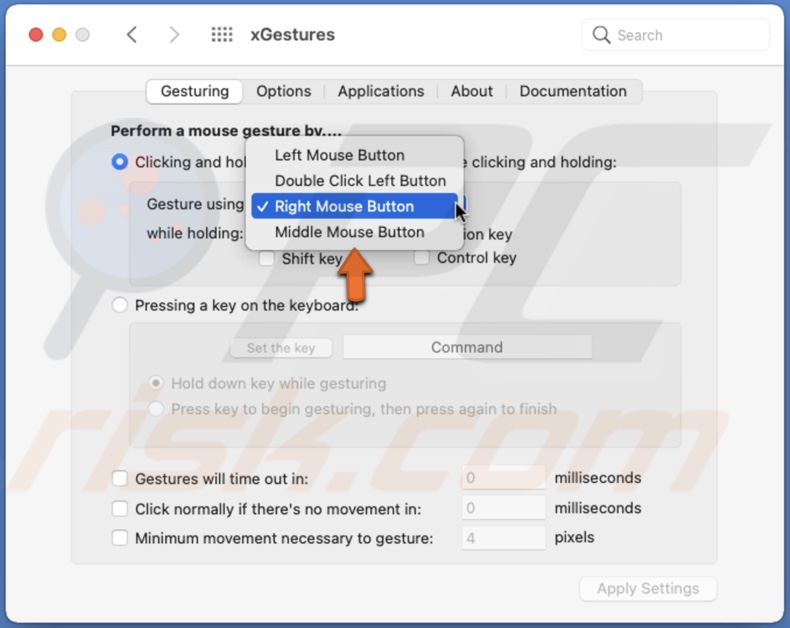
7. In the "Gesturing" tab, select how you want to perform the gestures with the mouse. Either with the middle button or by using the right and left buttons. You can explore other options as well.
8. Now, go to the "Applications" tab.
9. Check the box next to "Enable Global Gestures".
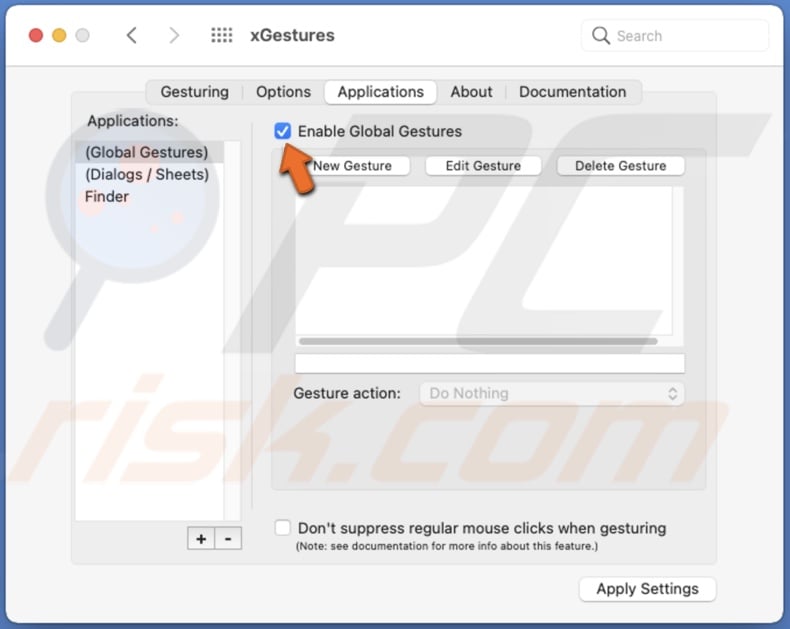
10 Then, select "New Gesture".
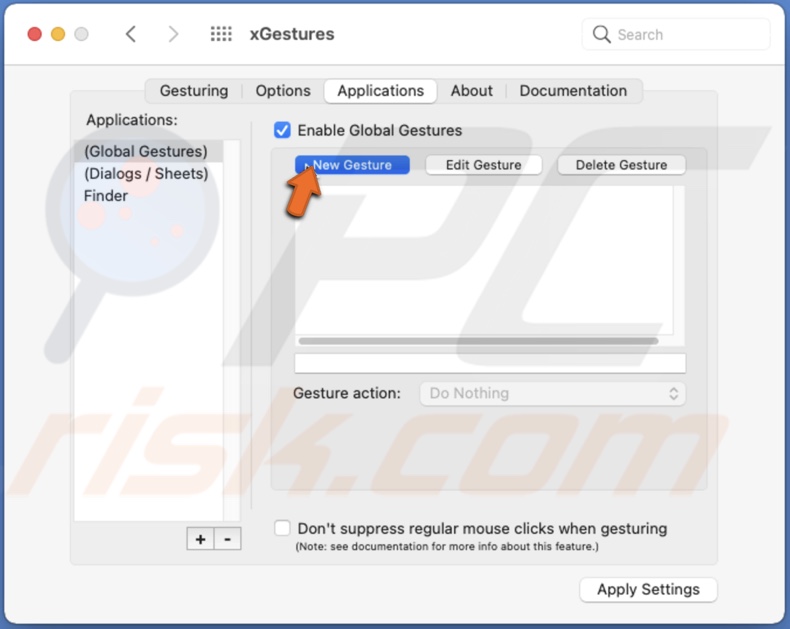
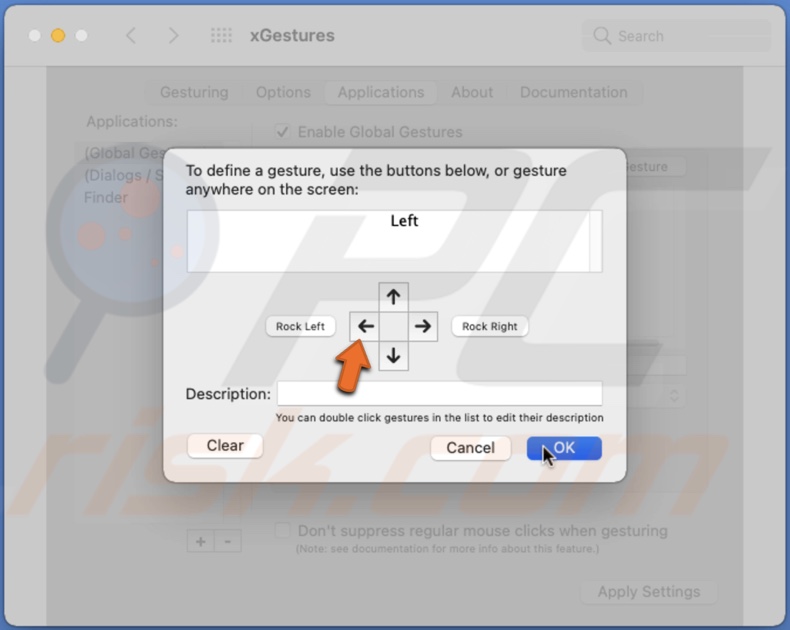
11. When a window pops up, click on the left side arrow. You should see the word 'Left' written. When done, click on "OK".
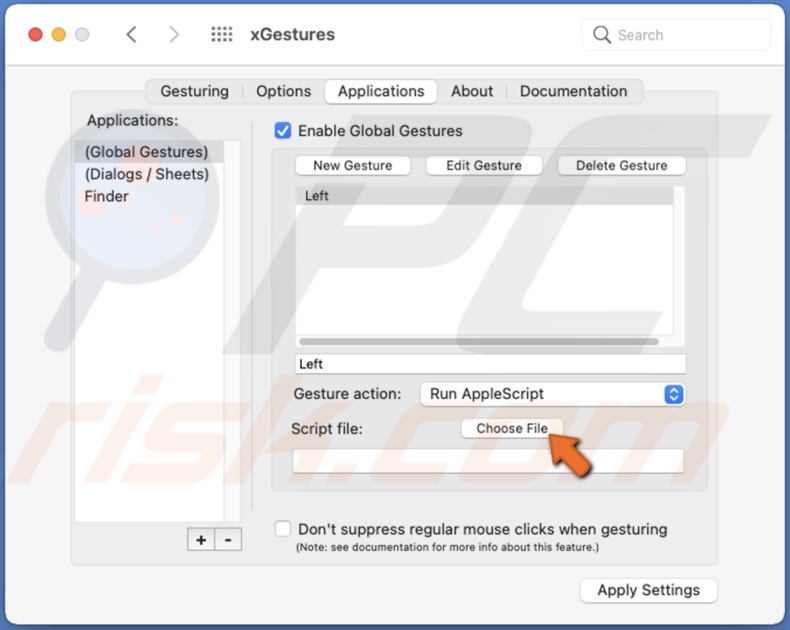
12. As "Gesture action", select "Run AppleScript".

13. Import the "ctrl-right" script for the Left gesture. Do the same thing for the Right and Up gestures. Import the "ctrl-left" script for the Right and the "ctrl-up" for the Up gestures.
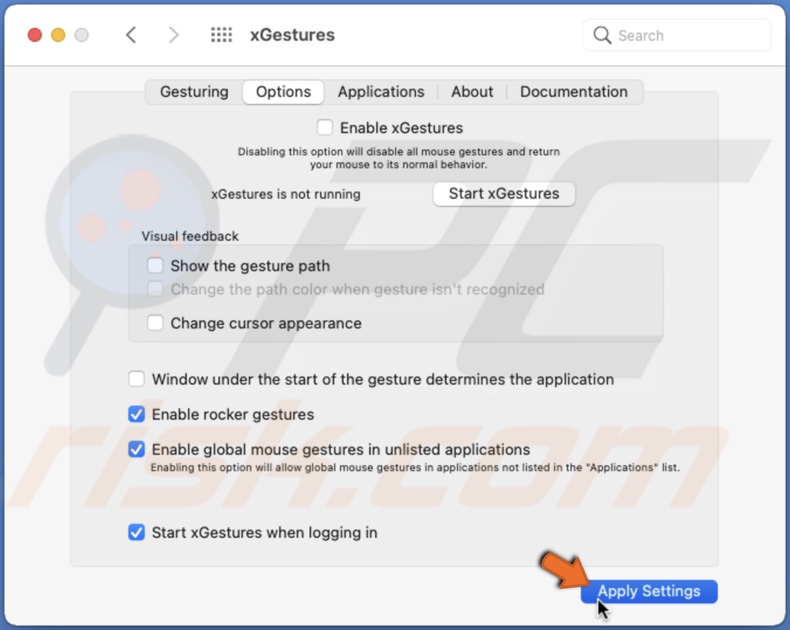
14. Next, go to the "Options" tab and check the box next to "Start xGestures when logging in".
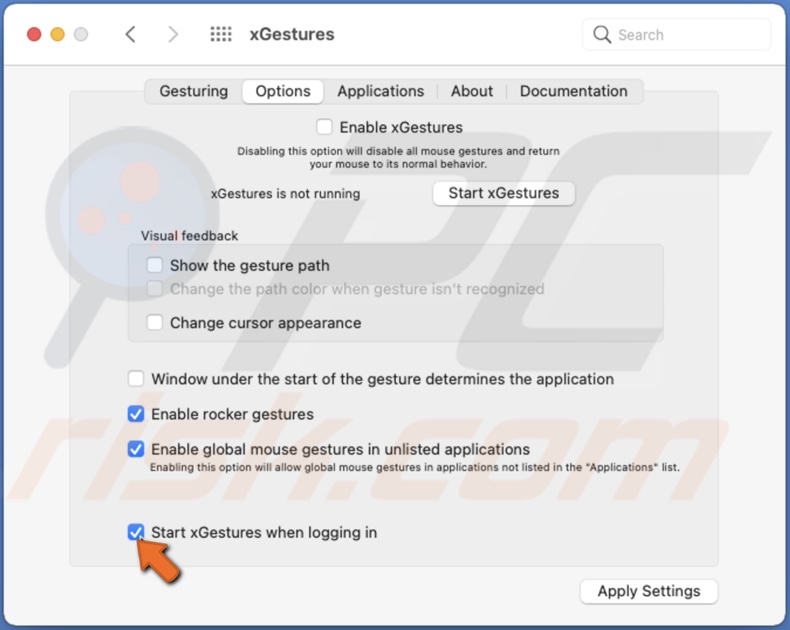
15. Finally, click on "Apply Settings".
If the created gestures stop working, go to "xGestures" preferences, and in the "Options" tab, click on "Start xGestures" to re-enable the feature.
We hope with the help of our article you managed to get the gestures working with your third-party mouse.
Share:

Karolina Peistariene
Author of how-to guides for Mac users
Responsible for collecting, analyzing, and presenting problem-solving solution articles related to macOS issues. Years of macOS experience combined with solid research and analyzing skills help Karolina provide readers with working and helpful solutions as well as introduce various features Mac has to offer.
▼ Show Discussion