How to Use Screen Time in iOS 14 on macOS and iOS?

(updated)
Get Free Scanner and check your computer for errors
Fix It NowTo fix found issues, you have to purchase the full version of Combo Cleaner. Free trial available. Combo Cleaner is owned and operated by Rcs Lt, the parent company of PCRisk.com read more.
How to Enable and Use Screen Time on iPhone, iPad, and Mac
The rise of social media and the increasing addiction to smartphones highly impacts our productivity and mental health. Tools like Screen Time can help you regain control of your time. Due to its integration with iOS and macOS, you can keep track of the time you spend on your phone as well as individual apps.
Screen time can also help you keep track and control the time your child spends playing games, restrict content that you don't want him to see, as well as control with whom he can communicate.
Due to Screen Time being cloud base, you can monitor how long you spend on all your smart devices. The chart will show you what apps did you opened and how long you spent on them. You can even see how many times you've picked up your device and how long the pick-up lasted.
Video on How to Enable and Use Screen Time on iPhone, iPad, and Mac?
Table of Contents:
- Introduction
- How to Enable Screen Time
- Set Up a Screen Time Passcode
- What is Downtime and How to Enable It
- What are App Limits and How To Set Them
- What are Communication Limits and How To Set Them
- How to Enable Content & Privacy Restrictions
- How to Block iTunes and App Store Purchases
- How to Turn On Child's Screen Time
- How to Disable Screen Time
- Video on How to Enable and Use Screen Time on iPhone, iPad, and Mac?
Download Computer Malware Repair Tool
It is recommended to run a free scan with Combo Cleaner - a tool to detect viruses and malware on your device. You will need to purchase the full version to remove infections. Free trial available. Combo Cleaner is owned and operated by Rcs Lt, the parent company of PCRisk.com read more.
How to Enable Screen Time
To use Screen Time, you need to turn it on in your device settings.
To enable Screen Time on iPhone and iPad, follow the steps below:
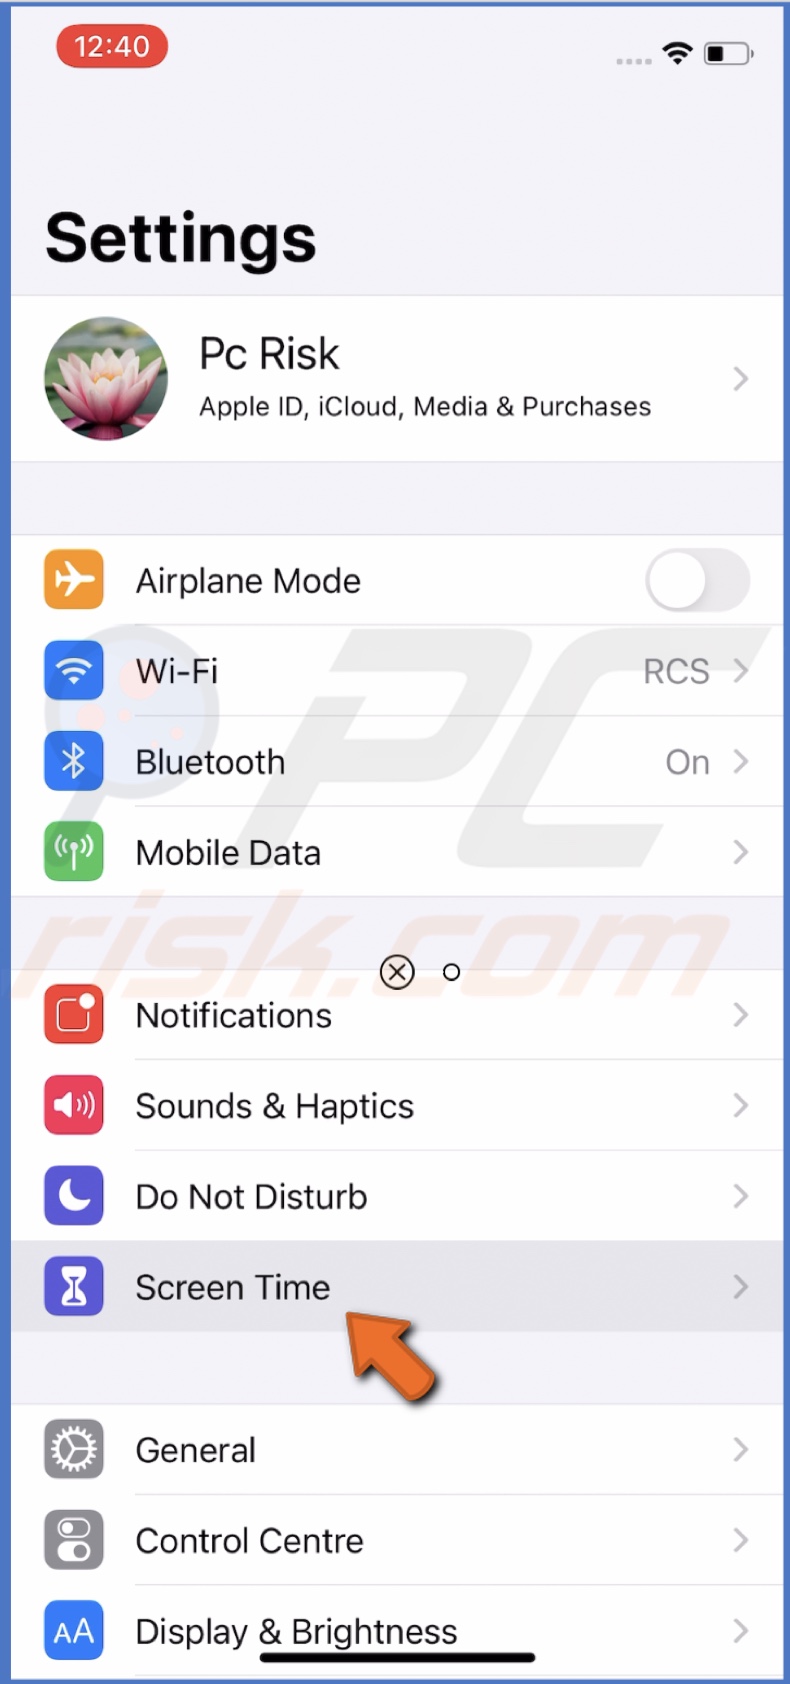
1. Go to the "Settings" app.
2. Locate "Screen Time" and tap on it.
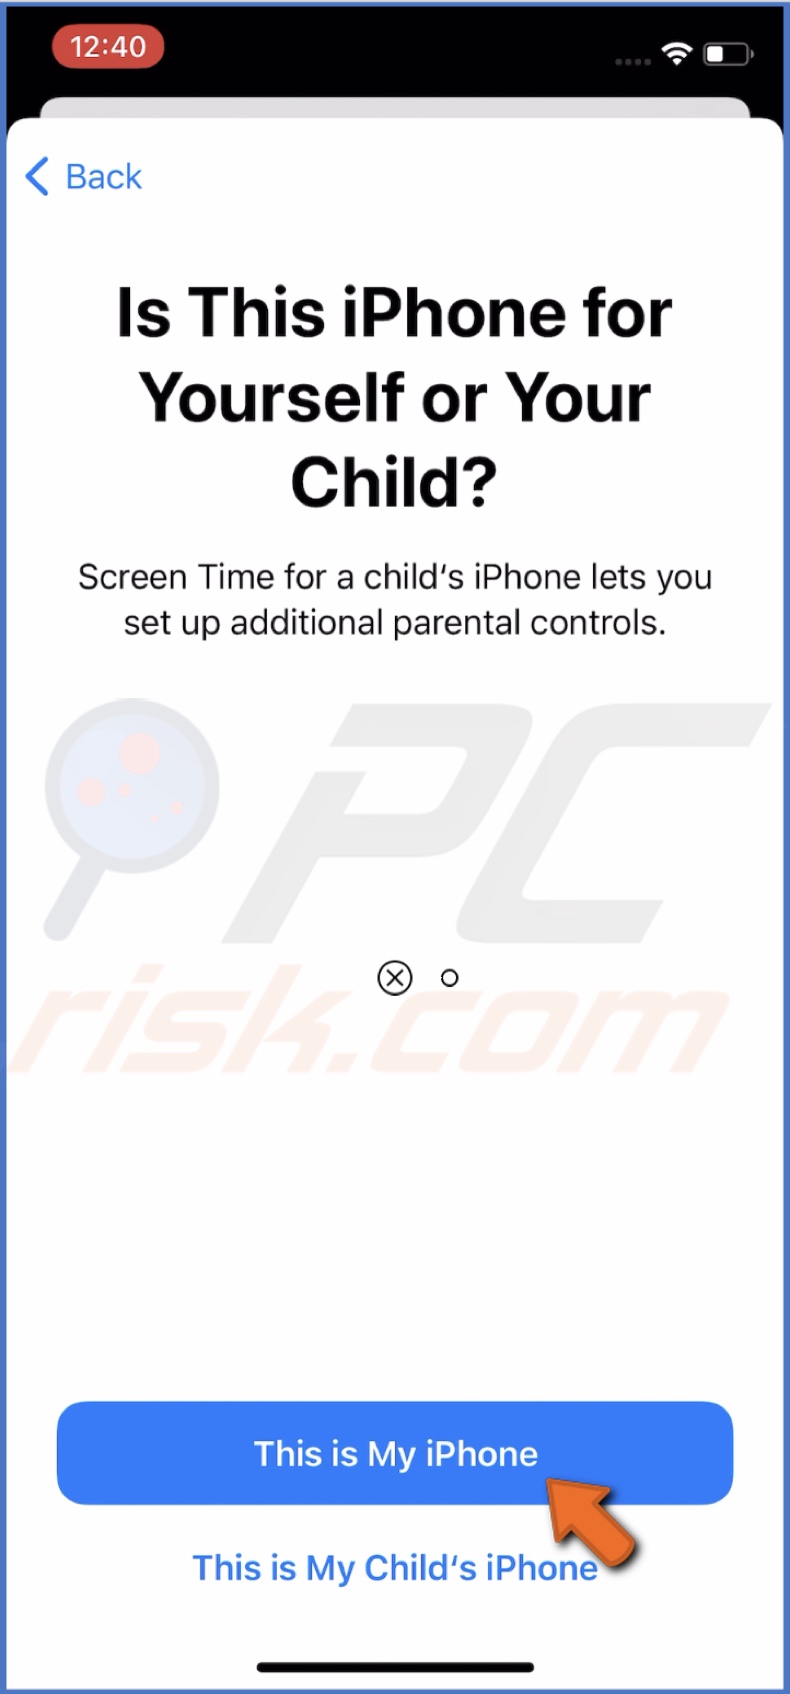
3. Then, select "Turn On Screen Time" and tap on "Continue".
4. Tap on "This is My iPhone".
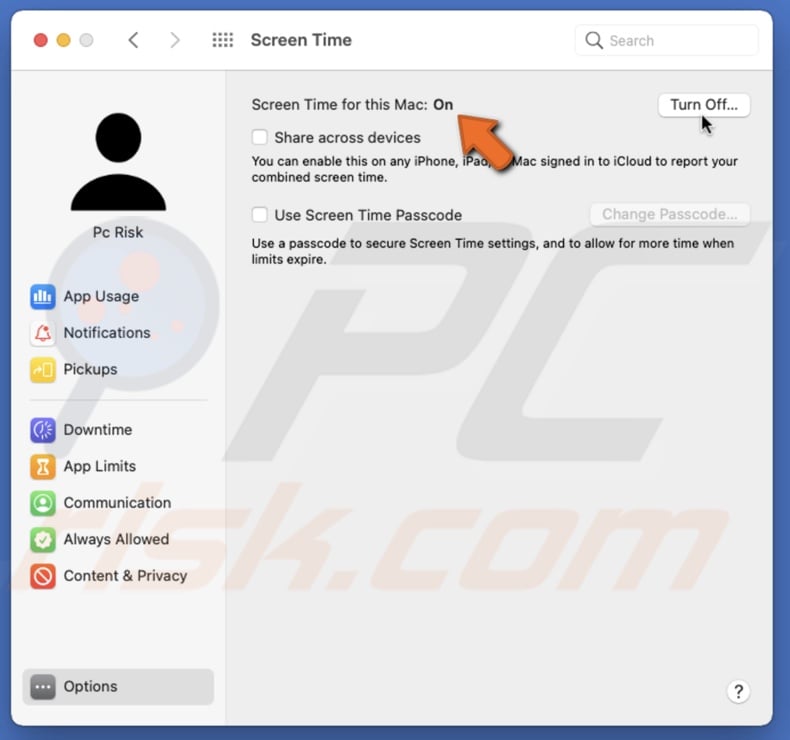
To enable Screen Time on Mac, follow the steps below:
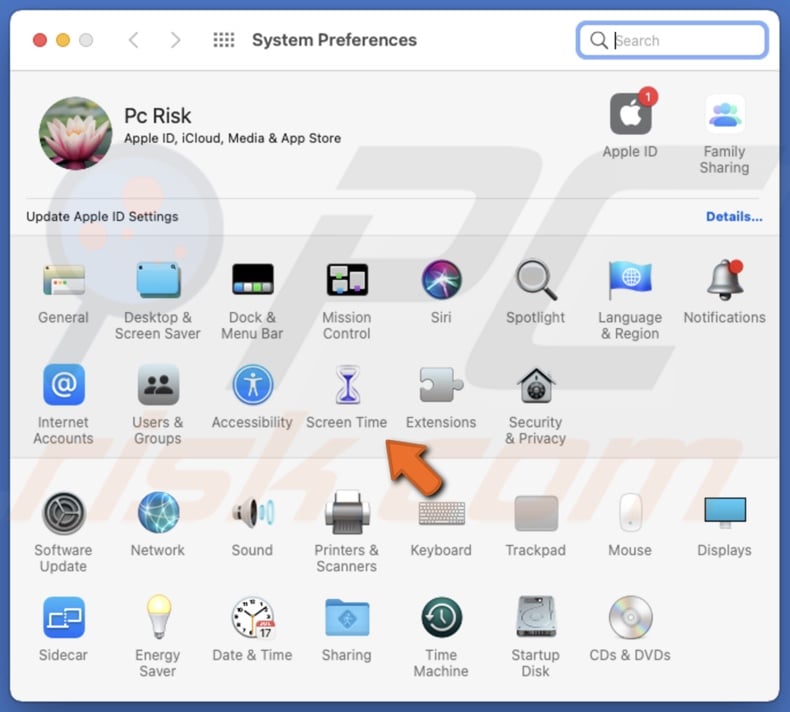
1. Click on the Apple logo to open the Apple menu.
2. Go to "System Preferences" and click on "Screen Time".
3. Then, at the bottom left corner, click on "Options".
4. At the top right corner, click on "Turn On".
Now that Screen Time is enabled, you can explore its features.
Set Up a Screen Time Passcode
We recommend setting up a passcode for Screen Time, so someone like your child wouldn't be able to change the settings.
To set up the Screen Time passcode for iPhone and iPad, follow the steps below:
1. Go to "Settings".
2. Locate and tap on "Screen Time".
3. Then, tap on "Use Screen Time Passcode".
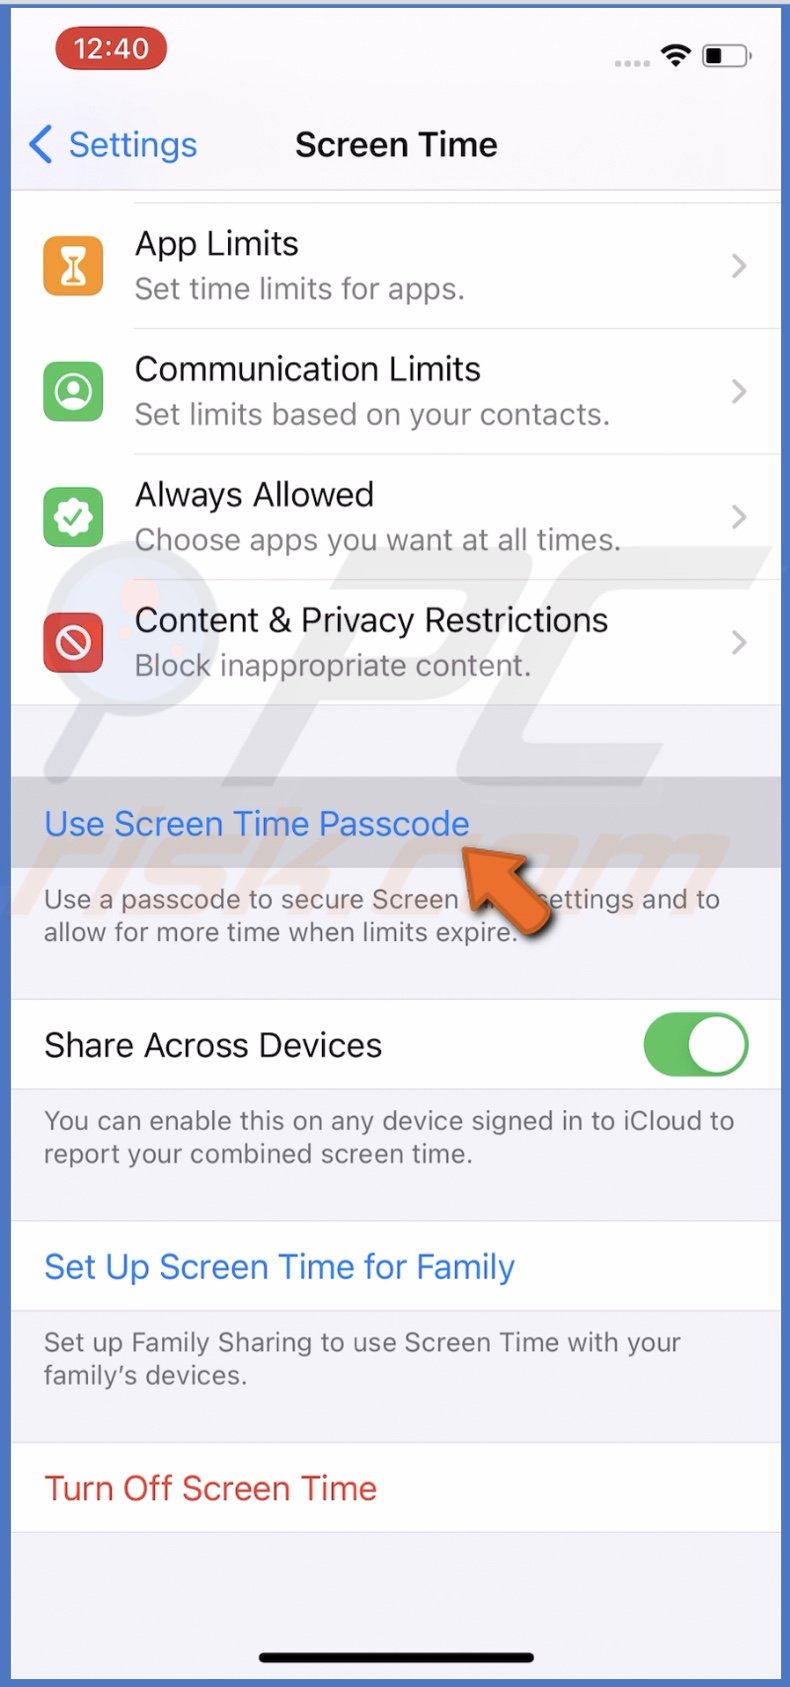
4. Enter a selected passcode and confirm it.
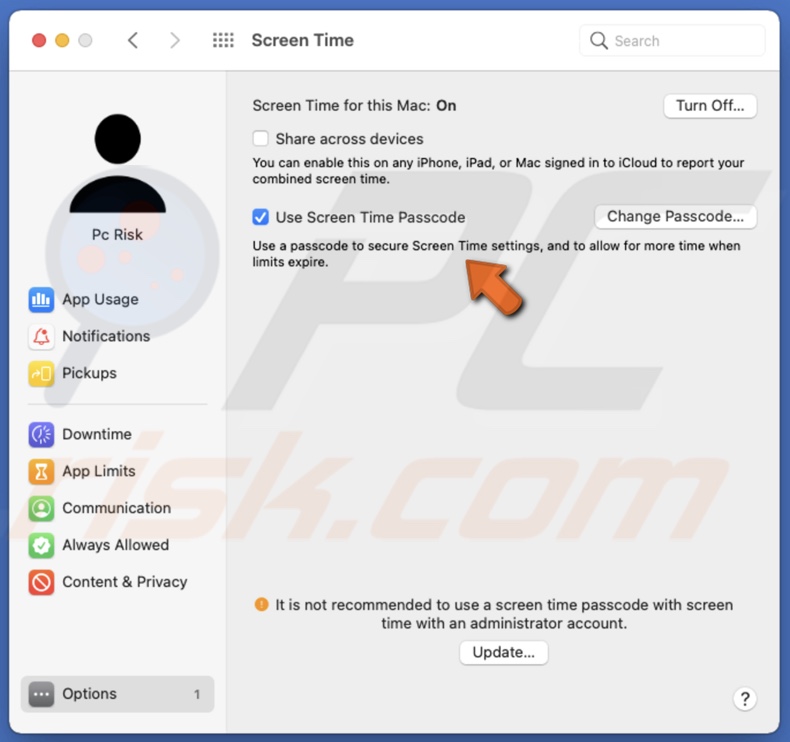
To set up the Screen Time passcode for Mac, follow the steps below:
1. Click on the Apple logo to open the Apple menu.
2. Go to "System Preferences" and click on "Screen Time".
3. Then, at the bottom left corner, click on "Options".
4. Check the box next to "Use Screen Time Passcode".
5. Select if you want to remain the admin or create a separate account and click on "Next".

6. Set a four-digit passcode for Screen Time.
7. Enter a passcode recovery email and click on "Next".
Now every time you'll want to access Screen Time settings, you'll have to enter the passcode you've created.
What is Downtime and How to Enable It
When Downtime is enabled, you can only access phone calls and specific apps that you allowed.
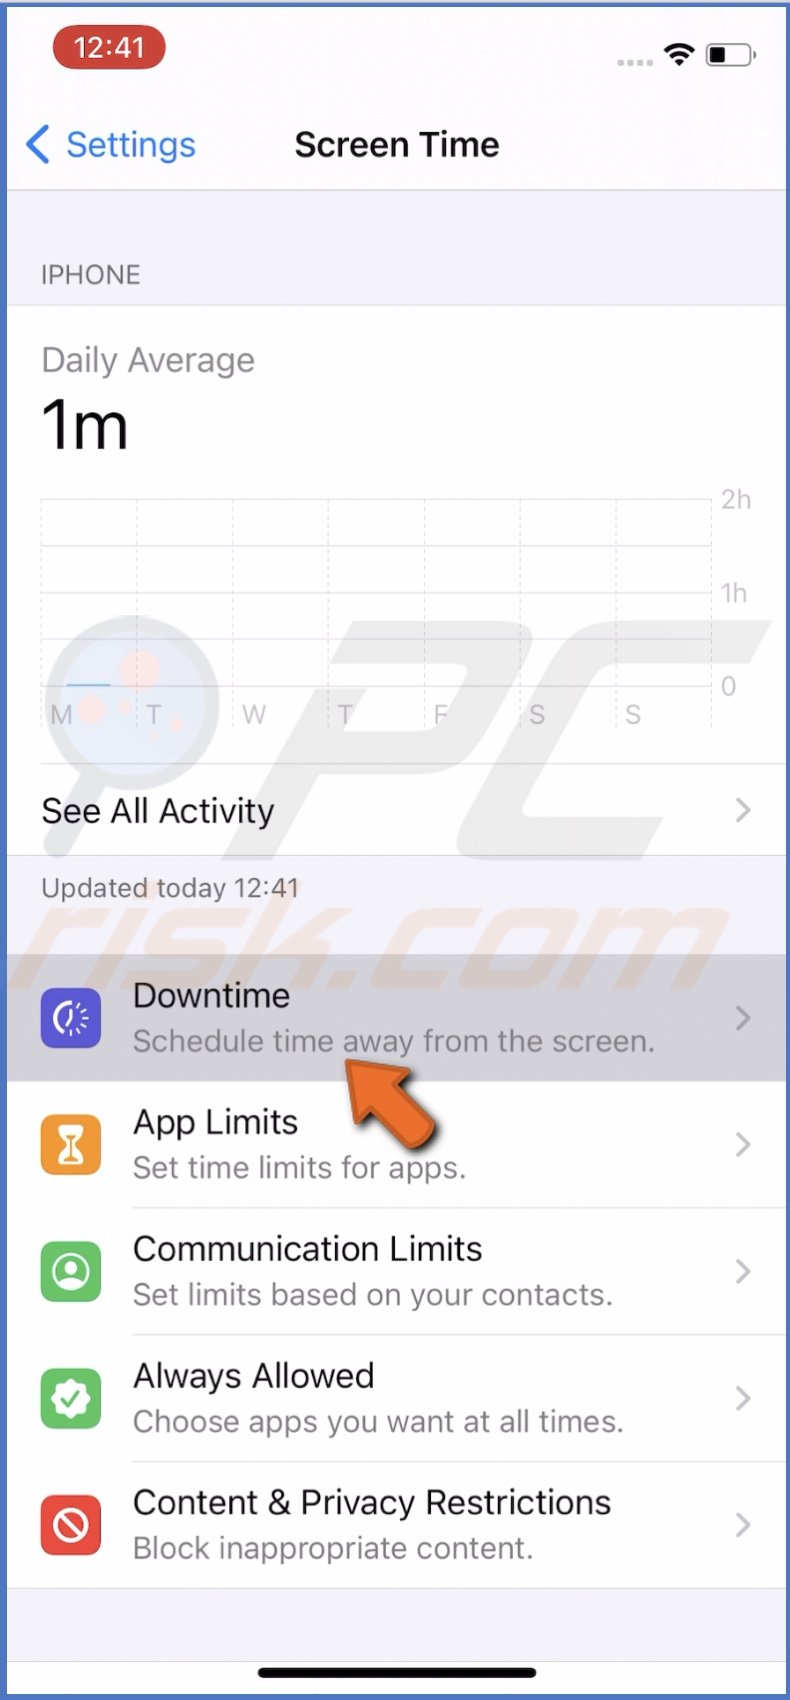
To enable Downtime for iPhone and iPad, follow the steps below:
1. Go to Your device settings.
2. Then, go to "Screen Time".
3. Tap on "Downtime" and enter the passcode.
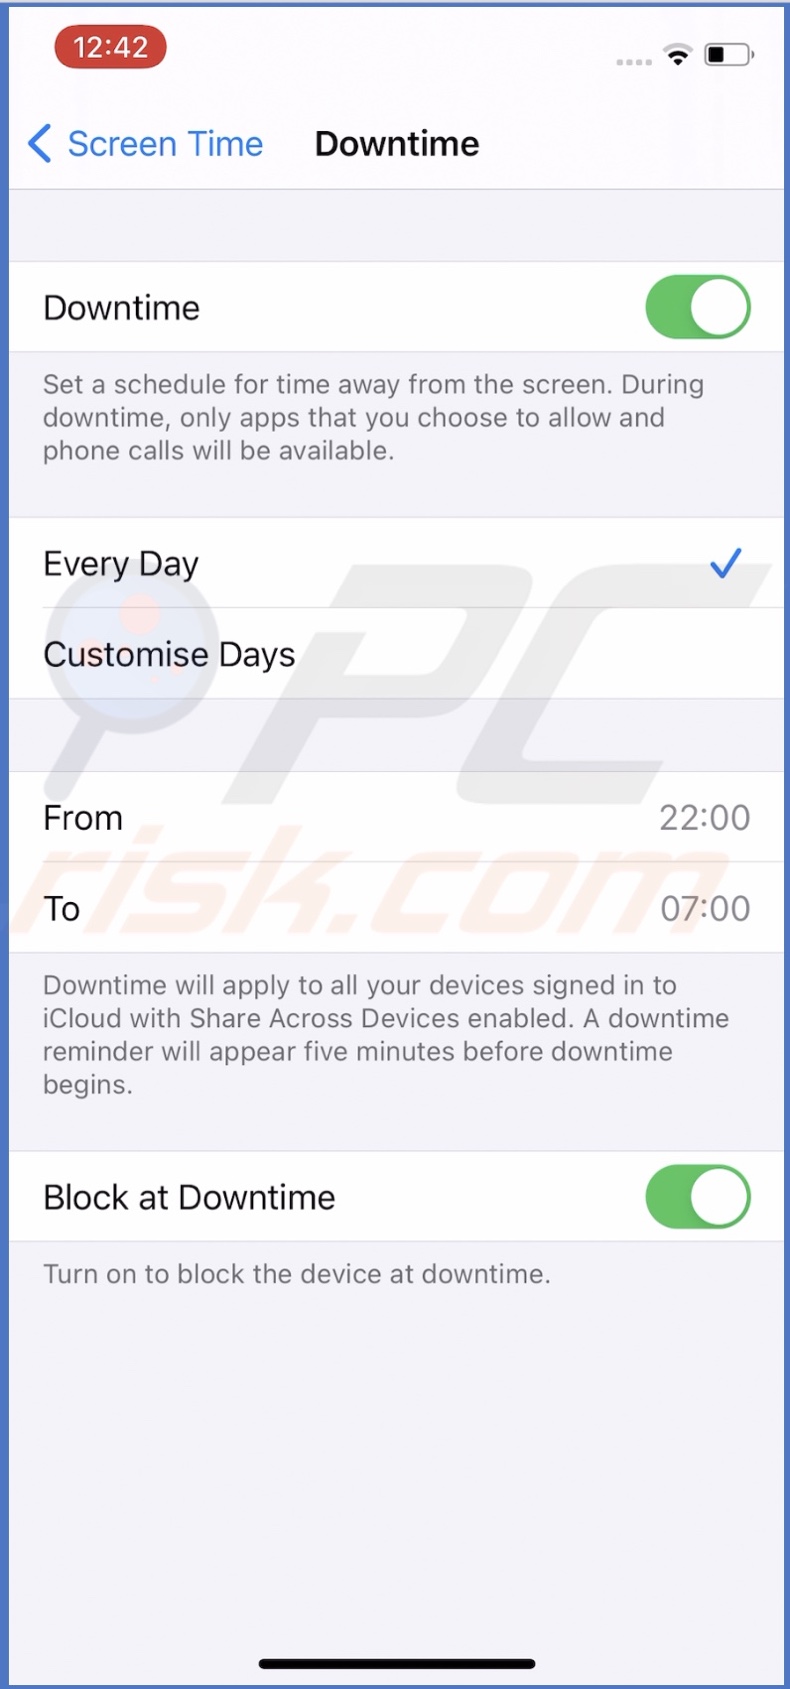
4. Next to "Downtime", move the slider to enable the feature.
5. Then, under "Downtime", choose either "Every Day" or "Customise Days".
6. If you selected "Every Day", below select the duration time you want the feature to be enabled.
If you've selected "Customise Days", choose what days you want Downtime to be enabled and the duration.
7. Now, go back to Screen Time settings and tap on "Always Allowed".
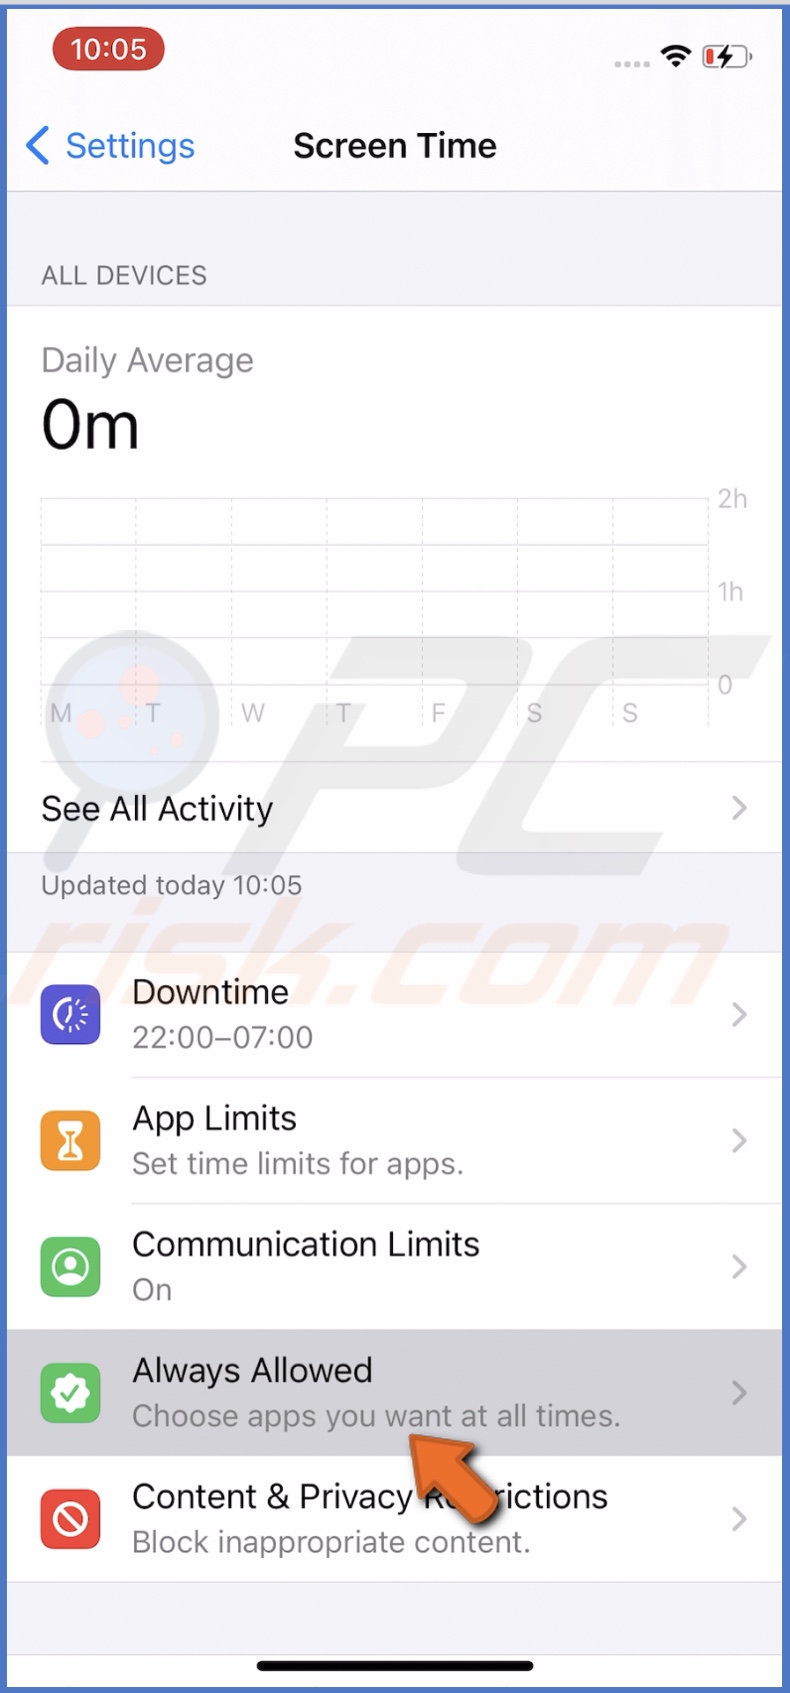
8. Choose which apps will be allowed during "Downtime".
There's also an option to "Block at Downtime". When you enable this feature and select "Ask For More Time when Downtime starts", you'll be able to approve an app you want to use for a specific time by entering the Screen Time passcode.
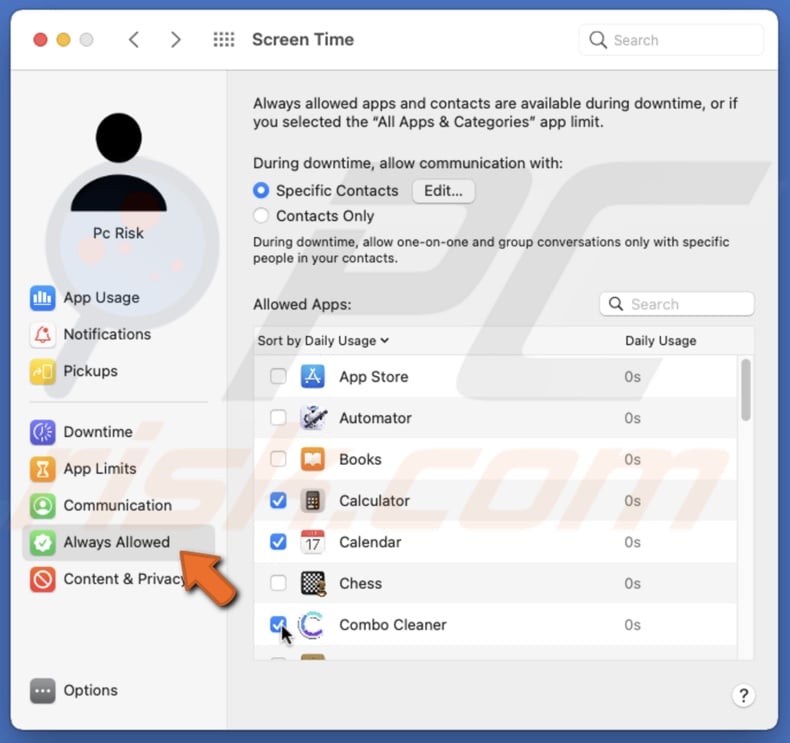
To enable Downtime for Mac, follow the steps below:
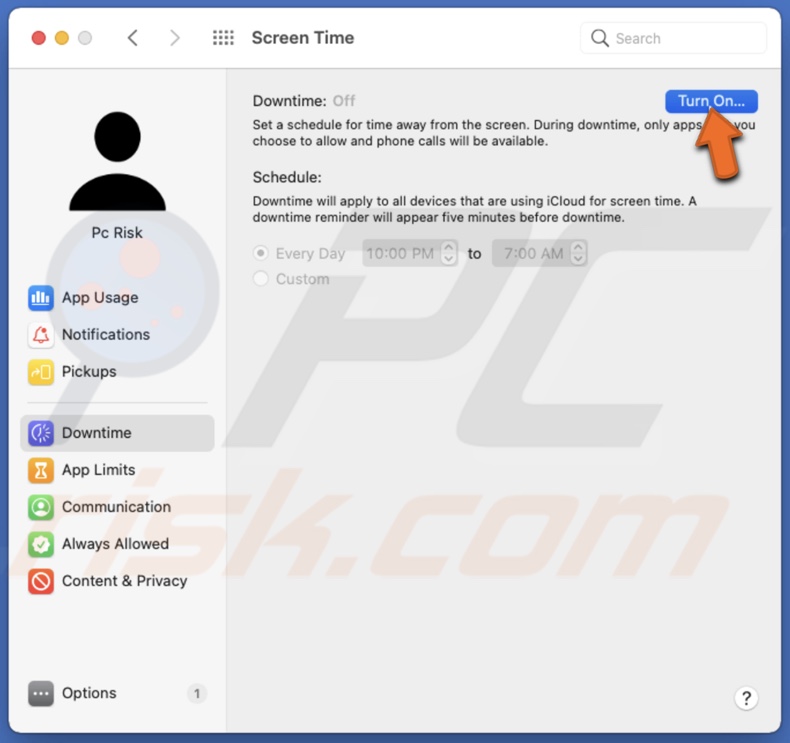
1. Click on the Apple logo to open the Apple menu.
2. Go to "System Preferences" and click on "Screen Time".
3. Select "Downtime" and click on "Turn On".
4. Select either "Every Day" or "Custom" and pick a time.
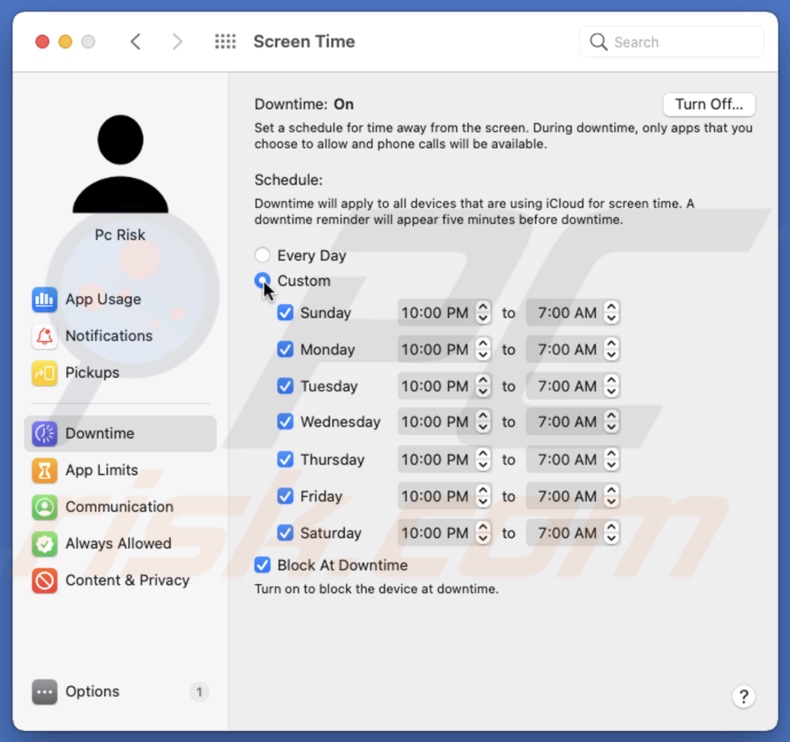
5. Go to "Always Allowed" and select apps that will be allowed to be used during Downtime.
To change Downtime settings, you'll have to enter your Screen Time passcode.
What are App Limits and How To Set Them
App Limits allow you to set a daily limit for specific apps. This feature allows you to be more productive as you can't access limited apps at a particular time of day.
To set App Limits for app categories for iPhone and iPad, follow the steps below:
1. Go to Your device settings.
2. Then, go to "Screen Time".
3. Tap on "App Limits" and enter the passcode.
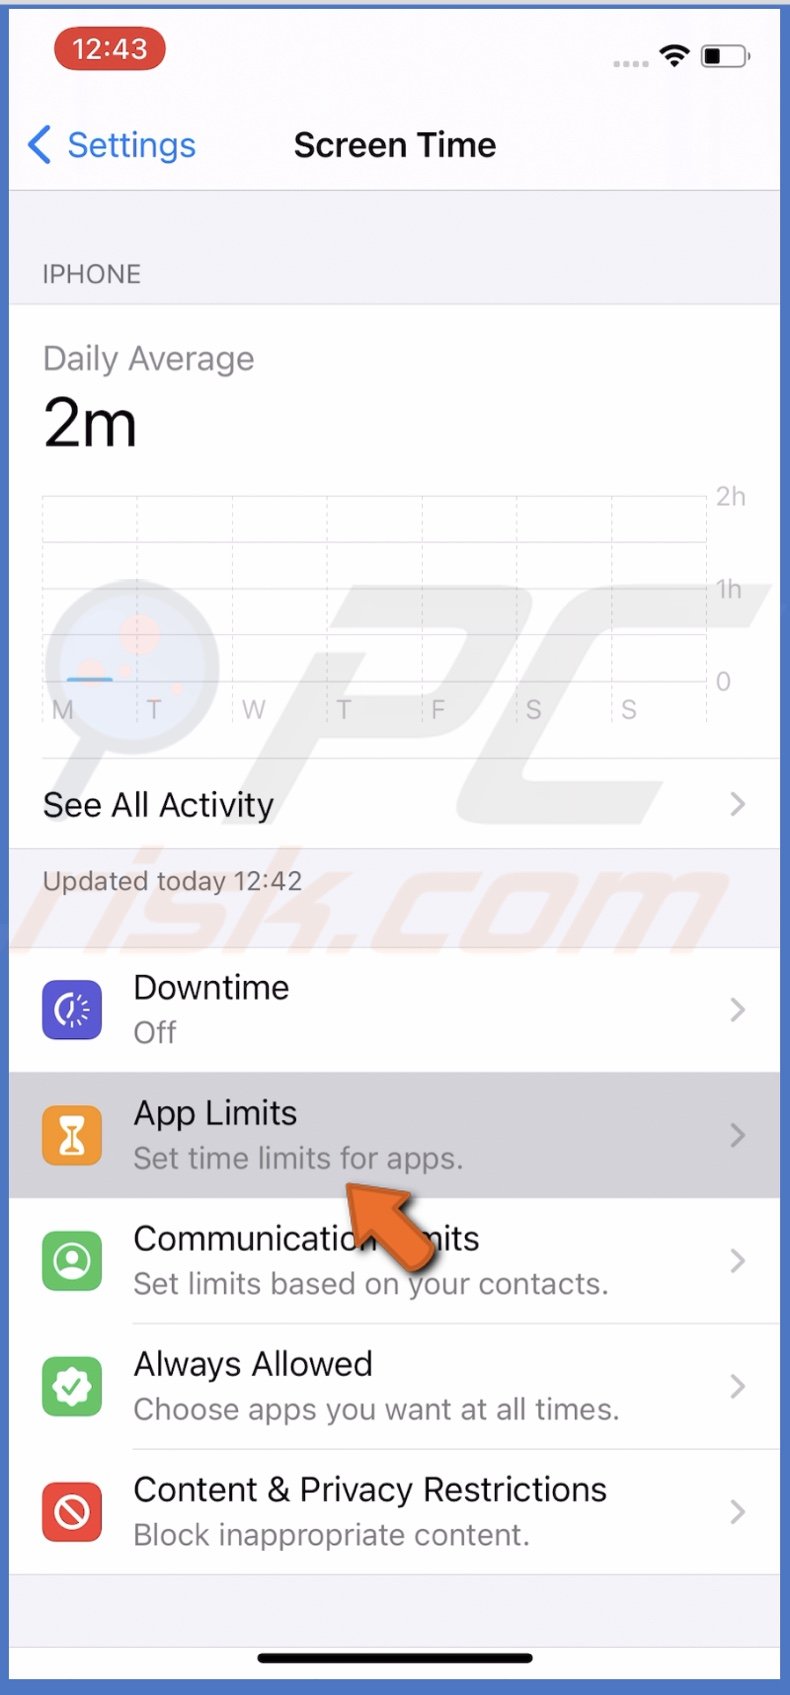
4. Tap on "App Limit".
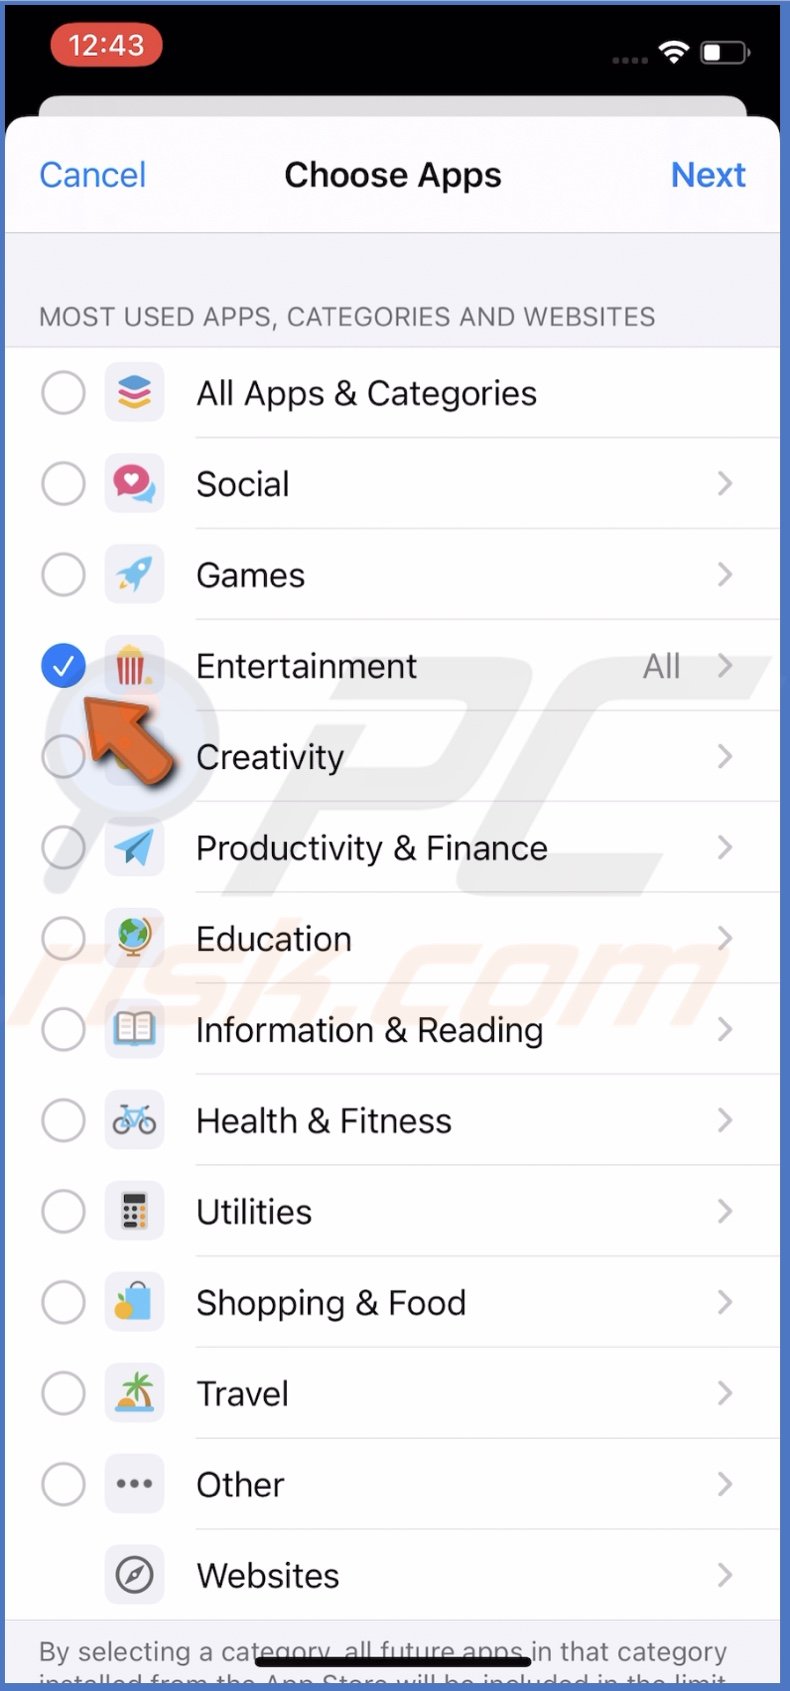
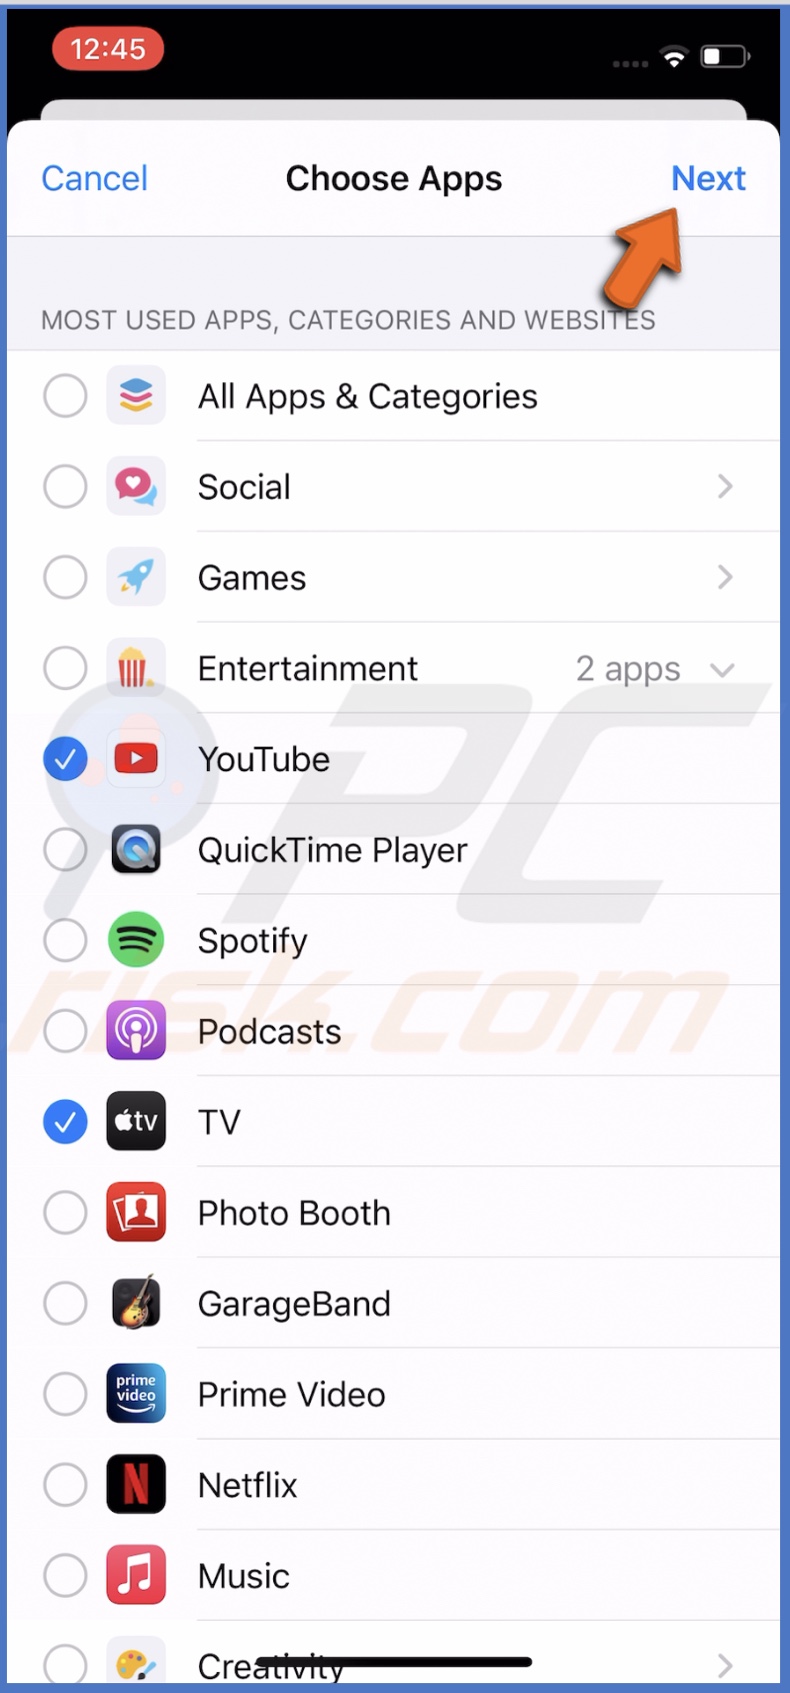
5. When asked to choose apps, select app categories you want to limit and tap on "Next" at the top right corner.
6. Then, set a limit duration or tap on "Customise Days" and set a duration for certain weekdays.
7. Then your done, tap on "Add".
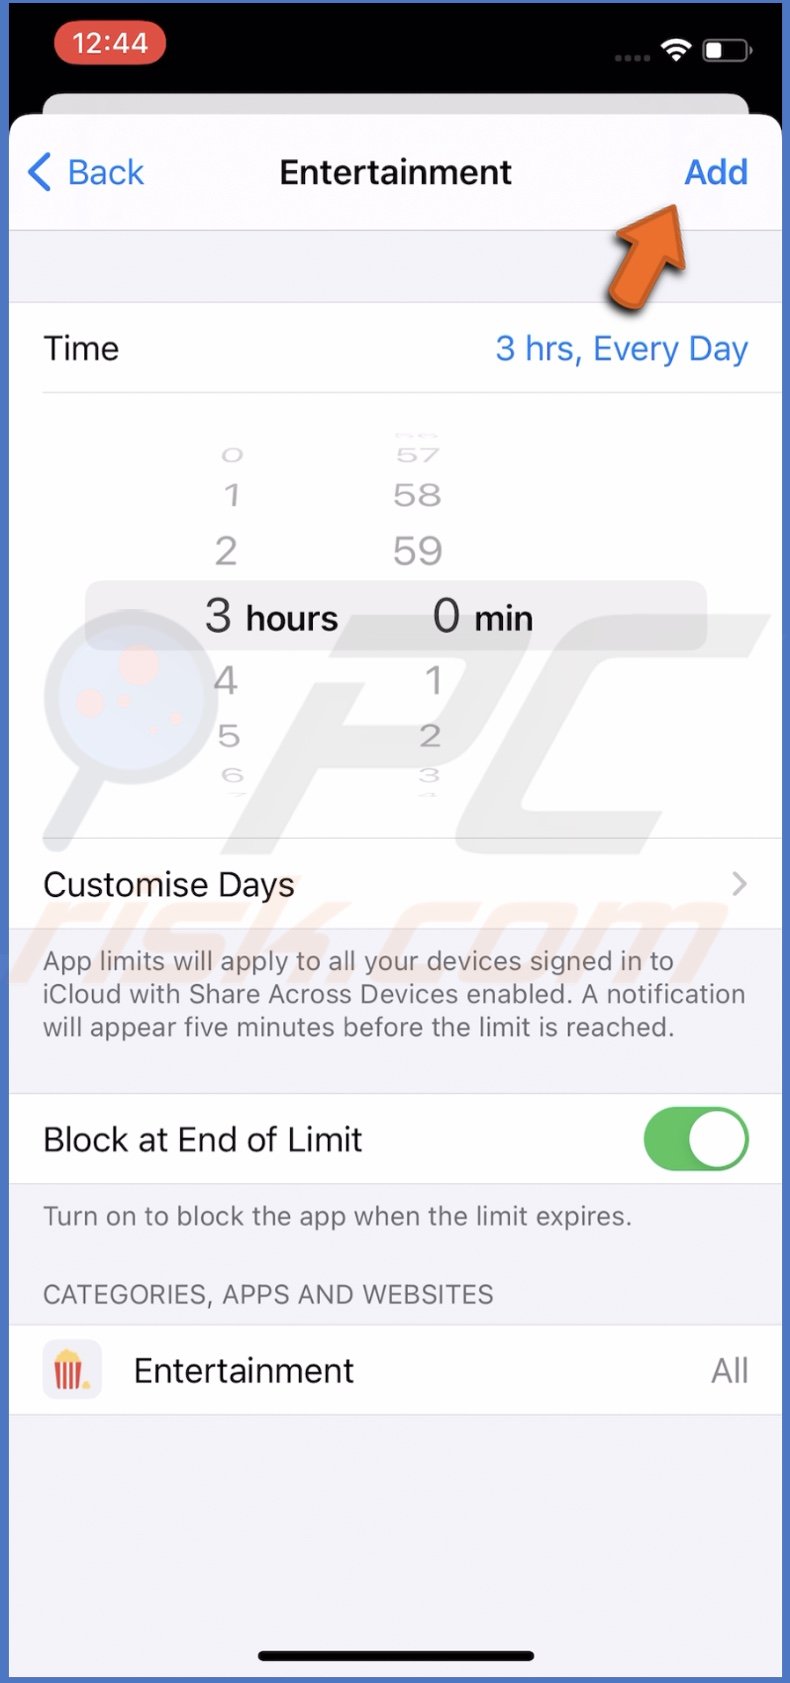
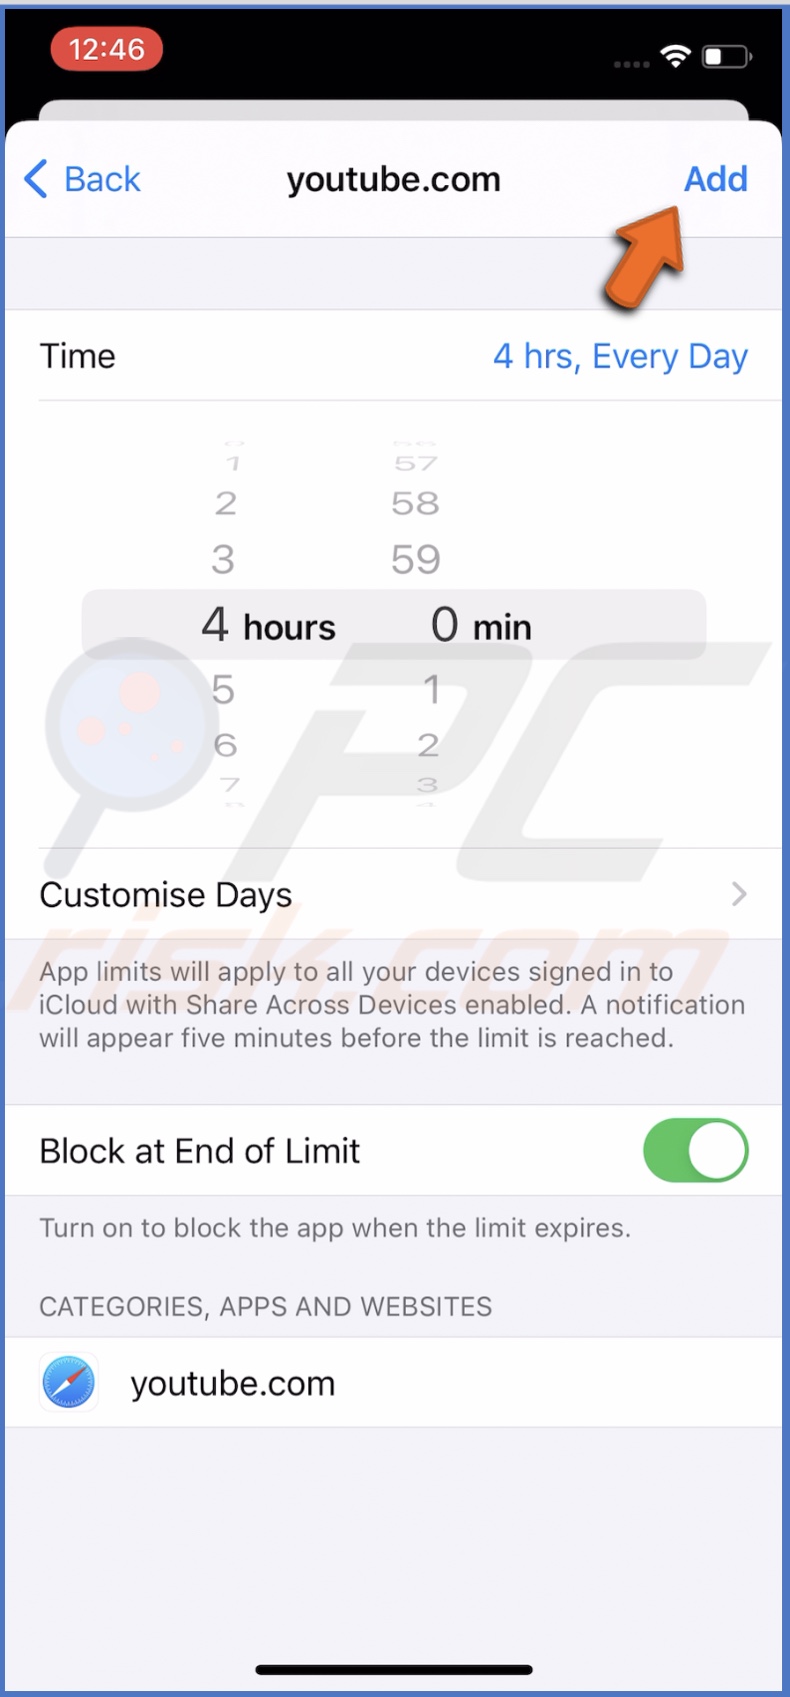
If you enable "Block at End of Limit", you won't be able to use the app after the limit expires.
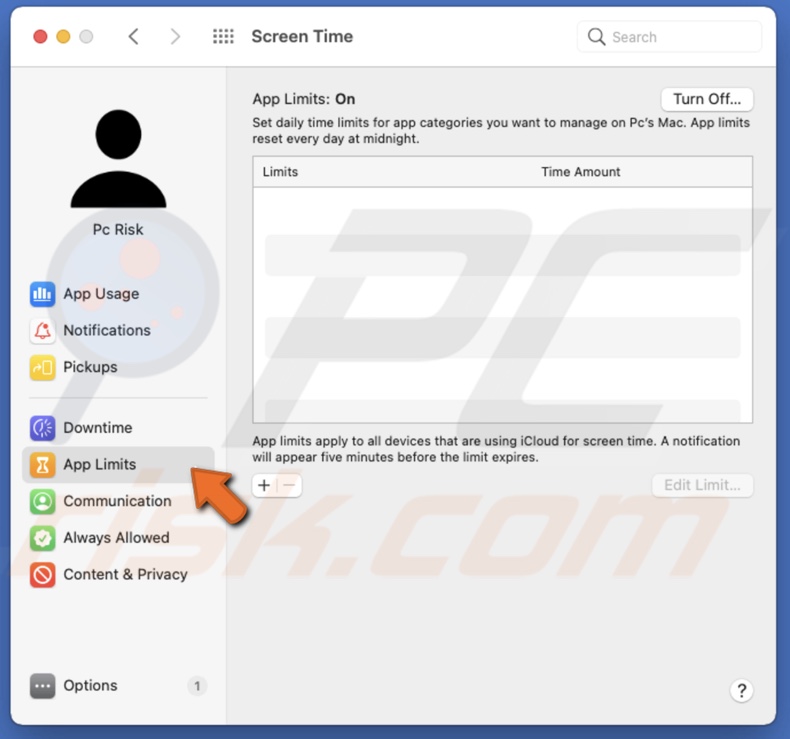
To set App Limits for app categories for Mac, follow the steps below:
1. Click on the Apple logo to open the Apple menu.
2. Go to "System Preferences" and click on "Screen Time".
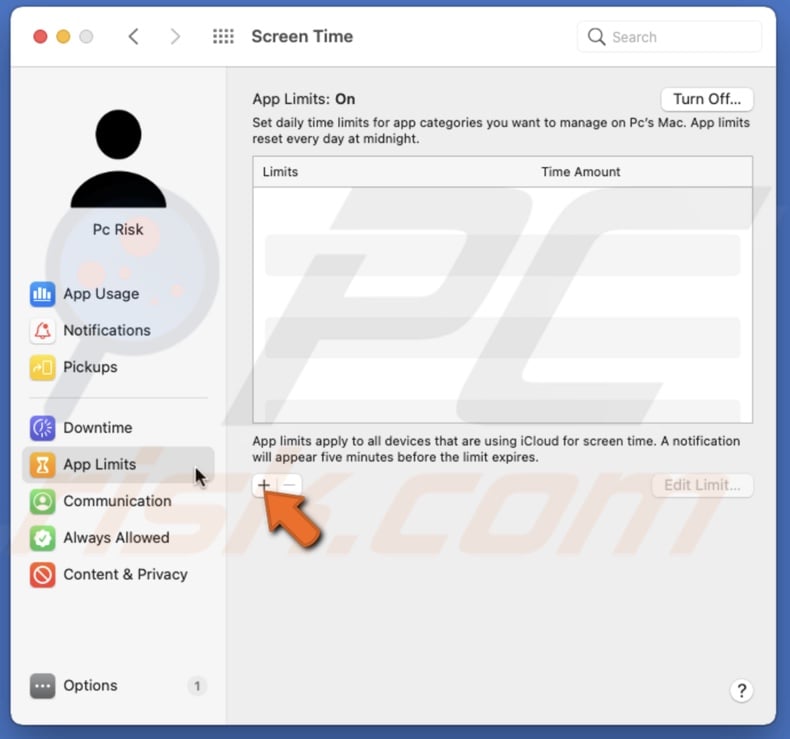
3. Select "App Limits" and click on "Turn On" if it's not already.
4. Then, click on the plus button.
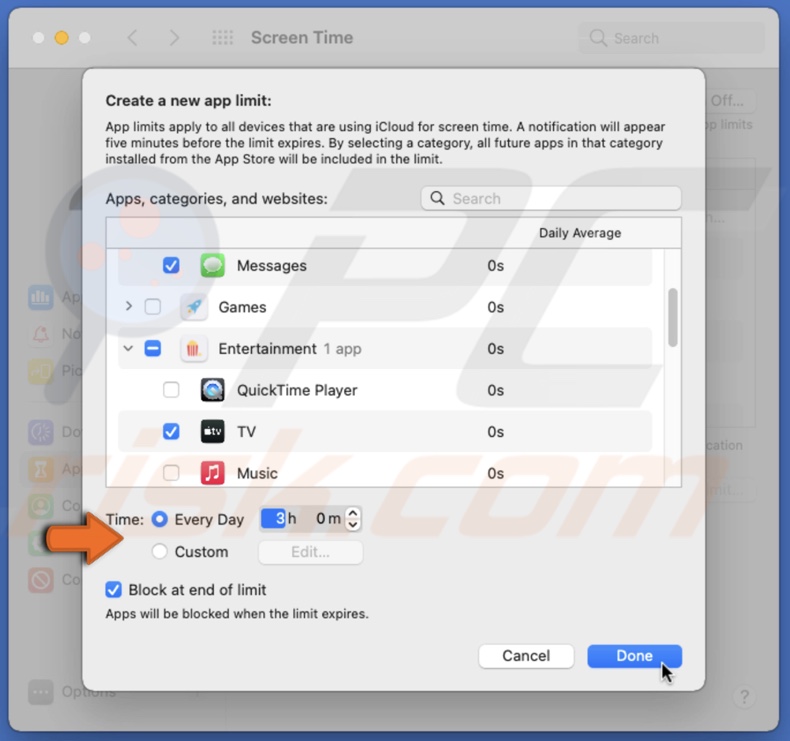
5. In the pop-up window, choose an app category and check the box next to it.
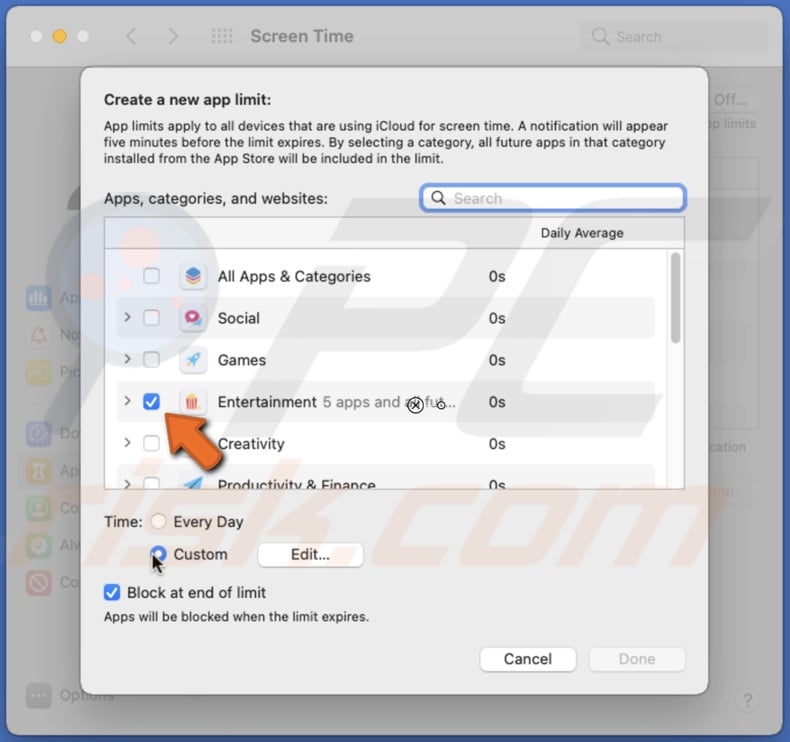
6. At the bottom, select either "Every Day" or "Custom" and pick a time. If you've chosen "Custom" click on "Edit" to choose the limit duration.
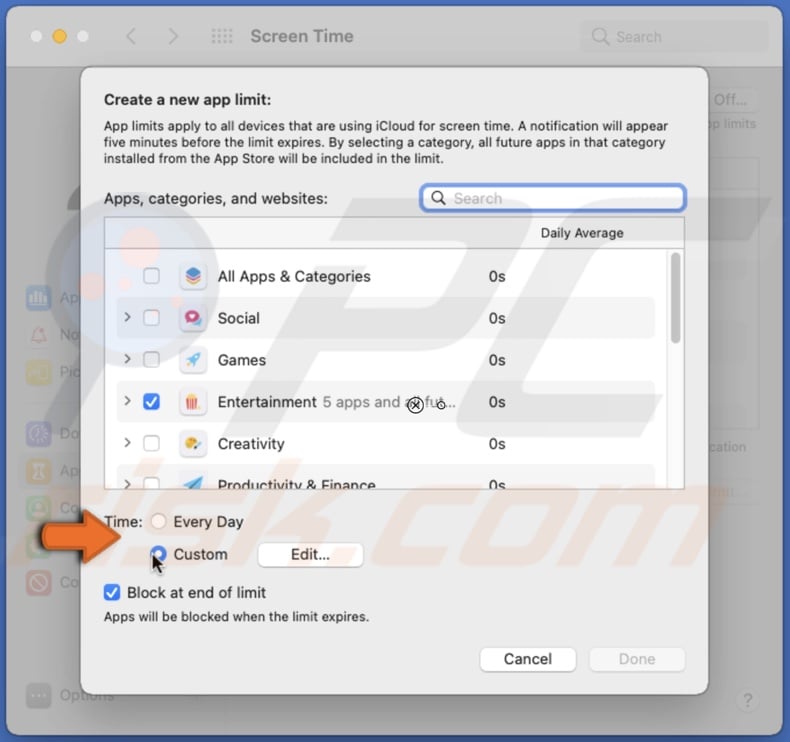
7. Click on "Done".
To set App Limits for specific apps on iPhone and iPad, follow the steps below:
1. Go to your device settings.
2. Then, go to "Screen Time" and enter the passcode.
3. Tap on "App Limits".
4. Choose an app category and tap on the arrow next to it.
5. Then, select an app or several apps from that category you want to limit.
6. When you're done, tap on "Next" at the top right corner.
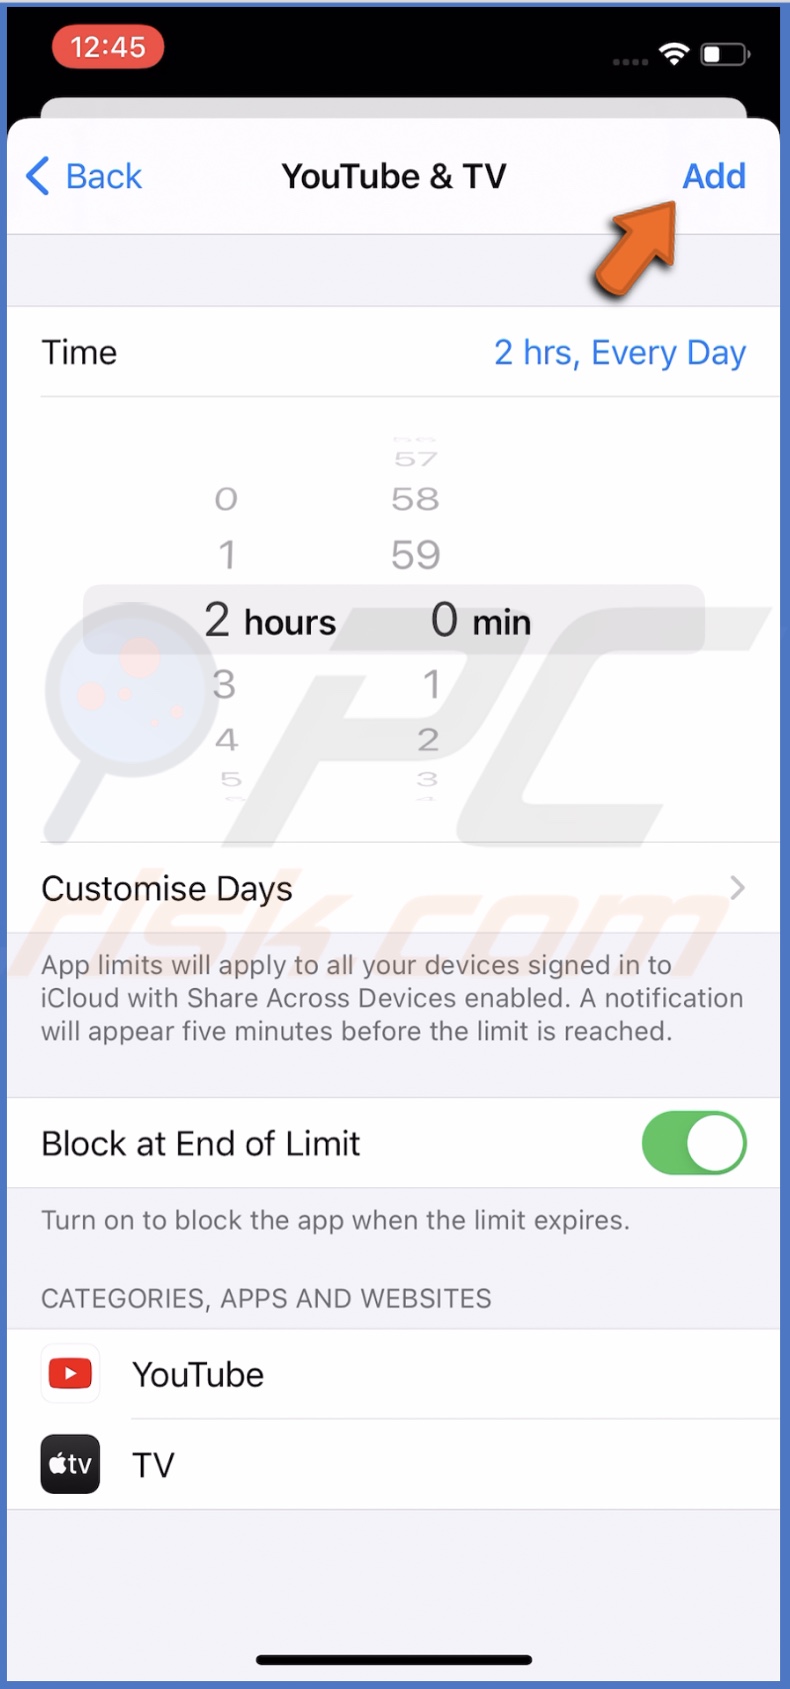
7. Then, set a limit duration or tap on "Customise Days" and set a duration for certain weekdays.
8. When you're done, tap on "Add".
To set App Limits for specific apps on Mac, follow the steps below:
1. Click on the Apple logo to open the Apple menu.
2. Go to "System Preferences" and click on "Screen Time".
3. Select "App Limits" and click on "Turn On" if it's not already.
4. Then, click on the plus button.
5. In the pop-up window, choose an app category and click on the arrow next to it.
6. Choose an app and check the box next to it.
7. Then, select either "Every Day" or "Custom" and pick a time.
8. Click on "Done".
To set App Limits for websites on iPhone and iPad, follow the steps below:
1. Go to your device settings.
2. Then, go to "Screen Time" and enter the passcode.
3. Tap on "App Limits".
4. Scroll down to the bottom and tap on "Websites".
5. Tap on "Add Websites" and enter a website URL you want to limit.
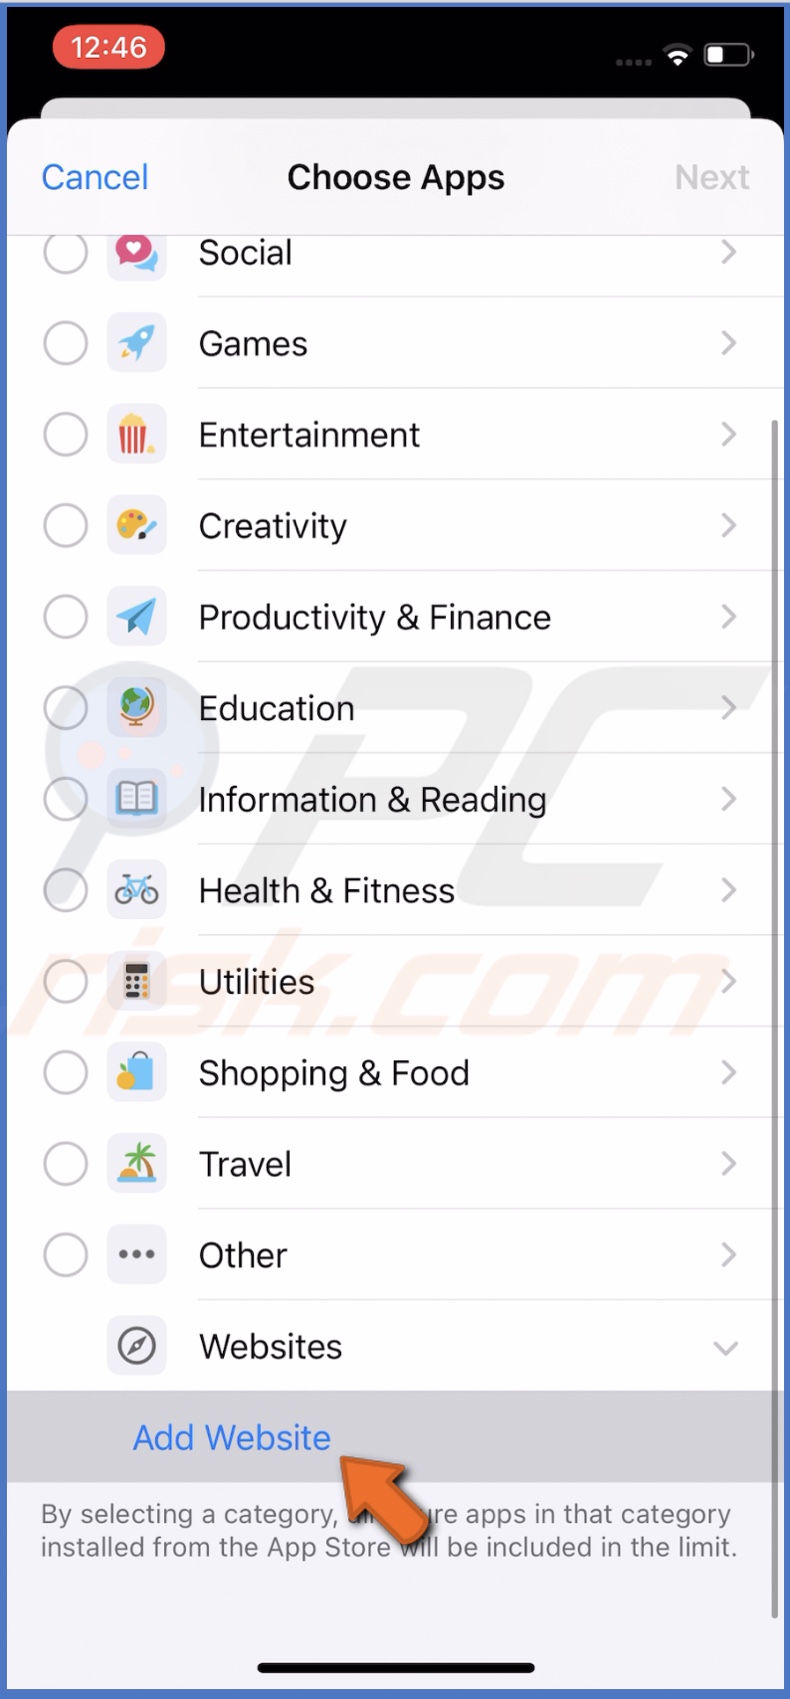
6. When done, in the top right corner of the screen, tap on "Next".
7. Then, set a limit duration or tap on "Customise Days" and set a duration for certain weekdays.
8. When you're done, tap on "Add".
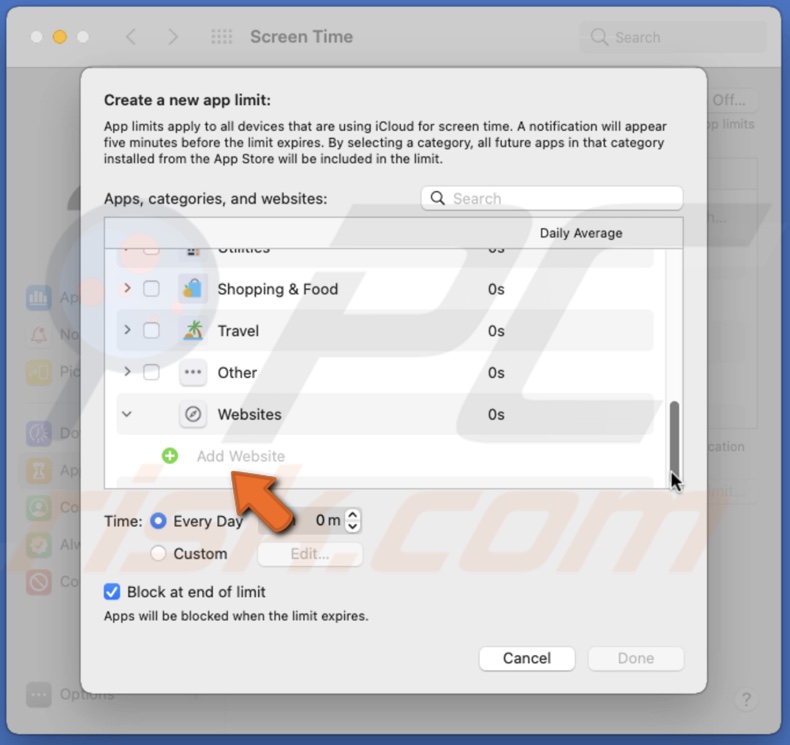
To set App Limits for websites on Mac, follow the steps below:
1. Click on the Apple logo to open the Apple menu.
2. Go to "System Preferences" and click on "Screen Time".
3. Select "App Limits" and click on "Turn On" if it's not already.
4. Then, click on the plus button.
5. In the pop-up window, scroll down to the bottom and click on the arrow next to "Websites".
6. Then, click on the green plus button next to "Add Website".
7. Select either "Every Day" or "Custom" and pick a time.
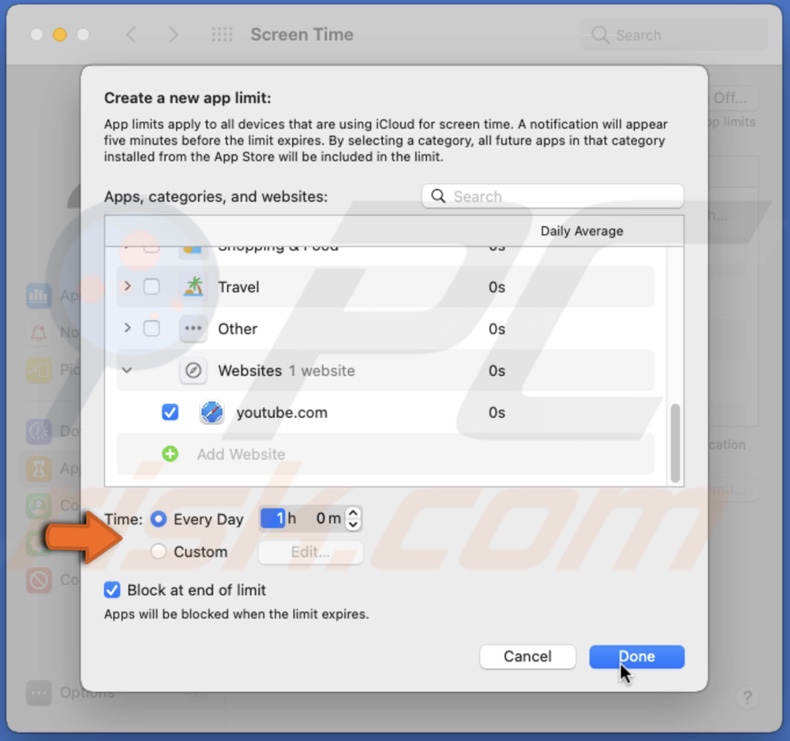
8. Click on "Done".
To delete set App Limits on iPhone and iPad, follow the steps below:
1. Go to Your device settings.
2. Then, go to "Screen Time" and enter the passcode.
3. Tap on "App Limits".
4. Locate your set limit and swipe on it to the left side.
5. You'll see a "Delete" button appear. Tap on it.
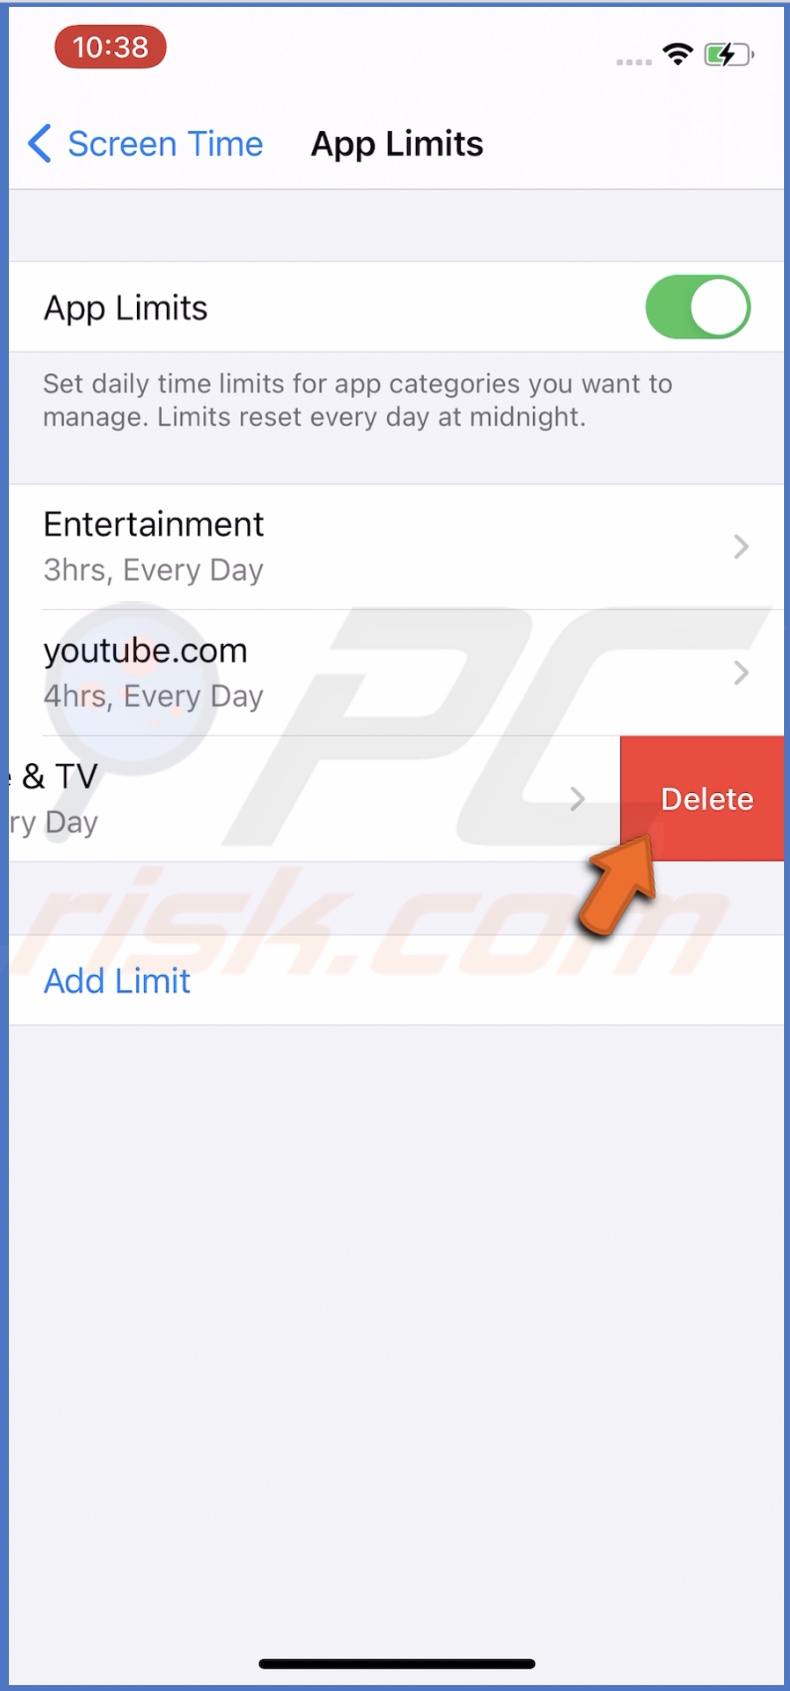
6. Tap on "Delete Limit".
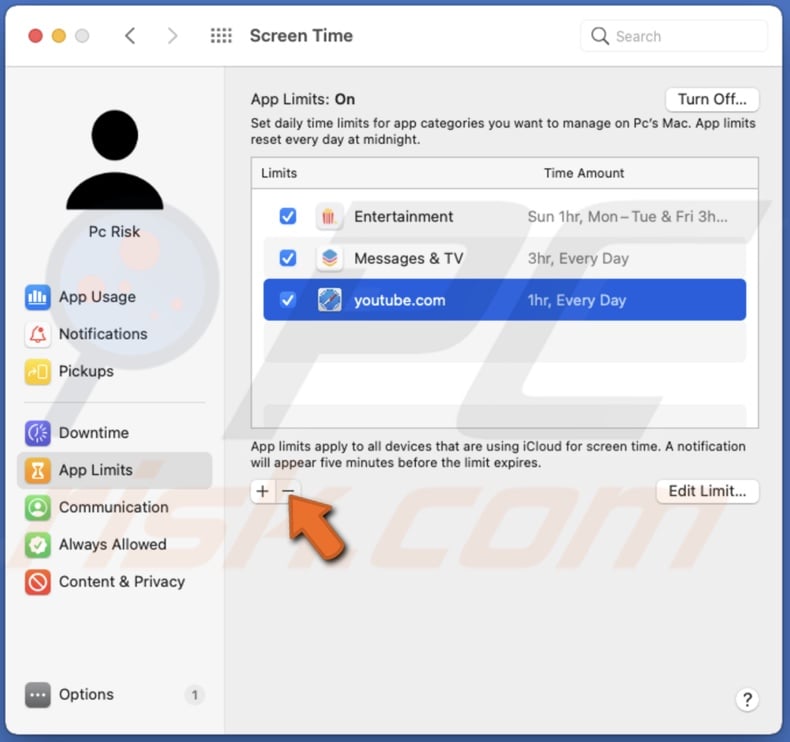
To delete set App Limits on Mac, follow the steps below:
1. Click on the Apple logo to open the Apple menu.
2. Go to "System Preferences" and click on "Screen Time".
3. Click on "App Limits".
4. Choose the app limit you want to remove and check the box next to it.
5. Then, click on the minus button and click on "Delete Limit".
What are Communication Limits and How To Set Them
With Communication Limits, you can limit who you or your children can communicate with. This feature applies to FaceTime, Messages, Phone, and iCloud contacts.
To turn on Communication Limits for iPhone and iPad, follow the steps below:
1. Go to your device settings.
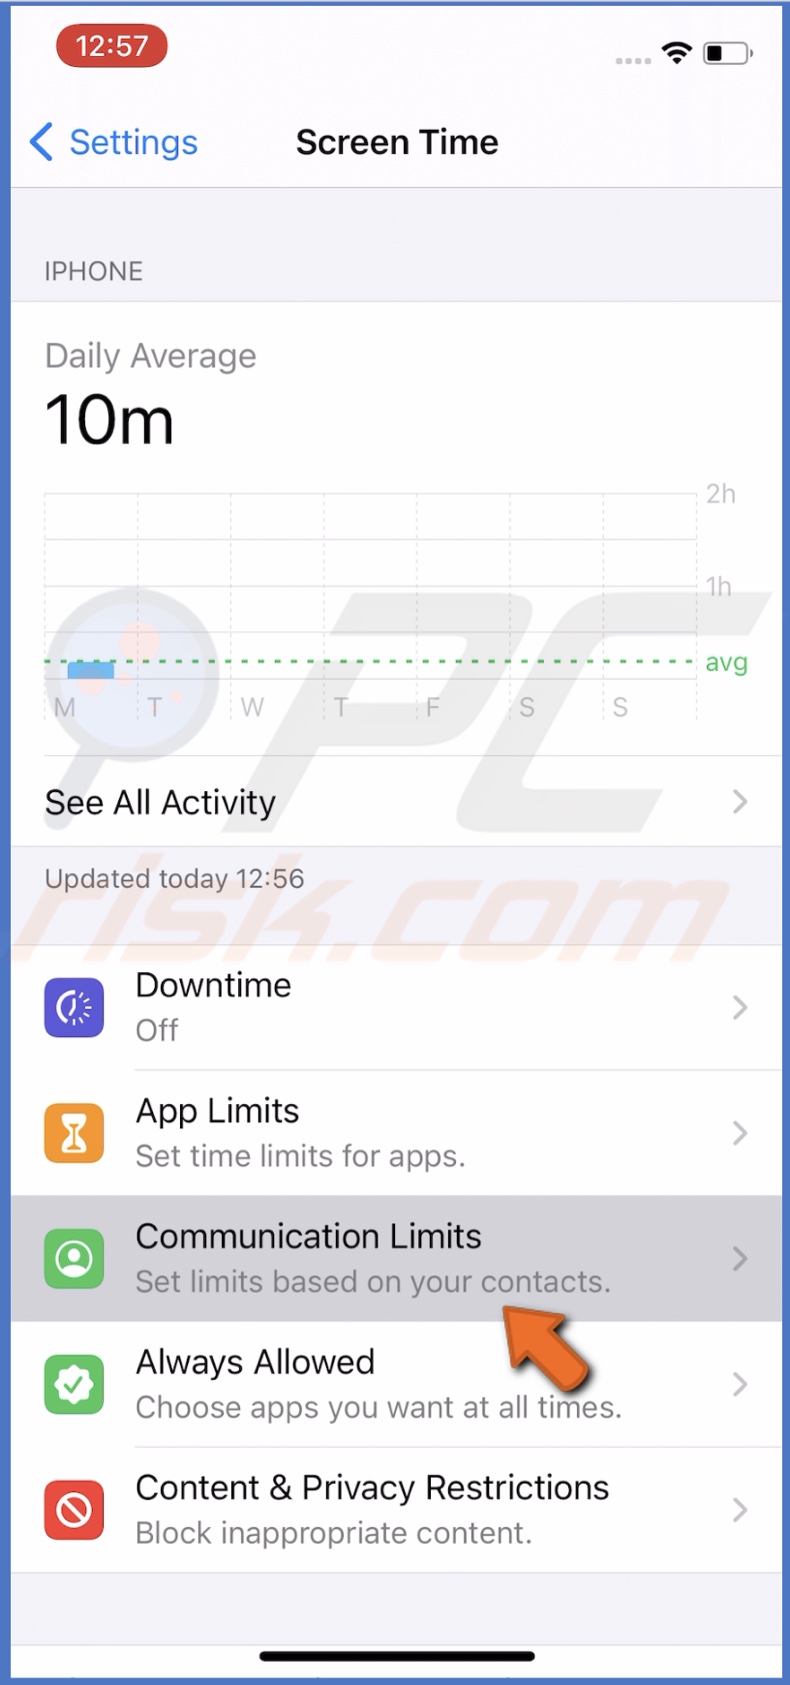
2. Then, go to "Screen Time".
3. Tap on "Communication Limits".
4. You can choose "During Screen time" and "During Downtime".
"During Screen Time" allows you to choose from "Contacts Only", "Contacts & groups with at Leats One Contact", or "Everyone".
"During Downtime" allows you to choose specific contacts.
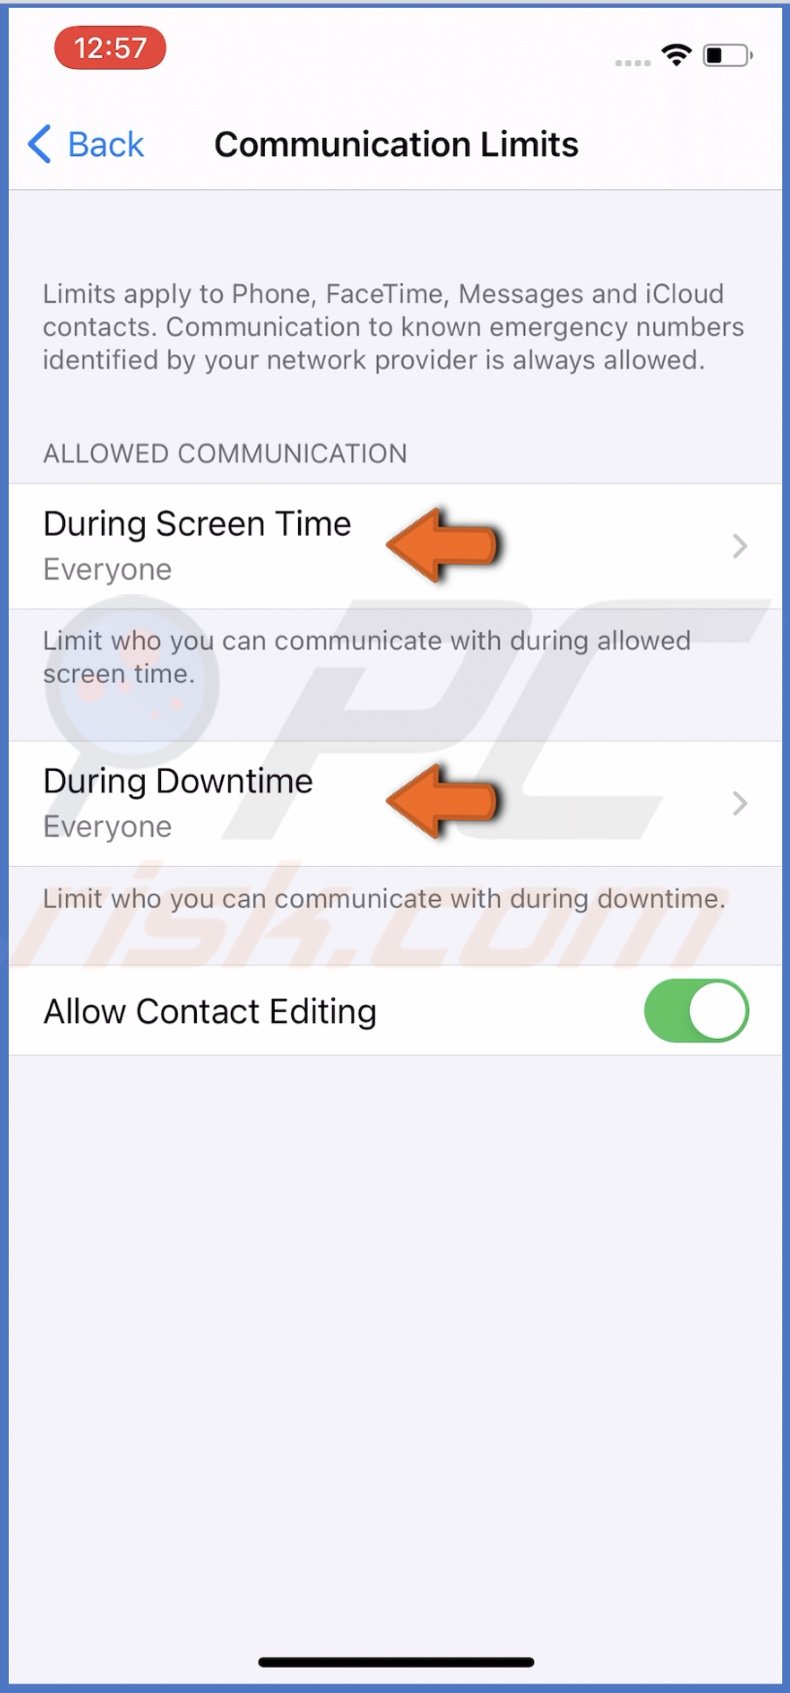
5. If you selected "During Downtime", tap on "Specific Contacts".
6. Select "Choose From My Contacts".
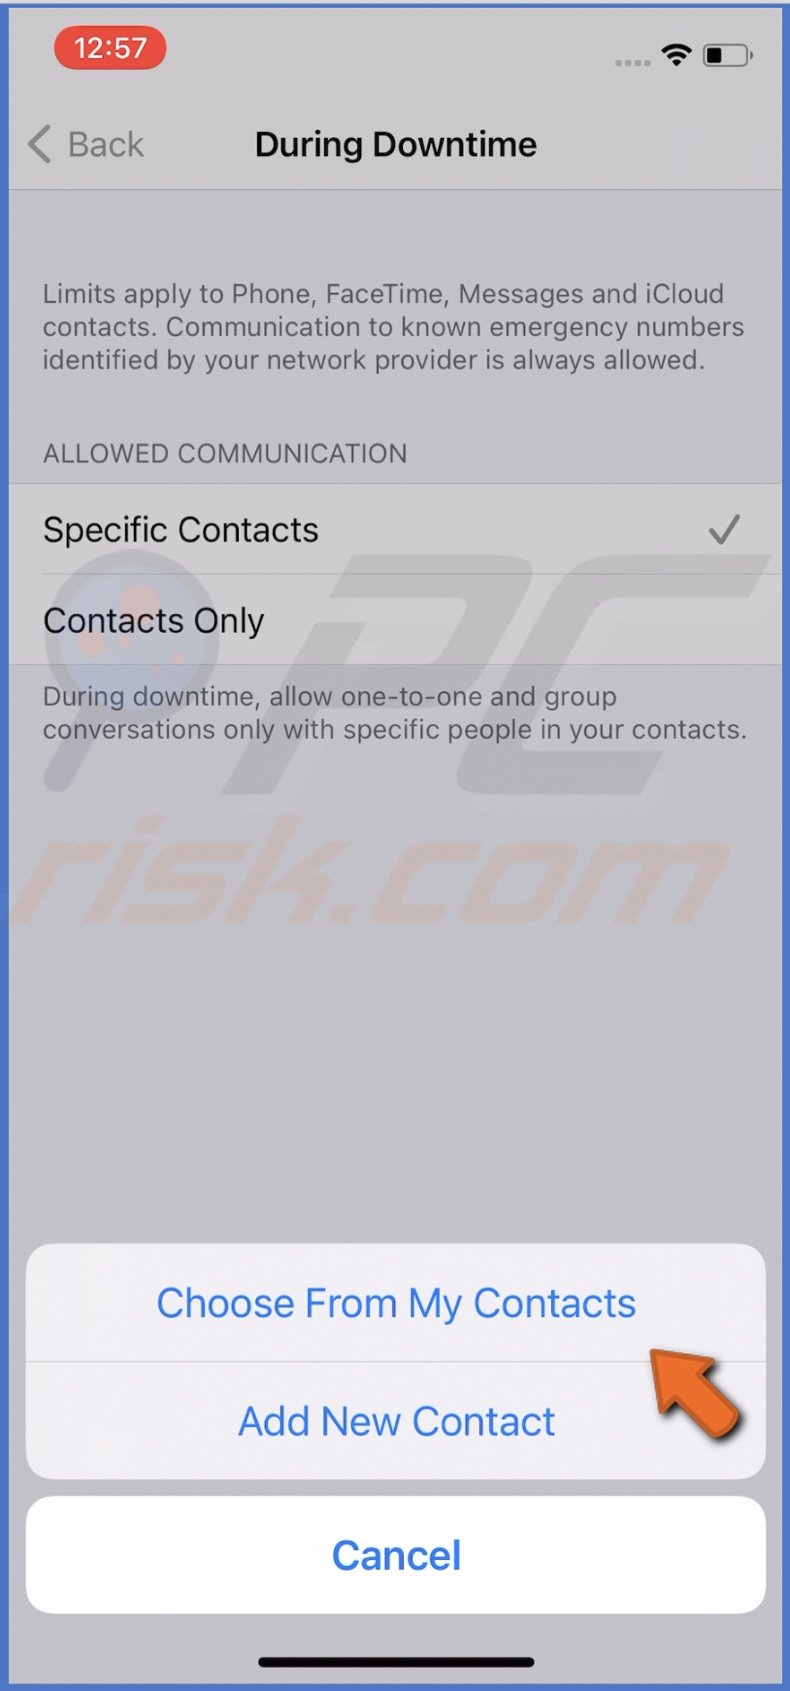
7. Select contacts you want to allow communication with.
8. When done, tap on "Done".
To turn on Communication Limits for Mac, follow the steps below:
1. Click on the Apple logo to open the Apple menu.
2. Go to "System Preferences" and click on "Screen Time".
3. Click on "Communication".
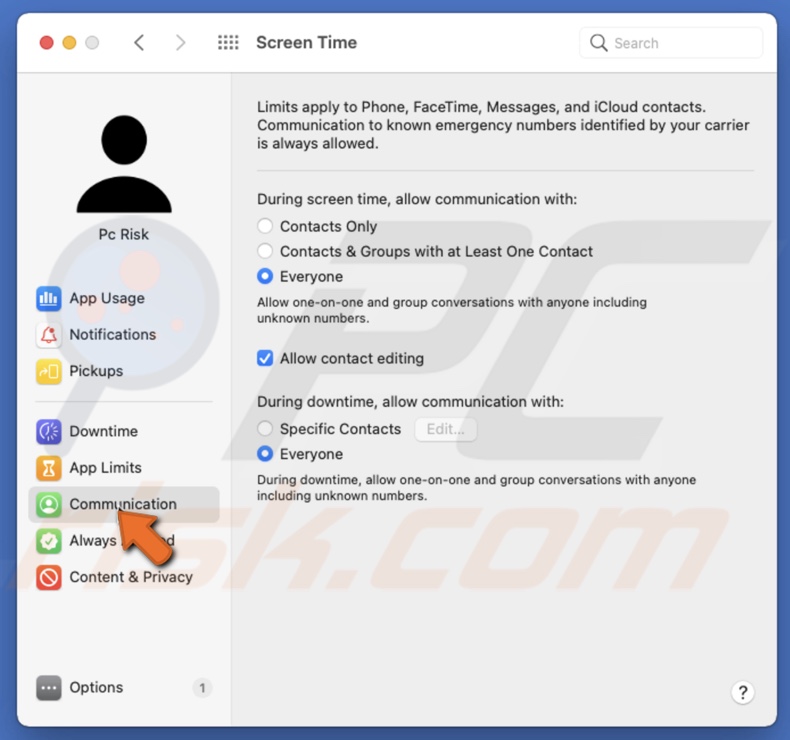
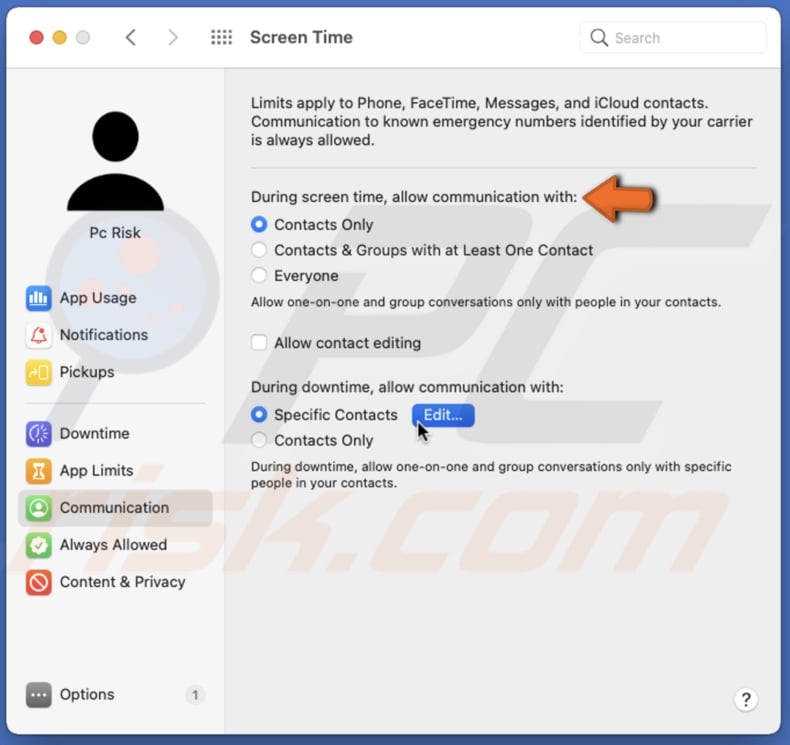
4. Under "During Screen Time, allow communication with" choose the preferred option.
5. Under "During Downtime, allow communication with" select "Specific Contacts".
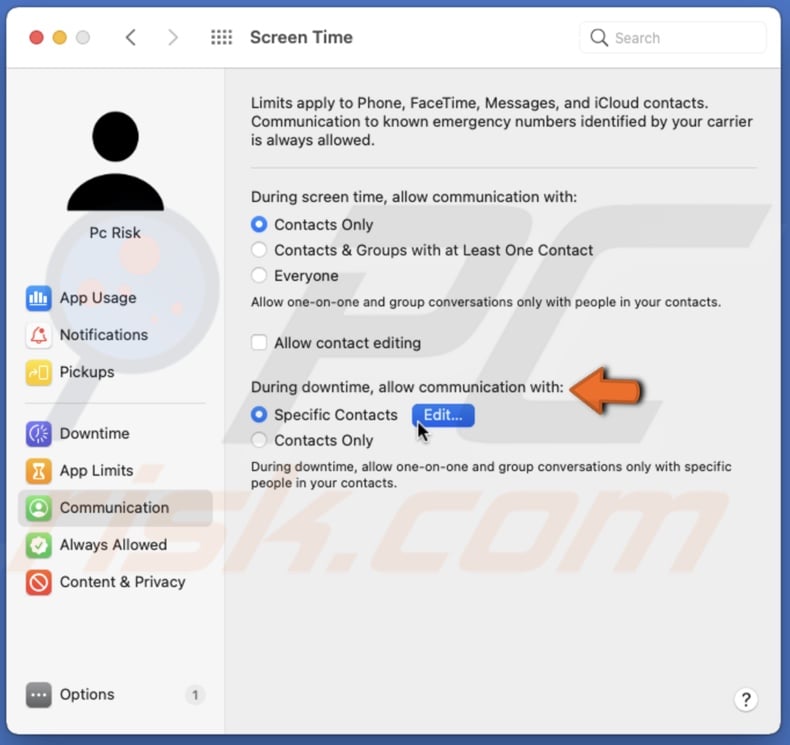
6. Click on "Edit", select "Add from My Contacts", and select contacts you want to allow communication with. Or select "Add New Contact" and enter the contact information.
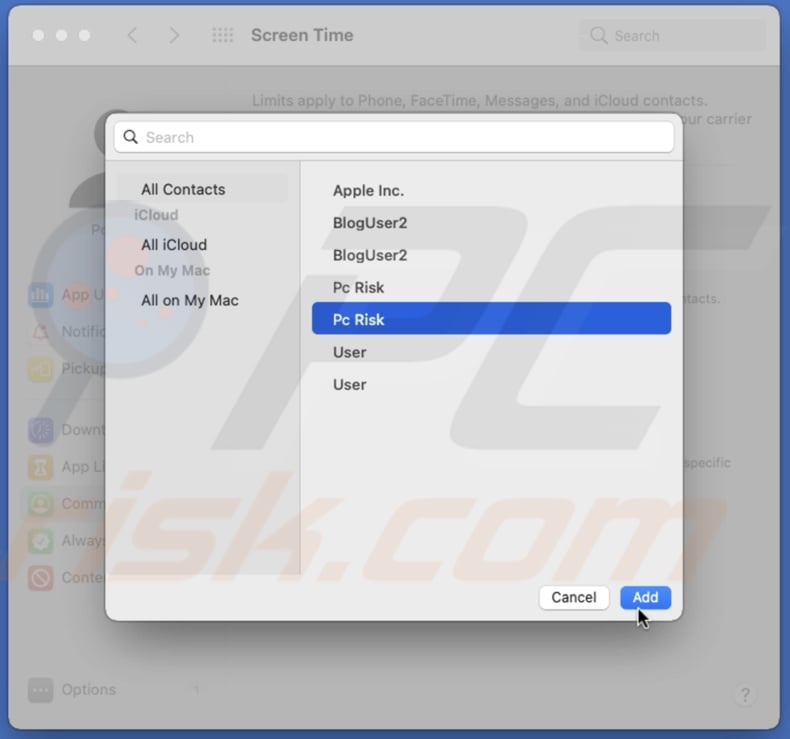
7. When you're done, click on "Add" and then on "Done".
How to Enable Content & Privacy Restrictions
When Content & Privacy Restrictions are enabled, you can control the content that appears on your device screen.
To turn on Content & Privacy Restrictions for iPhone and iPad, follow the steps below:
1. Go to your device settings.
2. Tap on "Screen Time".
3. Go to "Content & Privacy Restrictions".
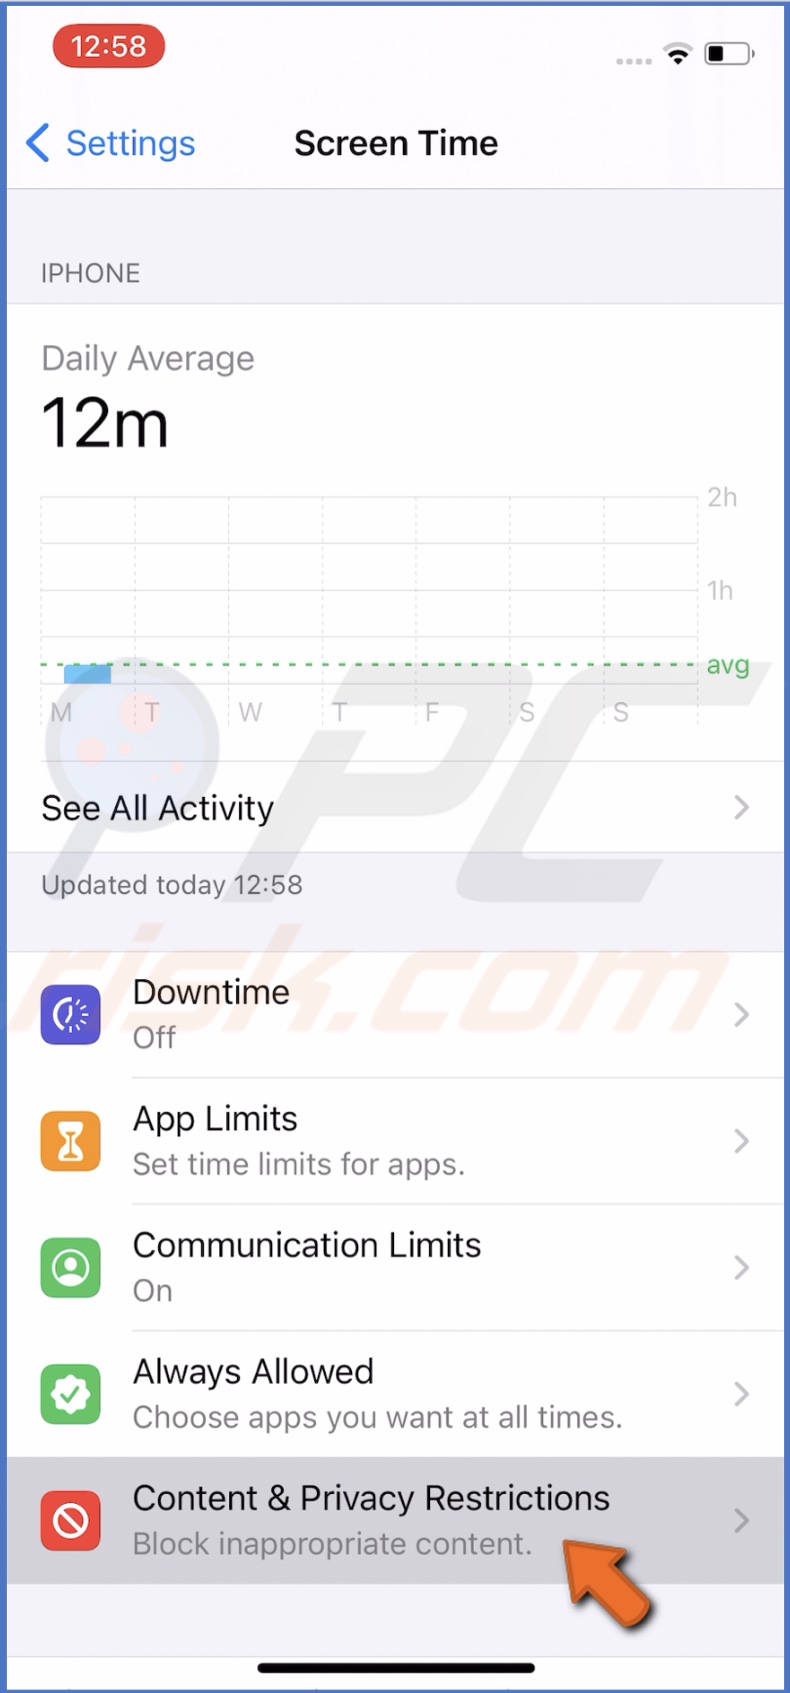
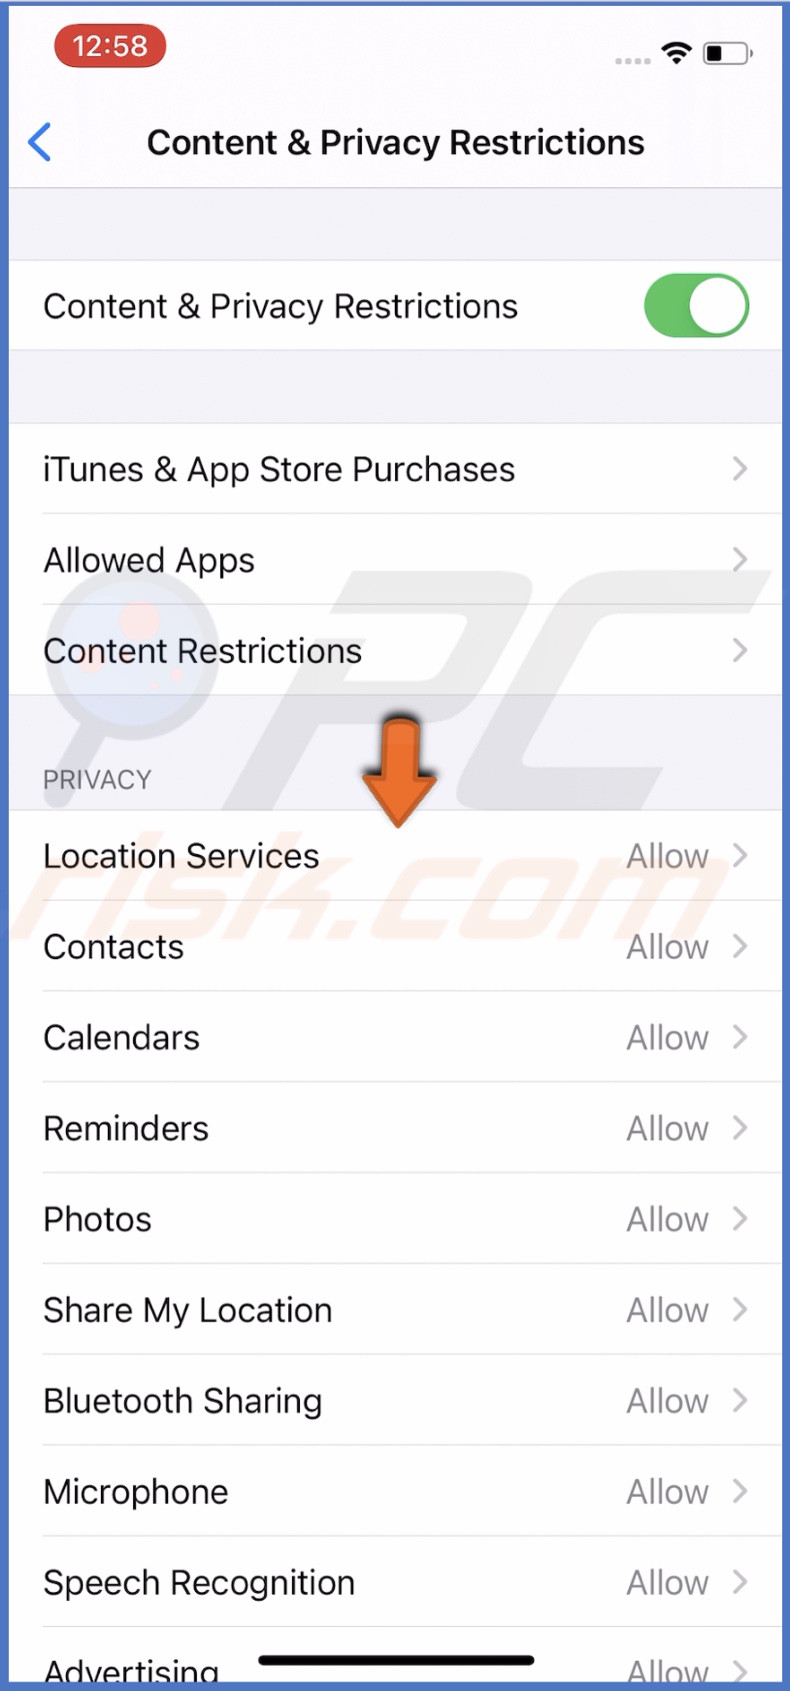
4. Next to "Content & Privacy Restrictions", move the slider to enable the feature.
5. Under the "Privacy" section, choose what you want to restrict, tap on it and select "Don't Allow Changes".
To turn on Content & Privacy Restrictions for Mac, follow the steps below:
1. Click on the Apple logo to open the Apple menu.
2. Go to "System Preferences" and click on "Screen Time".
3. Click on "Content & Privacy".
4. Click on "Turn On" if not already.
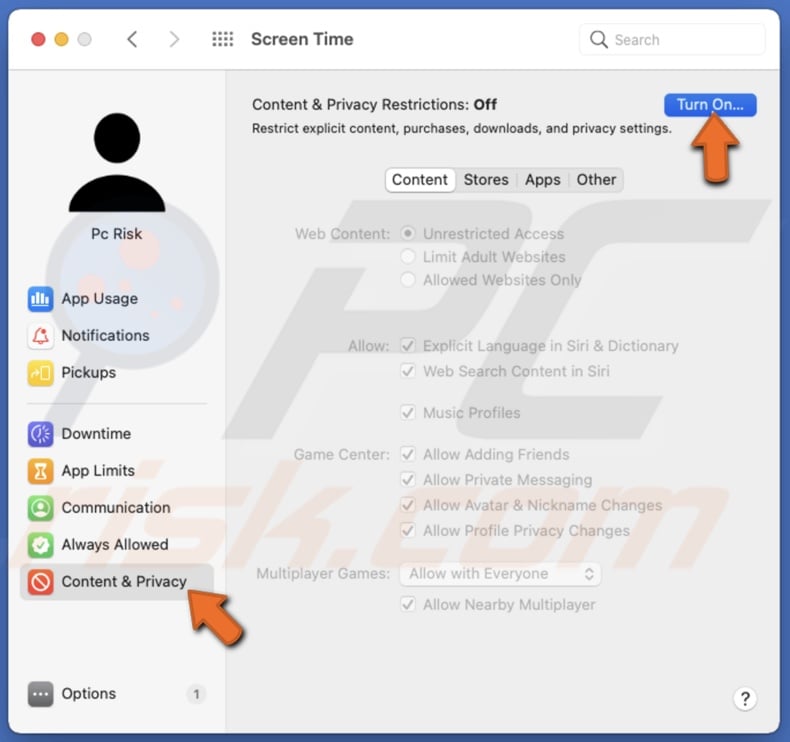
5. Then, select each tab and change the settings according to your liking.
Follow the same steps to disable content restrictions.
How to Block iTunes and App Store Purchases
You can restrict iTunes and App Store purchases from Content & Privacy Restrictions.
To restrict iTunes and App Store purchases on iPhone and iPad, follow the steps below:
1. Go to your device settings.
2. Tap on "Screen Time".
3. Go to "Content & Privacy Restrictions".
4. Next to "Content & Privacy Restrictions", move the slider to enable the feature.
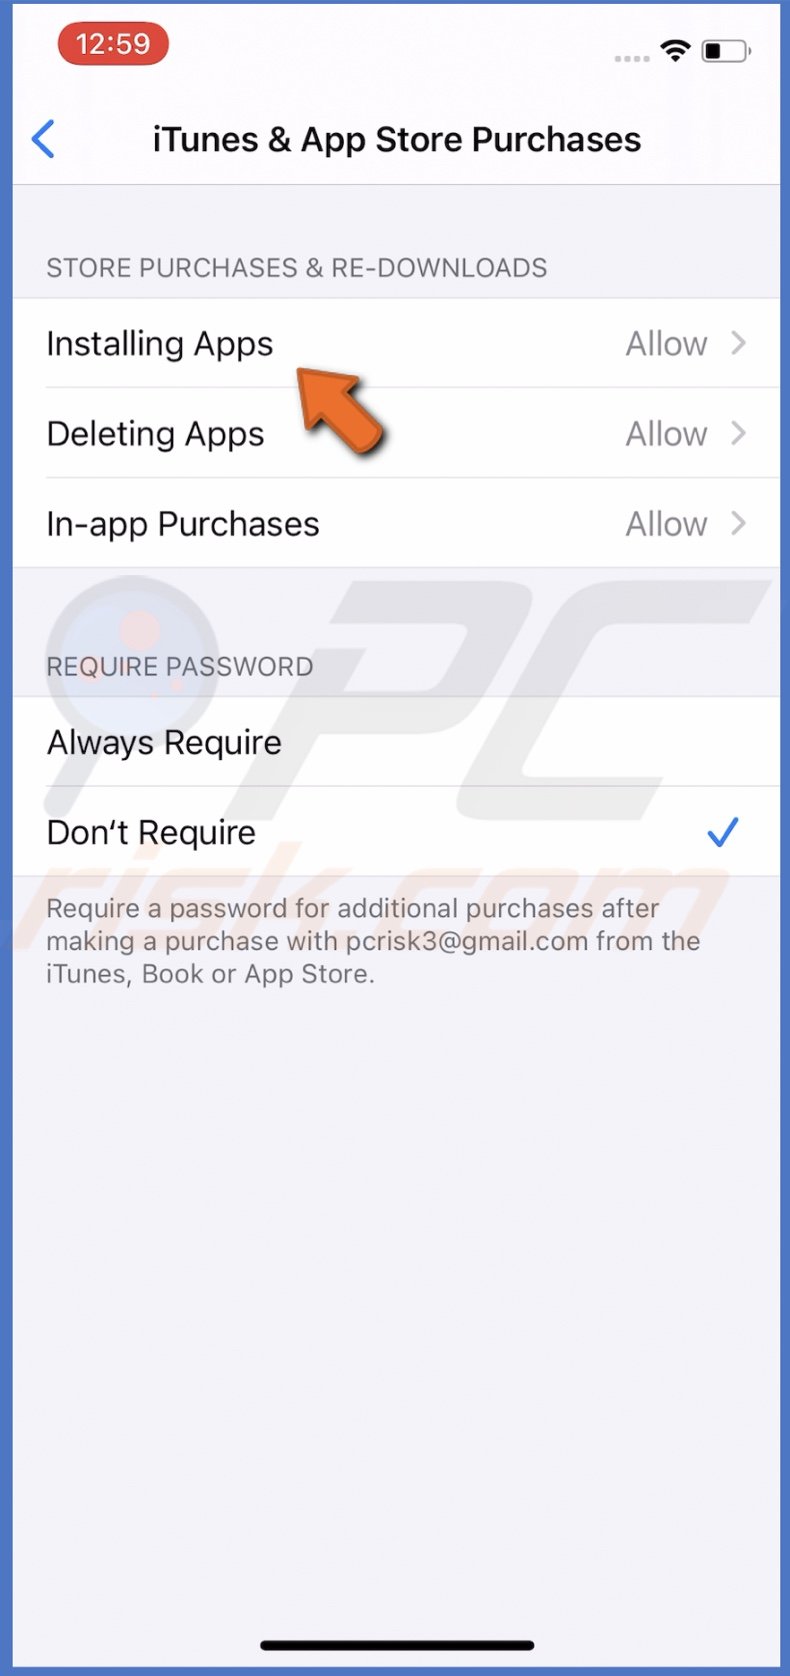
5. Then, tap on "iTunes & App Store Purchases".
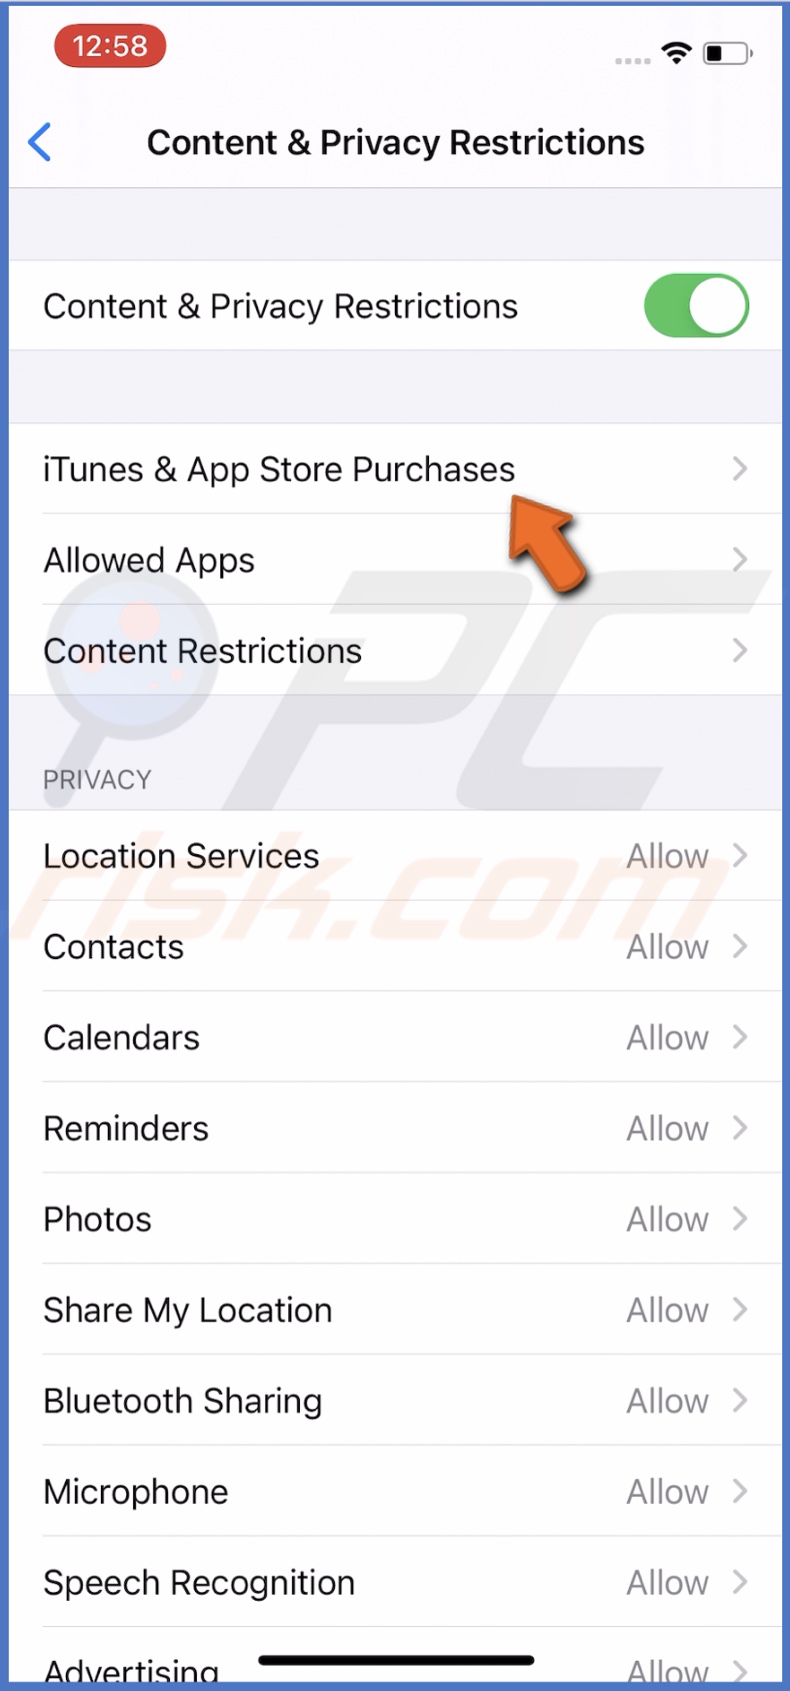
6. Tap on "Instaling Apps" and select "Don't Allow".
To restrict iTunes and App Store purchases on Mac, follow the steps below:
1. Click on the Apple logo to open the Apple menu.
2. Go to "System Preferences" and click on "Screen Time".
3. Click on "Content & Privacy".
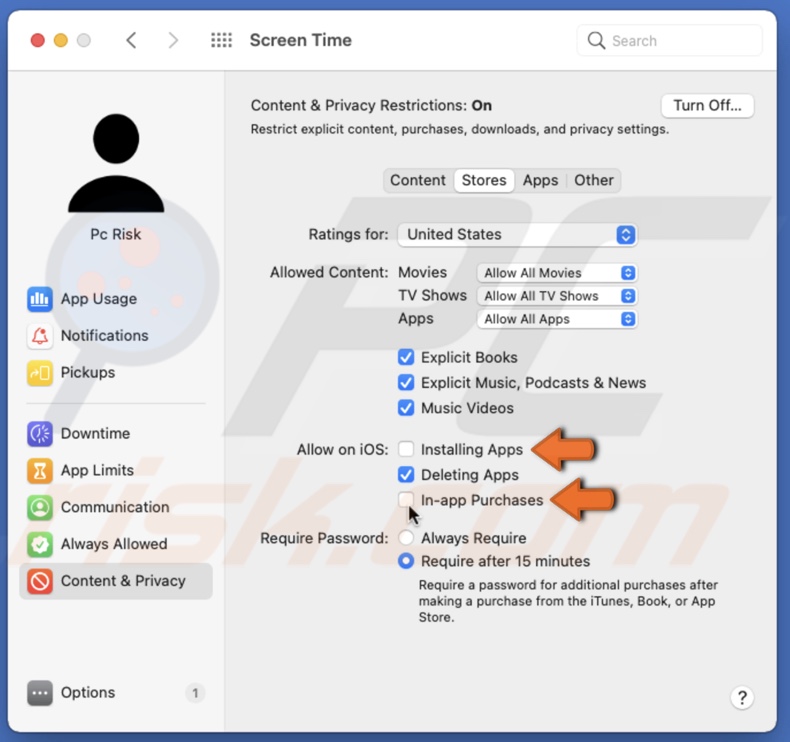
4. Go to the "Stores" tab.
5. Then, in the "Allow on iOS" section, uncheck the box next to "Installing Apps" and "In-app Purchases".
Now anyone using your device won't be able to download any apps from the App Store or iTunes.
To disable the restriction, follow the same steps.
How to Turn On Child's Screen Time
You can enable Screen Time on your child's iPhone as well.
To turn on child's Screen Time on iPhone and iPad, follow the steps below:
1. Open the Settings app on your kid's iPhone.
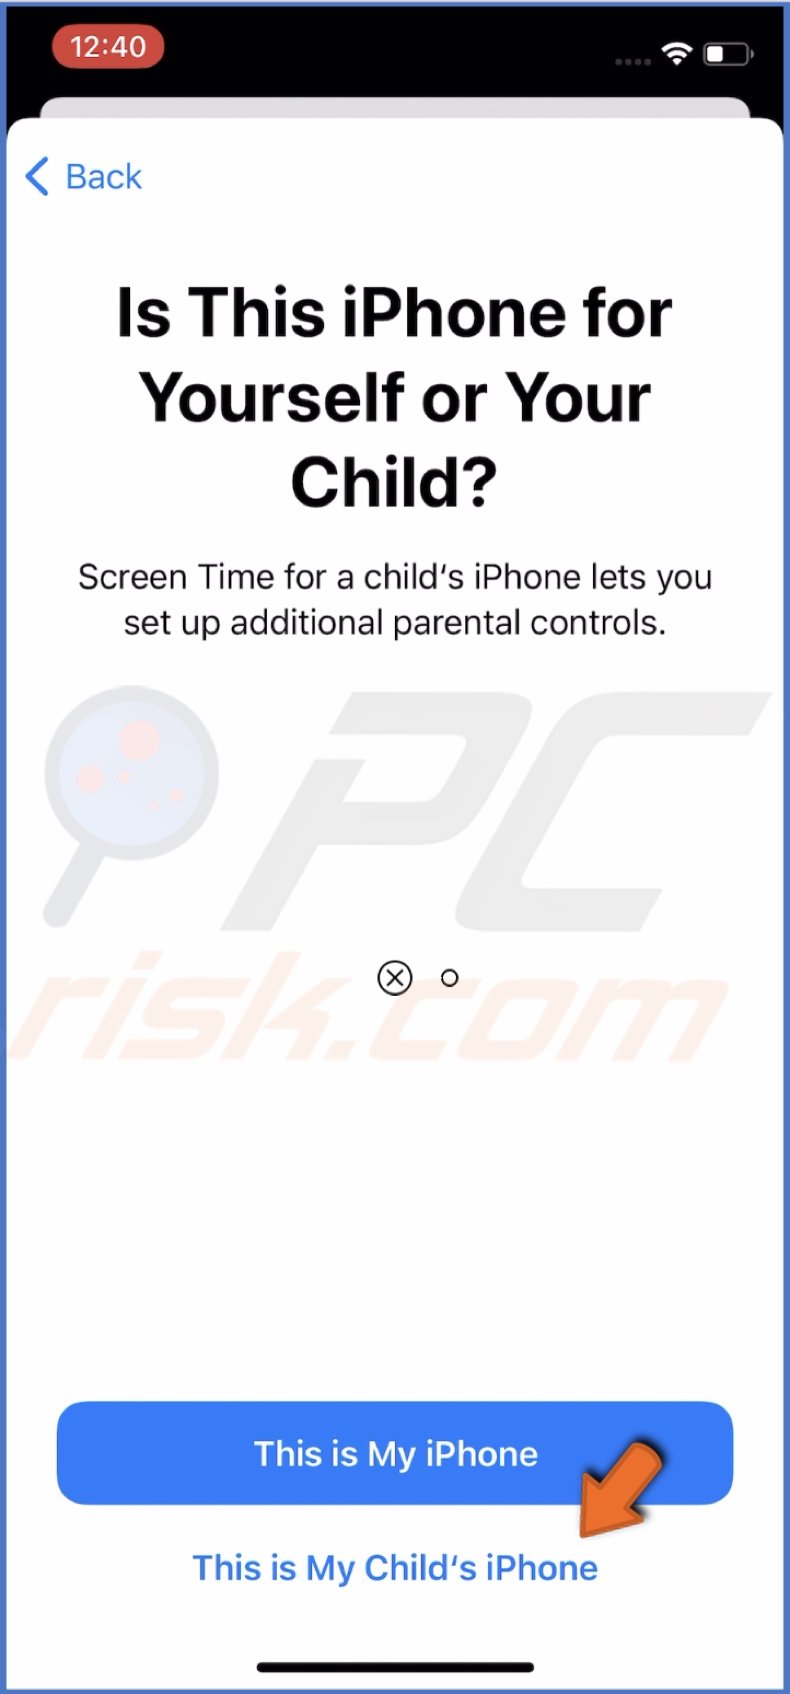
2. Go to "Screen Time" and tap on "Turn On Screen Time".
3. Tap on "Continue" and select "This is My Child's iPhone".
To turn on child's Screen Time on Mac, follow the steps below:
1. Go to Mac and click on the Apple logo to open the Apple menu.
2. Go to "System Preferences" and click on "Screen Time".
3. Then, at the bottom left corner, click on "Options".
4. At the top right corner, click on "Turn On".
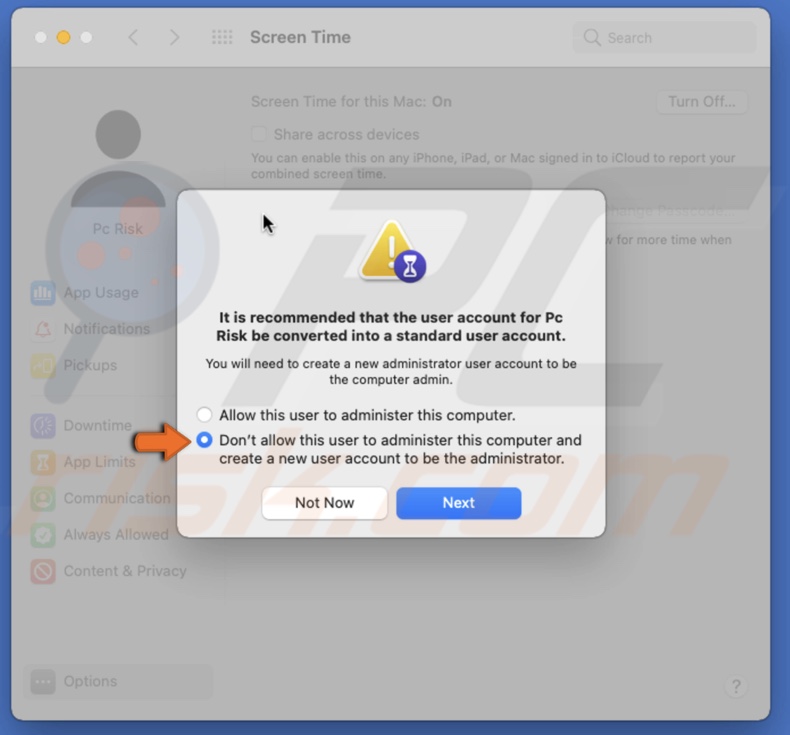
5. Check the box next to "Use Screen time Passcode".
6. Then, select the second option and create another account to be the administrator so your child can't access Screen Time settings.
Now you can proceed to set Downtime, Content & Privacy Restrictions, and other features.
How to Disable Screen Time
If you don't need to use Screen Time, you can quickly turn it off.
To disable Screen Time on iPhone and iPad, follow the steps below:
1. Go to the "Settings" app.
2. Tap on "Screen Time".
3. Scroll down to the bottom and tap on "Turn Off Screen Time".

4. Enter your Screen Time passcode and tap on "Turn Off Screen Time" again.
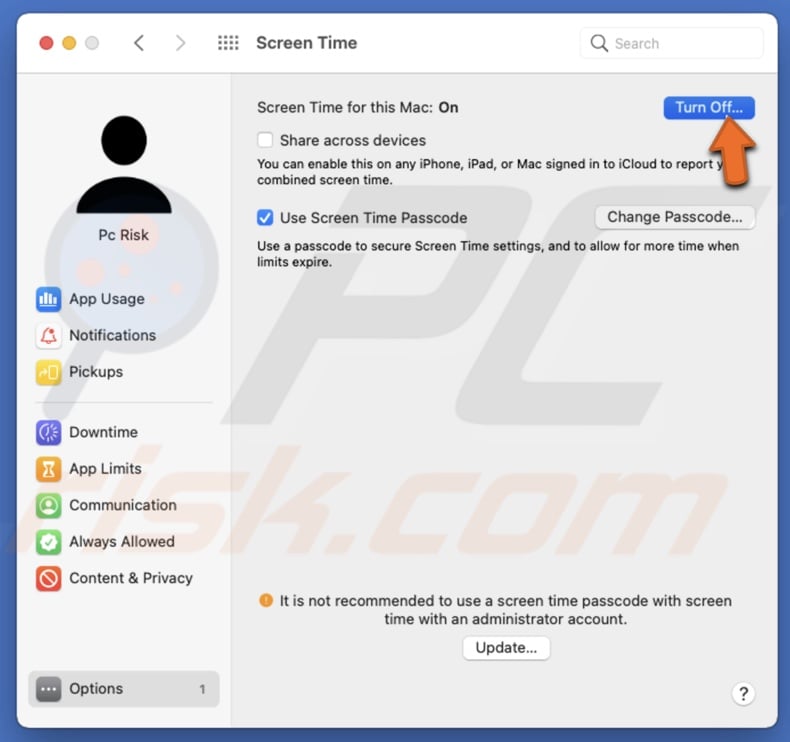
To disable Screen Time on Mac, follow the steps below:
1. Click on the Apple logo to open the Apple menu.
2. Go to "System Preferences" and click on "Screen Time".
3. Click on "Option" at the bottom left corner of the window.
4. Then, click on "Turn Off". If asked, enter your Screen Time passcode.
If you ever need to use Screen Time again, you'll have to set all restrictions and other settings again.
We hope you found the information to be helpful!
You can also check out the video above for a step-by-step tutorial.
Share:

Karolina Peistariene
Author of how-to guides for Mac users
Responsible for collecting, analyzing, and presenting problem-solving solution articles related to macOS issues. Years of macOS experience combined with solid research and analyzing skills help Karolina provide readers with working and helpful solutions as well as introduce various features Mac has to offer.
▼ Show Discussion