Set a Song as Your iPhone Ringtone Without iTunes or PC

(updated)
Get Free Scanner and check your computer for errors
Fix It NowTo fix found issues, you have to purchase the full version of Combo Cleaner. Free trial available. Combo Cleaner is owned and operated by Rcs Lt, the parent company of PCRisk.com read more.
How You Can Set a Song as Your iPhone Ringtone Without the Help of iTunes or PC?
Most mobile devices have the option to turn any sound or song into your device ringtone. Some offer a speedy and easy way to do that, while with other mobiles, you need to break a sweat. We would say iPhone belongs in the second category. Even though it's not that hard, it could take some time.
With the GarageBand app, you can create custom ringtones of any song, sound, or recorded track. Maybe you heard a song that would perfectly fit as a ringtone for a certain someone. Or perhaps you want to hear your child laugh every time someone calls you.
Keep on reading to find out how you can create a custom ringtone of a song or use a voice memo.
Video on How You Can Set a Song as Your iPhone Ringtone Without the Help of iTunes or PC?
Table of Contents:
- Introduction
- How to Create a Custom iPhone Ringtone
- How to Create a Custom iPhone Ringtone From a Voice Memo
- Video on How You Can Set a Song as Your iPhone Ringtone Without the Help of iTunes or PC?
Download Computer Malware Repair Tool
It is recommended to run a free scan with Combo Cleaner - a tool to detect viruses and malware on your device. You will need to purchase the full version to remove infections. Free trial available. Combo Cleaner is owned and operated by Rcs Lt, the parent company of PCRisk.com read more.
How to Create a Custom iPhone Ringtone
First, you need to download the song you want to make a ringtone out of. You can download it either from Youtube or place. The important this is it needs to be in your Files app or music library.
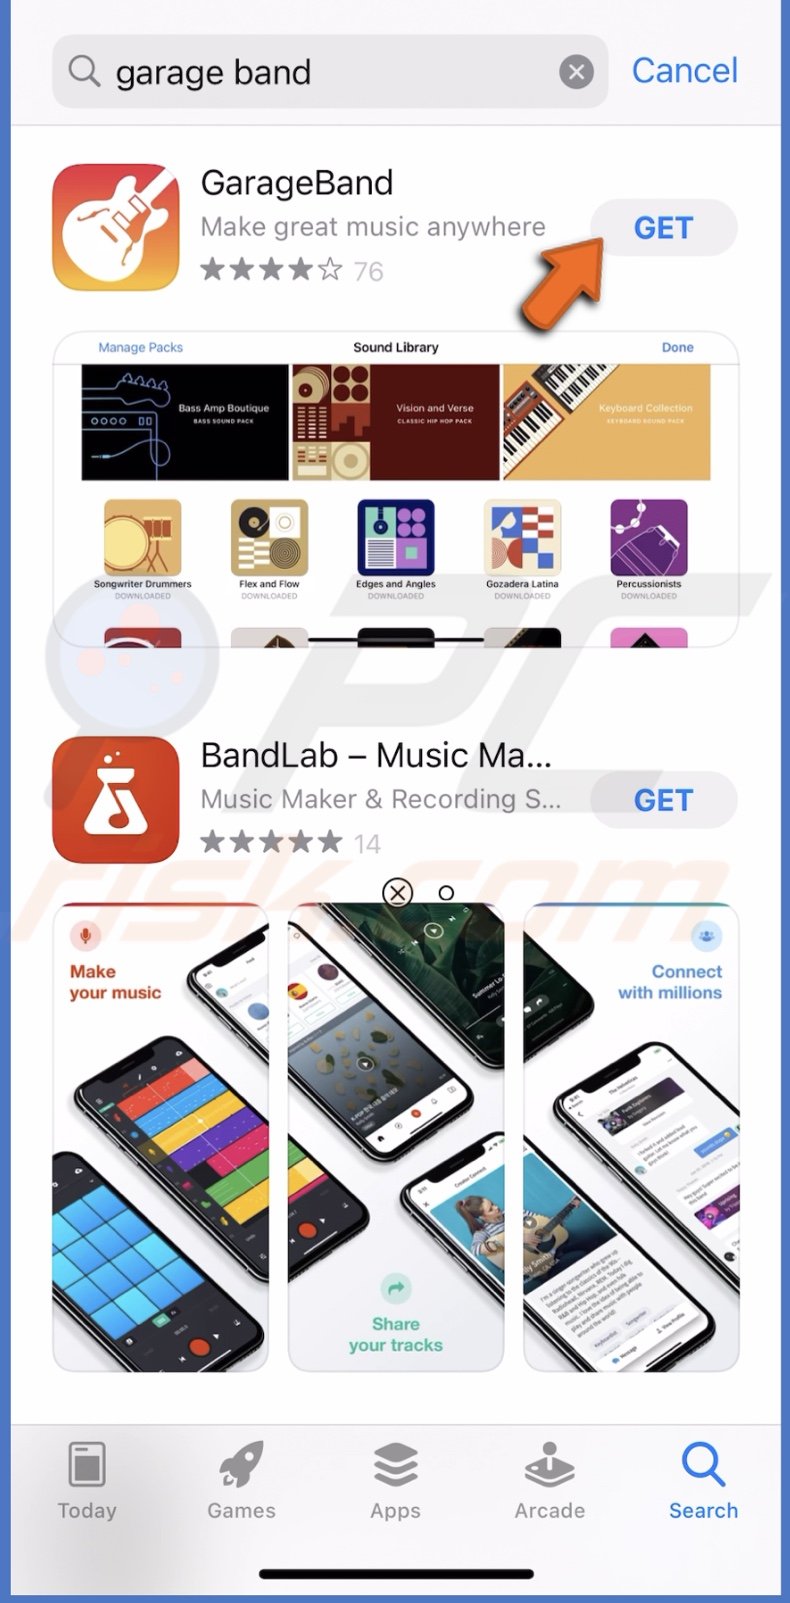
Also, make sure you have the Garageband app. If you don't, go to the App Store and download it. If you're not able to download it, make sure your device has the latest update.
To create a custom ringtone, follow the steps below:
1. Download and open the "GarageBand" app.
2. Select the "Tracks" tab and pick any instrument you like.
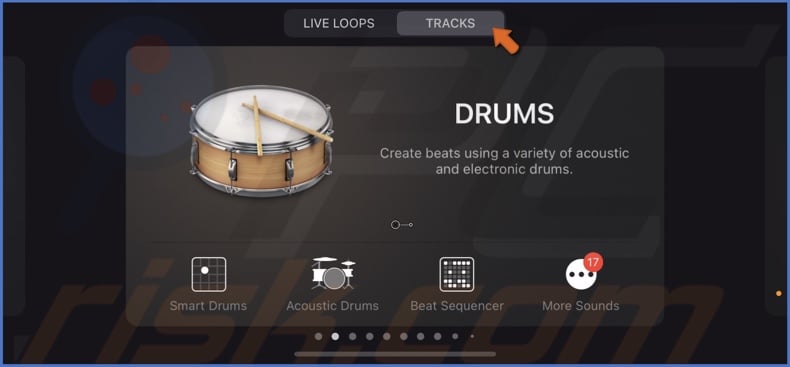
3. Create a track with the instrument and then, at the top left corner of your iPhone screen, tap on the "Project" icon.
![]()
4. In the top right corner of your screen, select the "Loop" icon.
![]()
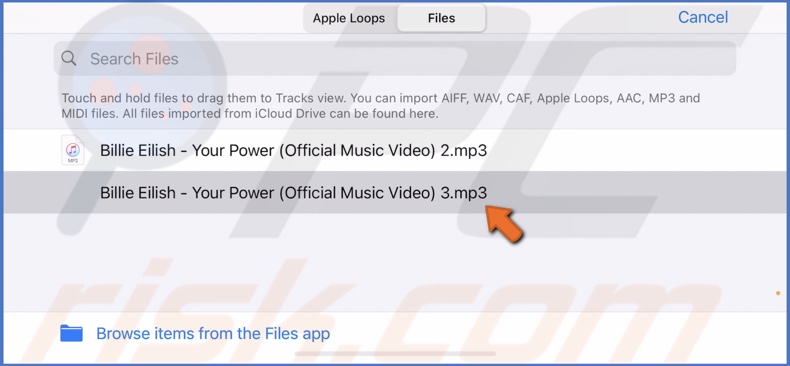
5. Select the "Files" tab and tap on "Browse items from the Files app".
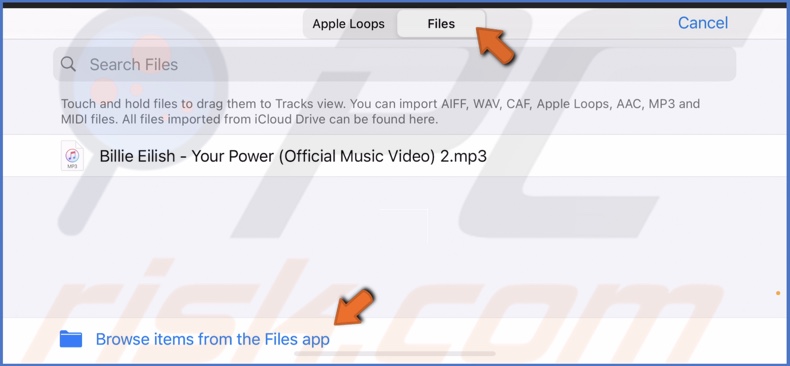
6. When a window of your downloaded tracks appears, locate and select the one you want to be your ringtone.
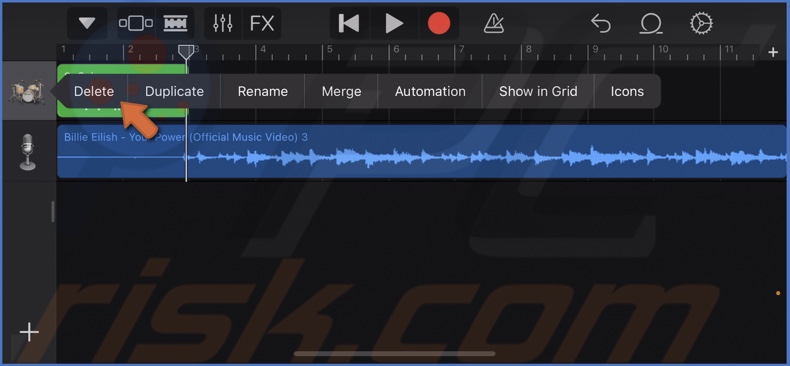
7. When the track is imported into the GarageBand app, tap and hold it, then drag it below the chosen instrument.
Then, tap on the instrument track and select "Delete" as we don't need it.
8. Then, tap and hold your imported song and drag the cursor to the beginning of the track to select the starting point.
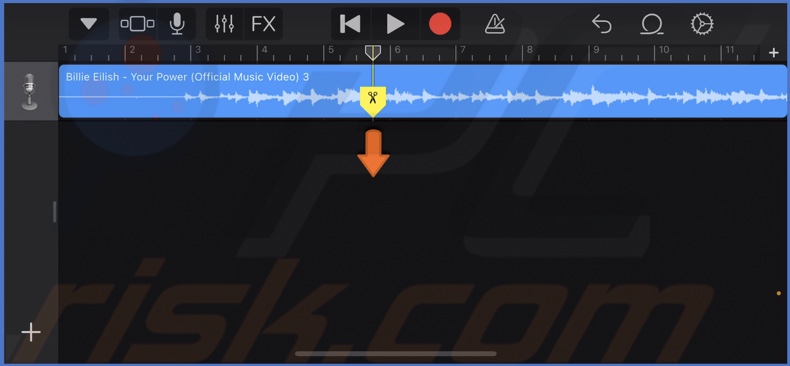
9. Tap and hold on the track to see additional tools.
10. Then, tap on "Split" to cut the song. You'll see the scissor icon.
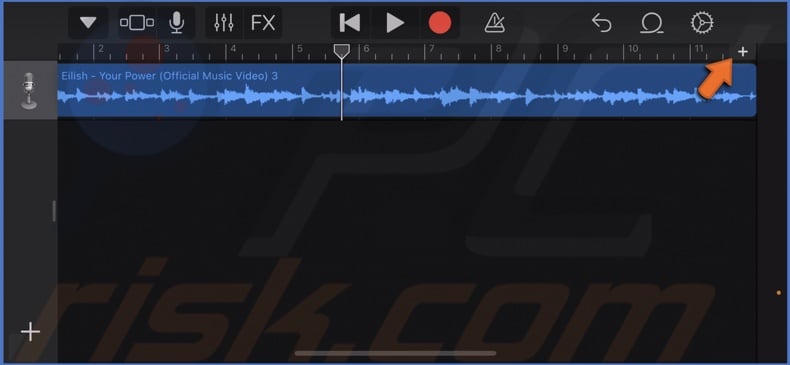
Note: You need to shorten your song up to 30 seconds, or the GarageBand app will shorten it for you upon exporting.
Tap on the plus button at the end of the bar and set bars to 11 so you have 29 seconds.
11. Drag the scissor icon to where you want to cut the song and drag it down.
12. When you've cut the track into two or more parts, tap and hold on the unwanted part and tap on "Delete". If you accidentally deleted the wrong part, you can undo the changes by tapping on the "Undo" icon, located next to the "Loop" icon.
13. When you're done, tap on the "Play" button to listen to the track you've edited.
14. If you're happy with the result, tap on the down arrow icon at the top left corner of the screen and select "My Songs".
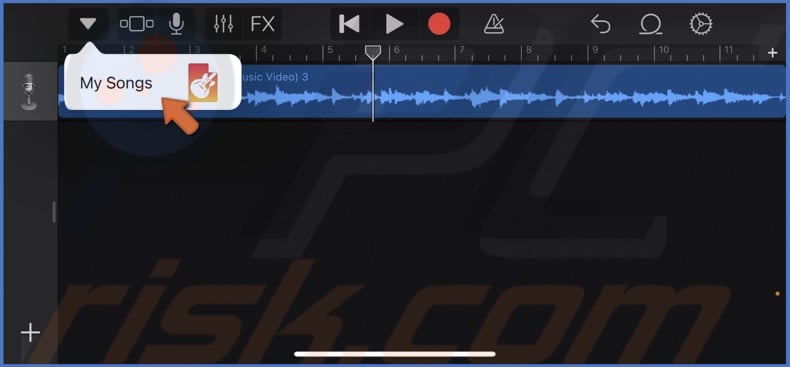
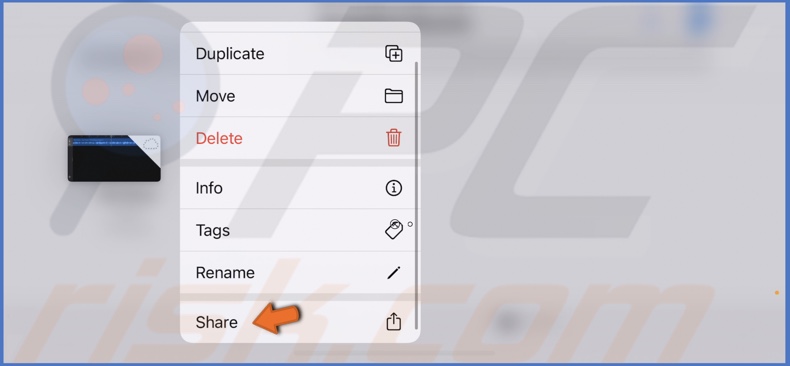
15. Then, tap and hold the track you've created. When a menu pops up, tap on "Share".
16. Select "Ringtone".
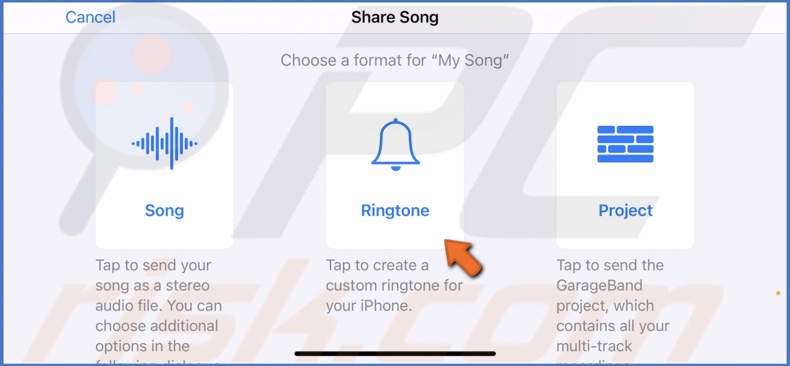
17. Enter the name of your ringtone and tap on "Export".
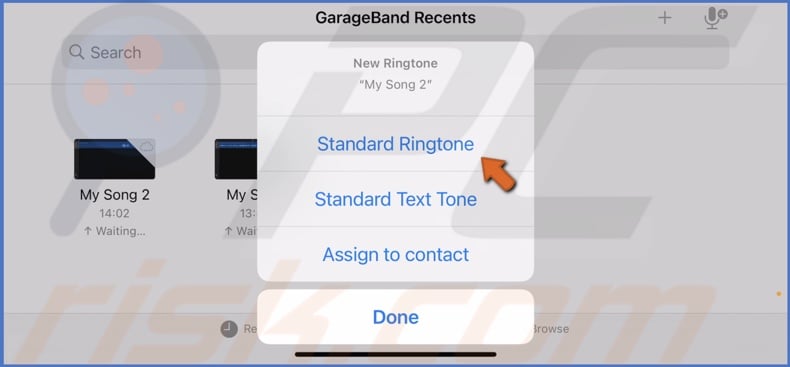
18. After the ringtone is exported successfully, tap on "Use sound as".
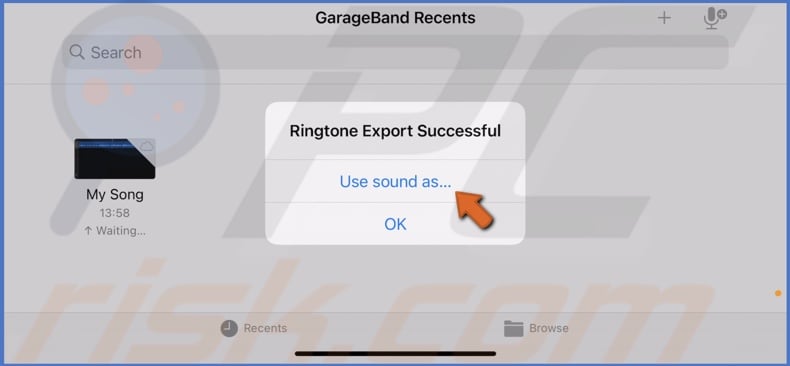
19. If you want to set it as a simple ringtone, select "Standart Ringtone". If you prefer, you can also choose between "Standard Text Tone" or "Assign to contact".
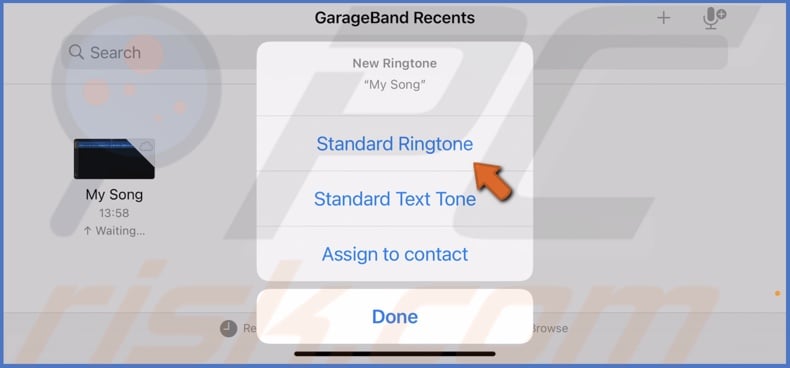
20. If you don't want to use the ringtone now, tap on "Done".
21. To use the ringtone, go to "Settings".
22. Tap on "Sounds & Haptics" and on "select your ringtone".
23. Then, select the ringtone you've created.
How to Create a Custom iPhone Ringtone From a Voice Memo
You can also create a voice memo ringtone. The process is very similar to creating a ringtone from a song.
To create a voice memo ringtone, follow the steps below:
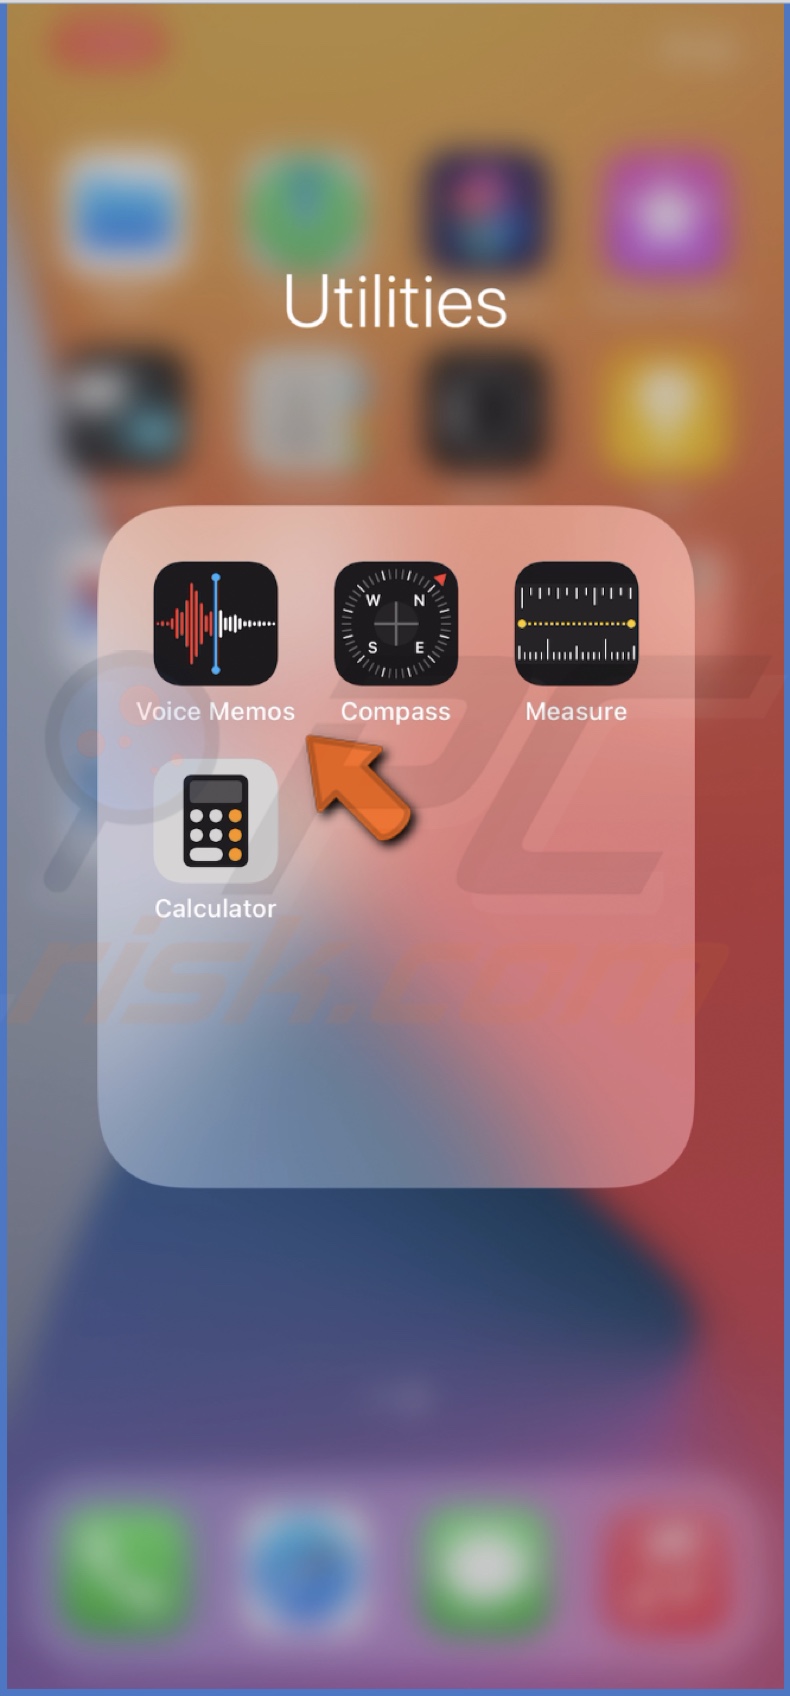
1. Open the "Voice Memo" app.
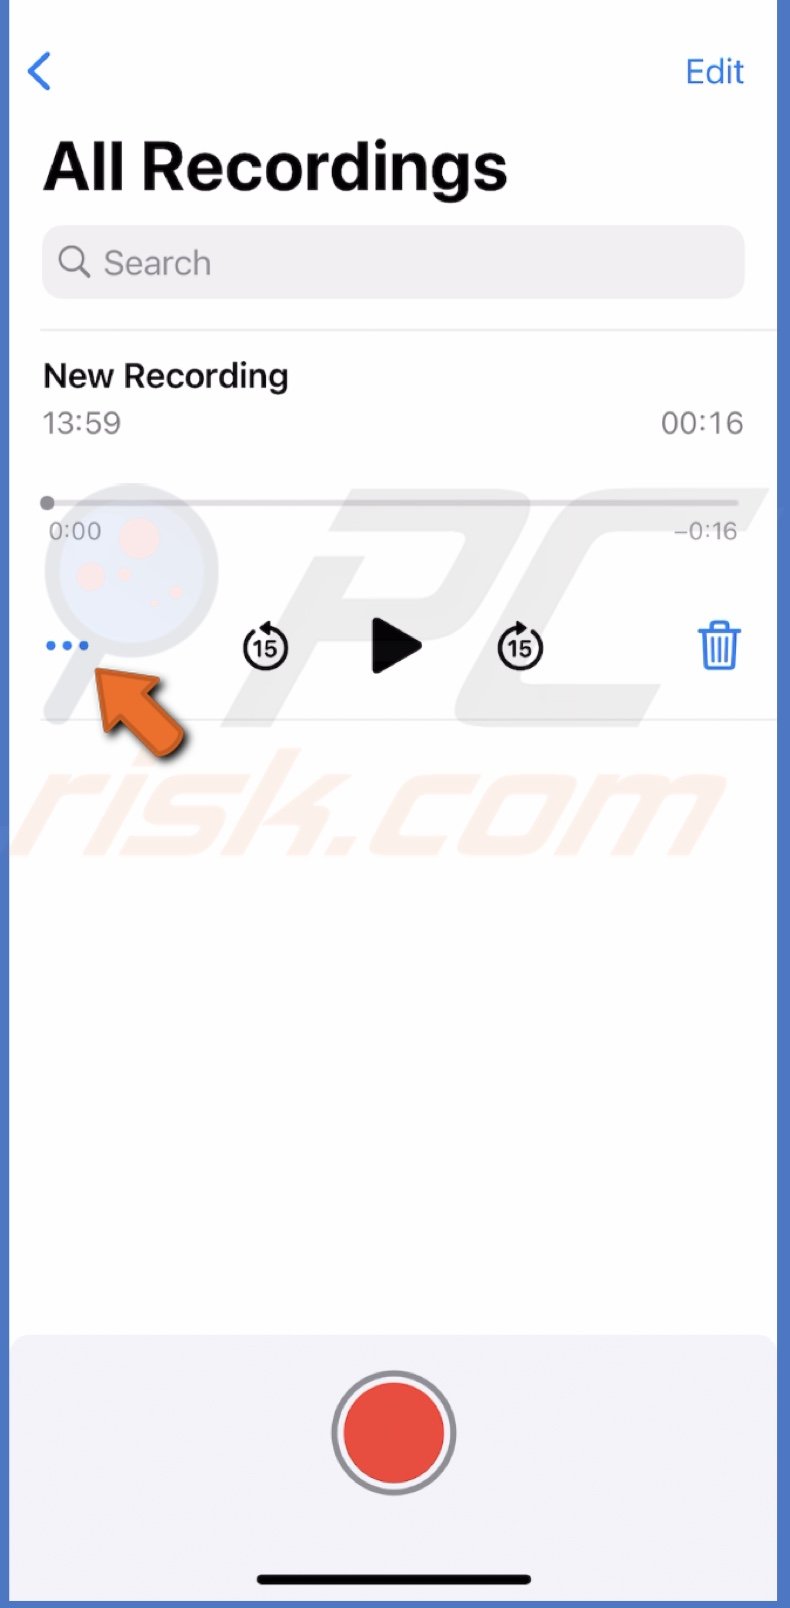
2. Then, select a memo you want to use as a ringtone or record one. Keep your voice recording up to 30 seconds. If they're longer than that, the recording will be trimmed upon export.
3. When a voice memo is selected, you'll see three dots in the left corner. Tap on the icon and then on "Save to Files".
4. Open the "GarageBand" app.
5. Select the "Tracks" tab and pick any instrument you like.
6. Create a track with the instrument and then tap on the "Project" icon, located in the top left corner.
![]()
7. In the top right corner of your screen, select the "Loop" icon.
![]()
8. Then, select the "Files" tab and tap on "Browse items from the Files app".
9. Select "audio recordings" to see your saved voice recording.
10. When the recording is imported, tap and hold it, then drag it below the instrument track. Then, tap on the instrument track and select "Delete" as we don't need it.
11. Next, in the top left corner of your iPhone screen, tap on the down arrow icon and select "My Songs".
12. Then, tap and hold the track you've created. When a menu pops up, tap on "Share".
13. Select "Ringtone".
14. Enter the name of your ringtone and tap on "Export", located at the top right corner.
15. After the ringtone is exported successfully, tap on "Use sound as".
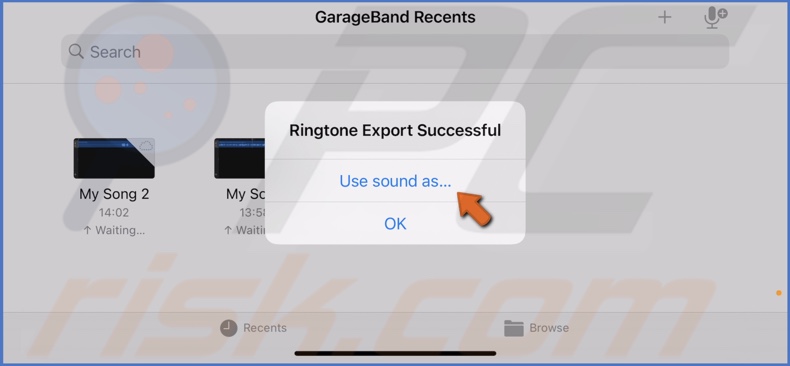
16. If you want to set it as a simple ringtone, select "Standart Ringtone". If you prefer, you can also choose between "Standard Text Tone" or "Assign to contact".
17. If you don't want to use the ringtone now, tap on "Done".
18. To use the ringtone, go to "Settings".
19. Tap on "Sounds & Haptics" and on "Select your ringtone".
20. Then, select the ringtone you've created.
That's it! Now you know how to create custom ringtones.
We hope this article was helpful!
You can also check out the video above for a step-by-step tutorial.
Share:

Karolina Peistariene
Author of how-to guides for Mac users
Responsible for collecting, analyzing, and presenting problem-solving solution articles related to macOS issues. Years of macOS experience combined with solid research and analyzing skills help Karolina provide readers with working and helpful solutions as well as introduce various features Mac has to offer.
▼ Show Discussion