Simple Ways You Can Share Your Mac's Screen With Another Mac

(updated)
Get Free Scanner and check your computer for errors
Fix It NowTo fix found issues, you have to purchase the full version of Combo Cleaner. Free trial available. Combo Cleaner is owned and operated by Rcs Lt, the parent company of PCRisk.com read more.
4 Ways on How You Can Share Your Mac's Screen With Another Mac
If you've come to this article, you're probably wondering how you can share your Mac's screen with another Mac. Perhaps you need to do a presentation or explain something using your Mac's screen. No matter what's the reason, you can easily share your screen with any other Mac. You'll be surprised by how simple and quick the process is.
You can share your screen using three different tools provided by Apple that are integrated into your Mac's operating system. You can use Finder, the Messages app, and the Screen Sharing app. The fourth method is to use a third-party app.
Take a look at all the methods below and choose the one that's best for you. Then, follow the steps to start screen sharing with the other Mac.
Video on 4 Ways on How You Can Share Your Mac's Screen With Another Mac
Table of Contents:
- Introduction
- Share Your Mac's Screen With Another Mac Using Finder
- Share Your Mac's Screen With Another Mac Using The Messages App
- Share Your Mac's Screen With Another Mac Using The Built-in Screen Sharing App
- Share Your Mac's Screen With Another Mac Using Third-Party Apps
- Video on 4 Ways on How You Can Share Your Mac's Screen With Another Mac
Download Computer Malware Repair Tool
It is recommended to run a free scan with Combo Cleaner - a tool to detect viruses and malware on your device. You will need to purchase the full version to remove infections. Free trial available. Combo Cleaner is owned and operated by Rcs Lt, the parent company of PCRisk.com read more.
You can share your Mac's screen fast by using Finder.
To share your screen using Finder, follow the steps below:
1. Open the Finder window on the other Mac.
2. Then, in the sidebar, under "Locations", locate "Network" and click on it.
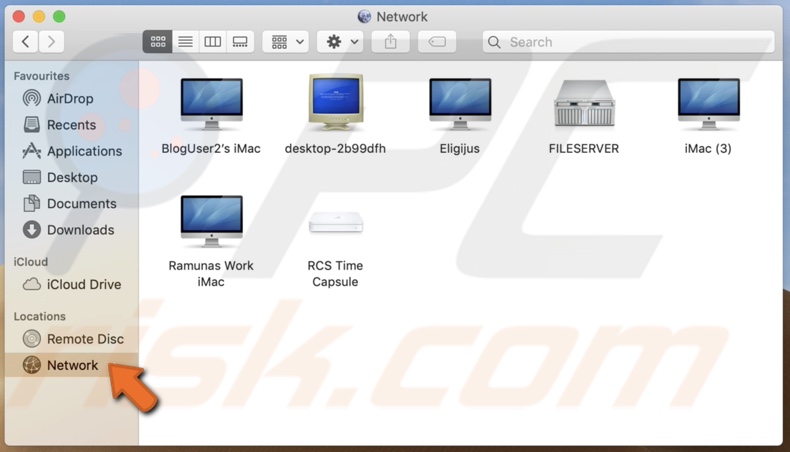
3. Double-click on your Mac.
4. In the top right corner, click on "Share Screen".
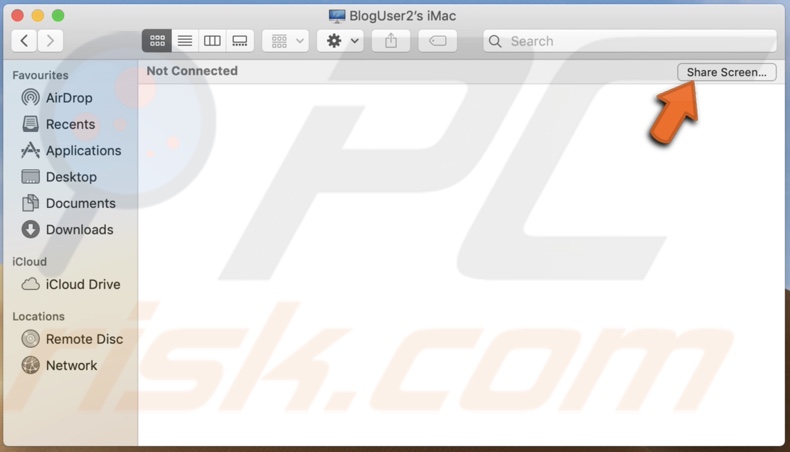
5. Wait for the Mac to connect to your Mac. If asked, enter your Mac's credentials or check to ask for permission.
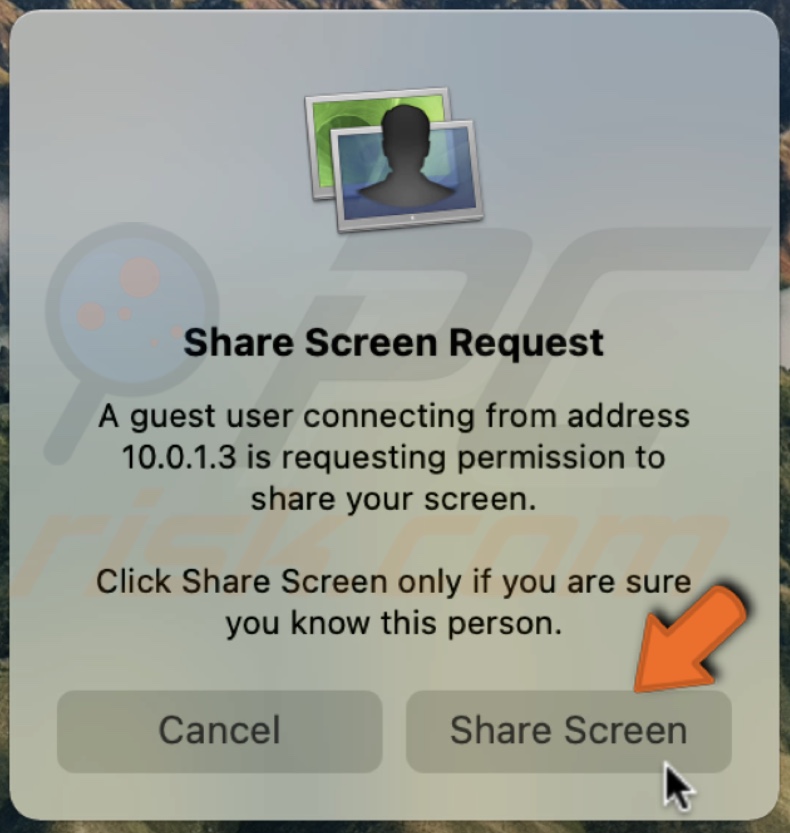
A window with a shared screen will appear.
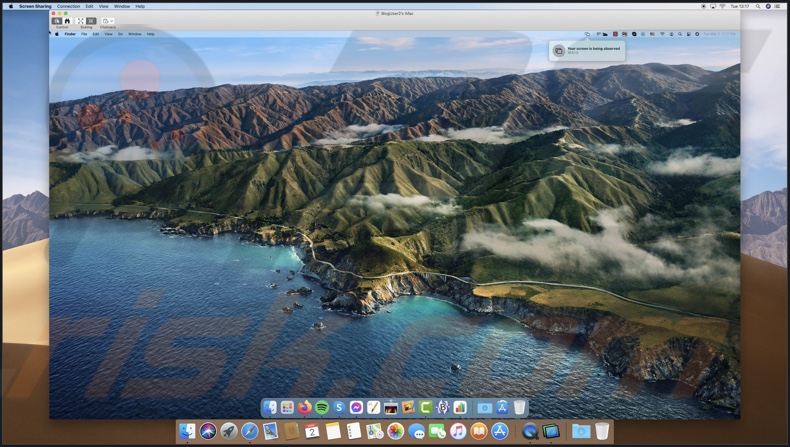
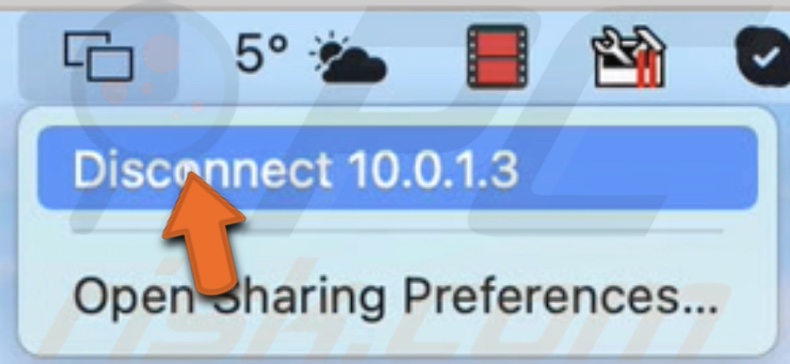
To stop screen sharing, click on the red "X" button at the screen sharing window's top-left corner. Or click on the sharing icon, located at the menu bar's right corner, and select "Disconnect".
The Messages app also has a screen sharing feature. It's fast and easy to set up.
To share your screen using the Messages app, follow the steps below:
1. Open the Messages app from Launchpad, Finder, or Spotlight.
2. Open a conversation or create one with the person you want to share your screen with.
3. Then, in the top right corner of the conversation, click on the information button.
![]()
4. You'll see an option "Share". Click on it and choose "Invite to Share My Screen".
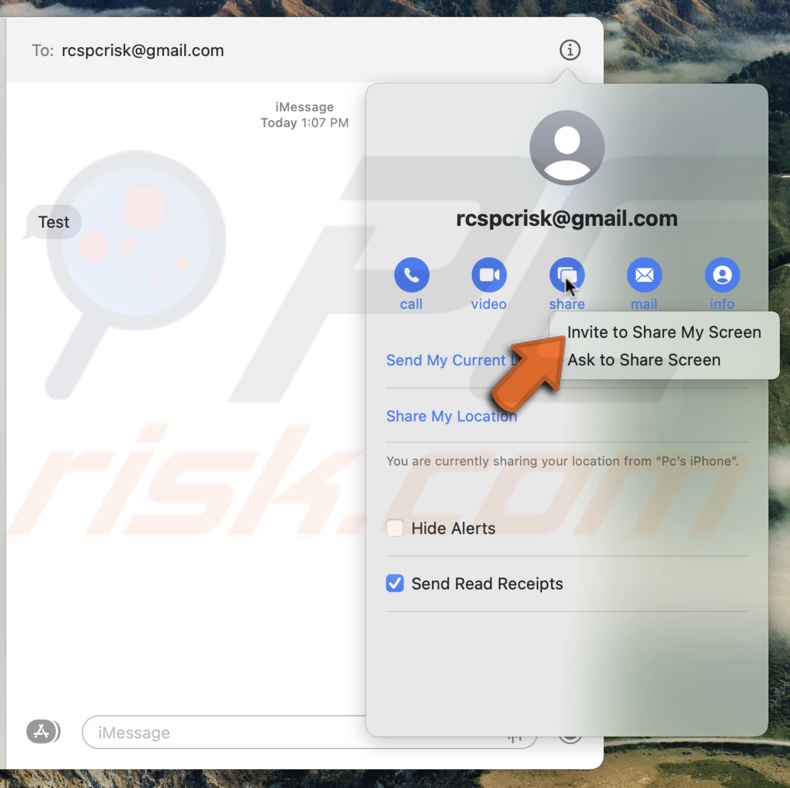
5. Wait for the screen sharing session to begin.
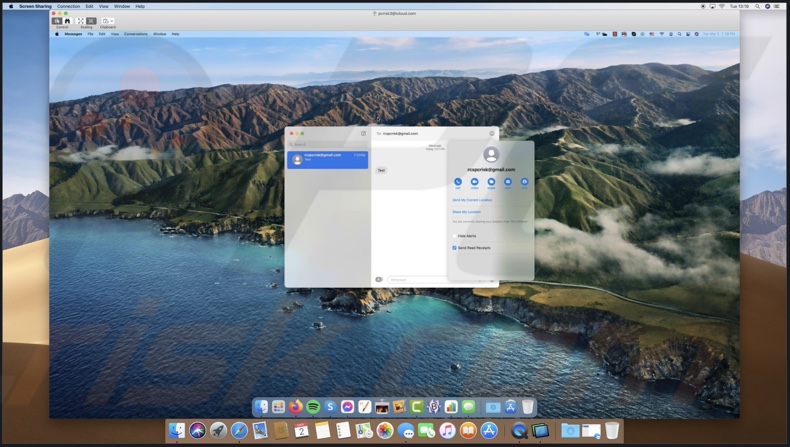
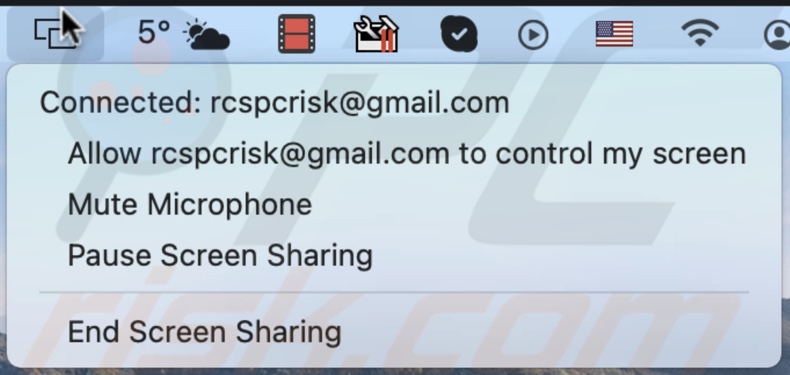
If you're sharing your screen, you'll see sharing icon appear at the menu bar's left corner. Click on it and choose if you want to allow the other person to control your screen. You can also pause screen sharing, mute the microphone, or end screen sharing.
You can share Your Mac's screen with the screen sharing feature that's integrated into the operating system. To start screen sharing, you first need to set it up.
To set up screen sharing on your Mac, follow the steps below:
1. In the menu bar, click on the Apple logo to access the Apple menu.
2. Then, go to "System Preferences".
3. Click on "Sharing".
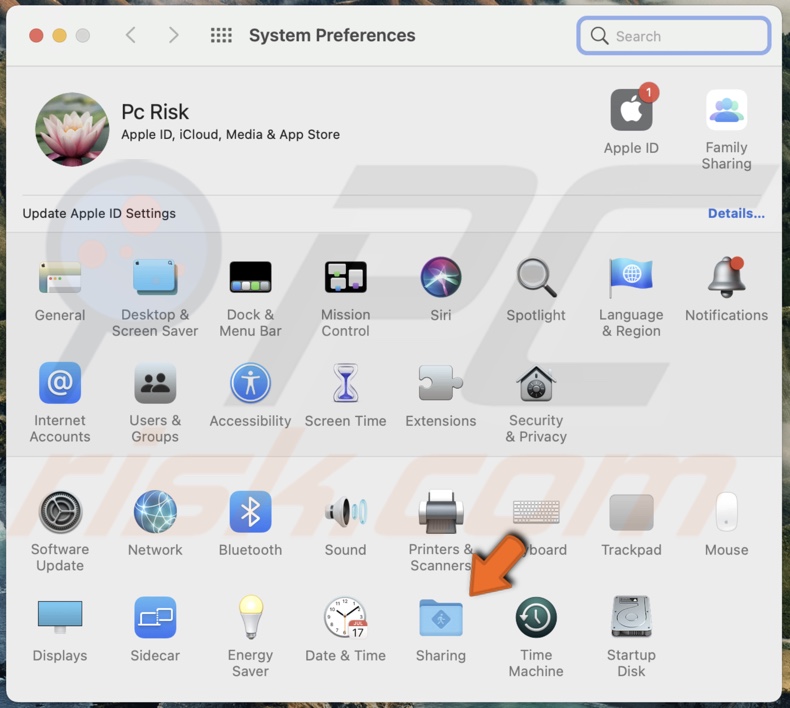
4. Check the box next to "Screen Sharing". If you're using "Remote Management", disable it as Screen Sharing and Remote Management can't work together at the same time.
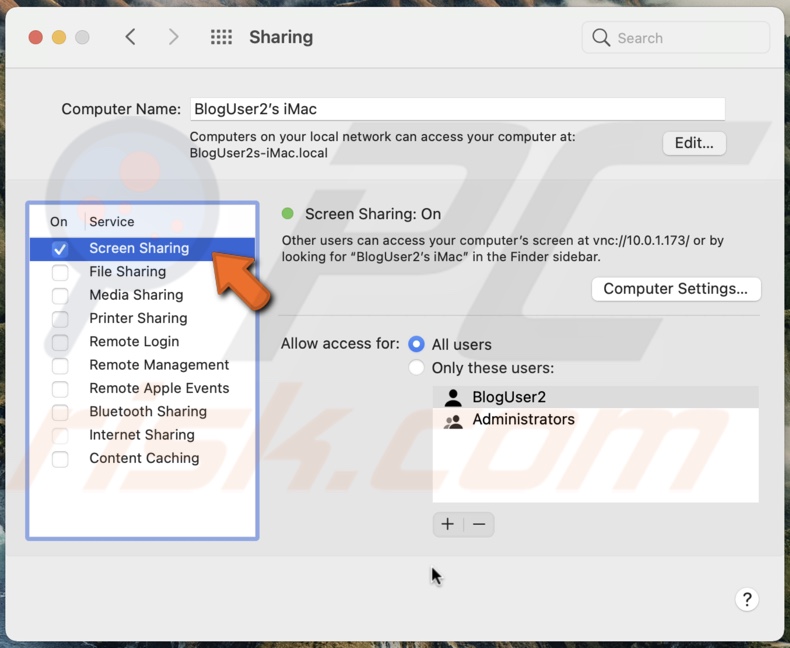
5. Next to "Allow access for", choose who has access to share your screen. Select "All users" if you want all users on your network to share your screen. Select "Only these users" to give access only to added users.
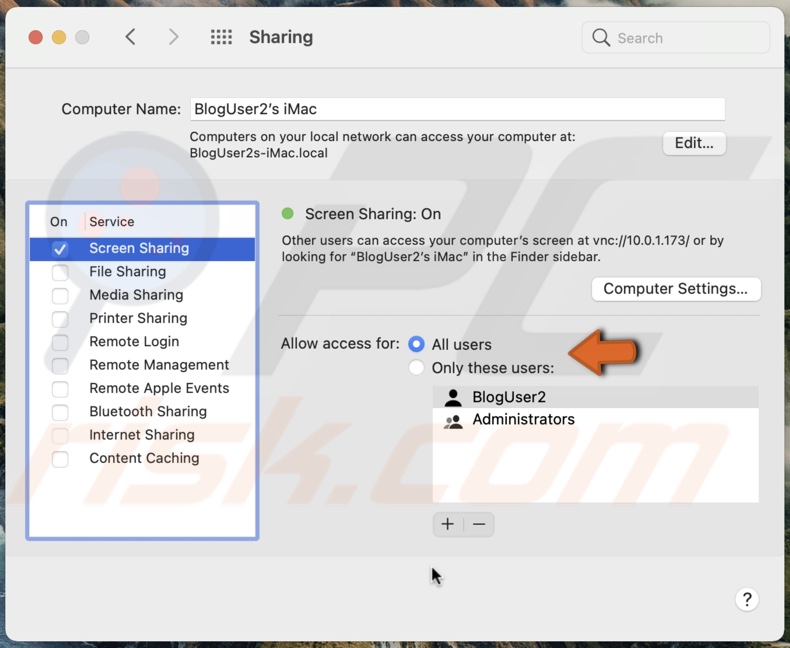
6. If you choose "Only these users", click on the "+" button to add users you want to share the screen with.
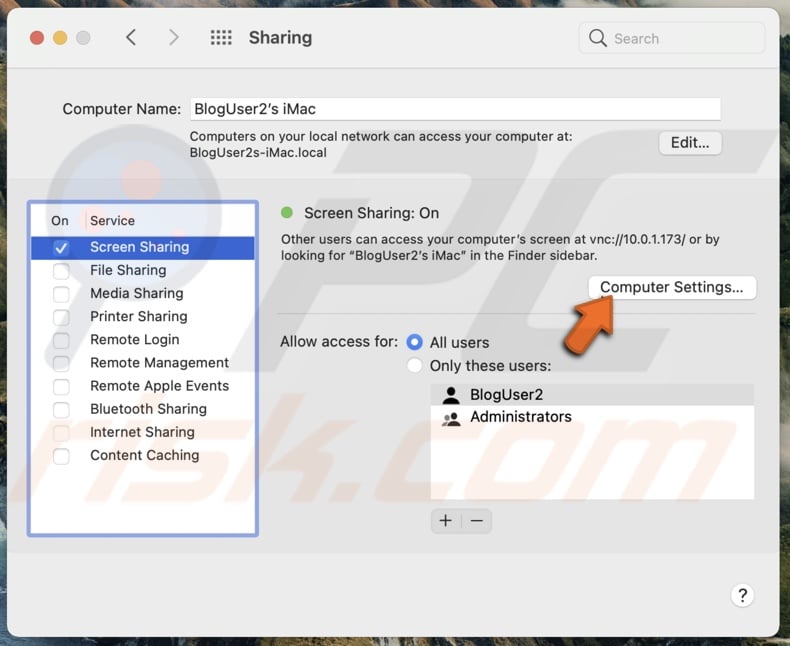
7. Then, click on "Computer Settings".
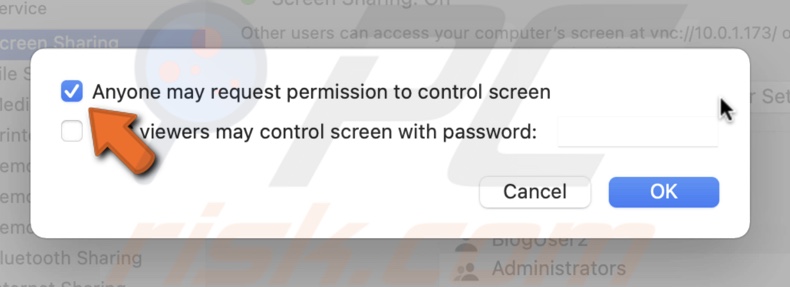
8. Check the box next to "Anyone may request permission to control screen", so other users don't have to enter a username and password.
After you've set up screen sharing on both Macs, you can start sharing your screen.
To share your screen using the screen sharing feature, follow the steps below:
1. Access the Apple menu on your Mac.
2. Go to "System Preferences".
3. Click on "Sharing".
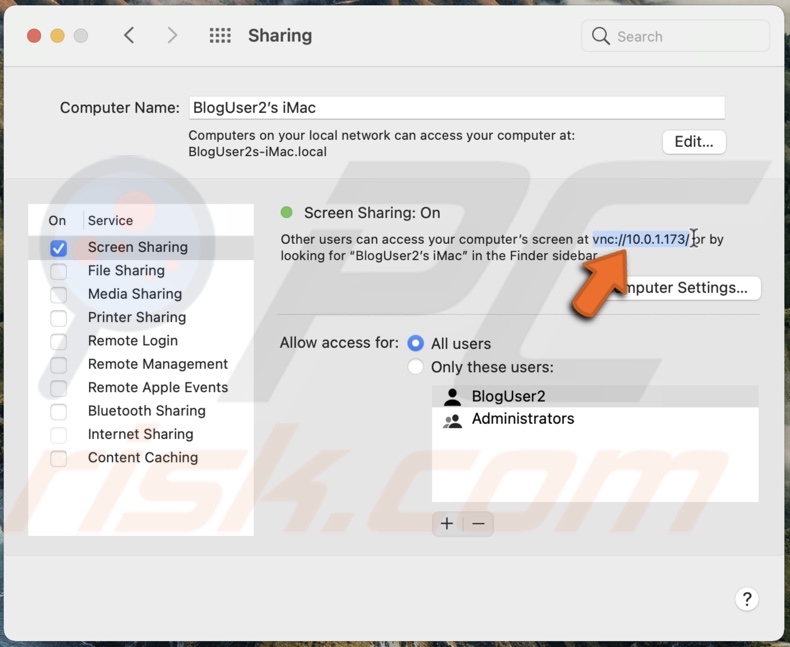
4. Below "Screen Sharing: On", you'll see your Mac's address. the format should look like "vnc://(address)/".
5. Then, on the other Mac, click on "Go" in the menu bar.
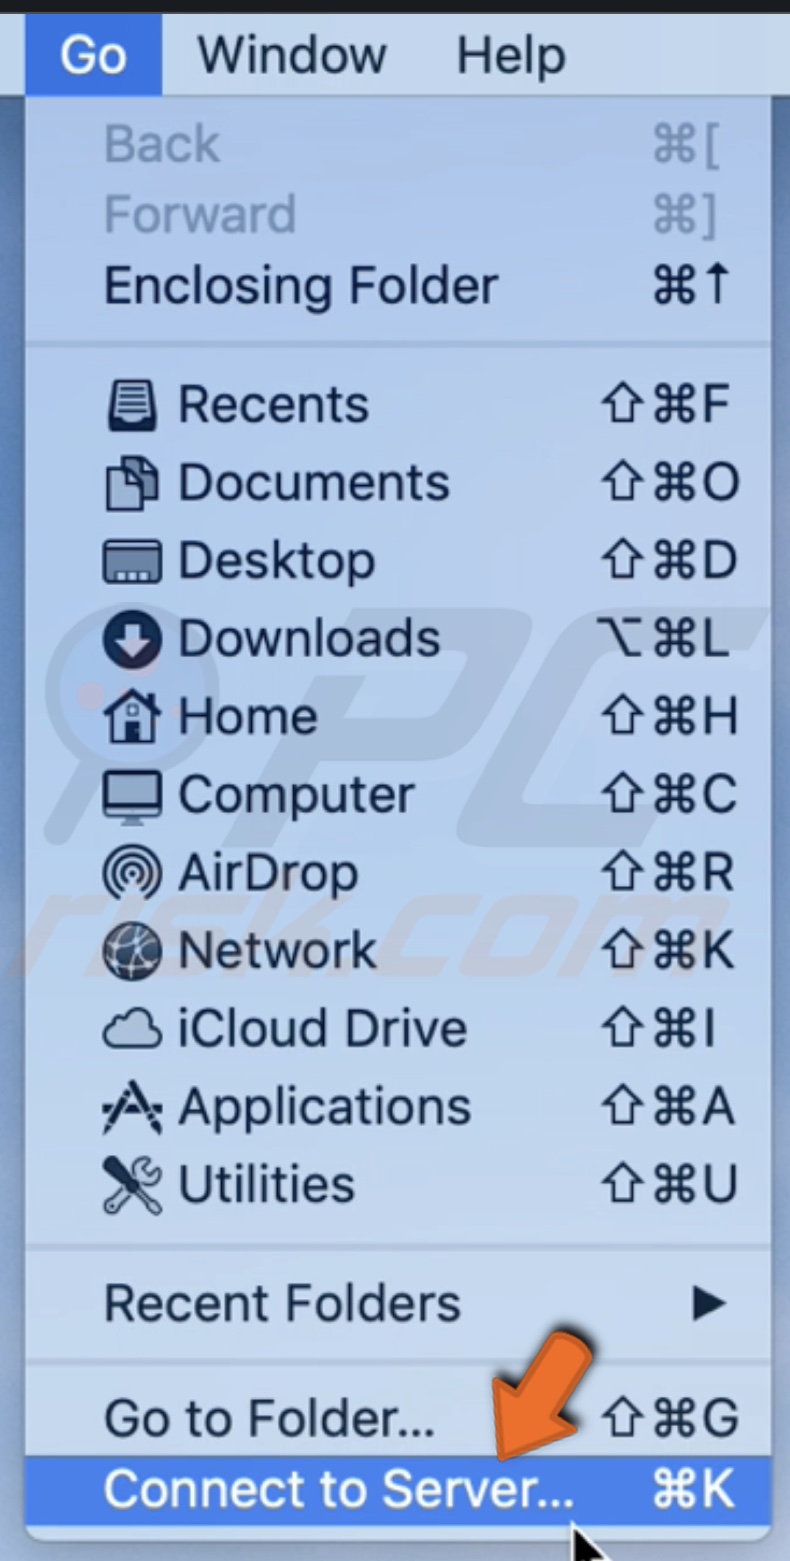
6. Then, click on "Connect to server".
7. In the Address bar, enter your Mac's address and click on "Connect".
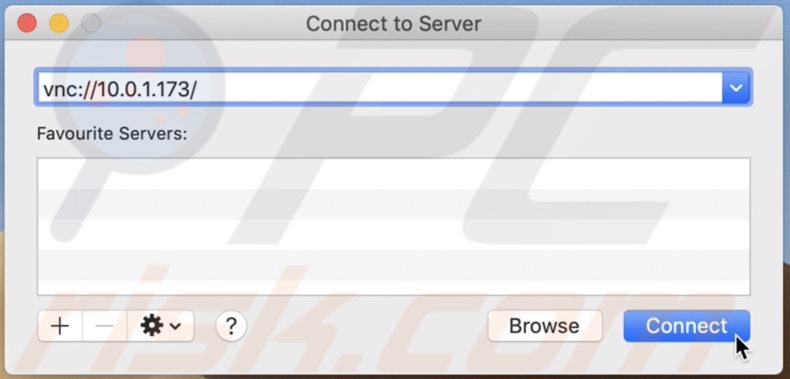
8. If asked, enter your Mac's username and password. Or request screen sharing permission.
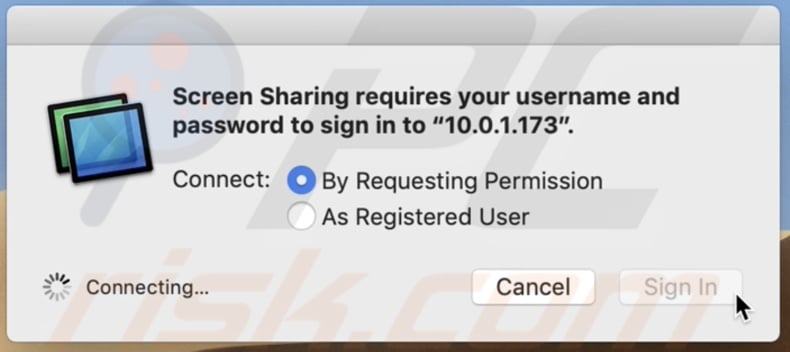
When the screen sharing session begins, you'll see a notification at the top right corner of your screen that your Mac is being observed.
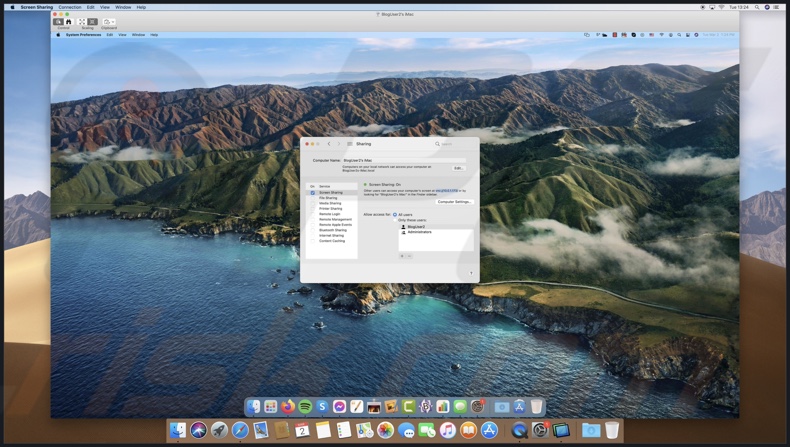
To stop screen sharing, click on the red "X" button at the screen sharing window's top-left corner.
You can also use third-party apps to share your screen. There are plenty in the market to choose from. You can pick a free or paid app depending on your preferences and needs.
We hope this article was helpful!
Check out the video above for a step-by-step tutorial on how to use each method to share your Mac's screen.
Share:

Karolina Peistariene
Author of how-to guides for Mac users
Responsible for collecting, analyzing, and presenting problem-solving solution articles related to macOS issues. Years of macOS experience combined with solid research and analyzing skills help Karolina provide readers with working and helpful solutions as well as introduce various features Mac has to offer.
▼ Show Discussion