5 Best Free Weather Apps to Use on Your Mac

(updated)
Get Free Scanner and check your computer for errors
Fix It NowTo fix found issues, you have to purchase the full version of Combo Cleaner. Free trial available. Combo Cleaner is owned and operated by Rcs Lt, the parent company of PCRisk.com read more.
5 Best Free Weather Apps You Can Add to Menu Bar or Dock on Mac
Weather forecasting is imperative as knowing the weather conditions ahead of time can sometimes be crucial. Information about the weather can help save lives and property. Although harsh weather forecasts are announced on the news and by the government, keeping an eye on everyday weather can be beneficial.

Knowing the forecast can help you stay warm in the cold fall and winter seasons as well as not overheat in the summer and spring seasons. After careful research, we have gathered the 5 best free weather forecast apps for your Mac. Some of them have a wide range of features, while others are more simple and minimalistic.
All apps are great in providing you a reliable weather forecast. Now, pick one and read about them to get to know the app better.
Video on 5 Best Free Weather Apps You Can Add to Menu Bar or Dock on Mac
Table of Contents:
- Introduction
- Weatherbug
- Weather Widget Desktop
- Weather Dock
- Forcast Bar
- Weather for Status Bar
- Video on 5 Best Free Weather Apps You Can Add to Menu Bar or Dock on Mac
Download Computer Malware Repair Tool
It is recommended to run a free scan with Combo Cleaner - a tool to detect viruses and malware on your device. You will need to purchase the full version to remove infections. Free trial available. Combo Cleaner is owned and operated by Rcs Lt, the parent company of PCRisk.com read more.
Weatherbug
Weatherbug is one of the most popular free weather forecast apps out there. It is informative and simple to use.
To add Weatherbug to the menu bar, follow the steps below:
1. Go to the App Store and download the Weatherbug app.
2. Then, open the app and click on "OK" to allow it to use your location.
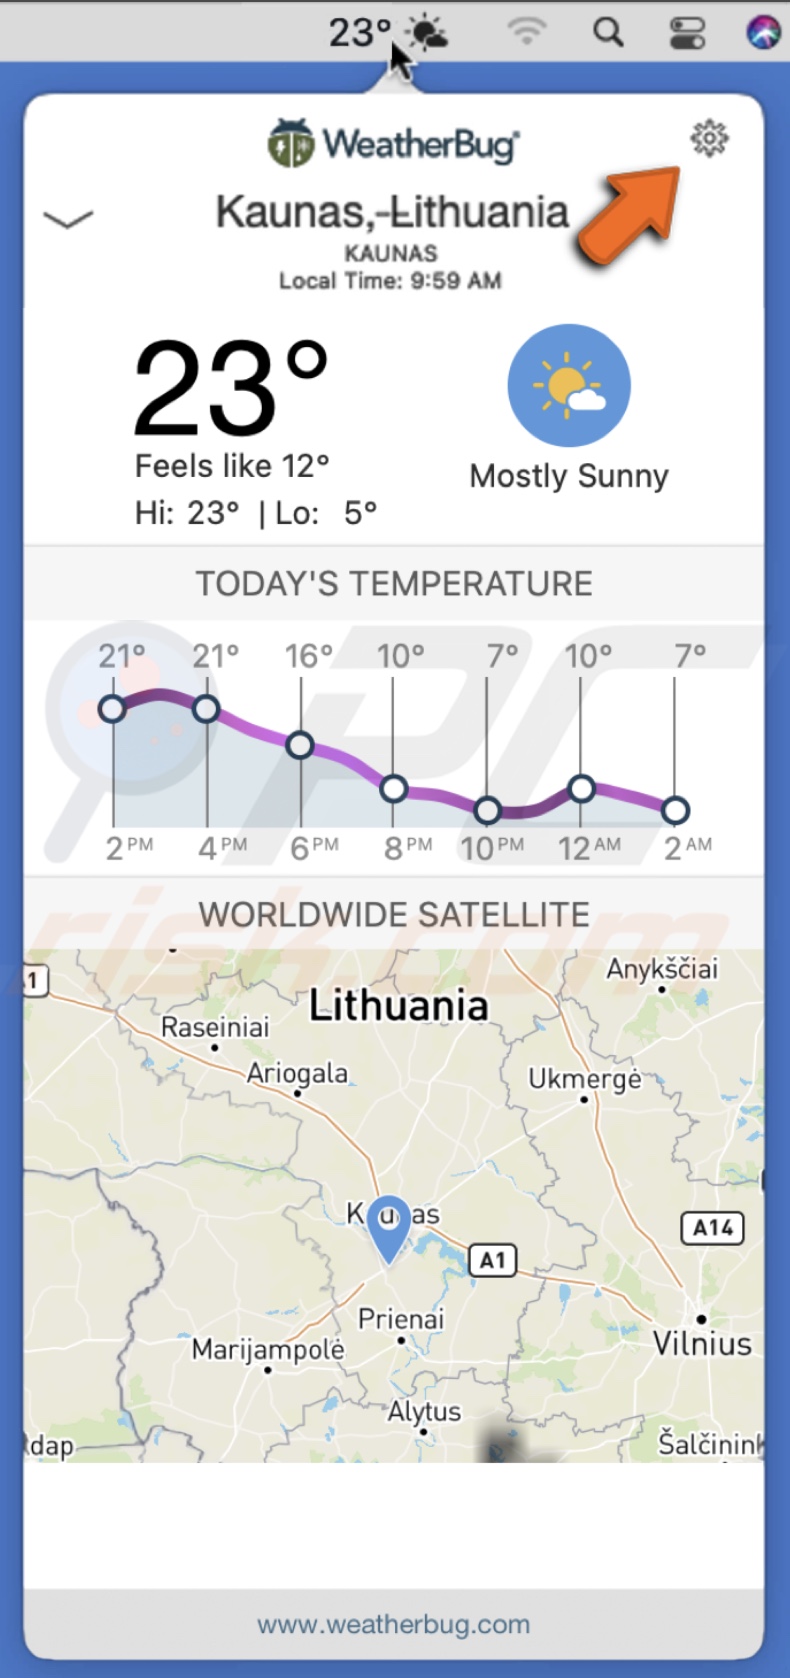
3. The Weatherbug icon will appear on the right side of the menu bar. By clicking on the icon, you'll be able to see current and today's forecast every few hours simultaneously, as well as worldwide satellite, which shows you your location.
To manage the Weatherbug app, follow the guide below:
- Click on the Weatherbug icon, and in the pop-up window, click on the gear icon, locater in the upper right corner.
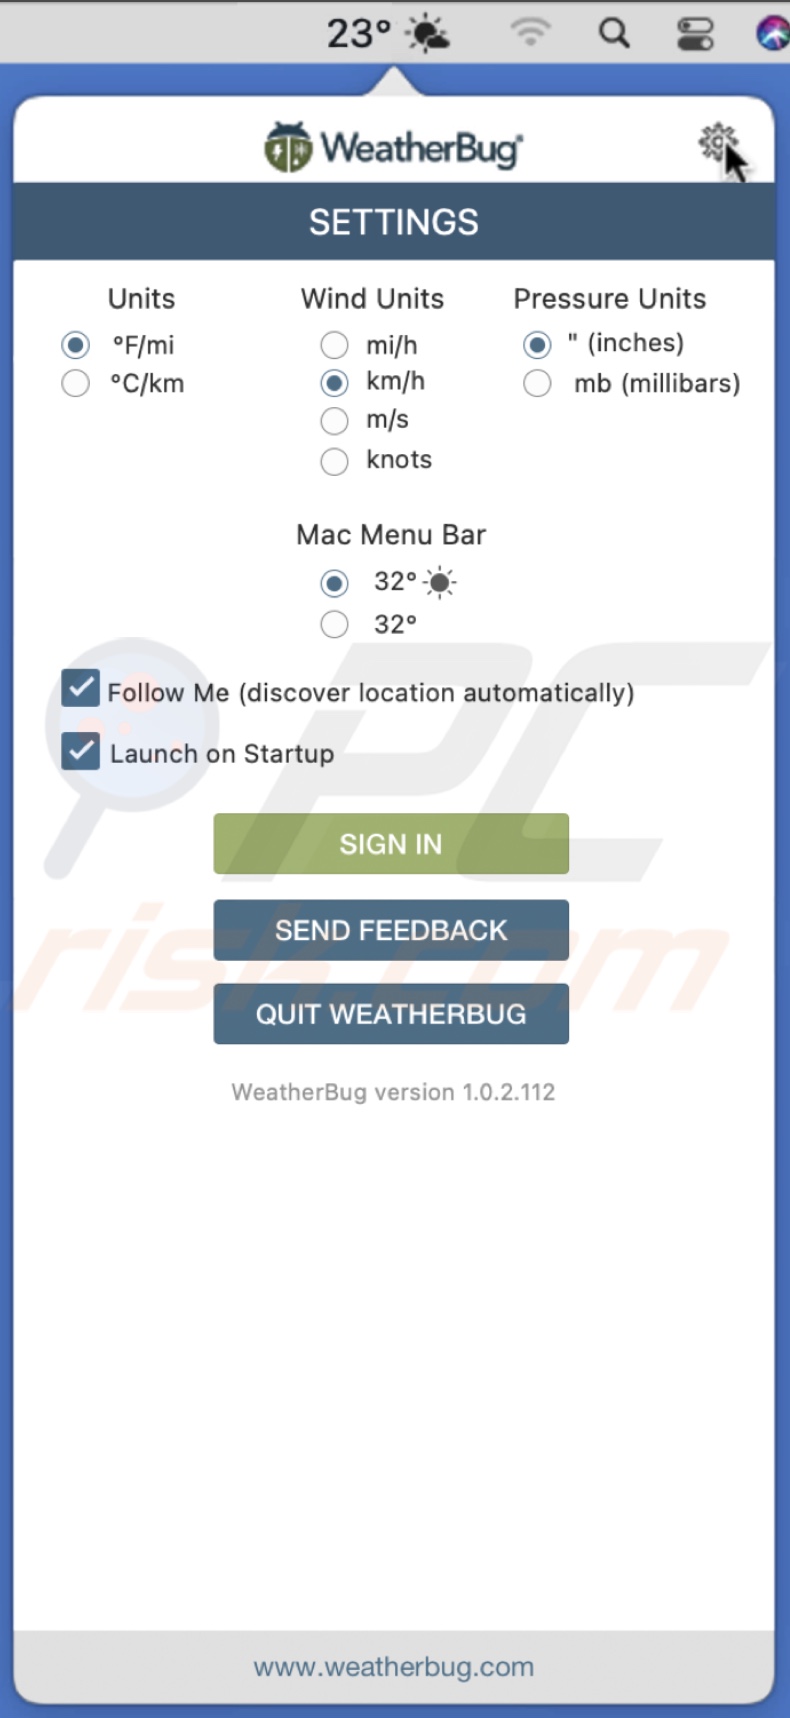
- Under "Units", "Weather Units" and "Pressure Units" you can choose the imperial or metric system for the weather forecast.
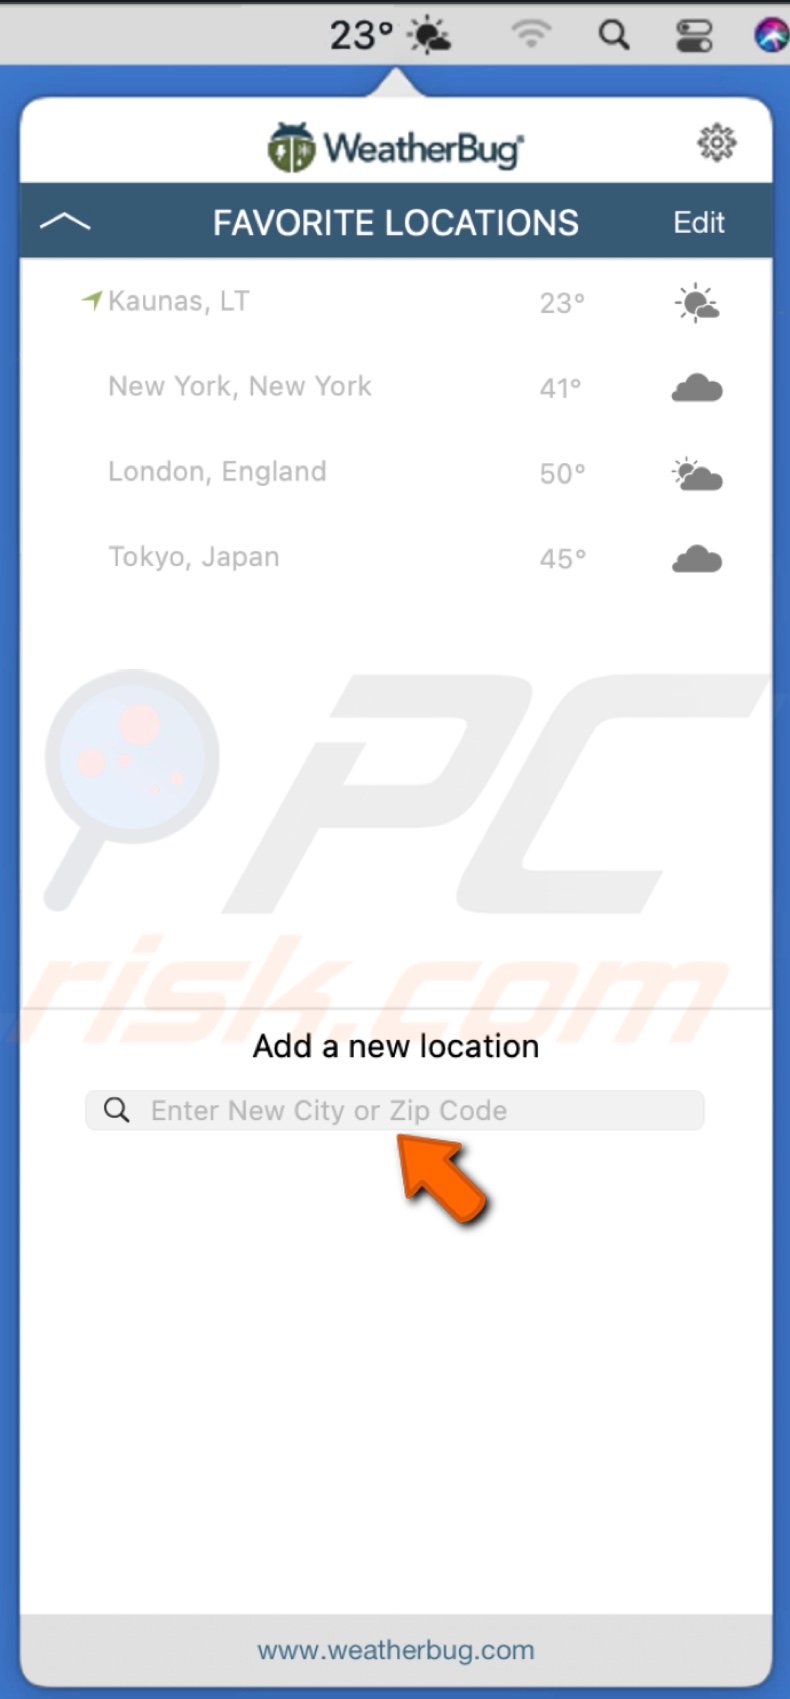
- You can add multiple locations by clicking on your location name and under "Add a new location", enter the city you want to add. Now you can see the weather forecast in all your favorite locations.
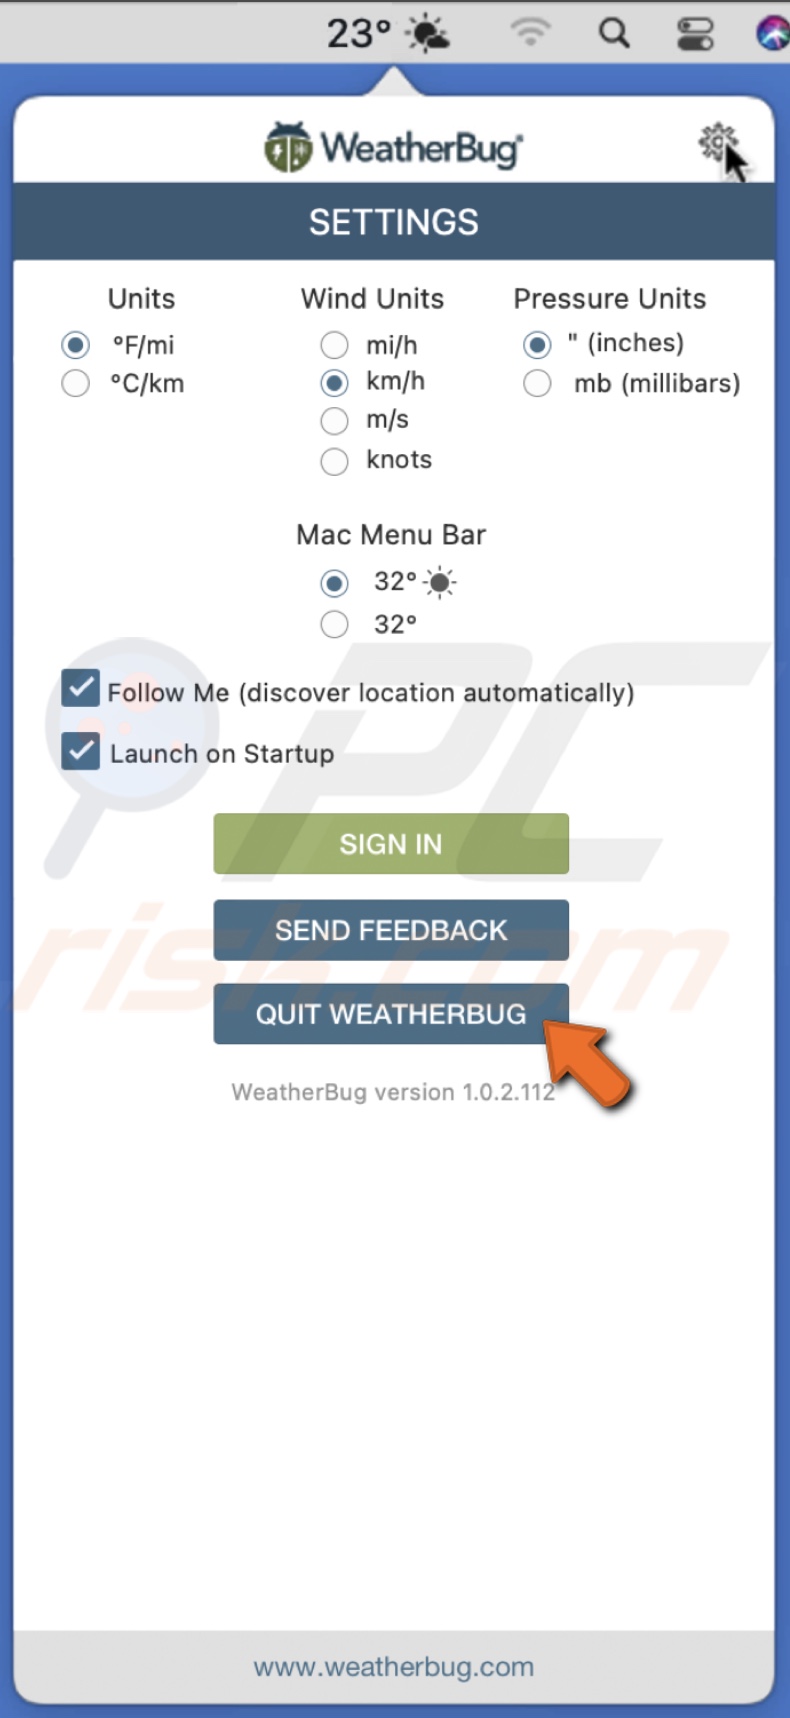
To remove the icon from the menu bar and quit the app, click on the icon, then on the gear icon, and at the bottom, choose "Quit Weatherbug".
Weather Widget Desktop
The Weather Widget Desktop app is a great weather forecast app for your Mac.
To add Weather Widget Desktop to the menu bar, follow the steps below:
1. Go to the App Store and download the Weather Widget Desktop app.
2. Then, open the weather app and click on "OK" to allow the app to use your location.
3. A weather icon will appear on the right side of the menu bar. You will instantly see the weather forecast.
4. Click on the weather icon on the menu bar, and you will be able to see today's and the next two days' weather forecast as well.
To manage Weather Widget Desktop, follow the guide below:
- To access app settings, click on the app icon in the menu bar and go to "Preferences".
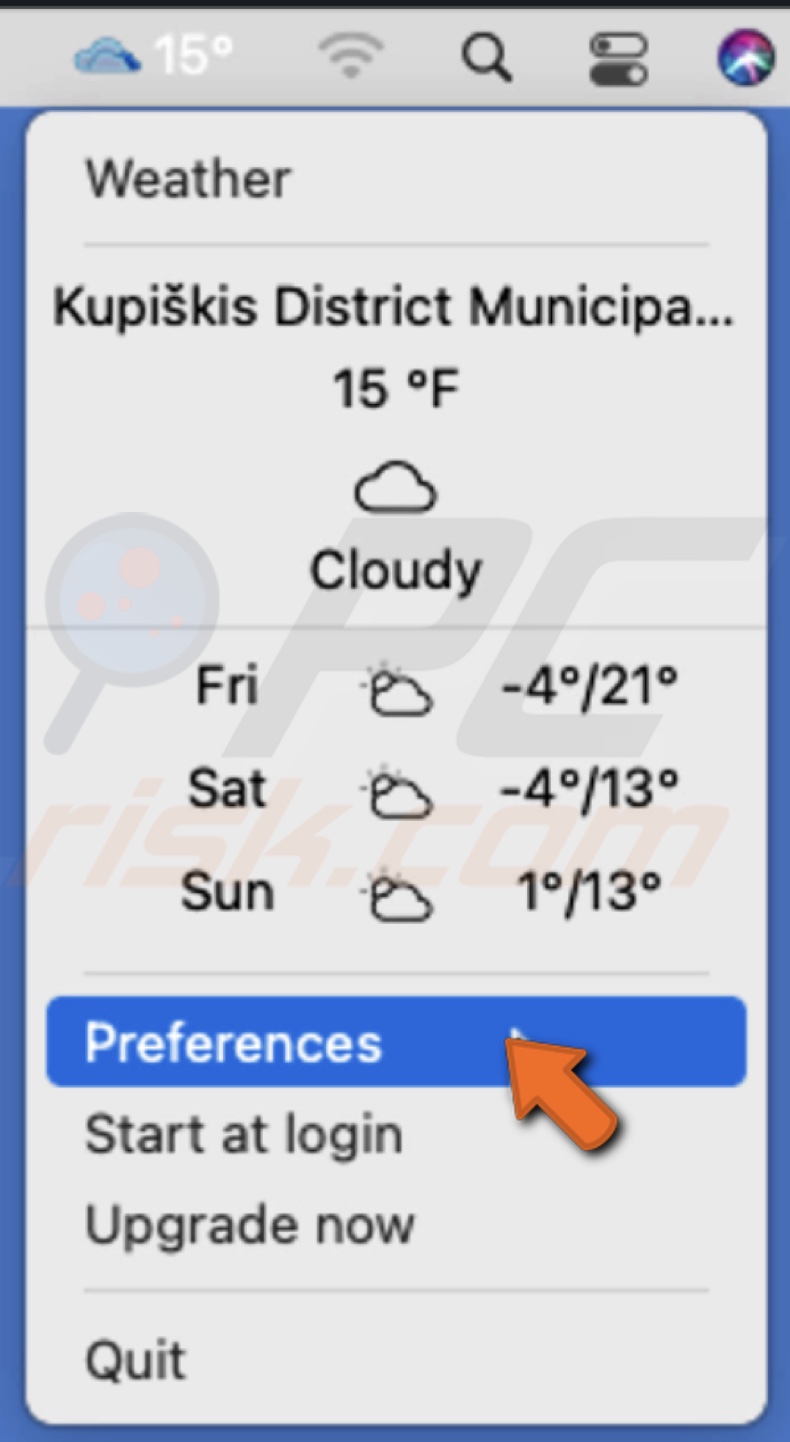
- If you need or want to change the location, you can enter it manually in the "Weather" tab.
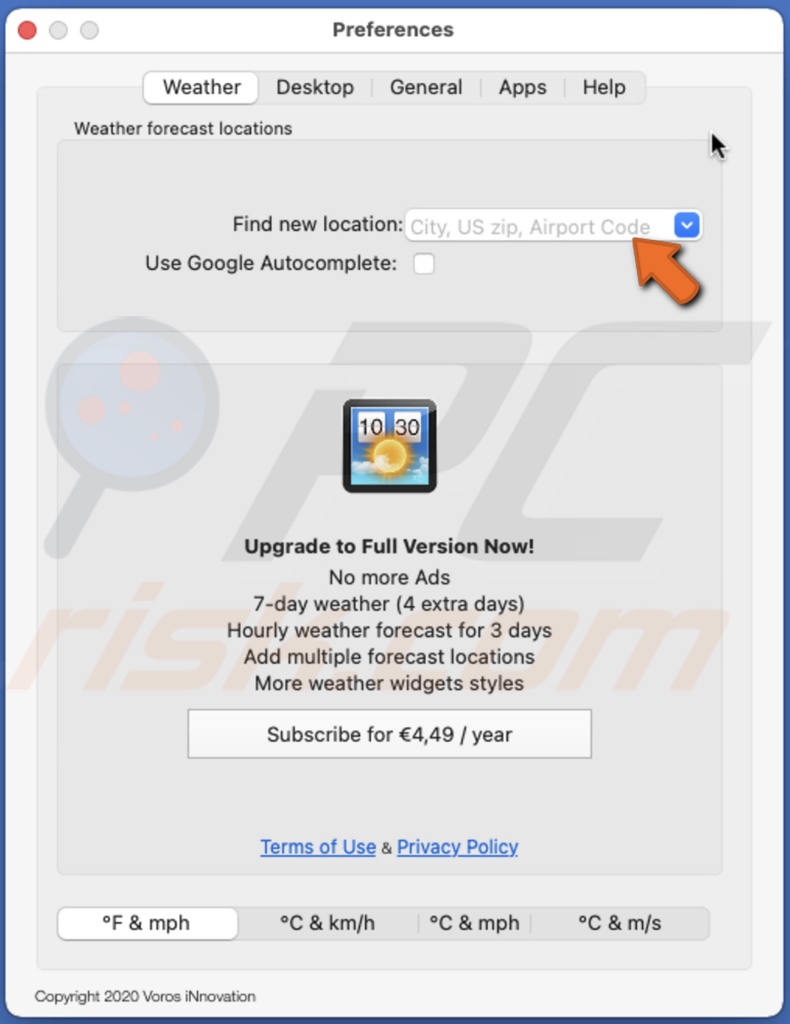
- At the bottom of the "Weather" tab window, you can choose the units you prefer.
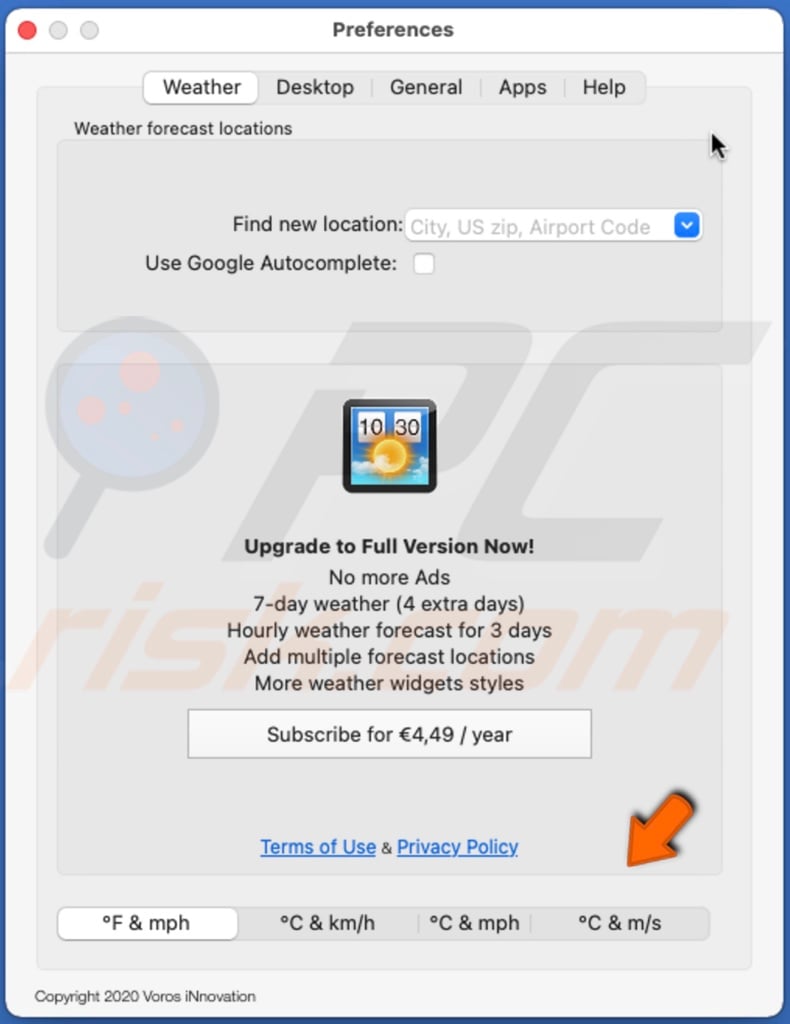
- In the "Desktop" tab, you can change style settings.
- If you do not want to see whether displayed on your desktop, expand the drop-down menu next to "Style" and select "None".
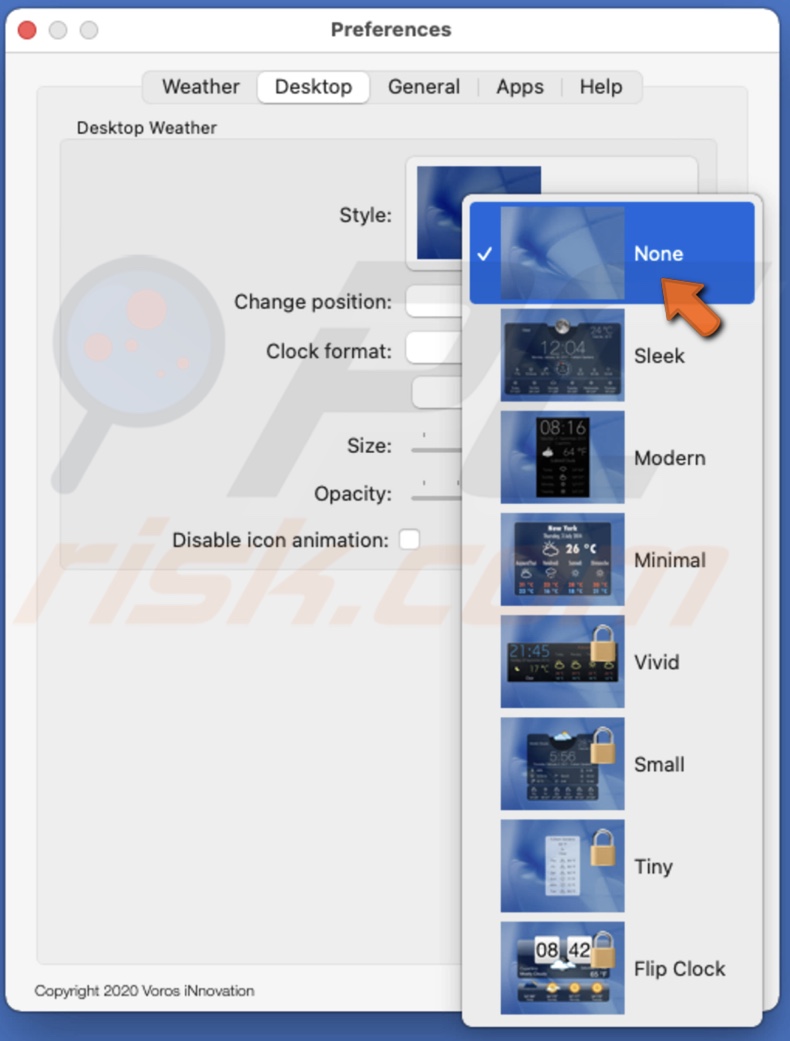
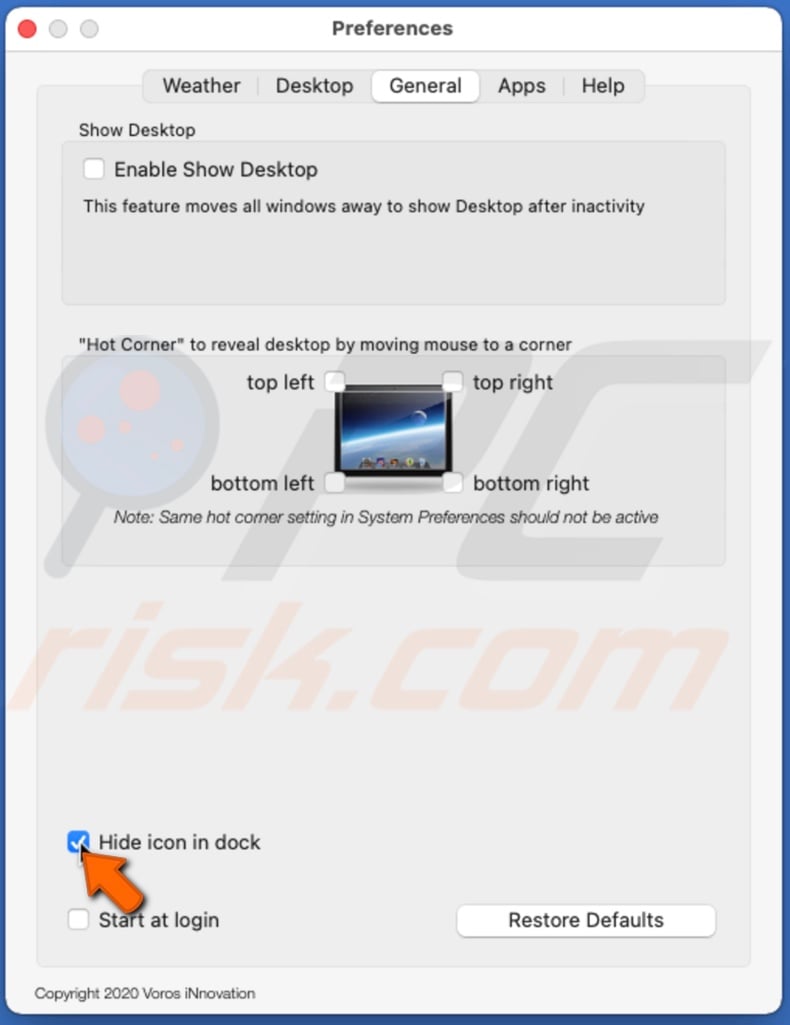
- In the "Generals" tab, check the box next to "Hide icon in dock" if you don't want to see the app's icon in the dock all the time.
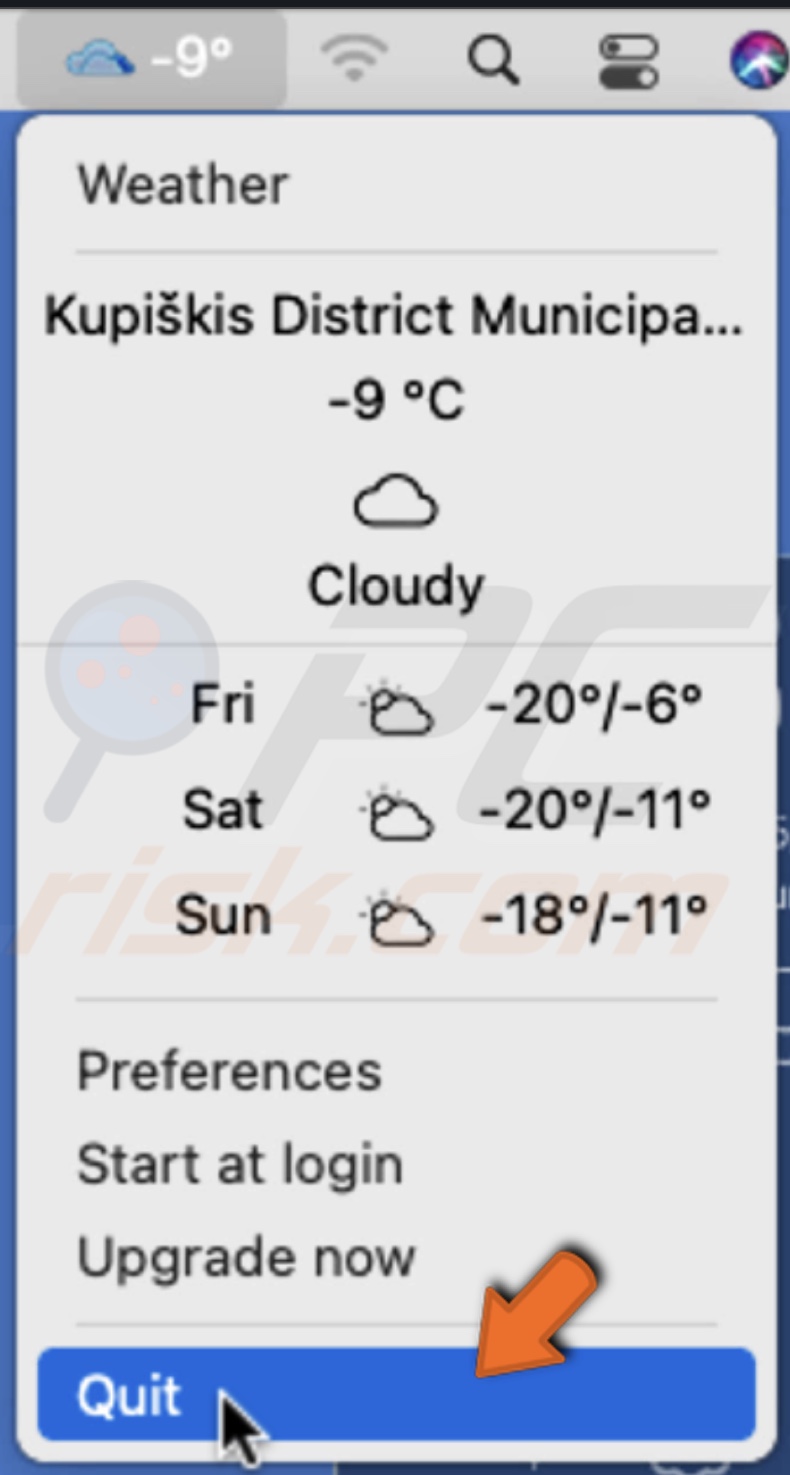
 If you decide to remove the Weather Widget Desktop icon from the menu bar, click on the icon and select "Quit".
Weather Dock
Weather Dock is another weather forecast app that's worth your attention. You can keep it in your Mac's dock.
To add Weather Widget Desktop to the dock, follow the steps below:
1. Go to the App Store and download the Weather Dock app.
2. Launch it and click on "OK" to allow the app to use your location.
3. The weather app's icon will appear in the dock. You can view the current, today's, and the next three-day weather forecast by clicking on the icon.
To manage Weather Dock, follow the guide below:
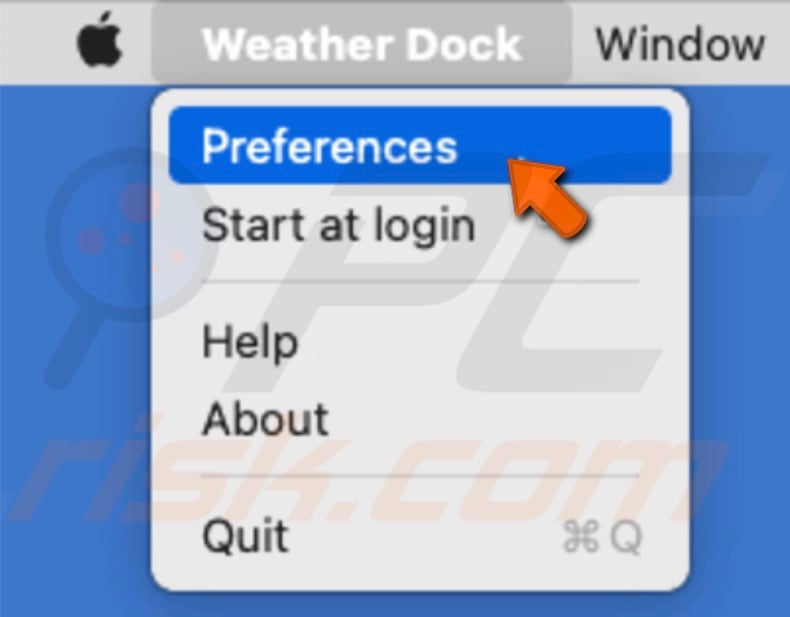
- To access app settings, click on the app icon in the dock, then click on "Weather Dock" in the menu bar and go to "Preferences".
- In the "Weather" tab, you can manually set a location.
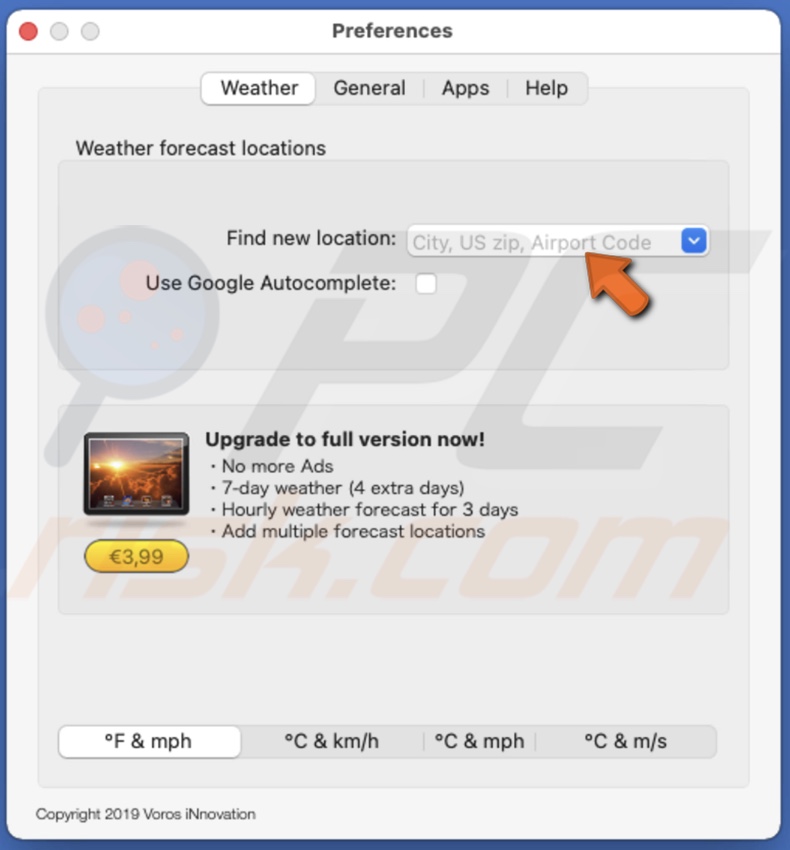
- At the bottom of the "Weather" tab window, you can choose the units you prefer.
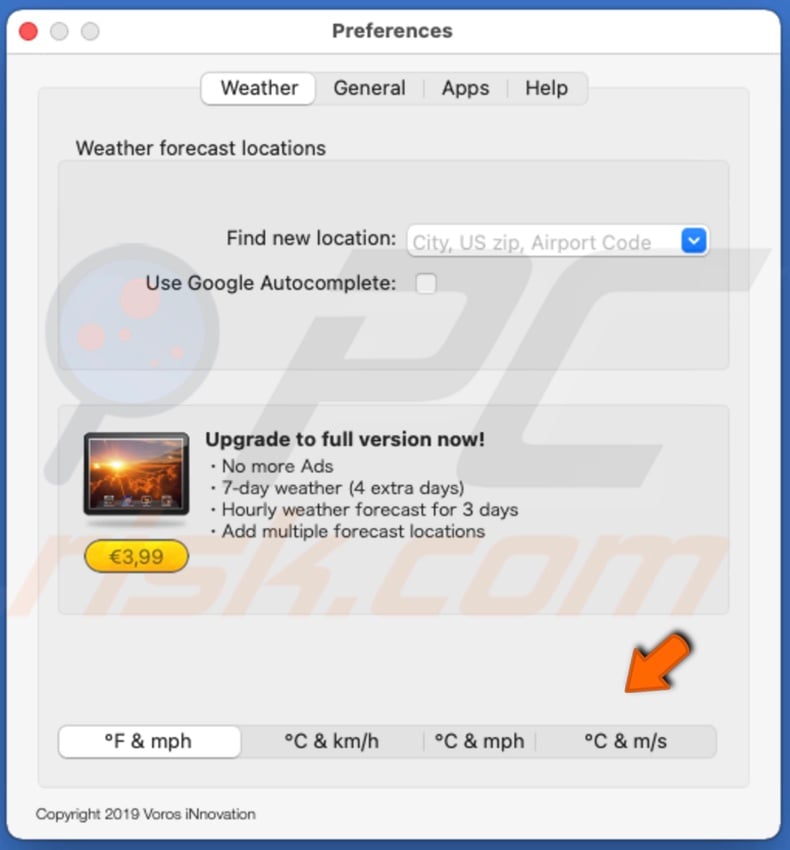
- In the "General" tab, you can choose what you want to see displayed on the app's icon in the dock.
- If you want to save your MacBooks battery, you can disable the icon animation by checking the box next to "Disable icon animation".
![]()
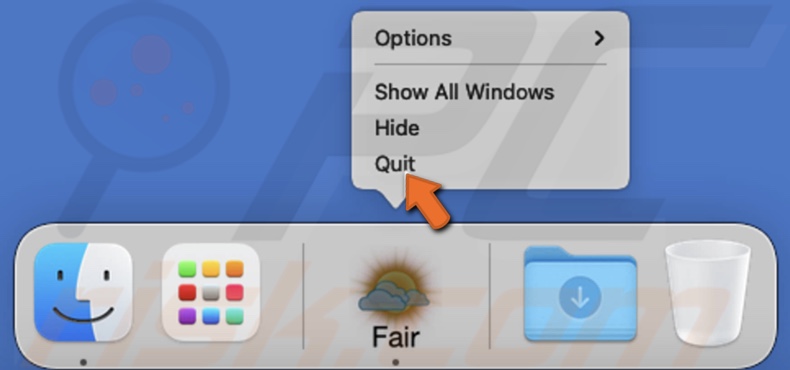
To remove the weather icon from the dock, right-click on it and select "Quit".
Forcast Bar
With the Forecast app, you can choose to view whether forecast in the menu bar or from the dock. When you first download the app, it gives you a free 7-day trial to try out the premium features.
To add Weather Widget Desktop to the dock or the menu bar, follow the steps below:
1. Go to the App Store and download the Forecast Bar app.
2. Launch it and select "Menu Bar" or "Dock" to display the forecast, and click on "Continue".
![]()
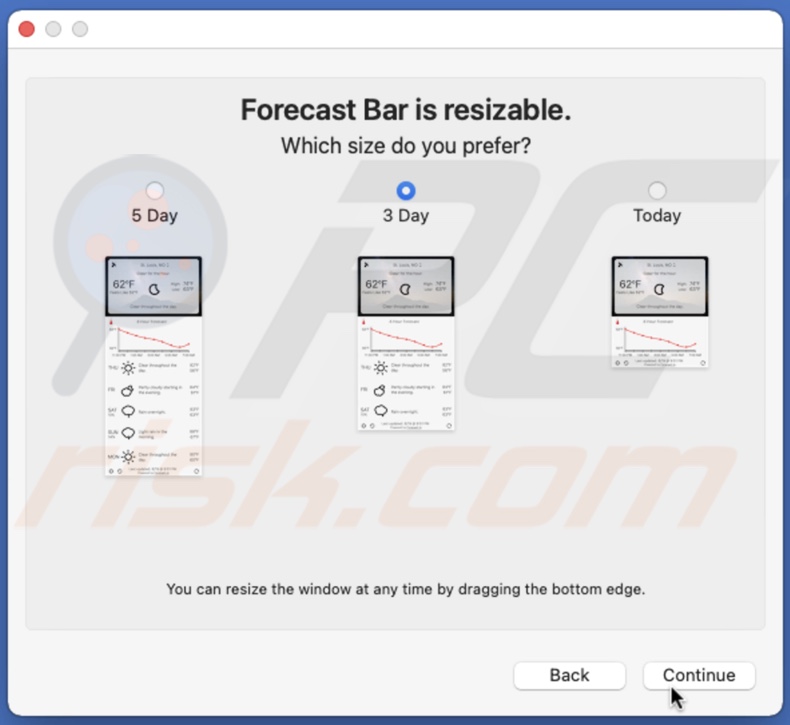
3. Then, select the size of the Forcast Bar and click on "Continue".
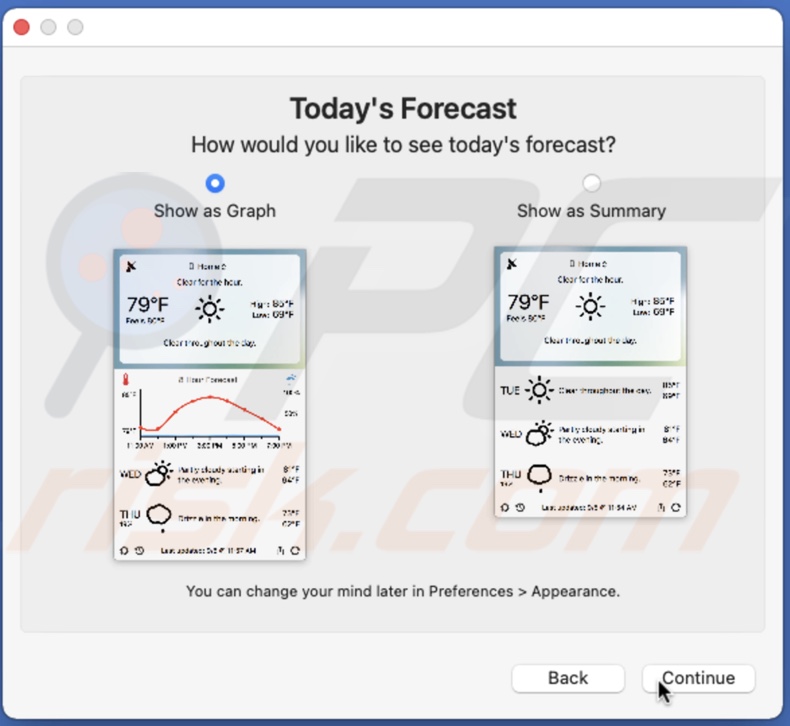
4. Choose how you want to see today's forecast and click on "Continue".
5. Choose if you want to be notified and click on "Continue".
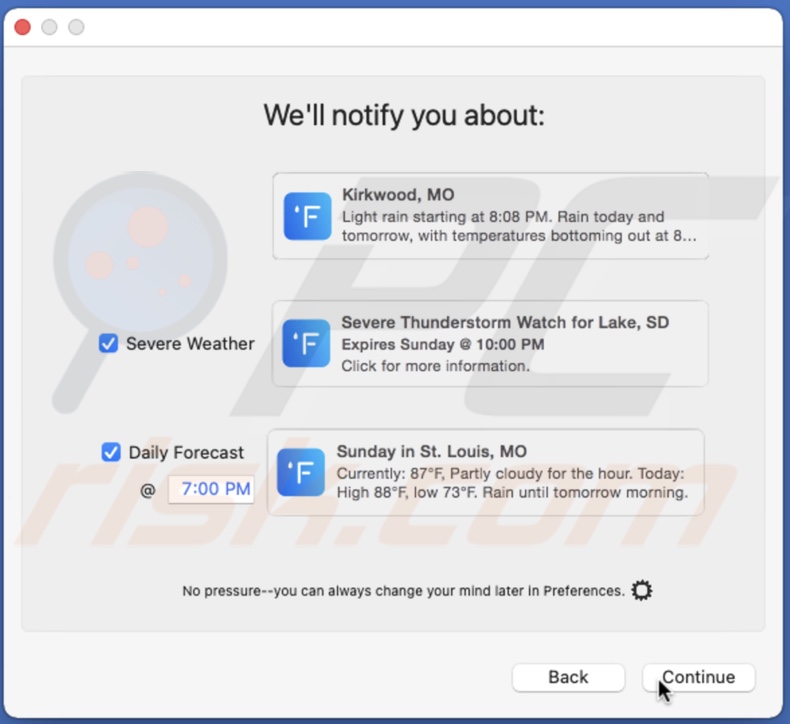
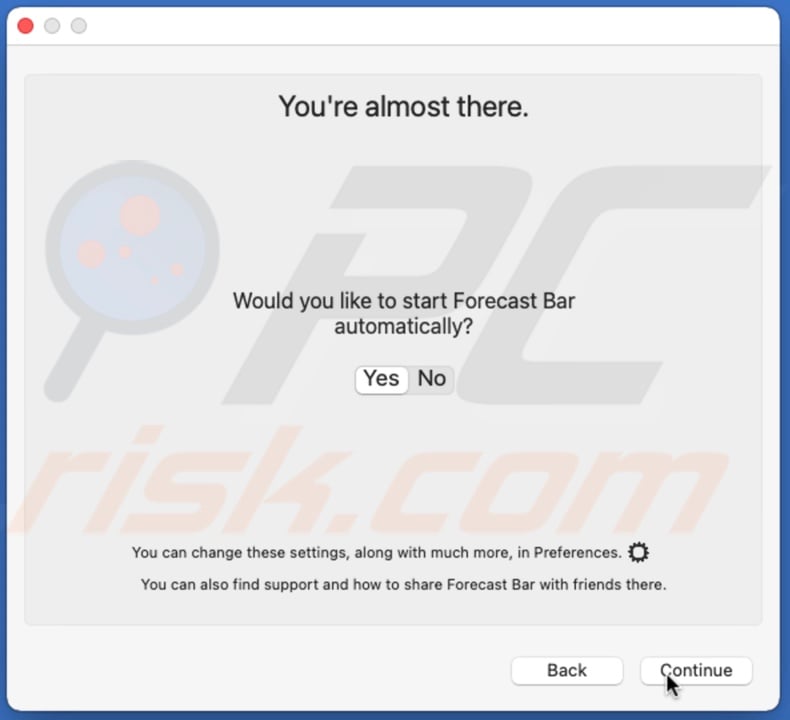
6. Then, choose if you want Forecast Bar to start automatically.
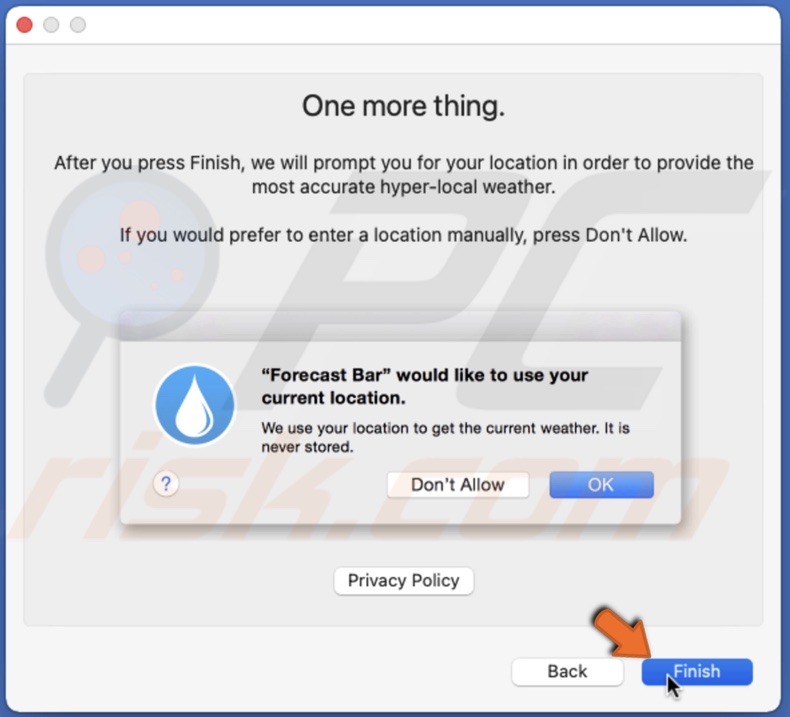
7. Finally, click on "Finish" and then on "OK" to allow the app to see your location.
To manage Forecast Bar, follow the guide below:
- To access Forecast Bar settings, click on the app icon, then click on the gear icon located at the bottom left corner of the window.
![]()
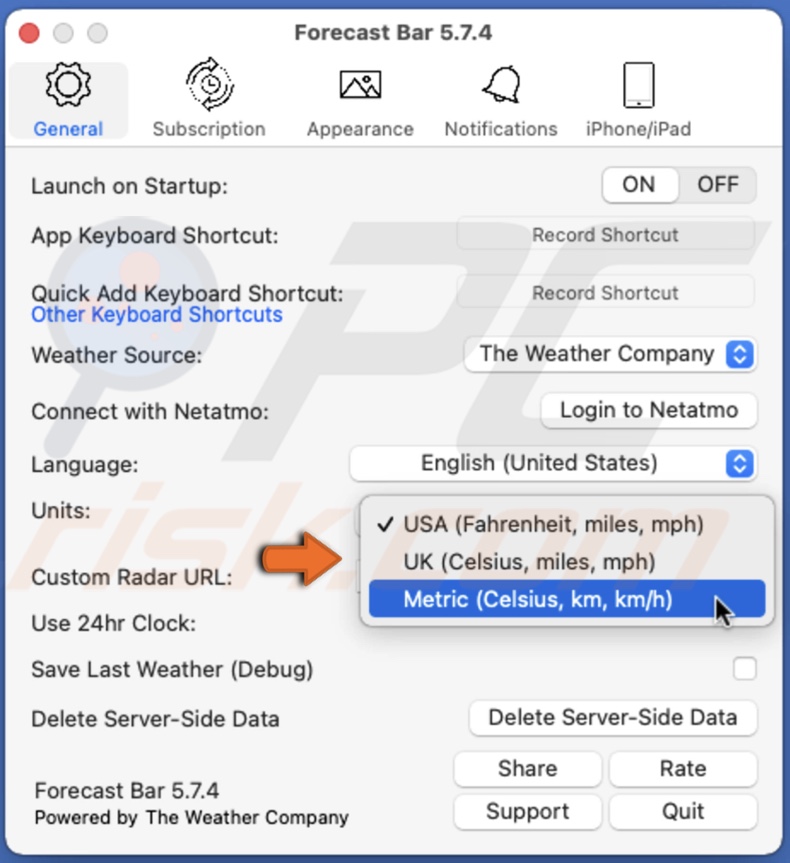
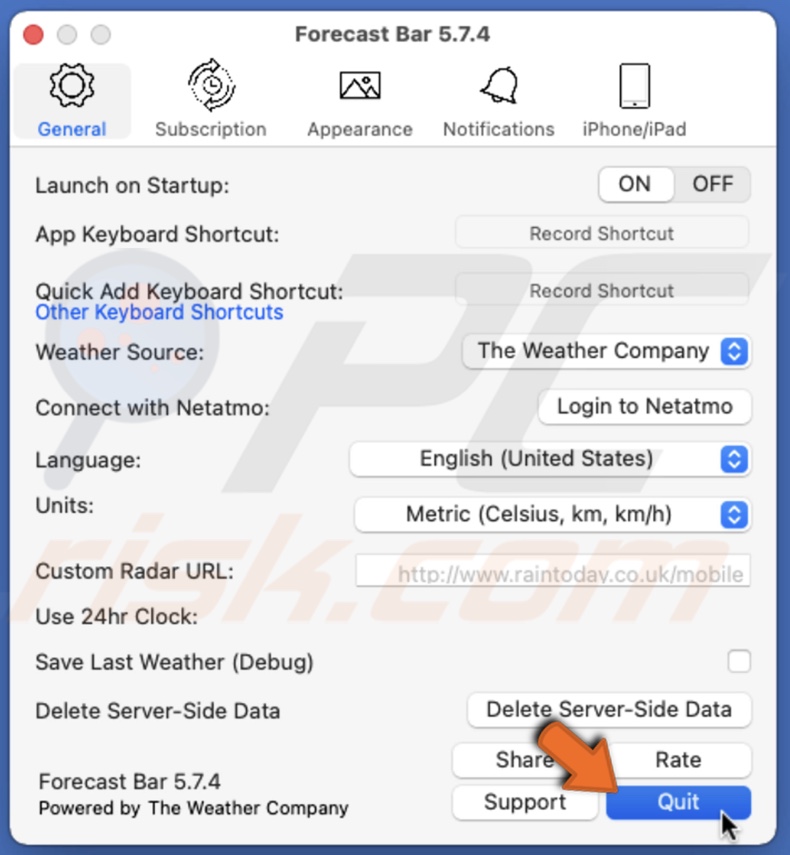
- In the settings window, in the "General" tab, you can select if you want the app to launch on startup.
- Next to "Units", select the imperial or metric system.
- In the "Subscription" tab, you can manage your subscription and get help if you've encountered some difficulties.
- In the "Appearance" tab, you can change style settings.
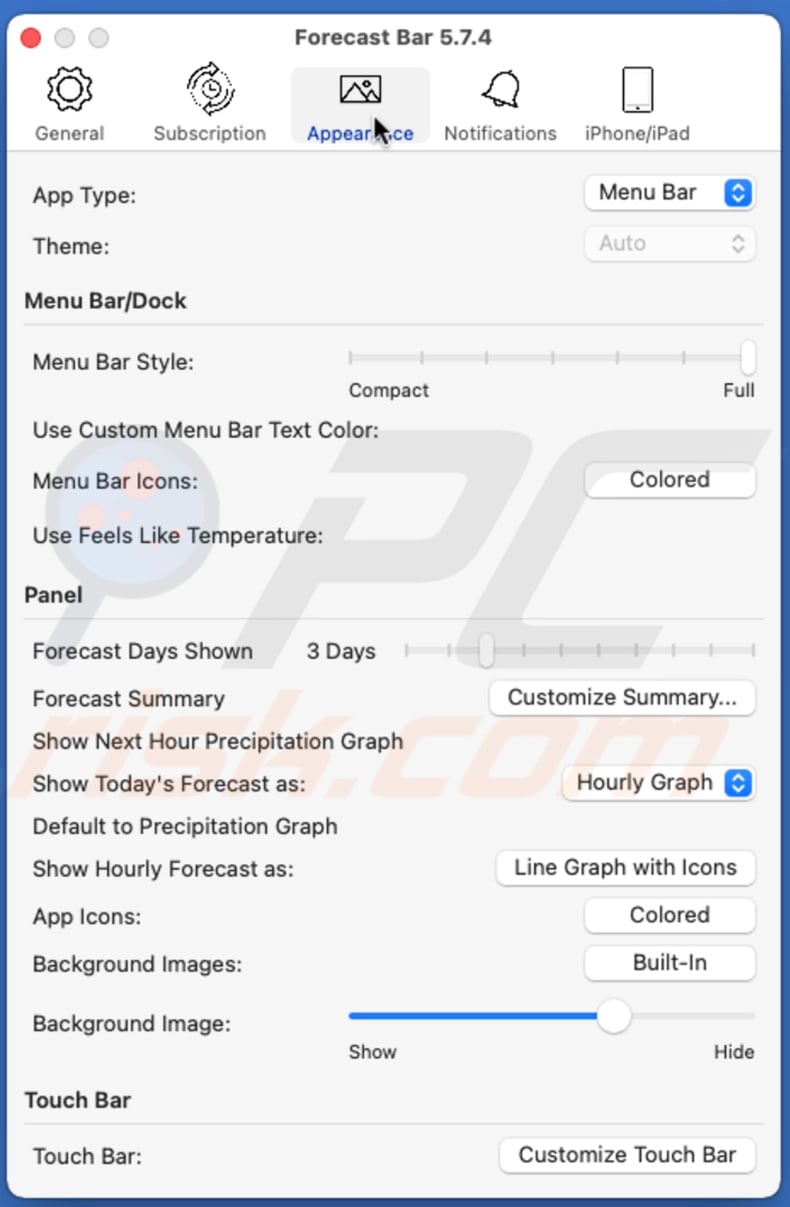
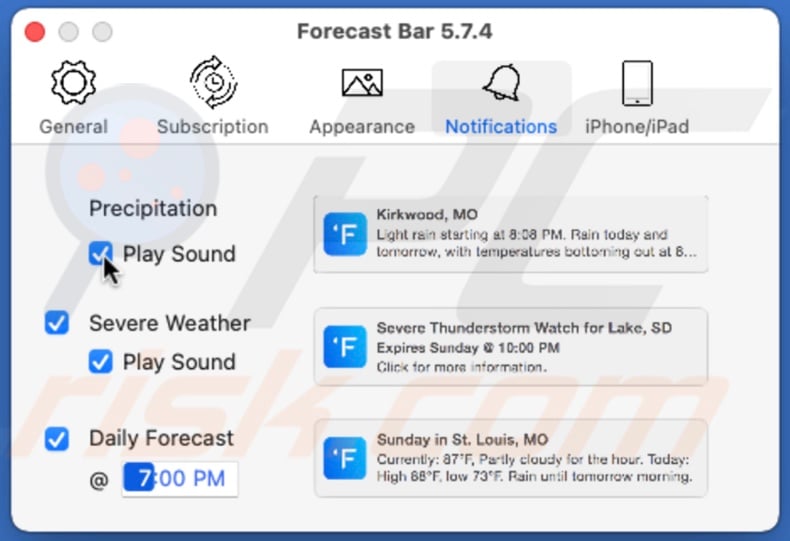
- In the "Notifications" tab, you can manage Forecast bar notifications and sound settings.
If you decide you want to quit the app, click on the Forecast Bar icon and go to the app setting by clicking on the gear icon. Then, in the "General" tab, click on "Quit".
Weather for Status Bar
The Weather for Status Bar app is very minimalistic. It's great if you only need minimal today's forecast.
To add Weather for Status Bar to the menu bar, follow the steps below:
1. Go to the App Store and download the Weather for Status Bar app.
2. Open it. You will see the weather app icon appear in the menu bar.
To manage Weather for Status Bar, follow the guide below:
- To access Forecast Bar settings, click on the app icon and select "Preferences".
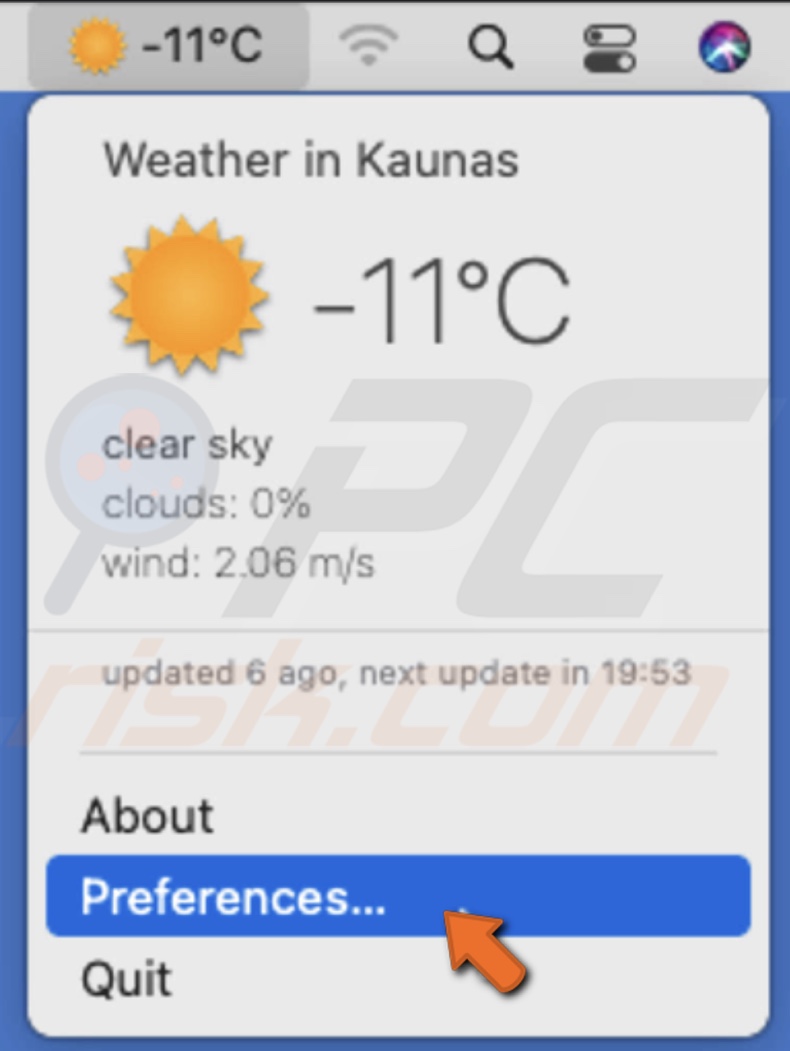
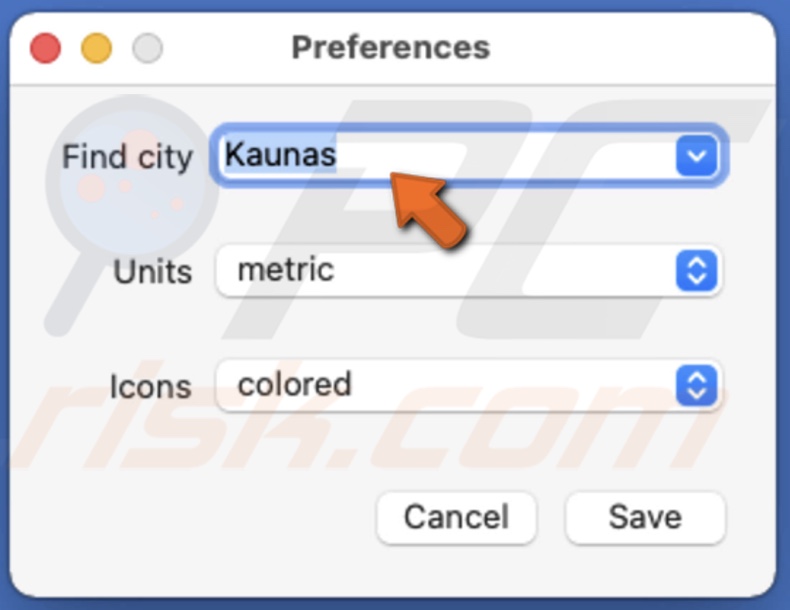
- In the app settings, next to Find city", you can enter the city you want to see the forecast for.
- Next to Units", select metric or imperial system.
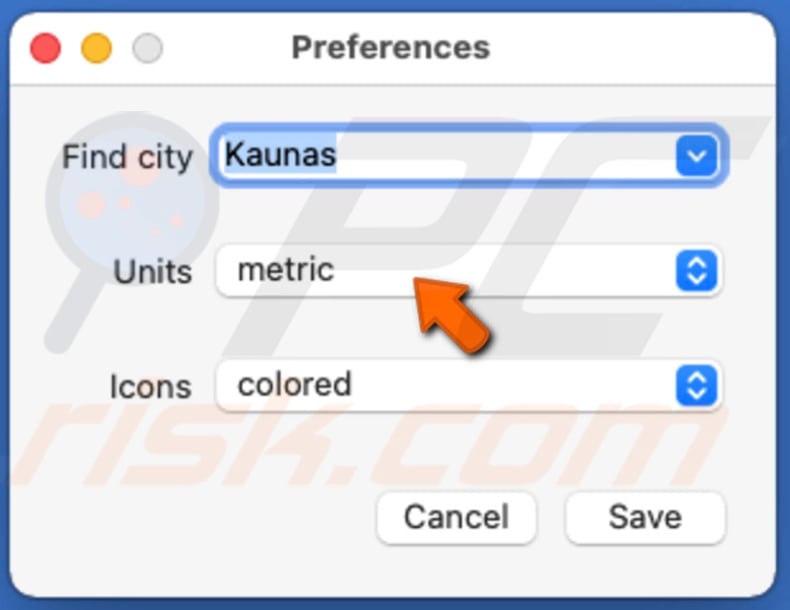
- Next to "Icons", you can select if you want the icons to be colored or black and white.
![]()
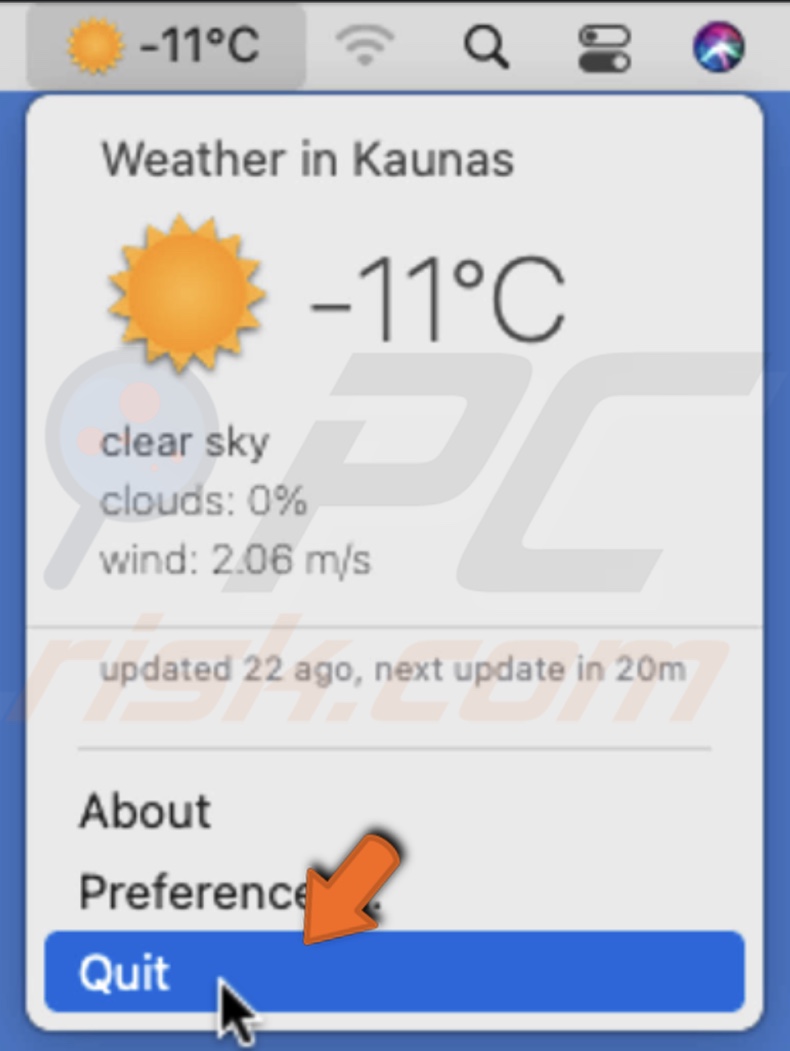
To quit the Weather for Status Bar app, click on the app icon and then click on "Quit".
We hope this article was helpful!
Check out the video below.
Share:

Karolina Peistariene
Author of how-to guides for Mac users
Responsible for collecting, analyzing, and presenting problem-solving solution articles related to macOS issues. Years of macOS experience combined with solid research and analyzing skills help Karolina provide readers with working and helpful solutions as well as introduce various features Mac has to offer.
▼ Show Discussion