How to Resolve Wi-Fi Not Working on macOS Big Sur?

(updated)
Get Free Scanner and check your computer for errors
Fix It NowTo fix found issues, you have to purchase the full version of Combo Cleaner. Free trial available. Combo Cleaner is owned and operated by Rcs Lt, the parent company of PCRisk.com read more.
Fix Wi-Fi Not Working on Mac After macOS BigSur Update
After updating Mac to macOS Big Sur, some users have reported some wireless network connectivity issues. They were experiencing frequent connection drops, failure to connect to a network or no connection at all, and similar problems like slow internet speed.
Wi-Fi issues can be related to hardware and software. It is important to indicate what could be the cause of the problem and accordingly take action. The methods provided below will help you indicate and fix the issues related to your wireless Wi-Fi.
If the problem lies with the router itself or none of the below methods help you solve the problem, contact your Internet Service Provider. Check if they're having technical difficulties, which might be the reason for your network connection failure. If it appears that your router is the cause of the problem, you might need to replace it.
Follow the methods below from top to bottom. If one method doesn't help, proceed to the next one.
Video on Fix Wi-Fi Not Working on Mac After macOS BigSur Update
Table of Contents:
- Introduction
- Method 1. Reset Your Wi-Fi Router
- Method 2. Try to Connect to a Different Network
- Method 3. Check for Software Updates
- Method 4. Restart Your Mac
- Method 5. Disconnect All Devices With a USB Connection
- Method 6. Reset NVRAM
- Method 7. Reset SMC
- Method 8. Create a New Wi-Fi Configuration
- Method 9. Create a New Network Location
- Video on Fix Wi-Fi Not Working on Mac After macOS BigSur Update
Download Computer Malware Repair Tool
It is recommended to run a free scan with Combo Cleaner - a tool to detect viruses and malware on your device. You will need to purchase the full version to remove infections. Free trial available. Combo Cleaner is owned and operated by Rcs Lt, the parent company of PCRisk.com read more.
Reset Your Wi-Fi Router
If you're experiencing Wi-Fi issues, the first thing you can do is reset your network router. By resetting your router/modem, you will reset its settings, and it might fix any connection and wireless issues that could have occurred.
To reset the router, unplug it from the power source and wait for about 30 seconds. Then, plug it back in and press the power button to turn it on.
Try to Connect to a Different Network
If resetting the router didn't help, try to connect your Mac to a different wireless network. If you have the possibility, share your mobile network using Personal Hotspot to check if your Mac can connect to it. If your Mac connects to a different network, it indicates that the router is the problem. In this case, your Internet Service Provider might be experiencing technical difficulties.
You can also try to connect to the same Wi-Fi network as your other devices. If you have another Mac, check if the other Macs can connect to the same network. If you see other devices successfully connect to Wi-Fi, the issue is with your Mac. In this case, the next step is to check for software updates.
Check for Software Updates
If restarting your router didn't help and you indicated that the connectivity issue lies with your Mac, check if any software updates are released to fix the system bug.
To check for software updates, follow the steps below:
1. In the upper menu, click on the Apple logo.
2. Go to "System Preferences".
3. Click on "Software Updates".
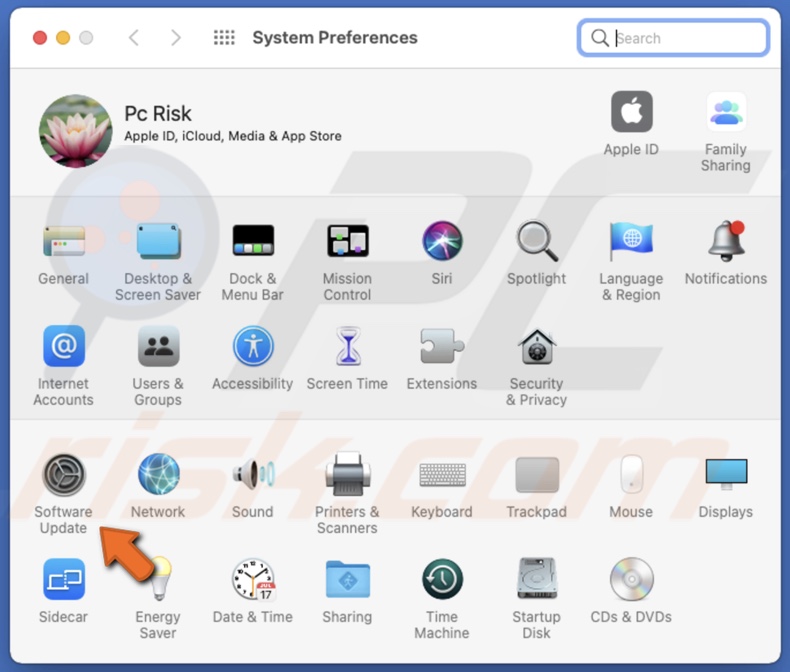
4. If your Mac finds any updates, update your software.
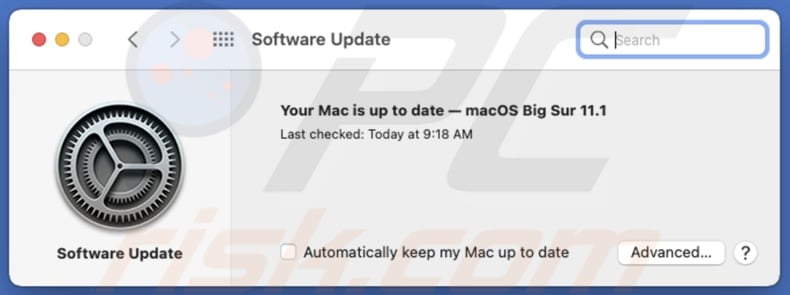
If Mac didn't find any updates, check from time to time to keep your software updates or set your Mac to search for updates automatically. You can do that by checking the box next to "Automatically keep my Mac up to date" in "Software Updates". In the meantime, if possible, connect to a different network or connect the router directly to your Mac with a cable.
Restart Your Mac
This method might be an obvious one, but try restarting your Mac to see if it resolves anything. This should help, especially if you keep your Mac in Sleep Mode all the time instead of completely turning it off. By rebooting the software, your Mac can fix minor software-related glitches and bugs.
You can reboot your Mac in two ways:
1. Click on the Apple logo in the upper menu and click on "Restart".
2. Hold the Power button on the back of your Mac and wait for it to shut down. Then, turn it back on.
When your Mac reboots, check if you can connect to your wireless network.
Disconnect All Devices With a USB Connection
Try to disconnect all devices plugged into USB ports like external hard drives, dongles, etc. It might seem unnecessary, but sometimes connectivity issues occur due to hardware interference with connected USB devices.
If your Mac connects to the wireless network after disconnecting USB devices, it was probably a hardware interference.
If you need to keep the device connected to your Mac, try to move it further away. Also, by switching your network from 2.4 GHz to 5 GHz, you will minimize network interruption.
Reset NVRAM
Try to reset your Mac's NVRAM (Non-Volatile Random Access Memory). It is usually very helpful.
To reset NVRAM, follow the steps below:
1. Shut down your Mac.
2. On your keyboard, locate Option + Command + P + R keys and press them at once as soon as you turn on your Mac. Hold the keys for 20 seconds and then release them.
This will reset NVRAM. When Mac boots, try to connect to Wi-Fi.
Reset SMC
Resetting System Management Controller will be beneficial as it can help fix Wi-Fi problems and hardware issues.
To reset SMC on MacBook with T2 chip, follow the steps below:
1. Turn off your MacBook.
2. On your keyboard, press and hold down Control + Option + Shift keys for 7 seconds.
3. Then, while pressing the keys, press the Power button and hold all four keys for another 7 seconds.
4. Release all keys and boot your Mac.
To reset SMC on MacBook without T2 chip, follow the steps below:
1. Turn off your MacBook.
2. On your keyboard, press and hold down Control + Option + Shift keys. While holding them press the Power button and hold all of them for 10 seconds.
3. Release all keys and boot your Mac.
To reset SMC on Desktop Mac, follow the steps below:
1. Turn off your Desktop Mac and unplug the power cord from the power socket.
2. Wait for about 15 seconds for Mac to reset and plug it back in.
3. Then, wait for 5 more seconds and turn on your Mac.
Try to connect to your Wi-Fi.
Create a New Wi-Fi Configuration
If the methods above didn't help, try to create a new Wi-Fi configuration. You will need to remove existing configuration files and make new ones.
To create new Wi-Fi configurations, follow the steps below:
1. Disable Wi-Fi connection.

2. Open Finder and choose a location.
3. Then, create a folder in that location and name it "Big Sur Wi-Fi Backup".
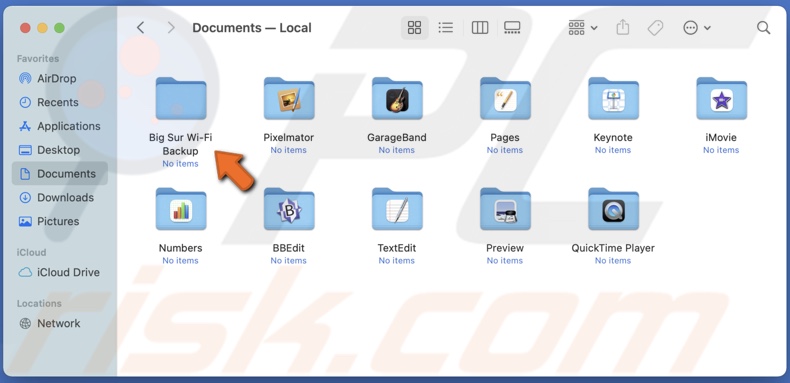
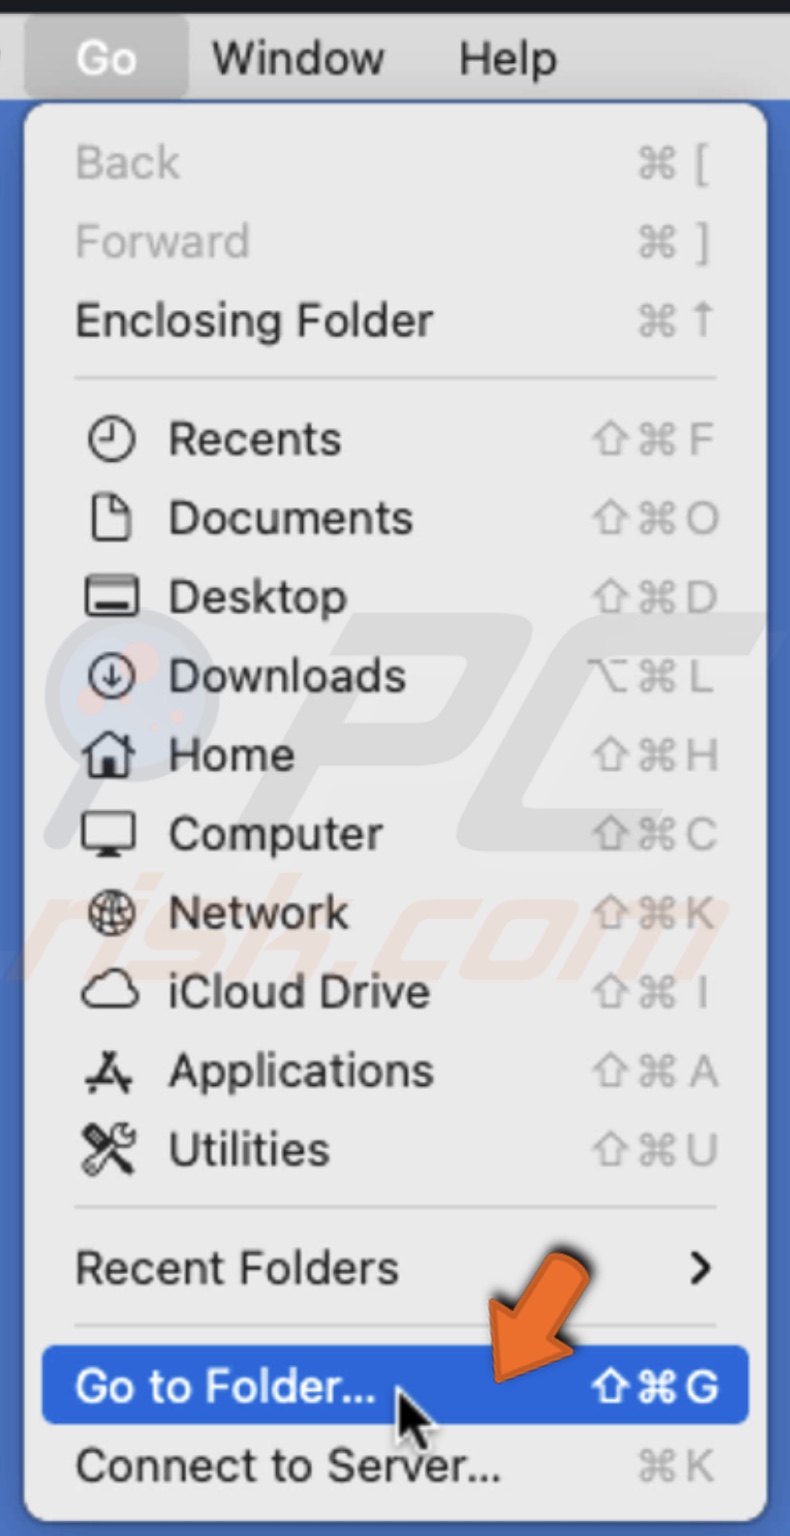
4. Go to the upper menu and click on "Go".
5. Then, click on "Go to Folder".
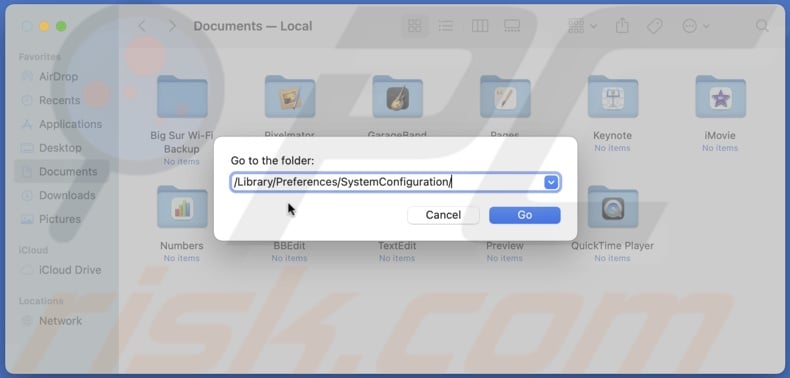
6. In the path bar, enter the line: /Library/Preferences/SystemConfiguration/
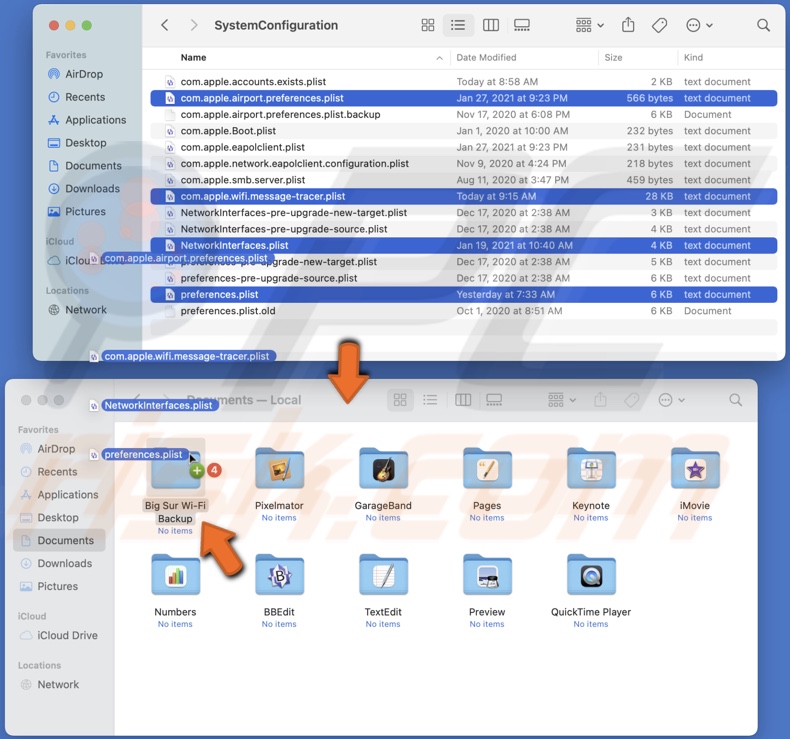
7. In the opened window, select the files below and drag them to the created folder.
- “NetworkInterfaces.plist”
- “com.apple.wifi.message-tracer.plist”
- “com.apple.airport.preferences.plist”
- “preferences.plist”
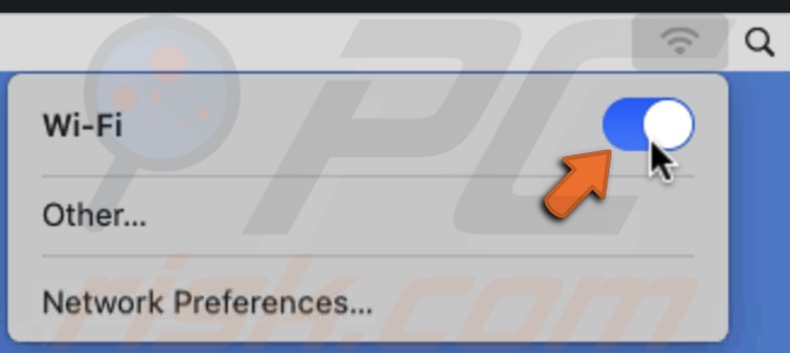
8. Restart your Mac and enable Wi-Fi.
This method usually fixes network issues.
Create a New Network Location
For some, this method can look hard, but you'll be fine if you follow the steps provided below.
To create a new network location, follow the steps below:
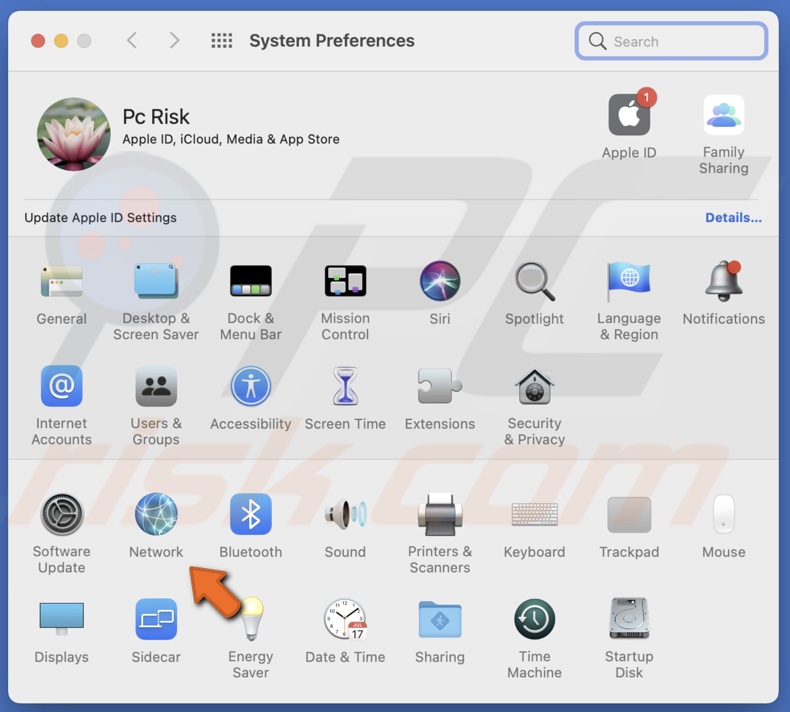
1. Click on the Apple logo and go to "System Preferences".
2. Go to "Network".
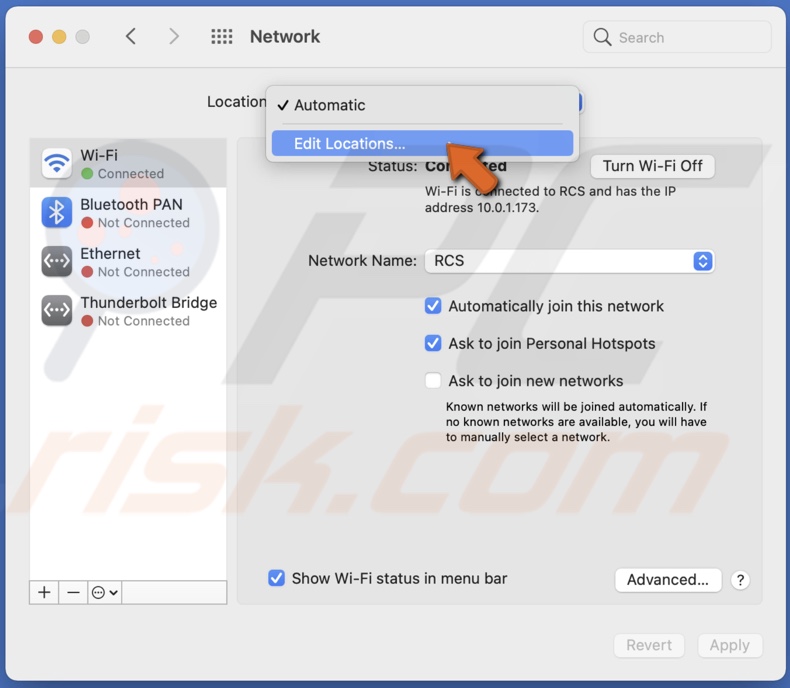
3. Select your Wi-Fi, and next to "Location", expand the drop-down menu.
4. Click on "Edit Locations".
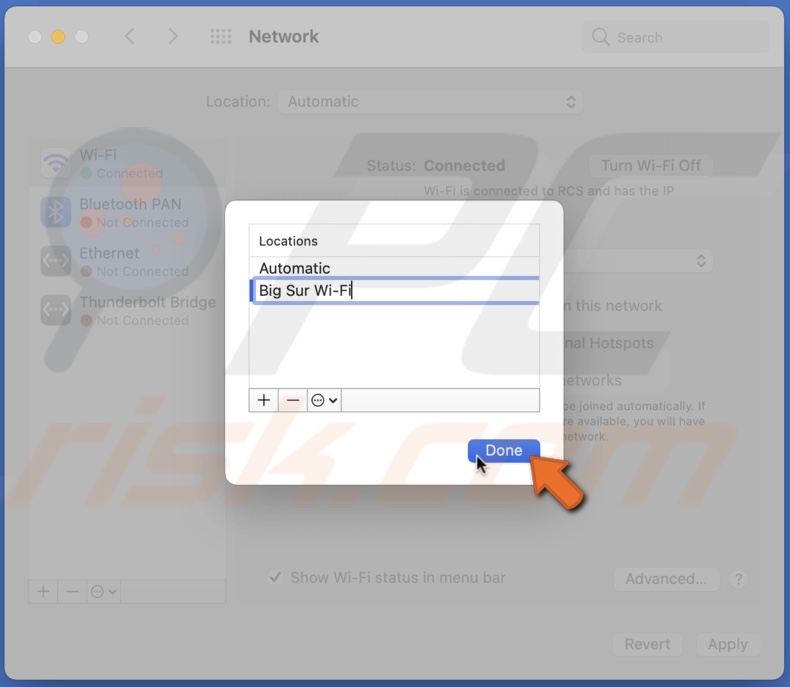
5. Then, in the pop-up window, click on the "+" button and name it "Big Sur Wi-Fi" or something similar.
6. Click on "Done".
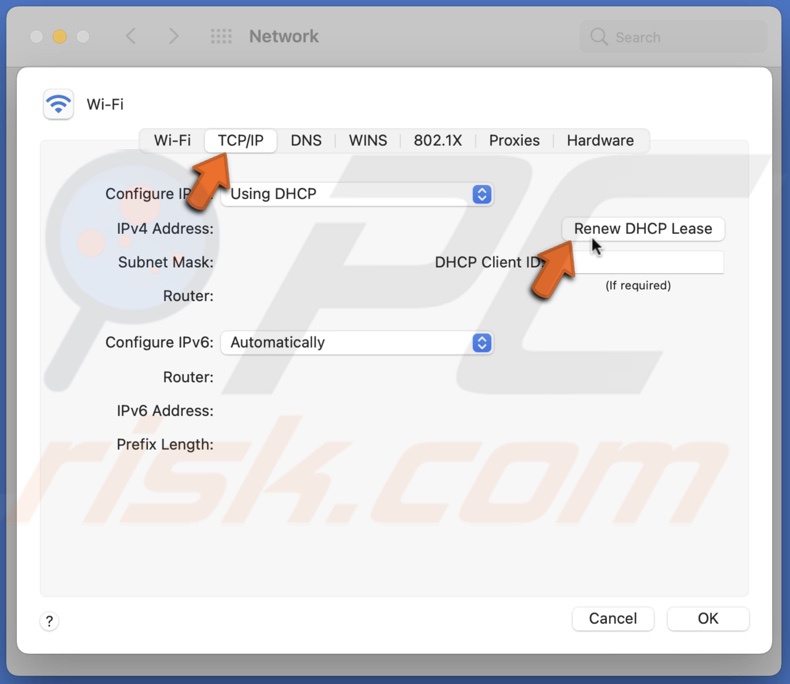
7. Then, click on the "Advanced" button.
8. In the "TCP/IP" tab, click on "Renew DHCP Lease" and then on "Apply".
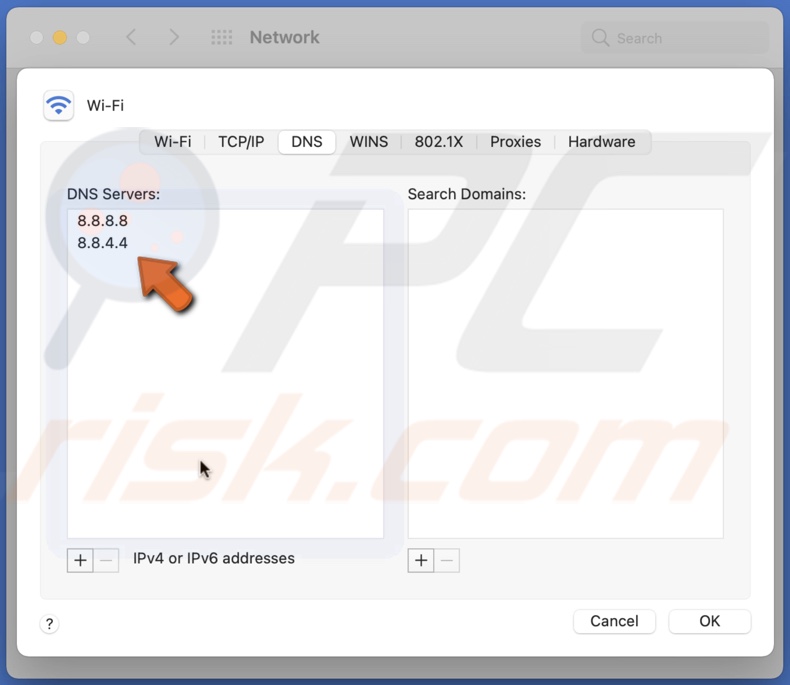
9. Next, go to the "DNS" tab.
10. Click on the "+" button and enter 8.8.8.8. Then, click on the "+" again and enter the 8.8.4.4 server.
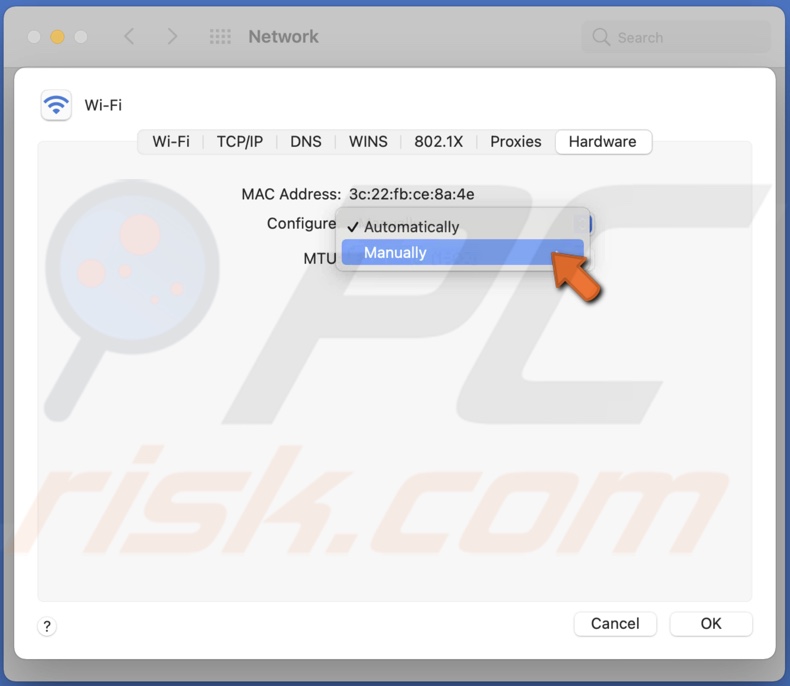
10. Then, go to the "Hardware" tab.
11. Expand the drop-down menu next to "MTU" and select "Custom".
12. Then, enter the value "1492".
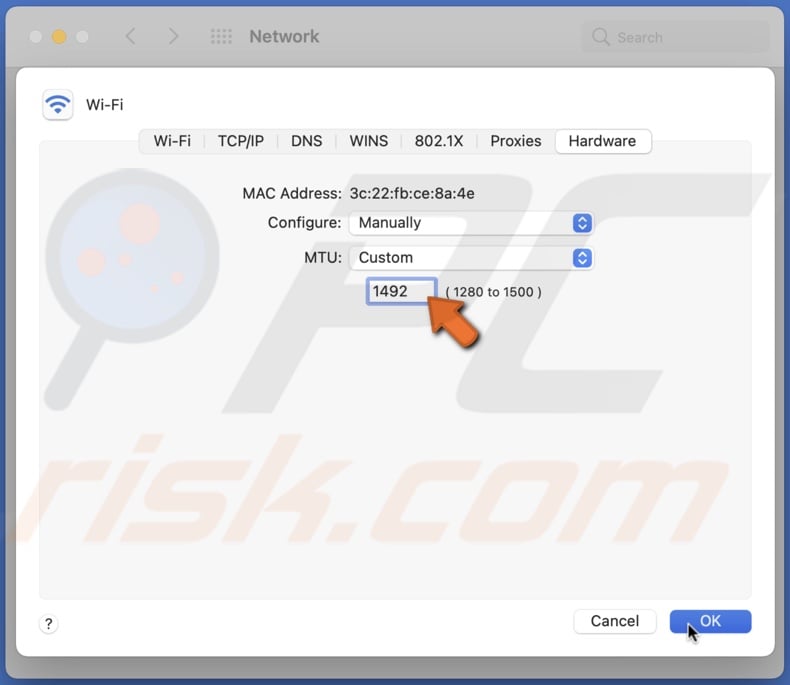
13. Click on "OK".
14. Then, click on "Apply".
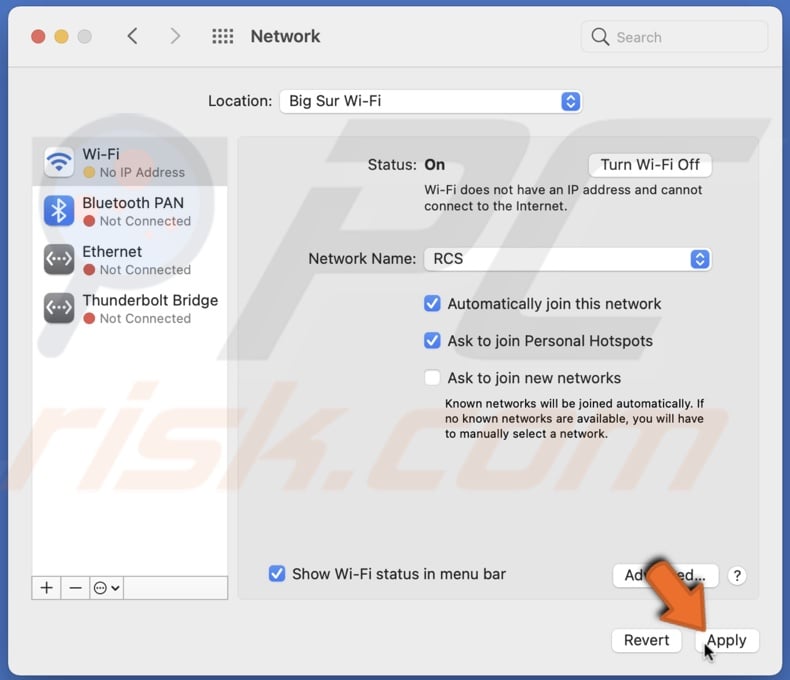
Now try to connect to your Wi-Fi network.
We hope this article was helpful!
Also, you can check out the video above for a step-by-step tutorial.
Share:

Karolina Peistariene
Author of how-to guides for Mac users
Responsible for collecting, analyzing, and presenting problem-solving solution articles related to macOS issues. Years of macOS experience combined with solid research and analyzing skills help Karolina provide readers with working and helpful solutions as well as introduce various features Mac has to offer.
▼ Show Discussion