How to Enable Do Not Disturb Mode in 3 Easy Ways on Mac?

(updated)
Get Free Scanner and check your computer for errors
Fix It NowTo fix found issues, you have to purchase the full version of Combo Cleaner. Free trial available. Combo Cleaner is owned and operated by Rcs Lt, the parent company of PCRisk.com read more.
How to Enable Do Not Disturb Mode on Mac With Few Quick Clicks
If you have a particular time when you need to focus, you can set a specific time range for the Do Not Disturb mode to be turned on. For example, you know you have to finish a work presentation or an essay for school in a few hours, but every time you get an email, your focus shifts. To avoid this kind of situation and save yourself from stress, turn on the feature, which will help you stay focused.
Suppose you do not want to be in Do Not Disturb Mode but need to mute certain applications. In that case, you can easily do that by following the steps in the "How to Mute Only Some Notifications" section.
Below you will find information on how to enable Do Not Disturb Mode, access it quickly from the menu bar, create a shortcut, and more.
Video on How to Enable Do Not Disturb Mode on Mac in 3 Easy Ways
Table of Contents:
- Introduction
- Method 1. How to Turn On Do Not Disturb Mode Using Control Center
- Method 2. How to Schedule a Specific Time Range For Do Not Disturb Mode Using Notification Center
- Method 3. How to Create and Turn On Do Not Disturb Mode Using Keyboard Shortcut
- How to Mute Only Some Notifications
- Video on How to Enable Do Not Disturb Mode on Mac With Few Quick Clicks
Download Computer Malware Repair Tool
It is recommended to run a free scan with Combo Cleaner - a tool to detect viruses and malware on your device. You will need to purchase the full version to remove infections. Free trial available. Combo Cleaner is owned and operated by Rcs Lt, the parent company of PCRisk.com read more.
How to Turn On Do Not Disturb Mode Using Control Center
Control Center lets you quickly access important and often used system settings such as volume, brightness, and of course, the Do Not Disturb feature.
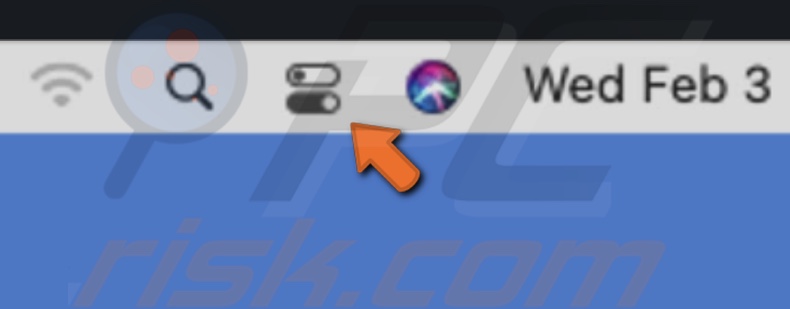
If your Mac is running on macOS BigSur, the Control Center icon should look like two sliders. The bottom one has a dark circle in the right corner, and the top one has a white circle in the left corner.
If you have macOS Catalina or an older operating system on your Mac, the Control Center will look like three dots, and each dot has a line next to it.
To turn on Do Not Disturb Mode on macOS BigSur using Control Center, follow the steps below:
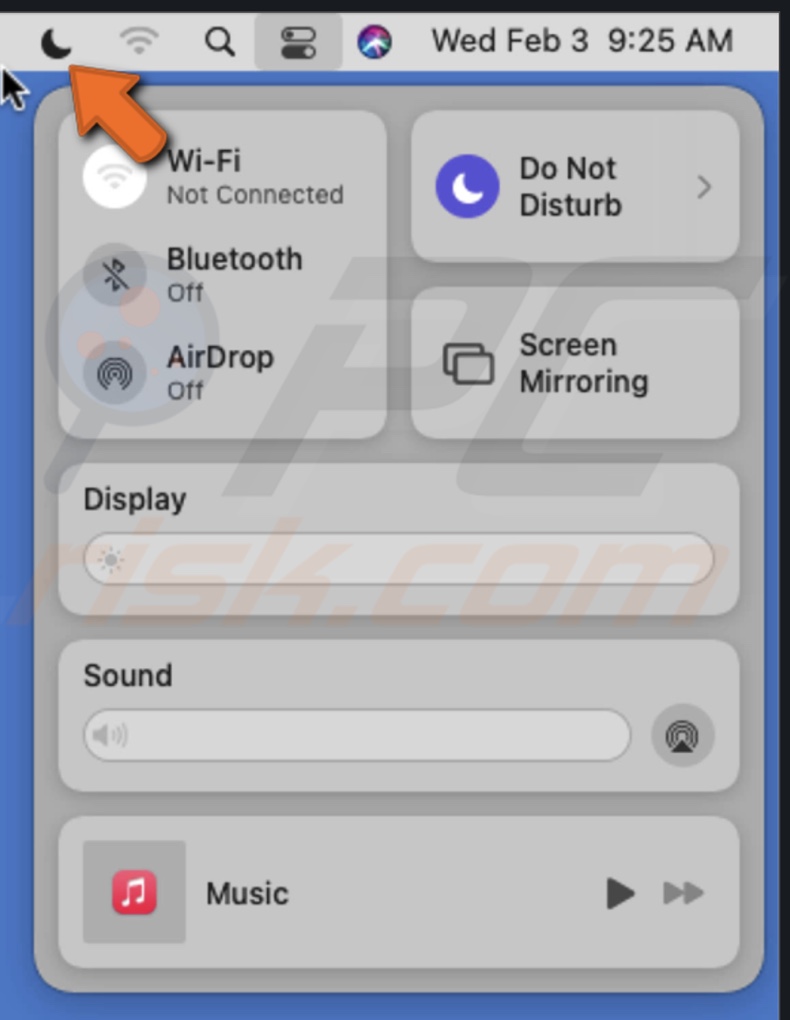
1. In the upper menu, click on the Control Center icon, located in the right corner, next to Siri.
2. Click on the moon icon next to "Do Not Disturb" to enable the feature.
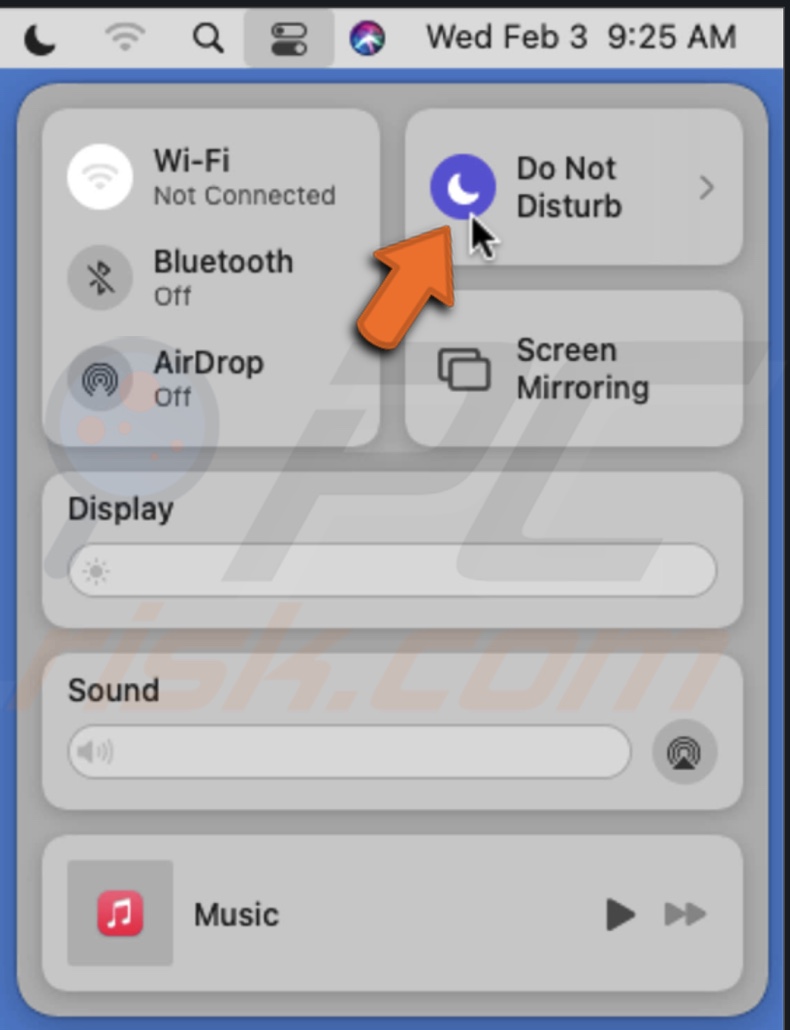
When you enable Do Not Disturb Mode, it will stay turned on until you decide to turn it off.
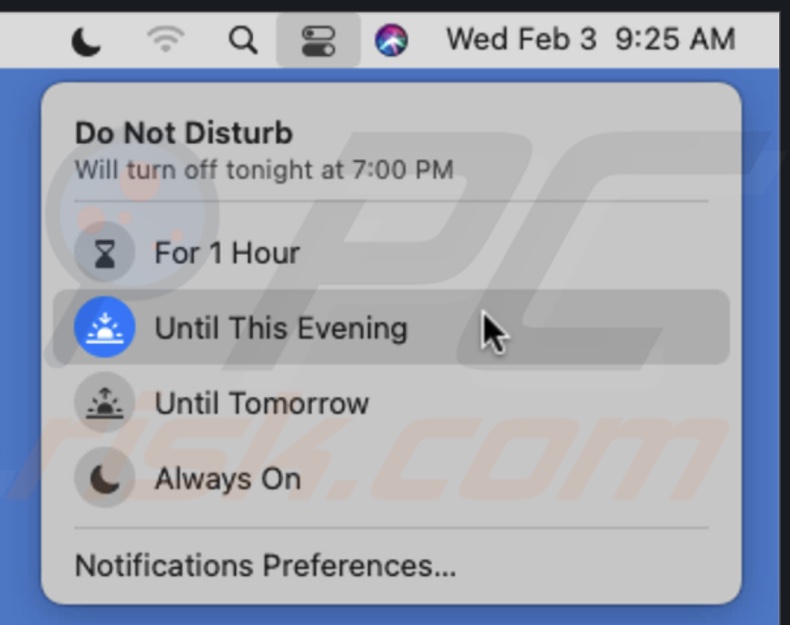
When you hover over "Do Not Disturb", you will see an arrow appear. Click on the arrow to set Do Not Disturb Mode for an hour, until evening, or until tomorrow.
If you want to disable the Do Not Disturb feature, click on the moon icon again.
For quicker access, you can add the Do Not Disturb menu directly to the menu bar, so you don't have to access it from the Control Center.
To add the Do Not Disturb menu to the main menu bar, follow the steps below:
1. In the upper menu, click on the Control Center icon, located in the right corner, next to Siri.
2. Click and hold the Do Not Disturb menu and drag it to the upper menu bar.
3. Choose a place in the right corner of the menu bar and release it. The menu icon will look like a moon.
To turn on Do Not Disturb Mode on macOS Catalina or older using Control Center, follow the steps below:
1. In the upper menu, click on the Control Center icon, located in the right corner, next to Siri.
2. Then, go to the "Today" tab.
3. Next to the "Do Not Disturb" toggle the slider on to enable the mode.
Do Not Disturb Mode will stay turned on until the next day.
You can also enable the Do Not Disturb mode by clicking on the Notification Center icon while pressing and holding the Option key on your keyboard. When the Do Not Disturb Mode turns on, the Notification Center icon will be dimmed. The mode will stay enabled until midnight or until you decide to turn it off.
If you want to disable the Do Not Disturb feature, toggle the slider off.
How to Schedule a Specific Time Range For Do Not Disturb Mode Using Notification Center
Notification Center provides you the option to see notifications from apps and your Macs system. For example, when notifications are turned on, you can see if you got an email or be notified if a software update is available. You can enable and manage the Do Not Disturb Mode in Notification Center as well.
To schedule Do Not Disturb Mode on using Notification Center, follow the steps below:
1. In the upper menu, click on the Apple logo to access the Apple menu.
2. Go to "System Preferences".
3. Locate and click on "Notifications".
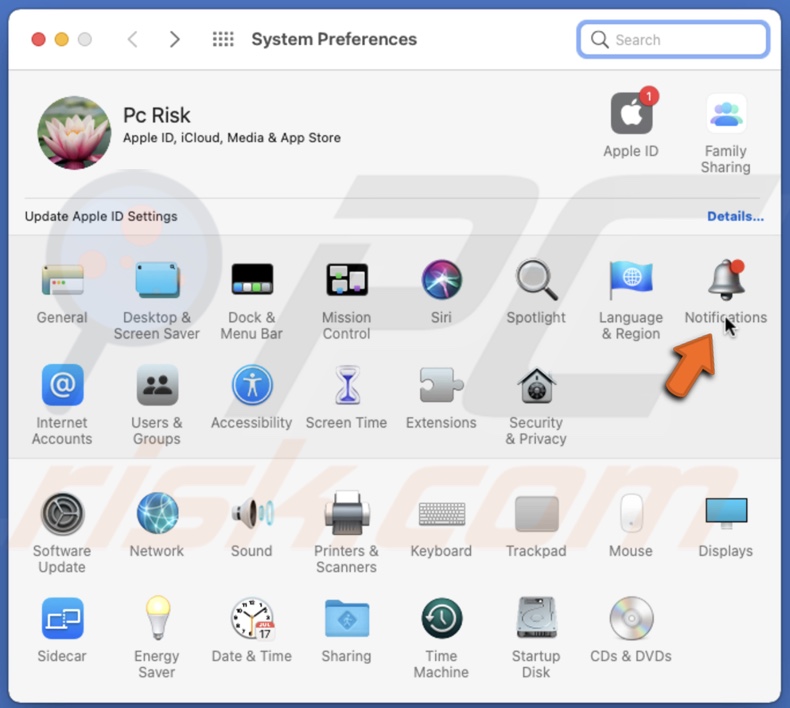
4. Select "Do Not Disturb".
5. Then, on the left side of the window, check the box next to "From" under "Turn on Do Not Disturb" and choose a time range.
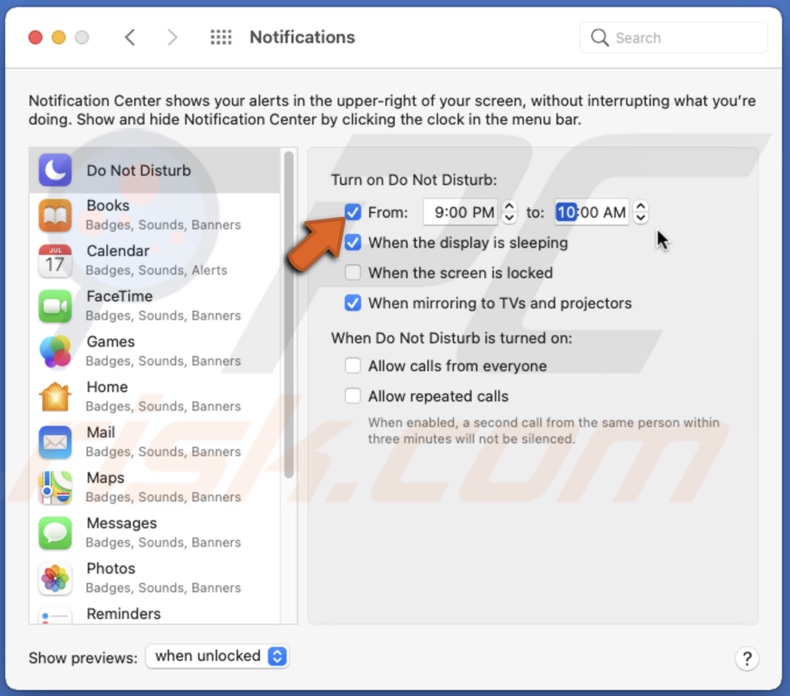
The Do Not Disturb Mode will stay enabled in that time range and later will disable itself automatically.
If you decide you want to turn off Do Not Disturb entirely, uncheck the box in step 5.
How to Create and Turn On Do Not Disturb Mode Using Keyboard Shortcut
If you like to use keyboard shortcuts, you can create one to quickly enable/disable the Do Not Disturb Mode.
To create a keyboard shortcut for the Do Not Disturb feature, follow the steps below:
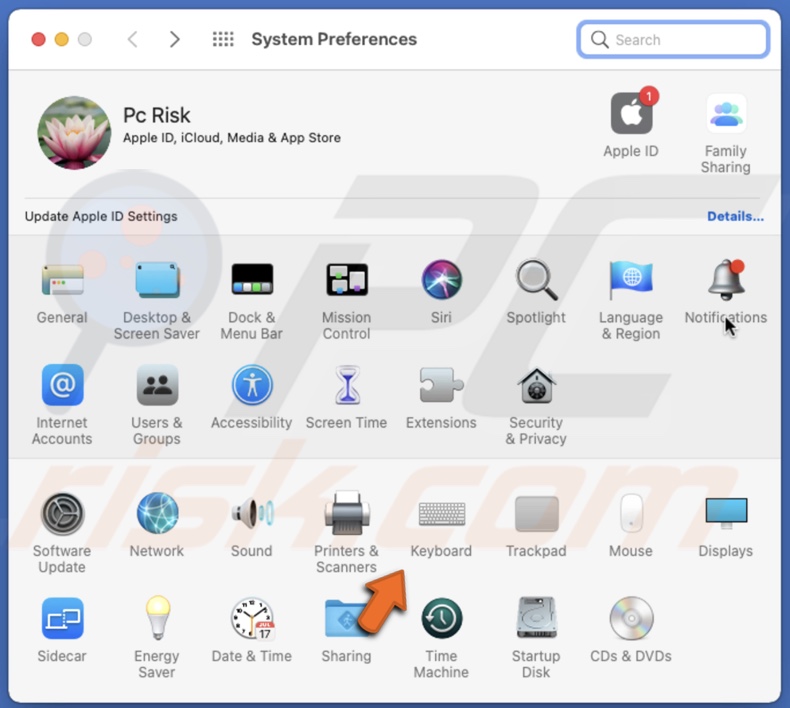
1. In the upper menu, click on the Apple logo to access the Apple menu.
2. Go to "System Preferences".
3. Then, go to "Keyboard" settings.
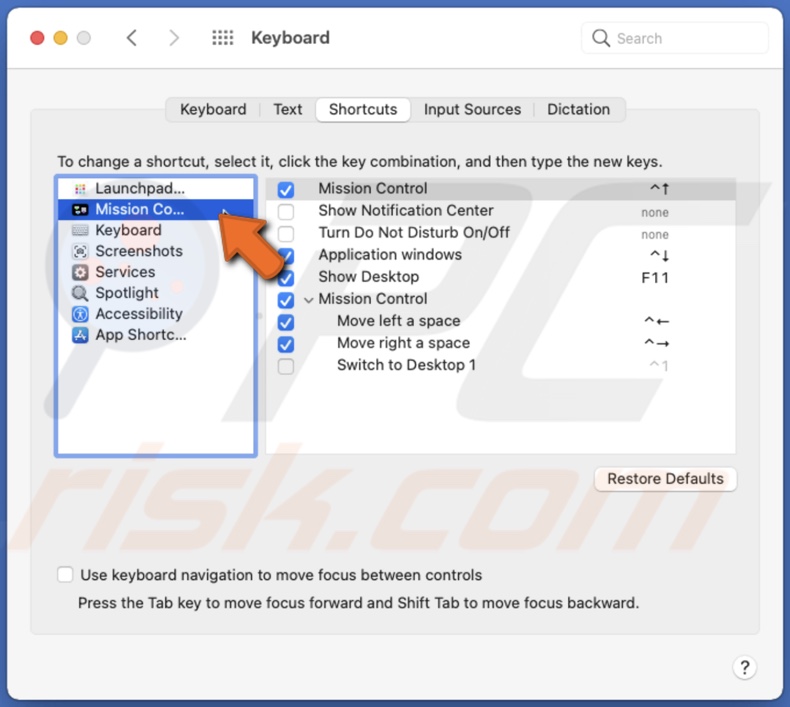
4. Go to the "Shortcuts" tab.
5. On the left side, locate and select "Mission Control". It is usually the second option, under "Launchpad & Dock".
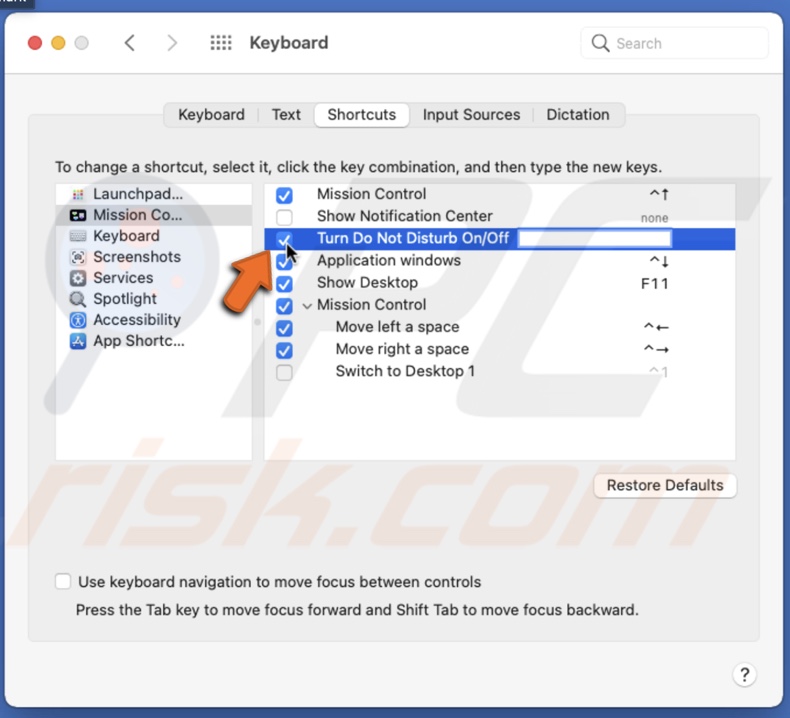
6. Then, on the left side, check the box next to "Turn Do Not Disturb On/Off". A text field will appear next to it.
7. On your keyboard press the desired key combination that will be the shortcut for the Do Not Disturb Mode.
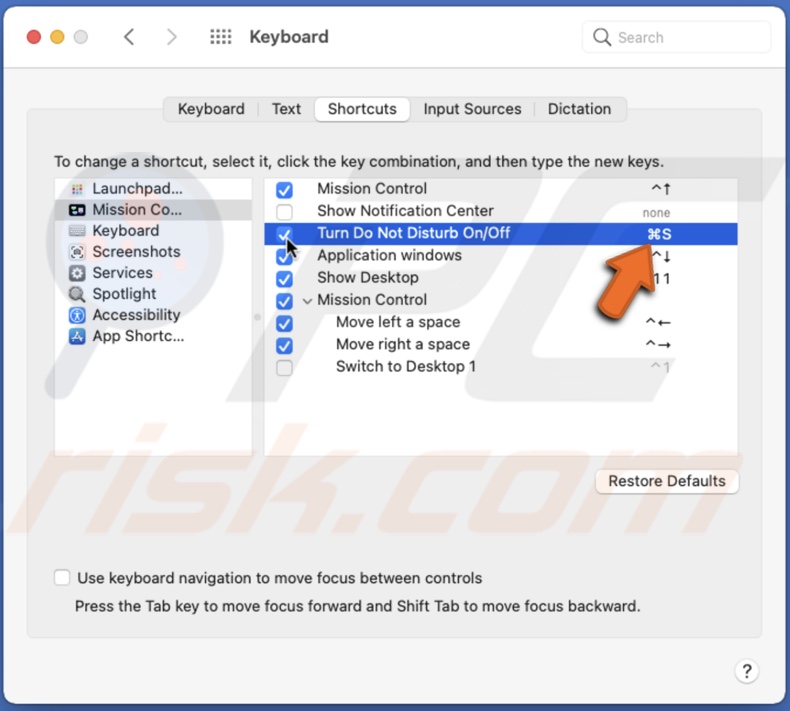
Now you can turn on and off the Do Not Disturb feature easily with the shortcut you created.
How to Mute Only Some Notifications
Supposedly you need to focus and want to disable only distracting app notifications, and you need to be notified by certain apps, for example, Mail. You can choose which apps to keep muted in the Notification Center.
1. In the upper menu, click on the Apple logo to access the Apple menu.
2. Go to "System Preferences".
3. Locate and click on "Notifications".
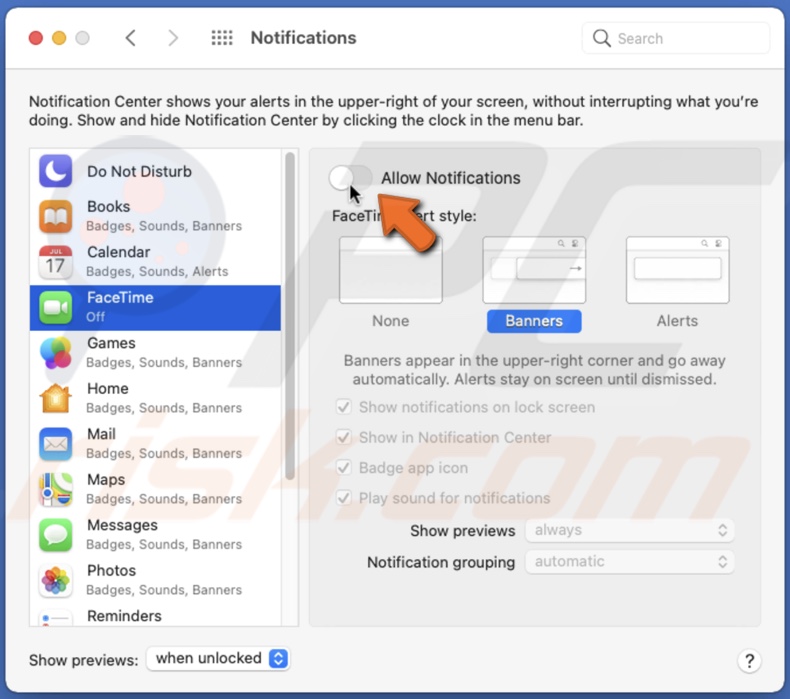
4. When the "Notifications" window appears, select an application or a feature you want to mute on the left side.
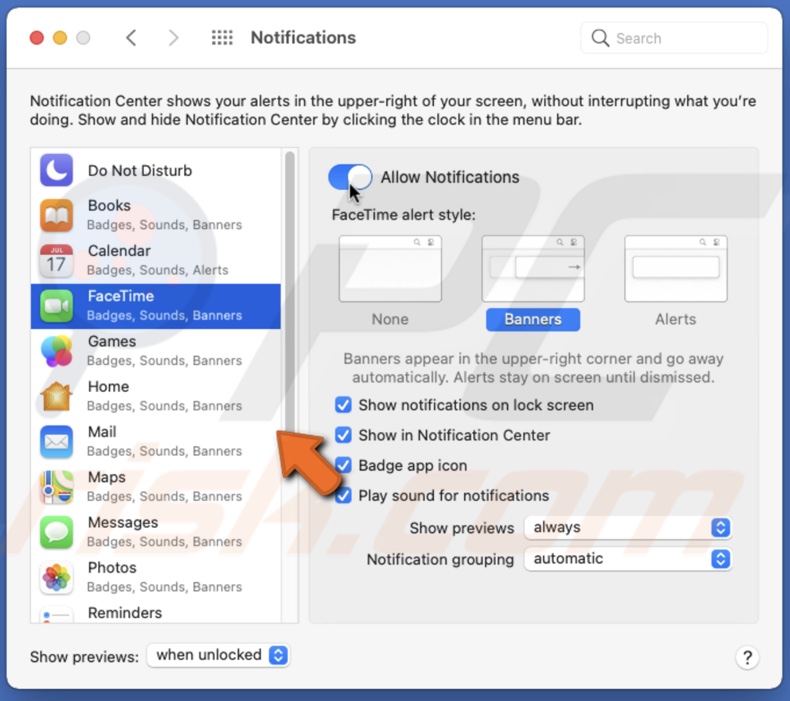
5. Then, on the right side, toggle off the slider next to "Allow Notifications" to mute the app.
You can also enable Do Not Disturb Mode and unmute certain apps and features to see their notifications.
We hope this article was helpful!
Check out the video above for a video tutorial.
Share:

Karolina Peistariene
Author of how-to guides for Mac users
Responsible for collecting, analyzing, and presenting problem-solving solution articles related to macOS issues. Years of macOS experience combined with solid research and analyzing skills help Karolina provide readers with working and helpful solutions as well as introduce various features Mac has to offer.
▼ Show Discussion