3 Ways You Can Enable Dark Mode on Mac

(updated)
Get Free Scanner and check your computer for errors
Fix It NowTo fix found issues, you have to purchase the full version of Combo Cleaner. Free trial available. Combo Cleaner is owned and operated by Rcs Lt, the parent company of PCRisk.com read more.
3 Quick Ways How You Can Enable Dark Mode on Mac
Dark Mode, also known as Black Mode, Dark Theme, Light-On-Dark, or Night Mode is your device's interface setting that turns the default white background to black. The content color scheme is also changed from dark to light. You can use dark mode for your device or third-party apps as well.
Although Dark Mode is a great feature and more users are starting to use it, it also has some disadvantages in certain environments. While using Dark Mode in a low-lit room can reduce eye fatigue, using the feature all the time, including in a brightly lit environment, can increase strain on your eyes.
The Dark Mode feature can be a great tool if used wisely. Below you will find information on how you can turn on Dark Mode as well as how you can automatically switch Light and Dark modes according to your light conditions.
Video on 3 Quick Ways How You Can Enable Dark Mode on Mac
Table of Contents:
- Introduction
- Method 1. Turn On Dark Mode From Control Center
- Add Display Preferences to the Menu Bar
- Method 2. Turn On Dark Mode From System Preferences
- Method 3. Enable And Control Dark Mode With NightOwl
- How Dark Mode Works With System Features And Apps
- Video on 3 Quick Ways How You Can Enable Dark Mode on Mac
Download Computer Malware Repair Tool
It is recommended to run a free scan with Combo Cleaner - a tool to detect viruses and malware on your device. You will need to purchase the full version to remove infections. Free trial available. Combo Cleaner is owned and operated by Rcs Lt, the parent company of PCRisk.com read more.
Turn On Dark Mode From Control Center
Fortunately for users with Macs running on macOS BigSur, you can now enable or disable dark mode much faster anytime you want.
To turn on dark mode from Control Center, follow the steps below:
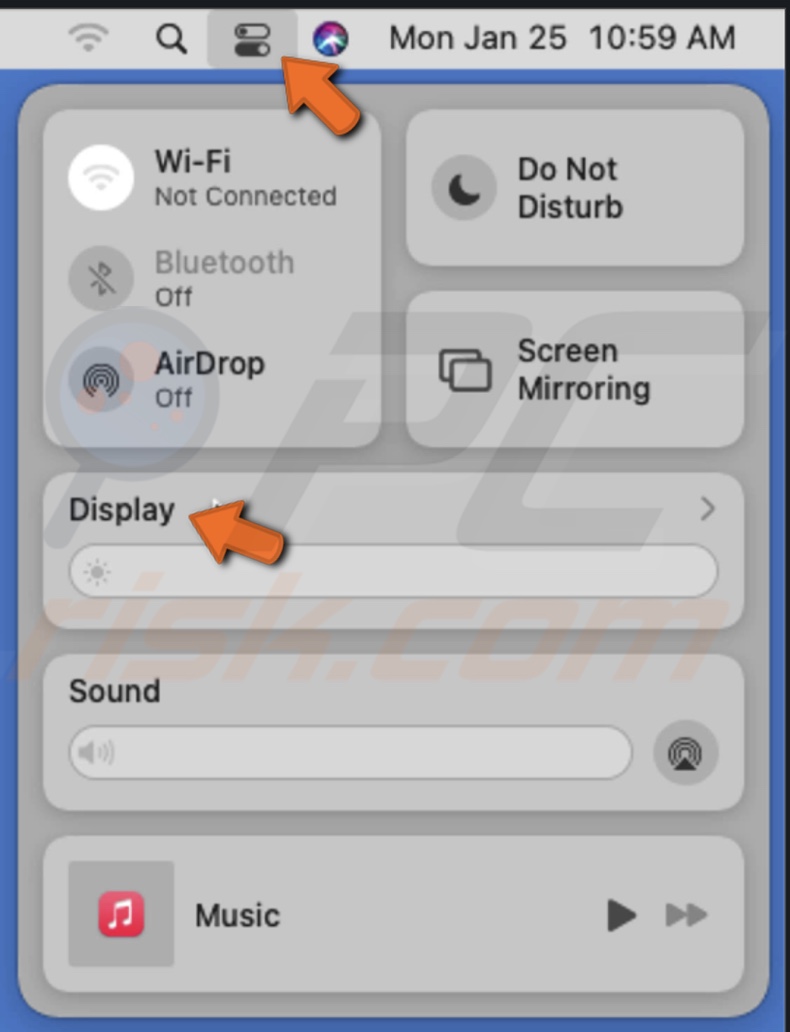
1. In the top right corner of your screen, locate the "Control Center" icon and click on it.
2. When the menu appears, click on "Display".
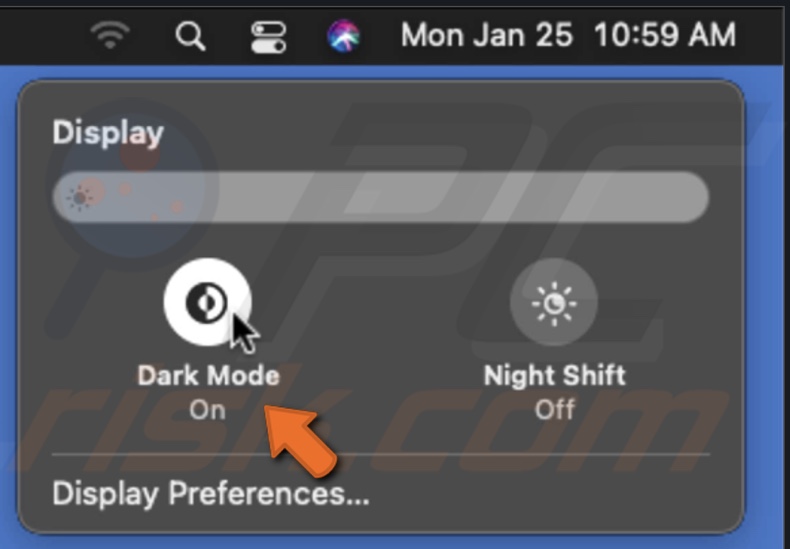
3. Then, display preferences will appear, and you will see features like "Dark Mode" and "Night Shift".
4. Click on "Dark Mode" to enable dark mode on your Mac.
To turn off Dark Mode, just go to the Display preferences from Control Center again and click on "Dark Mode" again.
You will notice immediately when your Mac's interface will change to dark mode.
You can add display preferences to the menu bar for even quicker access to "Dark" mode. It will allow you to switch from "Dark" to "Light" modes with only two clicks of your mouse. Unfortunately, this feature is only available for macOS BigSur.
To add display preferences to the menu bar, follow the steps below:
1. In the top right corner of your screen, locate the "Control center" icon and click on it.
2. When the menu appears, locate the "Display" feature.
3. Then, drag it to the menu bar. Mac frame-like icon will appear and will stay there permanently.
To turn on Dark Mode, click on the icon, and when the menu pops up, click on the "Dark Mode" button.

If you want to remove or change the position of the icon on the menu bar, press the Command key on your keyboard and drag the icon where you want to on the menu bar. To remove it from the menu bar, just drag it to the Desktop and let go.
Turn On Dark Mode From System Preferences
If you have an older operating system, then like macOS Catalina or Mojave, you can access dark mode from "System Preferences". This method applies to macOS Big Sur as well.
To turn on dark mode from System Preferences in macOS Mojave and Catalina, follow the steps below:
1. In the upper menu, click on the Apple logo.
2. When the secondary menu appears, click on "System Preferences".
3. When the preferences window pops up, go to "General".
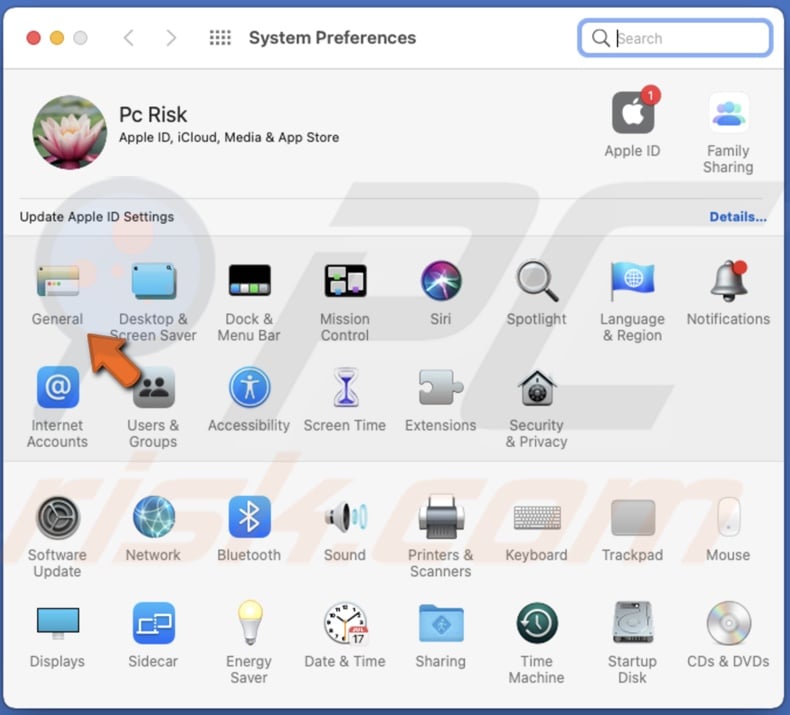
4. In the general settings window, next to the word "Appearance", you will see two options: "Dark" and "Light".
5. Click on "Dark" to enable Dark Mode.
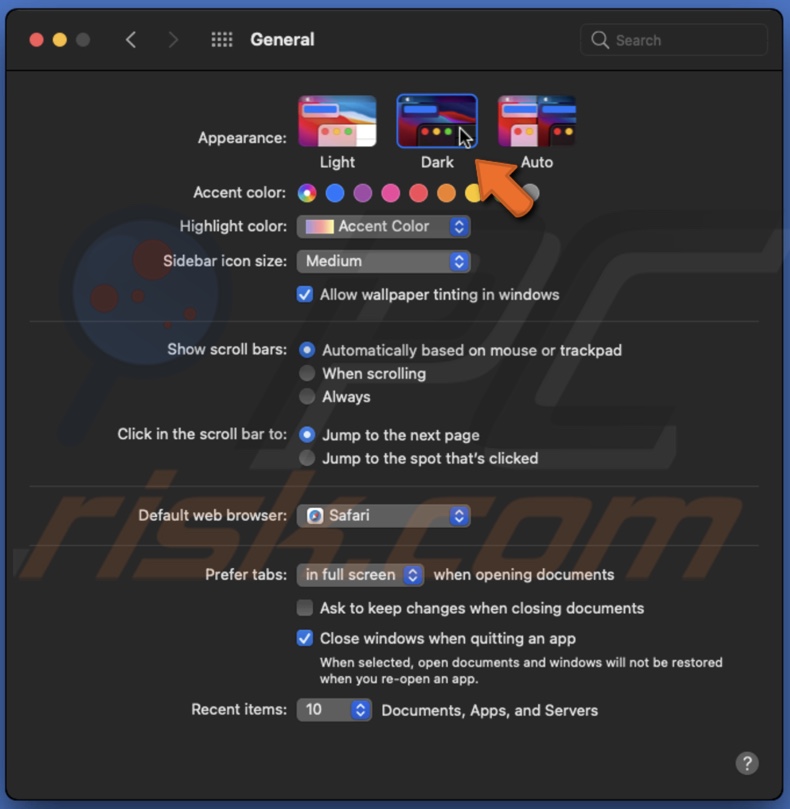
If your Mac runs on macOS Catalina or later, you will also see an option called "Auto". If you choose the "Auto" feature, the Dark Mode will be turned on automatically depending on the time of the day. It will automatically enable the feature in the evening, and in the morning, it will change to Light Mode mode.
Enable And Control Dark Mode With NightOwl
NightOwl is a third-party utility for macOS Mojave and newer. With it, you can set to enable dark mode at a specific time, quickly switch from Dark Mode to Light Mode from the menu bar. You can also choose to disable Dark Mode in certain apps. The application is free to use, and you can download it from the official website.
NightOwl interface is quite simple. To turn on dark mode using NightOwl, follow the steps below:
1. Download the NightOwl app.
2. When you open the app, an owl icon will appear in the menu bar's upper right corner. By holding the Command key on your keyboard you can rearrange the icon on the menu bar.
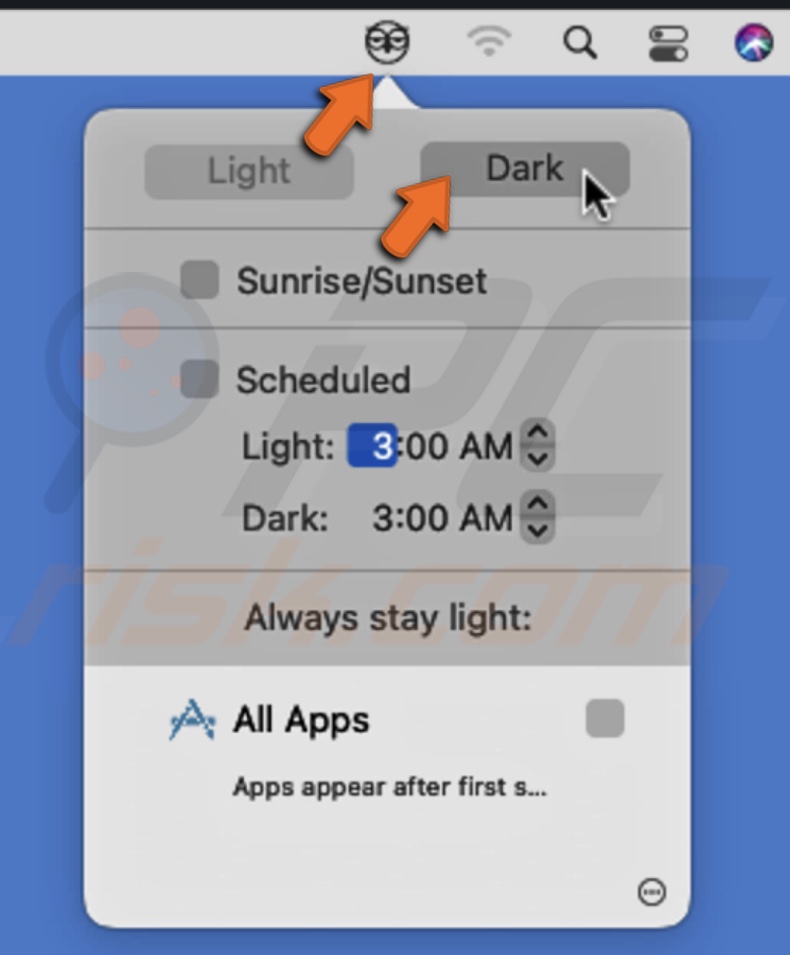
2. Click on the icon. A menu will appear.
3. At the top of the menu window, you will see the "Light" and "Dark" buttons. Click on the "Dark" button to turn on Dark Mode.
If you want your interface to switch from Light Mode To Drak Mode and vice versa automatically, depending on whether it is day or night, check the box next to "Sunrise/Sunset".
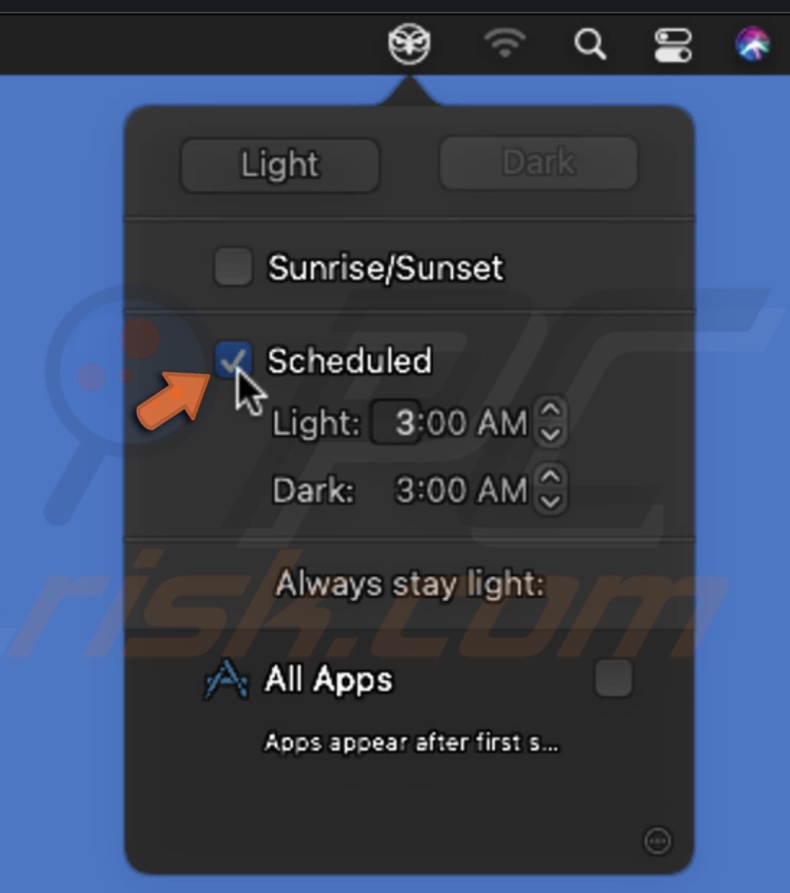
You can also schedule a time when you want the Dark Mode to be turned on. The same goes for Light Mode. To do that, check the box next to "Schedule", and next to each mode, click on the drop-down menu to select a time you want them enabled.
Under "Always stay light", you will have the option to choose some feature to stay in Light Mode even when Dark Mode is enabled.
By clicking the gear icon at the bottom right corner of the menu window, you will see options to "Run on Boot", "Check for Updates", and more. If you decide you want to remove NightOwl from the menu bar, click on the gear icon, and at the bottom, click on "Quit", or you can press and hold the Command key on your keyboard and drag the icon to the Desktop.
NightOwl is a handy tool if you like to switch from Light and Dark modes, and your Mac's operating system is older than macOS BigSur.
How Dark Mode Works With System Features And Apps
Some built-in apps and features have their own special Dark Mode settings.
When you have Dark Mode on, you can keep the light background for email messages.
To change background only for email messages, follow the steps below:
1. Open the Mail app from Launchpad, Finder, or Spotlight.
2. Then, in the upper menu, click on "Mail".
3. When the secondary menu appears, click on "Preferences" to open Mail app settings.
4. When the preferences window pops up, go to the "Viewing" tab and uncheck the box next to "Use dark background for messages" if you want a light theme.
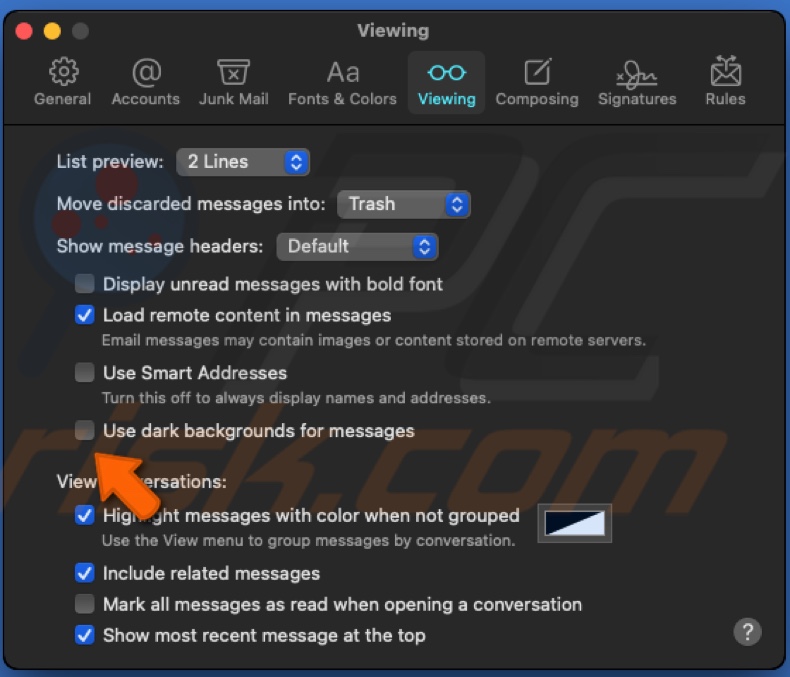
If you want to keep the background dark, check the box. This option is only visible when Drak Mode is turned on.
Maps
If, for example, you enable Dark Mode for all apps, you can change the Maps interface to Light Mode separately.
To change the Maps app interface theme, follow the steps below:
1. Open the Maps app from Launchpad, Finder, or Spotlight.
2. Then, in the upper menu, click on "Maps", and go to "Preferences".
3. In the "General" tab, check the box next to "Always use lightmap appearance".
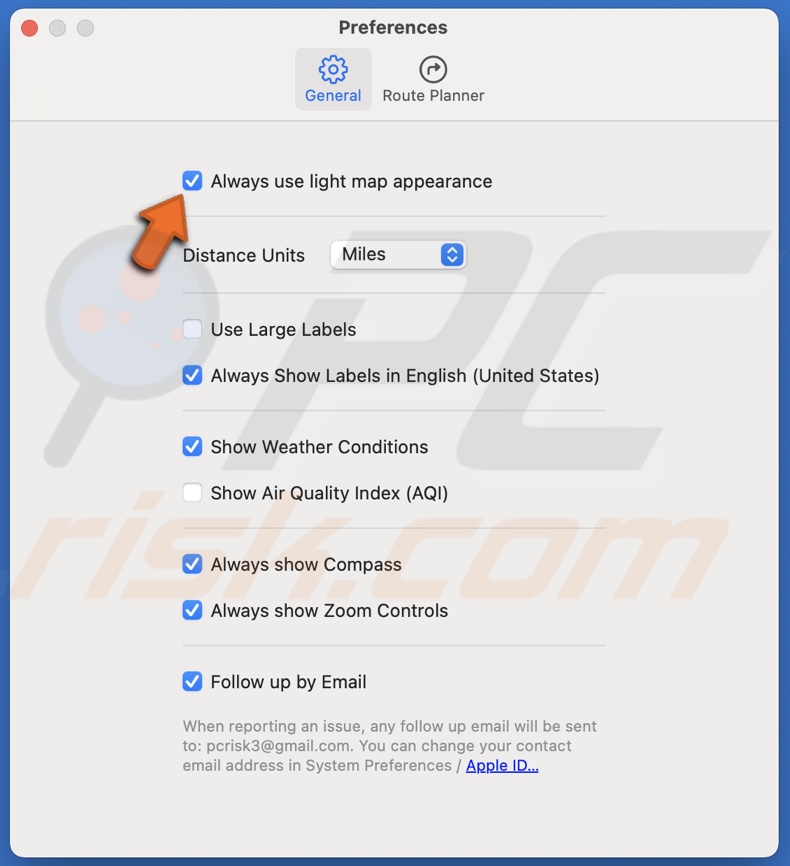
Now, your Map will stay in Light Mode until you decide to disable the feature.
Notes
If you are used to writing your notes on the white background, you can reverse the Dark Mode with few quick clicks.
To set Light Mode in the Notes app, follow the steps below:
1. Open the Notes app from Launchpad, Finder, or Spotlight.
2. In the upper menu, click on "Notes".
3. Then, go to "Preferences".
4. In the Notes settings window, uncheck the box next to "Use dark background for note content".
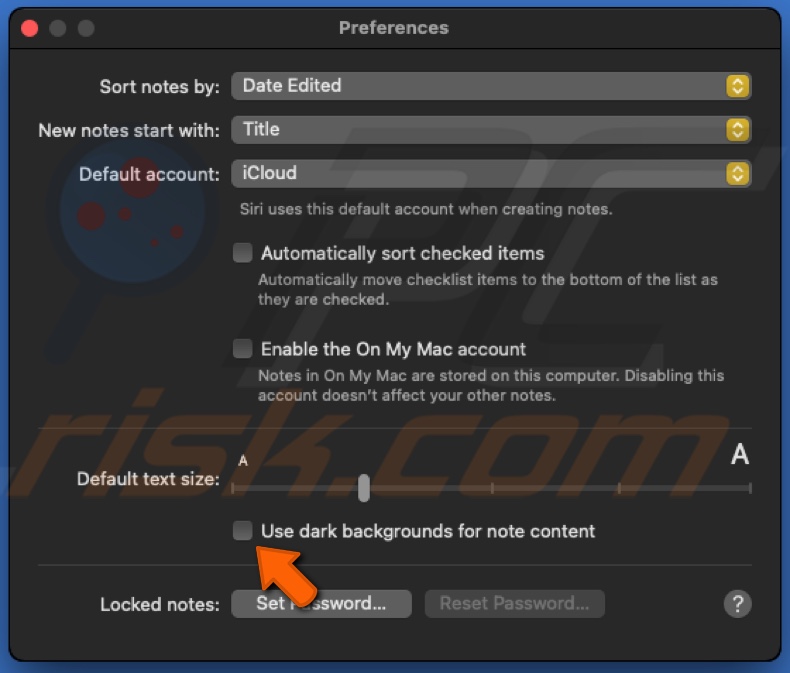
Simple as that.
Safari Browser
When you enable the Dark Mode, your Safari browser automatically displays webpages in Dark Mode as well. Keep in mind that pages will be in Dar Mode only if they are designed to support it.
With the "Reader" feature, you can choose to keep Dark Mode for all available websites or disable it for all of them. Also, you can disable Dar Mode for specific pages.
To turn on or off Dark Mode for all websites, follow the steps below:
1. Open the Safari browser from Launchpad, Finder, or Spotlight.
2. In the upper menu, click on "Safari".
3. Then, click on "Preferences" to open Safari preferences.
4. When a window appears, go to the "Websites" tab.
5. Then, in the left sidebar, select "Reader".

6. In the bottom right corner, next to "When visiting other websites", click on the drop-down menu and select "On" to enable dark mode on all available websites.
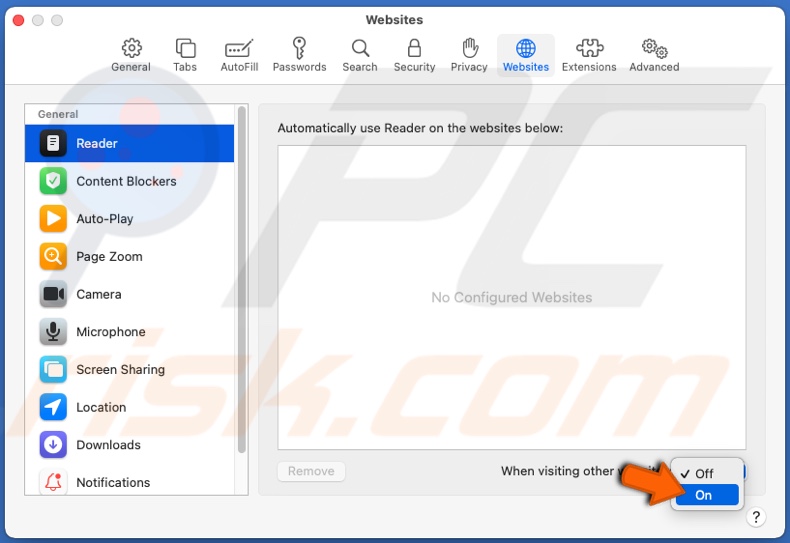
7. Choose the option "Off" if you do not want to browse in Dark Mode.
To turn on or off Dark Mode for a specific website, follow the steps below:
1. Open the Safari browser from Launchpad, Finder, or Spotlight.
2. In the upper menu, click on "Safari".
3. Then, click on "Preferences" to open Safari preferences.
4. When a window appears, go to the "Websites" tab.
5. Then, in the left sidebar, select "Reader".
6. Then, in the Safari browser, open the website you want. It will automatically appear in the box under "Automatically use Reader on the websites below".
7. Next to the opened website's address, click on the drop-down menu and select "On" to enable dark mode on that specific website.
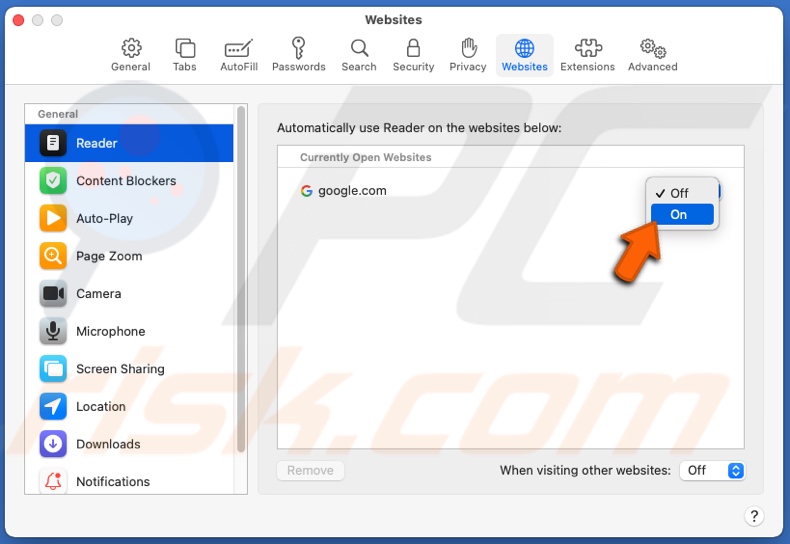
8. Choose the option "Off" if you do not want to browse in Dark Mode on that website.
The settings you set will stay until you decide to switch to the other mode.
Dynamic Desktop Feature
When you set Dark Mode on your Mac, your Desktop might get changed to a still picture. You can easily change it back the same way you set it.
To change your Macs background to Dynamic Desktop, follow the steps below:
1. In the upper menu, click on the Apple logo.
2. Then, go to "System Preferences".
3. In the preference window, locate and click on "Desktop & Screen Saver".
4. Go to the "Desktop" tab, and next to your desktop picture, click on the drop-down menu and choose "Dynamic".
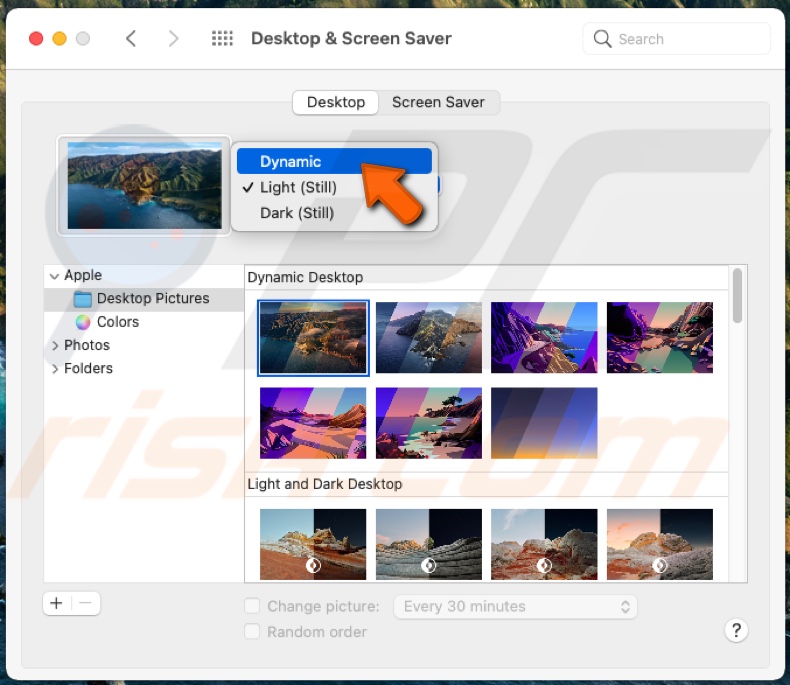
Your Desktop will now change its background according to the time where you are located.
We hope this article was helpful!
Above you will find a step-by-step tutorial video.
Share:

Karolina Peistariene
Author of how-to guides for Mac users
Responsible for collecting, analyzing, and presenting problem-solving solution articles related to macOS issues. Years of macOS experience combined with solid research and analyzing skills help Karolina provide readers with working and helpful solutions as well as introduce various features Mac has to offer.
▼ Show Discussion