Remove Text When Delete Key Not Working on Mac

(updated)
Get Free Scanner and check your computer for errors
Fix It NowTo fix found issues, you have to purchase the full version of Combo Cleaner. Free trial available. Combo Cleaner is owned and operated by Rcs Lt, the parent company of PCRisk.com read more.
4 Quick Ways You Can Delete Text When Delete Key is Not Working on Mac
Probably every person who has typed on any electronic device like a computer, mobile phone, etc., has used the Delete key. It's is presumably one of the most used keys on your keyboard, as it is usually the first thing we press when we want to delete not only text but also a file or other objects like images from a document file and so on.
Unfortunately, sometimes your keyboard keys might get damaged or have a manufacturing defect and stop working. It can be hard functioning without a proper Delete key. But do not worry, there are a few alternatives you can use while your physical keyboard is being fixed or while you replace it with a new one.
Below you will find four different methods of how you can delete text and more without a functioning Delete key on your keyboard.
Video on Quick Ways You Can Delete Text When Delete Key is Not Working on Mac
Table of Contents:
- Introduction
- Method 1. How to Delete Text Using a Mouse or Trackpad
- Method 2. How to Delete Text With Virtual Keyboard
- Method 3. How to Delete Text With Keyboard Shortcuts
- Method 4. How to Delete Text Using Your iOS Device as a Keyboard
- Video on Quick Ways You Can Delete Text When Delete Key is Not Working on Mac
Download Computer Malware Repair Tool
It is recommended to run a free scan with Combo Cleaner - a tool to detect viruses and malware on your device. You will need to purchase the full version to remove infections. Free trial available. Combo Cleaner is owned and operated by Rcs Lt, the parent company of PCRisk.com read more.
How to Delete Text Using a Mouse or Trackpad
The most known and obvious method is to delete text on your Mac by using your mouse or a trackpad.
To delete text using a mouse or a trackpad, follow the steps below:
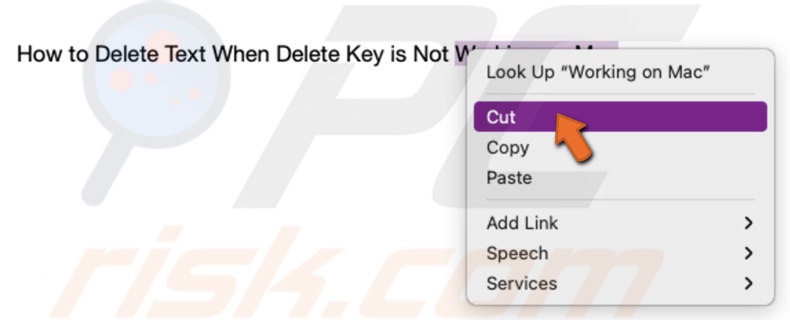
1. With your mouse or a trackpad, select the text you want to delete.
2. Then, right-click (if using a mouse) or use a two-finger tap (if using a trackpad) on the selection.
3. When the secondary menu appears, click on "Cut".
Suppose you want to write something different instead of deleting the text. In that case, you can just start writing a different text when the current text is selected, and it will get deleted automatically.
How to Delete Text With Virtual Keyboard
If you are having issues with your physical keyboard, you can use a virtual keyboard on your Mac screen and use it instead until you get the physical one fixed or replaced.
To delete text using a virtual keyboard, follow the steps below:
1. In the upper menu, click on the Apple logo.
2. Then, when the secondary menu appears, click on "System Preferences".
3. In the "System Preferences" window, locate and click on "Keyboard".

4. Go to the "Input Sources" tab and check the box next to "Show Input menu in menu bar".

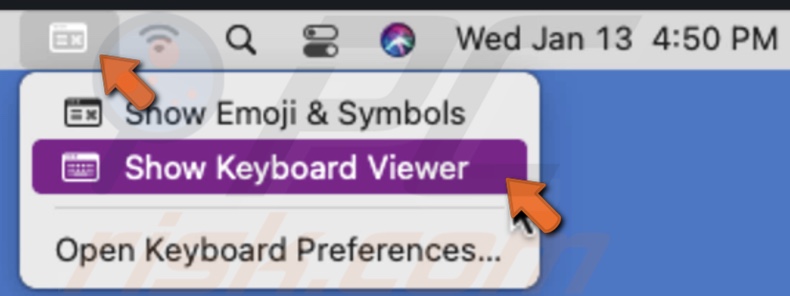
5. When a small icon appears in the upper right corner of your Mac's menu, click on it.
6. Select "Show Keyboard Viewer".
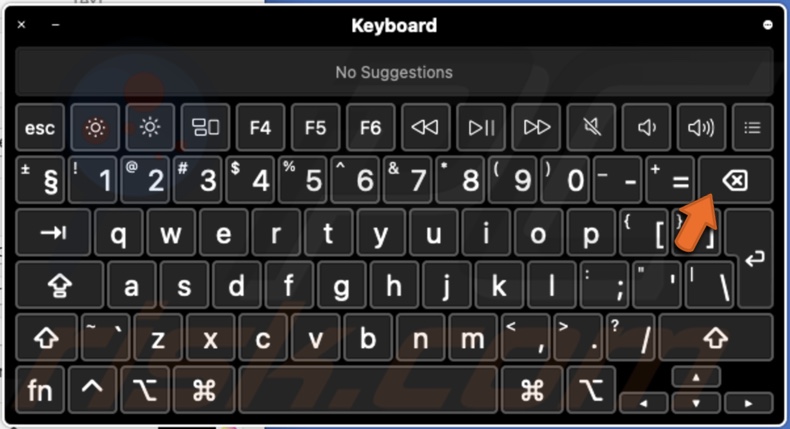
7. A virtual keyboard should appear on your screen.
8. Then, select the text you want to delete, and on your virtual keyboard, click on the "Delete" key.
A virtual keyboard is great for short use when you desperately need a key that does not work on your physical keyboard. Using it as a long term replacement for your physical keyboard will slow down your typing speed significantly, and it will take up more of your time.
How to Delete Text With Keyboard Shortcuts
If you do not prefer the methods above, all other keys on your keyboard work, and you like to be as efficient as possible, you can use these keyboard shortcuts.
To delete text using keyboard shortcuts, follow the steps below:
Shortcut 1
Put your cursor at the end of the text you want to delete and press the Control and H keys on your keyboard. It will delete the text behind the cursor.
Shortcut 2
Put your cursor before the text you want to delete and press the Control and D keys on your keyboard. It will delete the text in front of the cursor backward.
Shortcut 3
By pressing Shift and the left arrow keys on your keyboard, you can select one character at a time to the left side.
By pressing Shift and the right arrow keys on your keyboard, you can select one character at a time to the right side.
By pressing the arrow key more times, you can select more characters. When the text is selected, you can delete it as described in the methods above or start typing a different text.
Shortcut 4
By pressing Shift + Control + the left arrow keys on your keyboard, you can select one word at a time to the left side.
By pressing Shift + Control + the right arrow keys on your keyboard, you can select one word at a time to the right side.
By pressing the arrow key more times, you can select more words. When the text is selected, you can delete it as described in the methods above or start typing a different text.
Shortcut 5
By pressing Shift + Command + the left arrow keys on your keyboard, you can select the whole text in that line to the left side of the cursor.
By pressing Shift + Command + the right arrow keys on your keyboard, you can select the whole text in that line to the right side of the cursor.
When the text is selected, you can delete it as described in the methods above or start typing a different text.
How to Delete Text Using Your iOS Device as a Keyboard
There is also an alternative to use your iOS device, like an iPhone or iPad as a temporary keyboard. You can do that with the help of a third-party app called Mobile Mouse Remote, which you can find in your Apple App Store. It has an integrated QWERTY (typewriter and computer keyboard design for Latin-script alphabets) keyboard with some Mac keys like Command and Control. Although the app is great, it is not free. You will also need to pay for additional in-app purchases. If you decide to buy this app, then keep on reading.
To use your iOS device as a keyboard for your Mac, follow the steps below:
1. Open the App Store on your iOS device and go to the search bar.
2. In the search bar, enter "Mobile Mouse Remote".
3. When the app appears in the App Store, click on it to find more information and read it to make sure you want to buy the app.
4. After you purchase the app, go to your Mac.
5. Open the App Store from Launchpad, Finder, or Spotlight.
6. In the App Store, go to the search bar and enter "Mobile Mouse Server".
7. When the app appears, click on "Get" and then on "Install" to download the app. Enter your Apple ID password if asked. You will not have to pay for this app.
8. When the app has finished downloading, open the Mobile Mouse Server app on your Mac and the Mobile Mouse Remote app on your iOS device.
9. For devices to connect automatically, you need both devices connected to the same Wi-Fi connection.
When the devices are connected, the Mobile Mouse Remote app on your iOS device will have a trackpad like interface. At the top center of the screen, you will see what program are you currently using on your Mac.
To access the keyboard, click on the keyboard icon at the top right corner of the screen. You can switch tabs at the top right corner of the virtual keyboard and use the keyboard to type, execute a command, use the number pad, and more.
We hope this article was helpful!
For a step-by-step tutorial, see the video above.
Share:

Karolina Peistariene
Author of how-to guides for Mac users
Responsible for collecting, analyzing, and presenting problem-solving solution articles related to macOS issues. Years of macOS experience combined with solid research and analyzing skills help Karolina provide readers with working and helpful solutions as well as introduce various features Mac has to offer.
▼ Show Discussion