How to Transfer Photos From Mac to iPhone or iPad?

(updated)
Get Free Scanner and check your computer for errors
Fix It NowTo fix found issues, you have to purchase the full version of Combo Cleaner. Free trial available. Combo Cleaner is owned and operated by Rcs Lt, the parent company of PCRisk.com read more.
11 Ways You Can Transfer Photos From Mac to iPhone or iPad
There are plenty of ways how you can transfer photos from one Apple device to another. You can use the built-in features in Apple devices, like AirDrop, which allows macOS and iOS users to share and receive photos, videos, documents, map locations, and more.

Another way to transfer photos to your iPhone or iPad from Mac is by using iCloud Photos. You can also transfer photos using Finder and the iTunes application.
One of the best non-Apple photo-sharing services is Google Photos. 'By syncing your Mac and an iOS device with a google account, you can quickly access your photos on whichever device you need.
If you want to find out more ways to transfer your photos from Mac to an iOS device and a detailed explanation on how to do that, then keep on reading.
Video on How to Transfer Photos From Mac to iPhone or iPad
Table of Contents:
- Introduction
- Method 1. How to Transfer Photos Via AirDrop from macOS to iOS
- Method 2. How to Transfer Photos Via iCloud Photos from macOS to iOS
- Method 3. How to Transfer Photos Using iCloud Drive from macOS to iOS
- Method 4. How to Transfer Photos Using Finder from macOS to iOS
- Method 5. How to Transfer Photos Using iTunes from macOS to iOS
- Method 6. How to Transfer Photos Using Google Photos from macOS to iOS
- Method 7. Other Methods
- Video on How to Transfer Photos From Mac to iPhone or iPad
Download Computer Malware Repair Tool
It is recommended to run a free scan with Combo Cleaner - a tool to detect viruses and malware on your device. You will need to purchase the full version to remove infections. Free trial available. Combo Cleaner is owned and operated by Rcs Lt, the parent company of PCRisk.com read more.
How to Transfer Photos Via AirDrop from macOS to iOS
AirDrop is one of the best ways to send various content to nearby macOS and iOS devices. Before you begin to transfer photos to an iPhone or iPad, you need to enable Airdrop on both devices.
To enable Airdrop on iOS, follow the steps below:
1. Turn on Wi-Fi and Bluetooth.
2. Check if Personal Hotspot is off.
3. Go to "Settings".
4. Tap on "General".
5. Then, tap on "AirDrop" and select "Everyone".
To enable Airdrop on Mac, follow the steps below:
1.Turn on Wi-Fi and Bluetooth. Set AirDrop visibility to "Everyone".
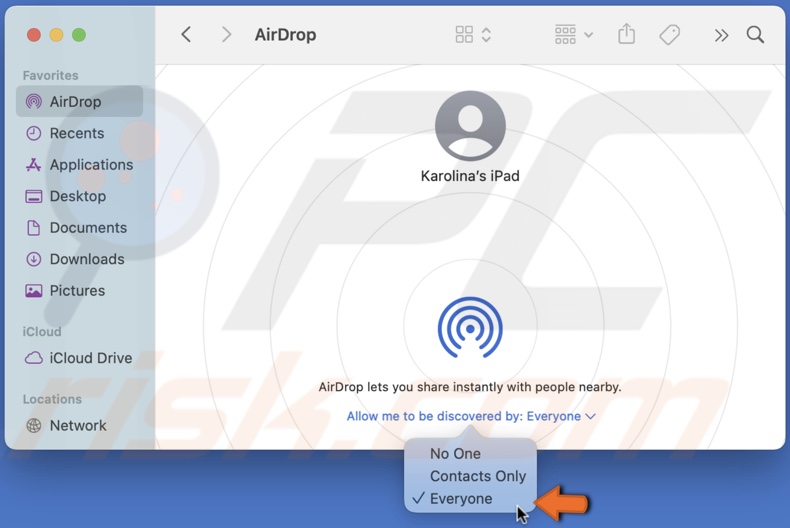
To transfer photos with AirDrop, follow the steps below:
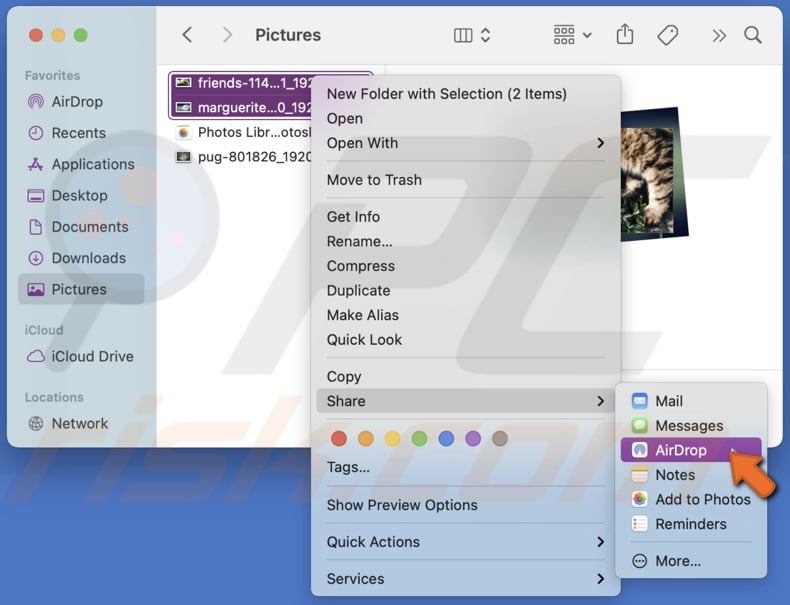
1. Open the folder where you store your photos. If your photos are inside the Photo app, drag them to the desktop or a folder.
2. Select the photos you want to transfer.
3. Right-click on the selection.
4. Click on "Share". A second menu will appear.
5. Click on "AirDrop".
6. AirDrop window will pop-up. Select the iOS device's name.
7. Then, go to your iPhone or iPad and tap on "Accept".
8. The selected photos will be quickly transferred from your Mac to an iOS device.
You will be able to find the transferred photos in the Photos app.
How to Transfer Photos Via iCloud Photos from macOS to iOS
With iCloud Photos, you can quickly and easily access your content across all Apple devices. You just need to enable sync, and your photos with videos will be uploaded and store in the cloud, which allows you to access them through the internet connection wherever, whenever.
To share photos with iCloud Photos, follow the steps below:
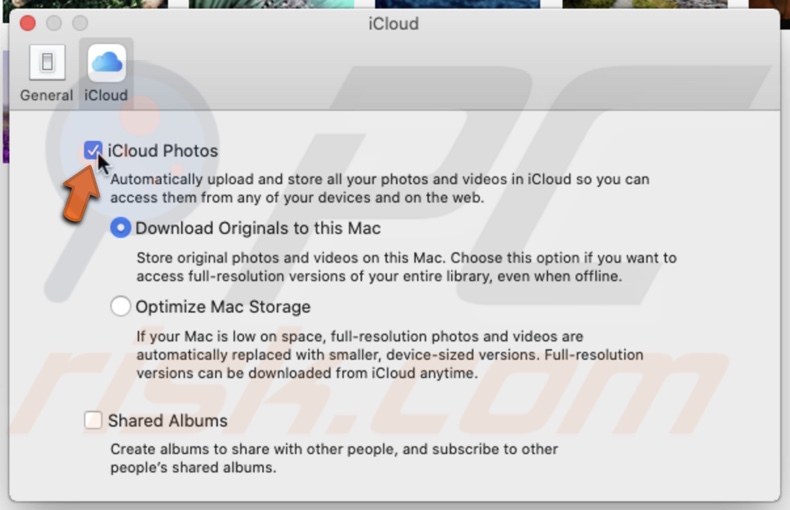
1. Open the Photos app from Launchpad, Finder, or Spotlight.
2. In the upper menu bar, click on "Photos".
3. Then, go to "Preferences".
4. In the Preference window, go to the "iCloud" tab.
5. Check the box next to "iCloud Photos".
6. Then, go to your iOS device and open "Settings".
7. In your device settings, tap on your account.
8. Tap on "iCloud". Then, tap on "Photos" and enable "iCloud Photos".
Now you have synced both devices with iCloud Photos. Wait for a bit while iCloud Photos finish syncing all your photos. Then, go to The Photos app to see your pictures.
How to Transfer Photos Using iCloud Drive from macOS to iOS
You can conveniently store and access content backed up in your iCloud Drive account from all devices synced with the account.
To share photos with iCloud Drive, follow the steps below:
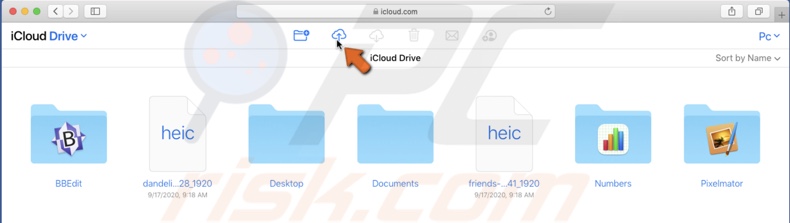
1. Open your browser and go to icloud.com.
2. Log into your iCloud account using your Apple ID credentials.
3. Then, go to "iCloud Drive".

4. Now, locate and select the photos you want to share from your Mac and drag them to the iCloud Drive window. Or you can click on the "Upload" icon and select the photos from there.

5. Then, go to your iOS device and make sure you are connected to the same iCloud account. Open the "Files" app and wait for the images to appear.
How to Transfer Photos Using Finder from macOS to iOS
By connecting the iPhone or iPad to Mac, you can share photos and other content between the two devices by using Finder.
To share photos using Finder, follow the steps below:
1. Connect your iOS device to Mac using a Lightning cable.
2. Then, tap on "Trust" (if asked) on your iPhone or iPad.
3. In Mac, launch Finder.
4. In the left sidebar, locate and click on the connected iOS device.
5. Click on the "Photos" tab.

6. If unchecked, check the box next to "Sync photos to your device from", and in the drop-down menu, select the "Photos" app. You can not choose individual images, but you can create a folder with particular images and select that folder.
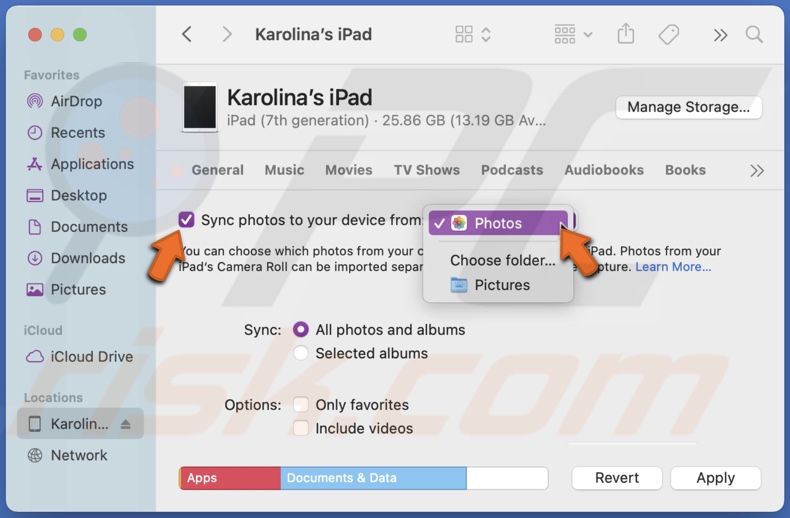
7. Then, at the bottom of the window, click on "Apply".
You will then be able to see the picture you synched on your connected device.
Unfortunately, with this method, you can not delete synced photos on your iOS device.
To remove synced photos, follow the steps below:
1. Connect your iOS device to Mac using a Lightning cable.
2. Then, tap on "Trust" (if asked) on your iPhone or iPad.
3. In Mac, launch Finder.
4. In the left sidebar, locate and click on the connected iOS device.
5. Click on the "Photos" tab.
6. Uncheck the box next to "Sync photos to your device from".
7. Then, at the bottom of the window, click on "Apply".
How to Transfer Photos Using iTunes from macOS to iOS
If you connect an iOS device to Mac, you can share photos and other content between the two devices by using iTunes. It is a very similar process as to sharing using Finder.
To share photos using iTunes, follow the steps below:
1. Connect your iOS device to Mac using a Lightning cable.
2. Then, tap on "Trust" (if asked) on your iPhone or iPad.
3. In Mac, launch iTunes.
4. Then, in the iTunes window, click on the iDevice icon.
5. Click on the "Photos" tab.
6. If unchecked, check the box next to "Sync photos", and in the drop-down menu, select the "Photos" app. You can not choose individual images, but you can create a folder with particular images and select that folder.
7. Then, at the bottom of the window, click on "Apply".
To Remove the photos from your iPad or iPhone, follow the steps below:
1. Connect your iOS device to Mac using a Lightning cable.
2. Then, tap on "Trust" (if asked) on your iPhone or iPad.
3. In Mac, launch iTunes.
4. Then, in the iTunes window, click on the iDevice icon.
5. Click on the "Photos" tab.
6. Uncheck the box next to "Sync photos".
7. Then, at the bottom of the window, click on "Apply".
How to Transfer Photos Using Google Photos from macOS to iOS
Google Photos is another great way to access your photos when you need them.
To share photos using Google Photos, follow the steps below:
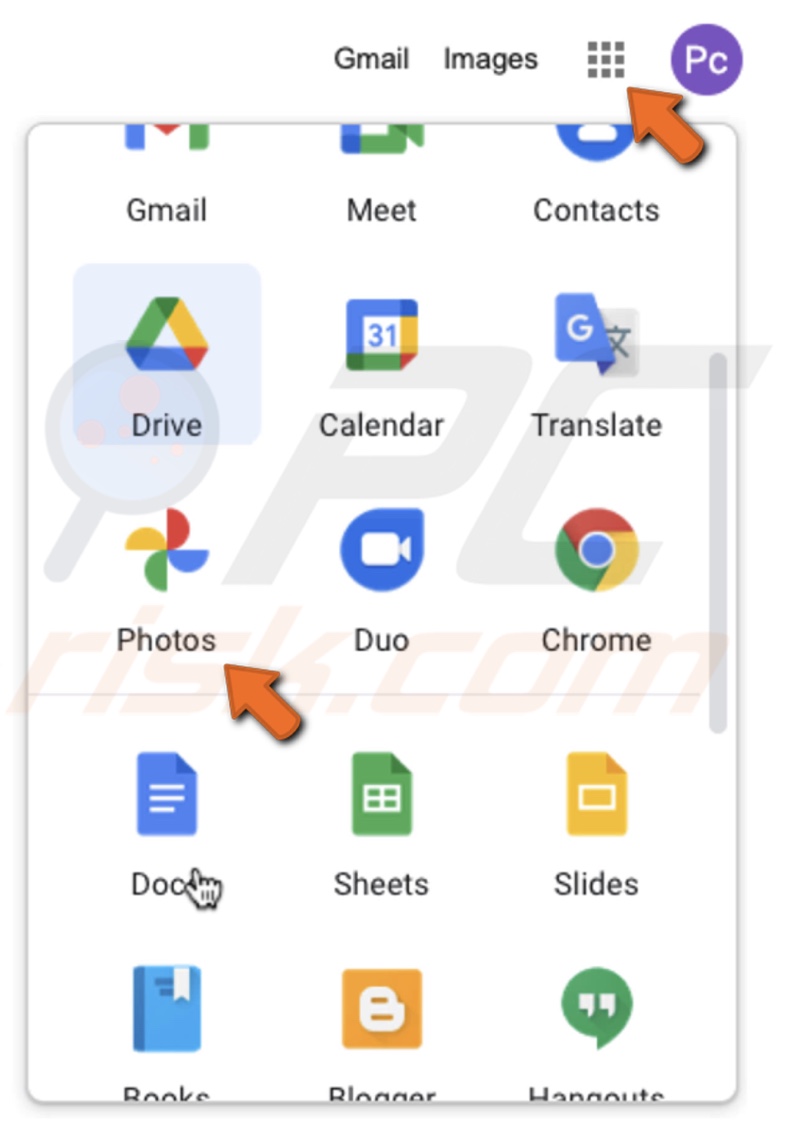
1. Open your browser, go to google.com, log into your Google account, and go to "Google Photos".
2. In the top right corner, click on "Upload" and then on "Computer".

3. Select individual photos or a folder and click on "Open", and wait for the photos to upload.
Or you can just drag the photo selection directly to the Google Photos window.
4. Then, go to your iPhone or iPad and download the "Google Photos" app.
5. Sign in using your Google ID, and you will be able to access your uploaded photos.
Other Methods
Dropbox
Dropbox is one of the alternatives to store and share your videos and photos through different devices. It provides 2 GB of storage, and you can upload your content to Dropbox by using a browser or the app. You will need to have the Dropbox app on your iOS device to have uploaded photos on your device.
Email is also a way to share photos, although you can only send a few of them as it has a limit as to how much you can attach. If you want to send a folder full of images, we suggest creating a zip file and then sending it through email. Then open the email on an iOS device and unzip the folder.
Social Media
You can upload your photos from Mac and then download them on your iPhone or iPad using social media. You can also create private folders or archive your photos to store them in your account and access them when you want. That way, you do not need to have additional storage apps on your device. Keep in mind that photos uploaded to social media are usually compressed, which means their quality is reduced drastically.
Chat Apps
If you quickly need to transfer one of two photos to your iPhone or iPad, you can do that with a messaging app. You can create a chat with yourself and upload pictures there. Although messaging apps drastically reduce the quality of your photos.
Third-Party Transfer Apps
Another way to transfer photos is to use a third-party app. There are plenty of great transfer apps that can upload and share your photos without reducing the quality. You can send them to yourself or another person by email or send a sharable link.
We hope you found this article helpful!
Share:

Karolina Peistariene
Author of how-to guides for Mac users
Responsible for collecting, analyzing, and presenting problem-solving solution articles related to macOS issues. Years of macOS experience combined with solid research and analyzing skills help Karolina provide readers with working and helpful solutions as well as introduce various features Mac has to offer.
▼ Show Discussion