How to Manage Dock on Mac?

(updated)
Get Free Scanner and check your computer for errors
Fix It NowTo fix found issues, you have to purchase the full version of Combo Cleaner. Free trial available. Combo Cleaner is owned and operated by Rcs Lt, the parent company of PCRisk.com read more.
How to Use And Customize Dock on Mac?
One of the things that differentiate macOS from other operating systems is the Dock. If you are a first-time Mac user, you might not know what Dock is. It is a small panel along the edge of your Mac's screen that lets you quickly launch and switch between running applications and more.
The Dock is an important part of Mac as it makes the user experience much more enjoyable. It can help you save time, work more efficiently, and organize your apps, folder, and files.
Below you will find how to add and remove items, manage the Downloads folder and the Launchpad, lock application in Dock, and hide Dock, and more.
Video on How to Use And Customize Dock on Mac?
Table of Contents:
- Introduction
- How to Add And Remove Applications, Files, And Folder From Dock
- How to Add And Remove The Downloads Folder to Dock
- How to Add And Remove Launchpad From Dock
- How to Lock Applications, Files, And Folder to Dock
- How to Hide Recent Applications, Files, And Folder on Dock
- How to Change Finder Icon
- How to Change And Lock Dock Position
- How to Change And Lock Dock Size
- How to Add More Space Between Items on Dock
- How to Automatically Hide or Show Dock
- How to Reset Dock
- Video on How to Use And Customize Dock on Mac?
Download Computer Malware Repair Tool
It is recommended to run a free scan with Combo Cleaner - a tool to detect viruses and malware on your device. You will need to purchase the full version to remove infections. Free trial available. Combo Cleaner is owned and operated by Rcs Lt, the parent company of PCRisk.com read more.
How to Add And Remove Applications, Files, And Folder From Dock
Adding and removing apps, folders, and files to Dock is a very easy process. Keep in mind that Applications and folders or files are kept in different sections of the Dock. Just follow the steps below.
Add applications to Dock:
1. Click on the Finder icon in the Dock to open a Finder window.
2. In the left sidebar, click on "Applications".
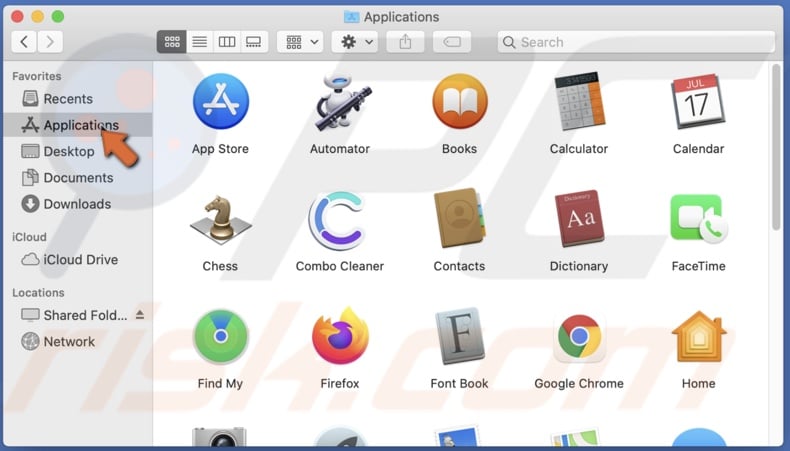
3. From the app list, select an application you want to add to the Dock and drag it to the left section of it.
4. Let go of the app when you see the Dock expand to make space for the app.
Add folders and files to Dock:
1. Click on the Finder icon in the Dock to open a Finder window.
2. Locate your folder or file that you want to add to the Dock.
3. Select it and drag it to the right section of the Dock.
4. Let go of the app when you see the Dock expand to make space for the folder or file.

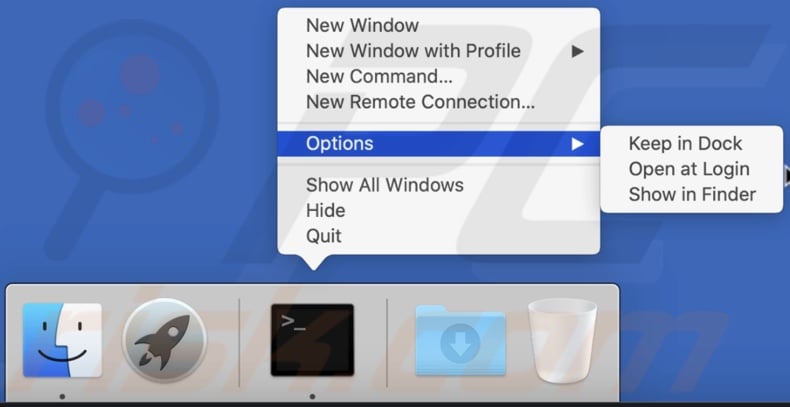
Supposedly you want to add a running application to the Dock. To do that, follow the steps below.
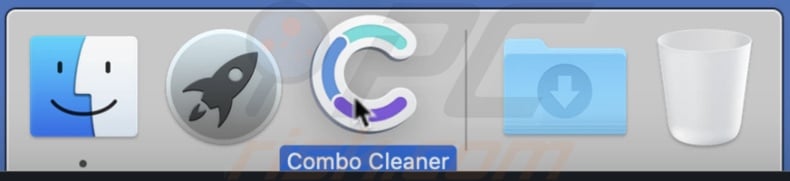
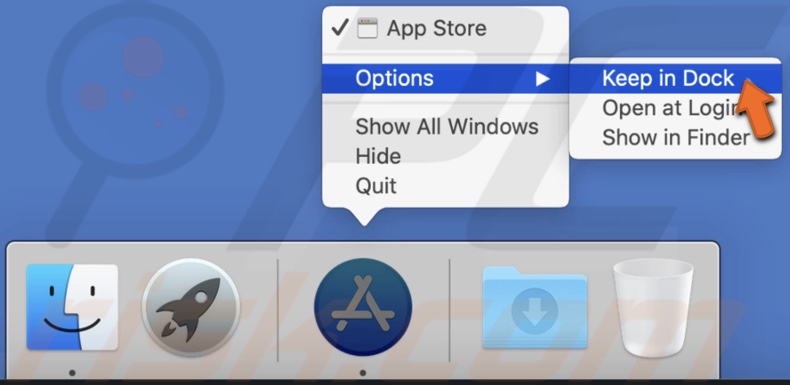
1. Right-click on the running application that is in the Dock.
2. In the menu, hover over "Option".
3. Then click on "Keep in Dock".
The same goes for any folder or file.
Remove apps, folders, or files:
1. Right-click on the application, folder, or file that is in the Dock.
2. In the menu, hover over "Option".
3. Then, click on "Remove from Dock".

Or you can remove it by simply dragging it from the Dock to the desktop. Hover over the desktop until you see the option "Remove" appear. Click on it, and you will remove the app, folder, or file from the Dock.
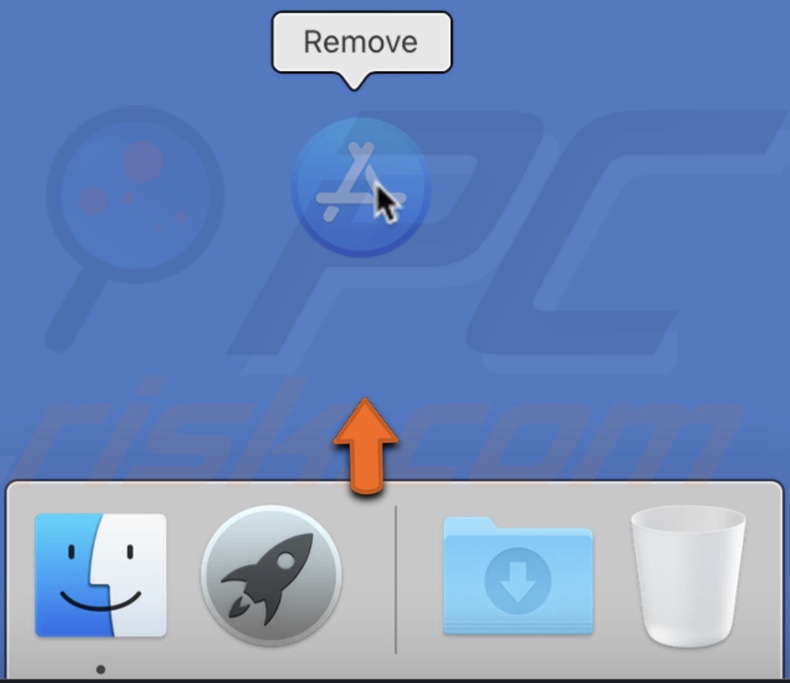
The app, folder, or file must be closed to remove it from the Dock.
How to Add And Remove The Downloads Folder to Dock
Usually, the Downloads folder is kept in the Dock for faster access to your downloaded files. It is more convenient than to go looking for them in the Finder each time you download something. If you do not see it in the Dock, you can easily add it by following the steps below.
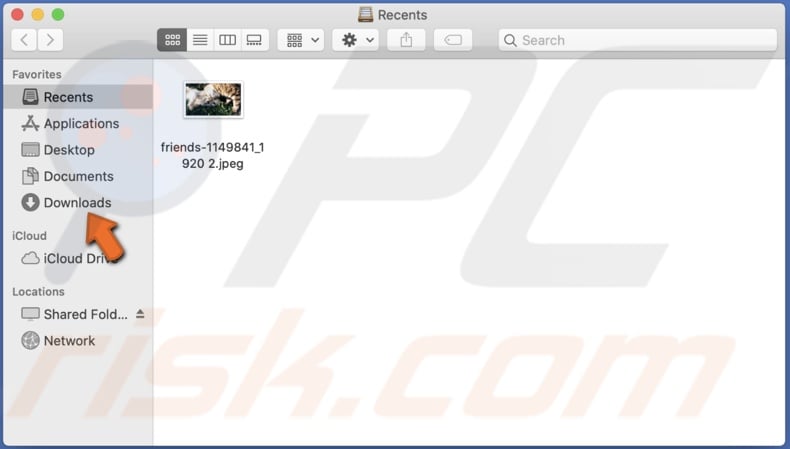
1. Launch Finder.
2. In the upper menu, click on "Go".
3. Then click on "Home".
4. Find the Downloads folder in the pop-up Finder window, select it, and drag it to the Dock's right section.
5. Let go of the folder when you see the Dock expand to make space for the folder or file.
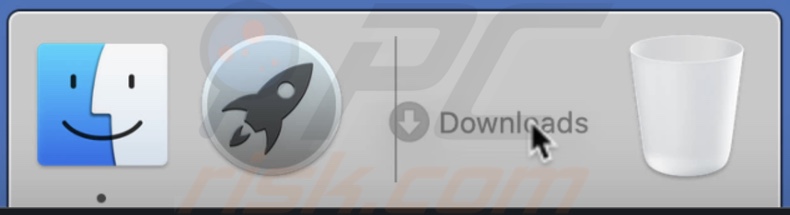
Or you can simply open Finder and, from the left sidebar, locate the Downloads folder, select it and drag it to the Docks right side.
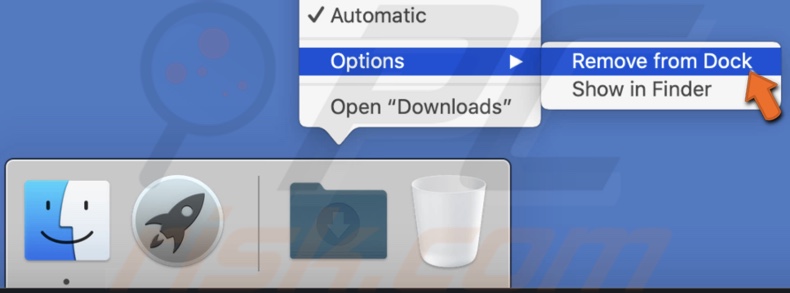
Remove the Downloads folder:
1. Right-click on the Downloads.
2. Then click on "Remove from Dock".
How to Add And Remove Launchpad From Dock
Launchpad is a handy tool that can help you find and open applications faster. You can easily add or remove it from the Dock.
Add Launchpad:
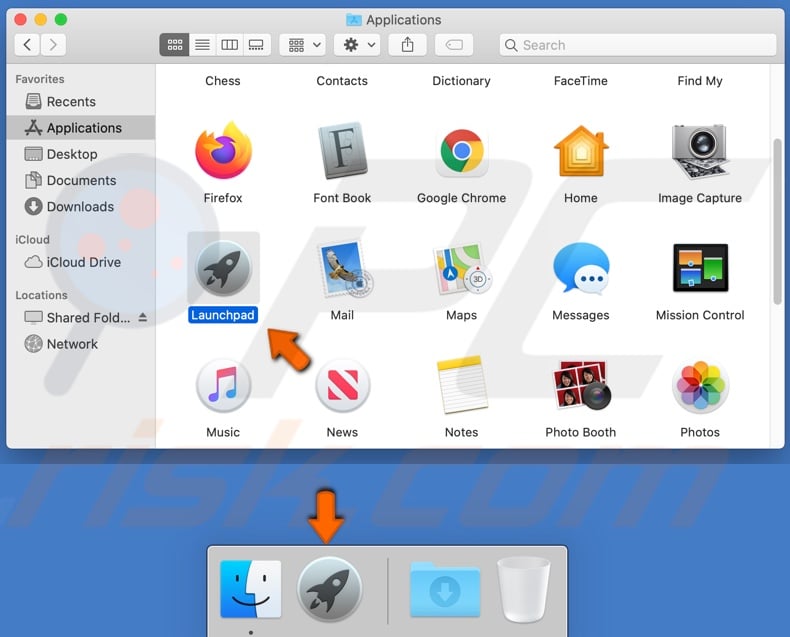
1. Click on the Finder icon in the Dock to open a Finder window.
2. In the left sidebar, click on "Applications".
3. From the app list, find and select Launchpad and drag it to the Dock's left section.
4. Let go of the Launchpad when you see the Dock expand to make space for the app.
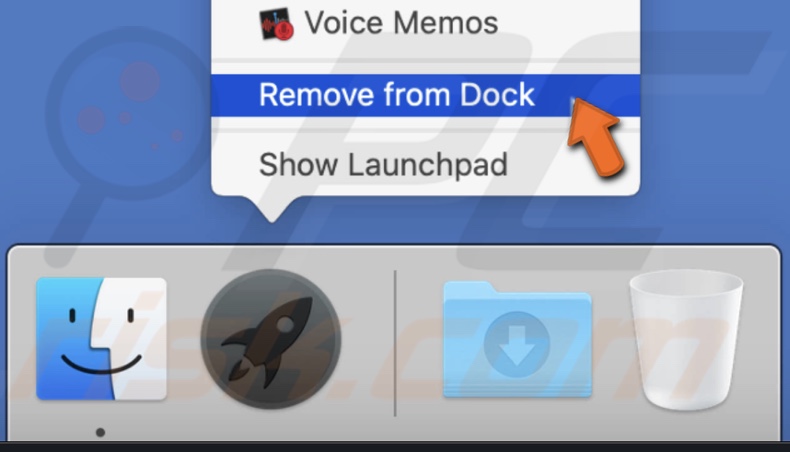
Remove Launchpad:
1. Right-click on the Launchpad.
2. Then click on "Remove from Dock".
How to Lock Applications, Files, And Folder to Dock
You can lock the Dock so no one can rearrange and add or remove apps, folders, and files you have added.
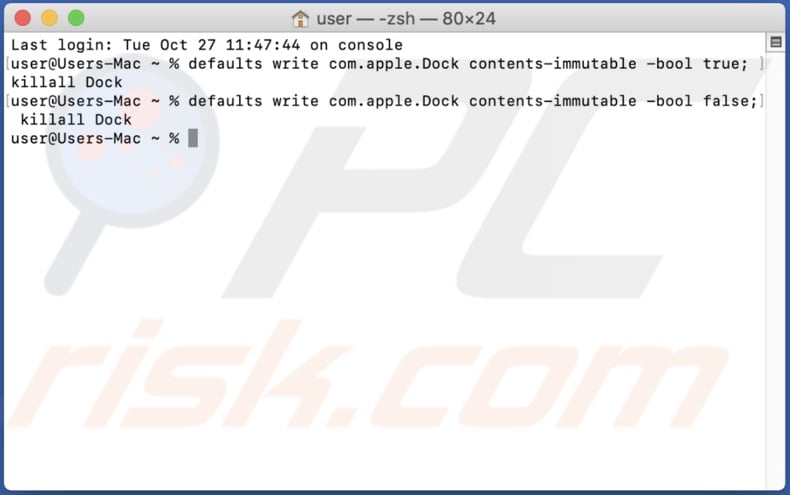
1. Open Terminal from Launchpad, Finder, or with Spotlight.
2. In the Terminal window, enter the command line: defaults write com.apple.Dock contents-immutable -bool true; killall Dock
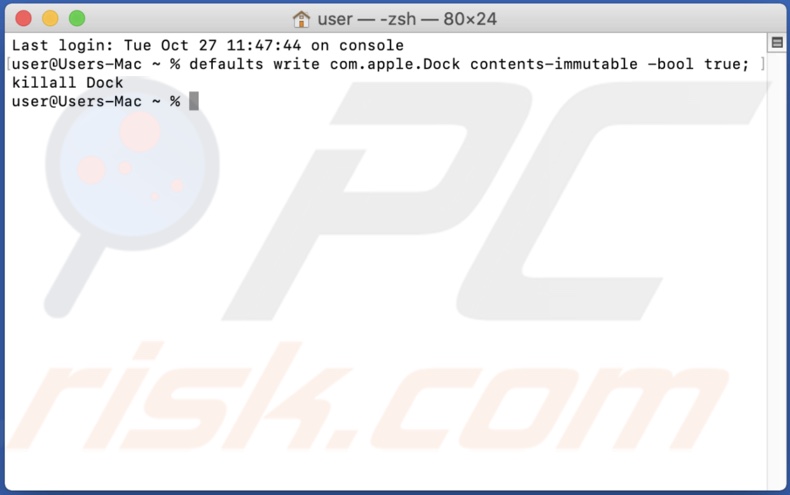
Now you will not be able to move content in the Dock. Also, the "Remove from Dock" option is gone, so you can not remove anything from it.
You can undo the lock by opening the Terminal window and entering the command line: defaults write com.apple.Dock contents-immutable -bool false; killall Dock
How to Hide Recent Applications, Files, And Folder on Dock
The Dock not only shows the items that you added, but it also shows the recently opened apps, folders, and files in a separate section. If you do not want that, you can have the recently opened items disappear after closing them.
1. In the upper menu, click on the Apple logo.
2. Go to "System Preferences".
3. Find and click on "Dock".
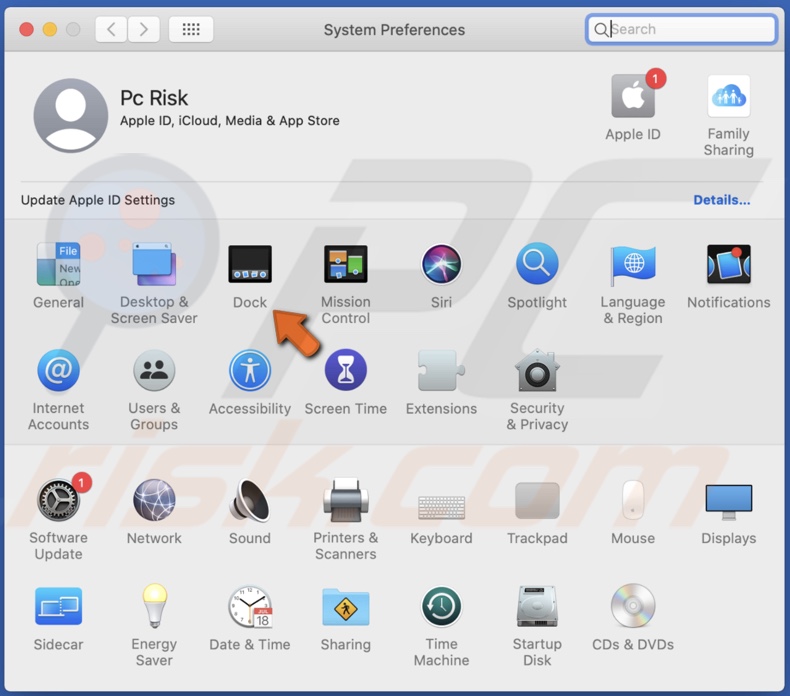
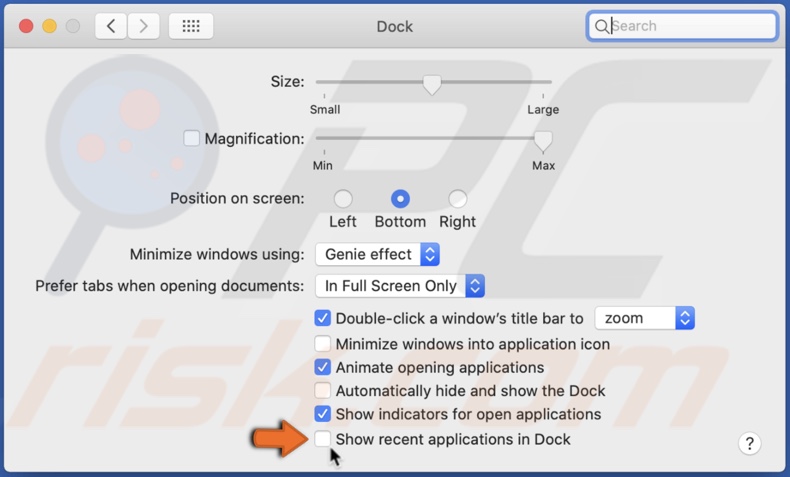
4. Uncheck the box next to "Show recent applications in Dock".
How to Change Finder Icon
The default icon for Finder is a smiley face with a half-blue, half-white background. But if you want to customize your Mac to the fullest, you can change the Finder icon with your own. To do that, we will have to momentarily disable SIP (System Integrity Protection).
1. Choose a picture you want to use and make sure it is in a PNG format.
2. Rename the picture to "finder". If your Mac has a retina screen, then rename the picture as "finder@2x".

3. Shut down your Mac and wait for about 30 seconds.
4. Then turn on your Mac and, at the same time, simultaneously hold down Command + R keys on your keyboard to load the Recovery mode.
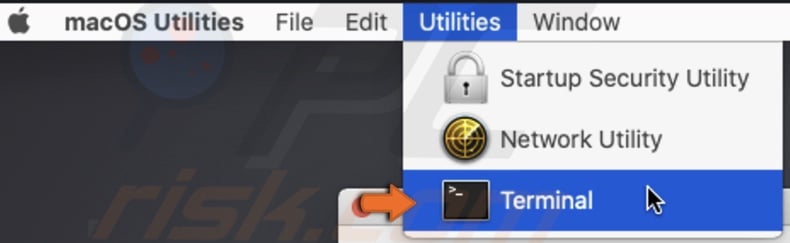
5. When you see macOS Utilities in the upper menu, click on "Utilities".
6. In the drop-down menu, click on "Terminal"
7. In the Terminal window, enter the command line: csrutil disable.
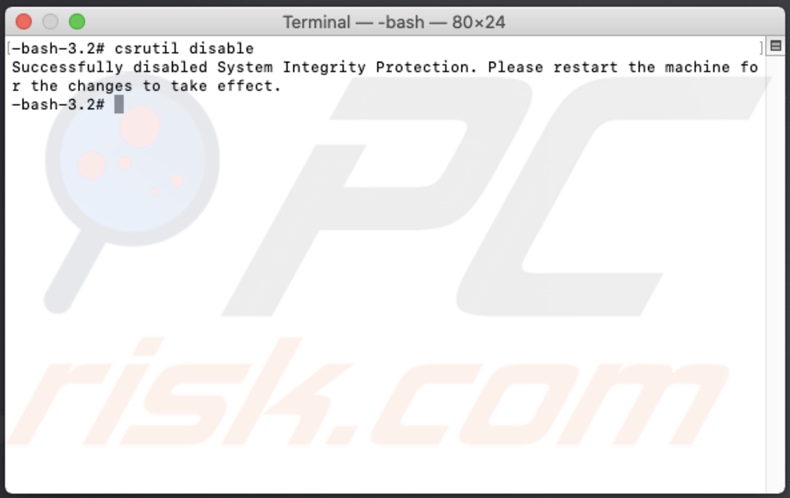
8. Then, in the upper menu, click on the Apple logo and then on "Restart".
9. Wait for your Mac to restart and log into your user.
10. Open Terminal from Launchpad, Finder, or with Spotlight.
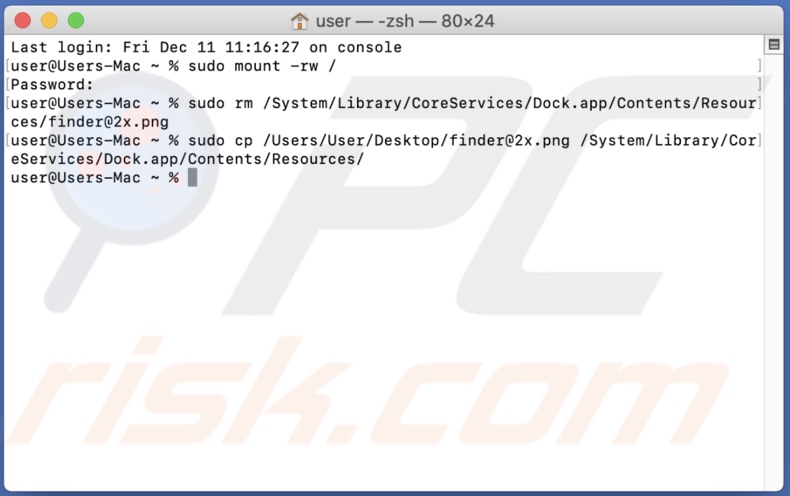
11. In the Terminal window, enter the command line: sudo mount -rw /
12. Enter your user password. The password characters will not be shown in the Terminal window.
![]()
13. Then remove the Finder icon. In the Terminal window, enter the command line: sudo rm /System/Library/CoreServices/Dock.app/Contents/Resources/finder.png or sudo rm /System/Library/CoreServices/Dock.app/Contents/Resources/finde@2x.png (for retina Mac)
![]()
14. Add your selected image. In the Terminal window, enter the command line: sudo cp /Users/your_username/Desktop/finder.png /System/Library/CoreServices/Dock.app/Contents/Resources/ or sudo cp /Users/your_username/Desktop/finder@2x.png /System/Library/CoreServices/Dock.app/Contents/Resources/ (for retina Mac)
15. Then, remove the Dock's icon cache. In the Terminal window, enter the command line: sudo find /private/var/folders/ -name com.apple.dock.iconcache -exec rm {} \;
![]()
16. And kill the Dock. In the Terminal window, enter the command line: killall Dock
![]()
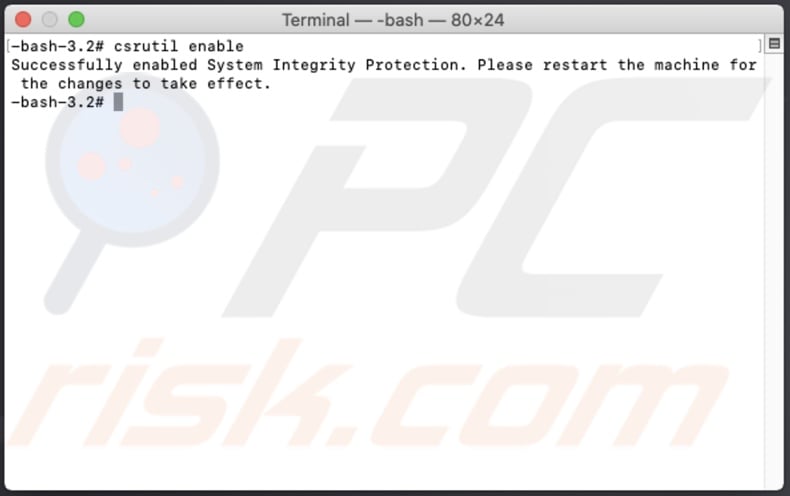
Your Dock will now refresh, and you should see your picture as the Finder icon. Now you need to enable SIP. To do that, follow the steps from 3 to 8. But instead, in step 7, enter the command line "csrutil enable".
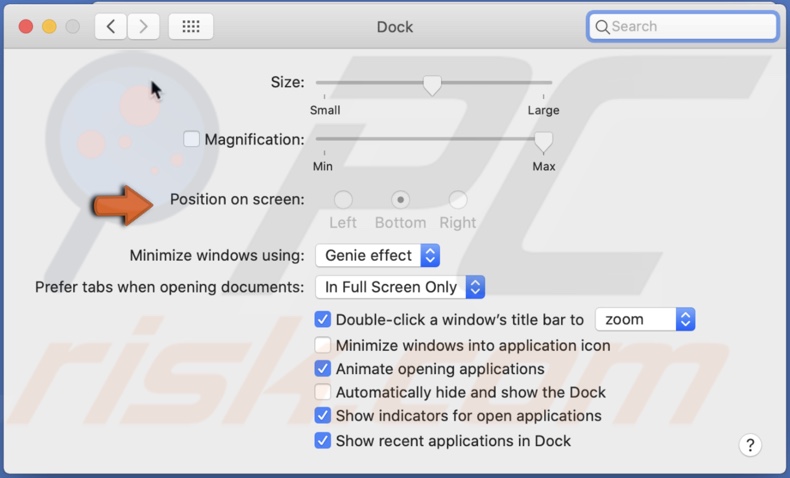
How to Change And Lock Dock Position
You can change the position of the Dock on your screen. You can position it at the bottom, the left or the right corners of your Mac's screen.
1. In the upper menu, click on the Apple logo.
2. Go to "System Preferences".
3. Find and click on "Dock".
4. Next to "Position on screen", you can choose "Left", "Bottom", or "Right".

If you share your Mac with other people, you can lock the Dock so no one can change its position.
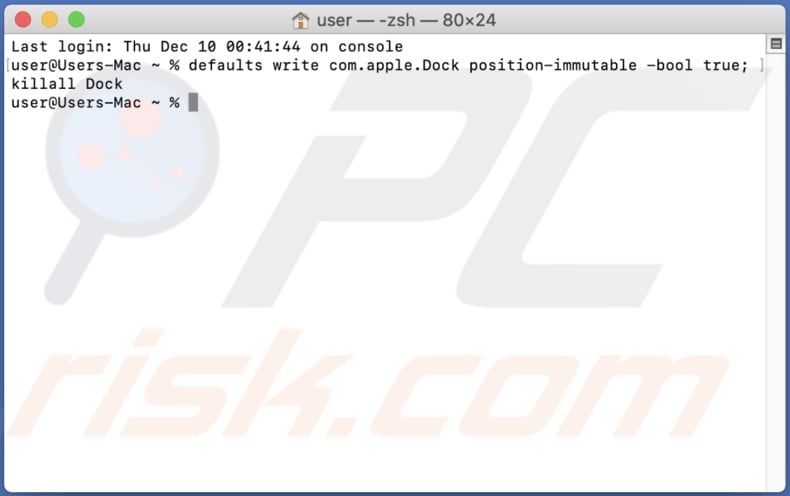
1. Open Terminal from Launchpad, Finder, or with Spotlight.
2. In the Terminal window, enter the command line: defaults write com.apple.Dock position-immutable -bool true; killall Dock
Now the option to change position in settings will be grayed out and unresponsive.
To allow Dock repositioning, in the Terminal window, enter the command line: defaults write com.apple.Dock position-immutable -bool false; killall Dock

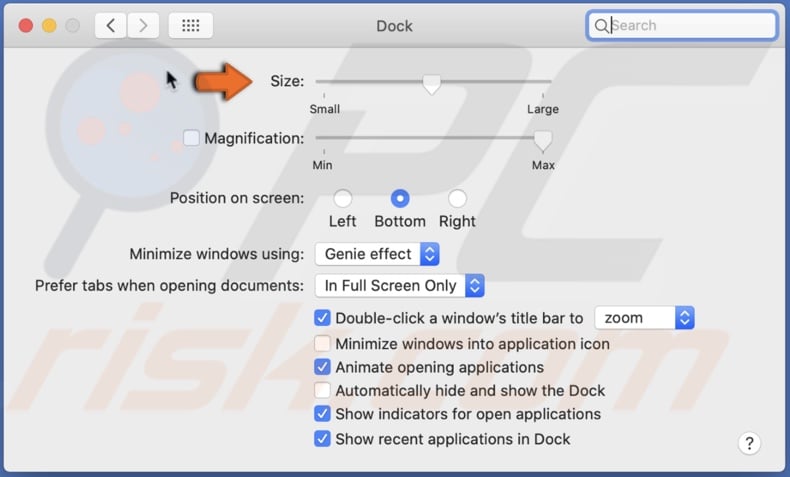
How to Change And Lock Dock Size
You can change the size of the Dock, depending on your preferences. If it is too small for you, you can make it bigger and vice versa.
1. In the upper menu, click on the Apple logo.
2. Go to "System Preferences".
3. Find and click on "Dock".
4. Next to "Size", set the slider as you wish.
You can also lock the Dock so no one can change its size.
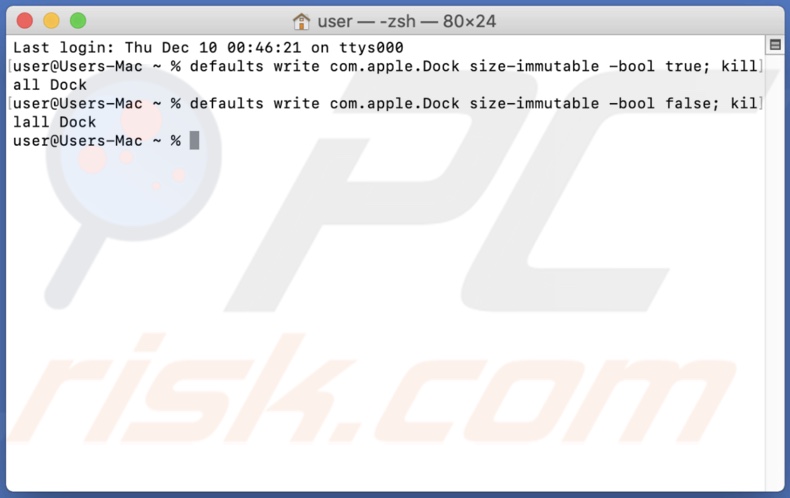
1. Open Terminal from Launchpad, Finder, or with Spotlight.
2. In the Terminal window, enter the command line: defaults write com.apple.Dock size-immutable -bool true; killall Dock
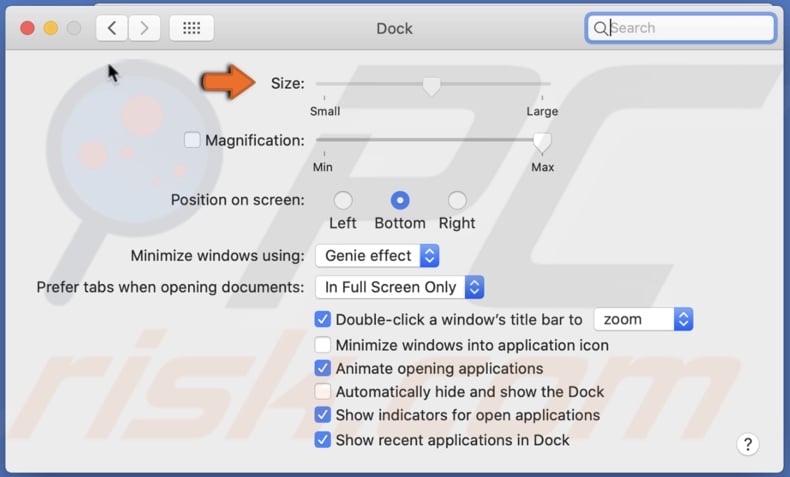
Now the option to resize in settings will be grayed out and unresponsive.
To allow Docs resizing, in the Terminal window, enter the command line: defaults write com.apple.Dock size-immutable -bool false; killall Dock
How to Add More Space Between Items on Dock
By default, all Dock items are next to each other with the same amount of space between them. But you can add more space between preferred items and separate them more.
1. Open Terminal from Launchpad, Finder, or with Spotlight.
2. In the Terminal window, enter the command line: defaults write com.apple.dock persistent-apps -array-add '{"tile-type"="spacer-tile";}'; killall Dock
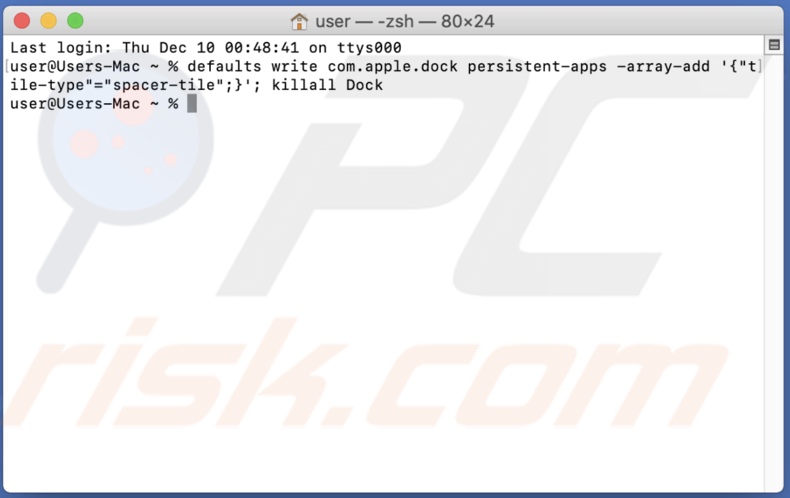
3. Space will appear in the Dock. You can click on it and drag between any items you prefer.

If you want to add space between other items as well, just retype the command line again.

If you decide that you do not want the space anymore, you can drag it outside the Dock and hover with it on the desktop while you see a "Remove" option appear. It is the same process as removing an item.
How to Automatically Hide or Show Dock
If you prefer to see the Dock when you need it, you can choose to hide or show the Dock on your screen automatically.
1. In the upper menu bar, click on the Apple logo.
2. Go to "System Preferences".
3. Find and click on "Dock".
4. In the Dock settings, check the box next to "Automatically hide and show the Dock".
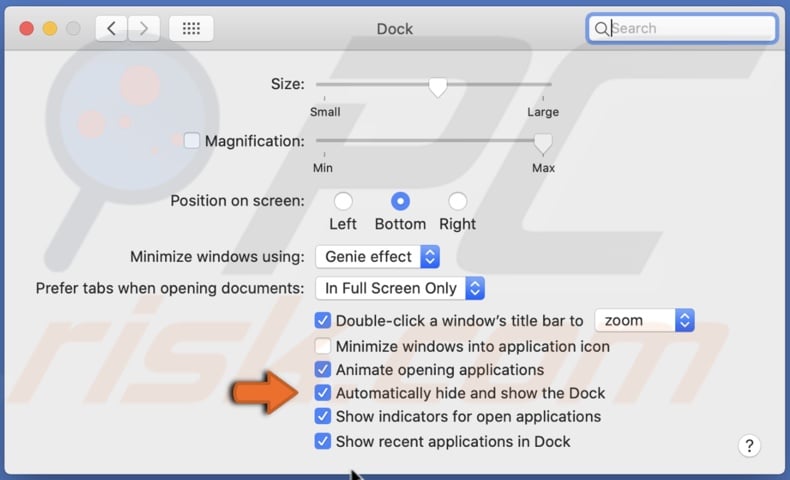
This will keep the Dock hidden until you hover your cursor over the place where it is positioned.
How to Reset Dock
Suppose you have many apps and folders added to the Dock and just want to remove everything or reset it to default settings. In that case, you can do that with the Terminal command. This method will remove existing customization.
1. Open Terminal from Launchpad, Finder, or with Spotlight.
2. In the Terminal window, enter the command line: defaults delete com.apple.dock; killall Dock
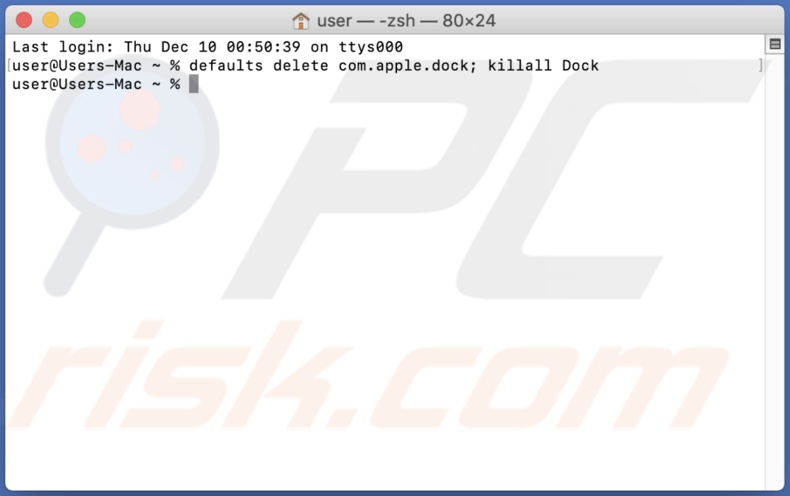
The Dock will relaunch itself with the default icons.

You can explore more Dock features in the Dock settings. The features that the Dock can offer you will also differ depending on the item. You can explore the suggested options of each item you add to the Dock by right-clicking on them.
We hope the information above was helpful!
Share:

Karolina Peistariene
Author of how-to guides for Mac users
Responsible for collecting, analyzing, and presenting problem-solving solution articles related to macOS issues. Years of macOS experience combined with solid research and analyzing skills help Karolina provide readers with working and helpful solutions as well as introduce various features Mac has to offer.
▼ Show Discussion