Fix Google Chrome Freezing or Crashing on Mac

(updated)
Get Free Scanner and check your computer for errors
Fix It NowTo fix found issues, you have to purchase the full version of Combo Cleaner. Free trial available. Combo Cleaner is owned and operated by Rcs Lt, the parent company of PCRisk.com read more.
What to Do if Google Chrome Keeps Freezing or Crashing on Mac
Even though Google Chrome is one of the leading browsers in the industry, it has its flaws. Due to its stability and fast performance, Chrome uses a lot of RAM (Random Access Memory), which can overall slow down your Mac. When that happens, you might experience Google Chrome browser freezing, crashing, or pages just stop loading.

If the Chrome browser runs slow, the cause for that can also be your battery draining too fast. Chrome is a fast browser that uses a lot of RAM and CPU (Central Processing Unit), especially if many pages are opened that also need a lot of resources, which will drain your battery faster.
The issue can also occur if Chrome has accumulated cache and cookies to the point where it needs to be cleared or the browser does not function properly. Also, a lot of times, bad extensions and failed updates are the cause of the problem. Damaged extensions can also make Google Chrome crash.
Below you will find troubleshooting steps that will help you fix Google Chrome crashing and other related issues.
Video on What to Do if Google Chrome Keeps Freezing or Crashing on Mac
Table of Contents:
- Introduction
- Method 1. Free Up Space on Your Mac
- Method 2. Delete Google Chrome Browsing Data
- Method 3. Quit Google Chrome
- Method 4. Check Google Chrome Extensions
- Method 5. Turn Off Hardware Acceleration
- Method 6. Check for Google Chrome Updates
- Method 7. Reinstall Google Chrome
- Video on What to Do if Google Chrome Keeps Freezing or Crashing on Mac
Download Computer Malware Repair Tool
It is recommended to run a free scan with Combo Cleaner - a tool to detect viruses and malware on your device. You will need to purchase the full version to remove infections. Free trial available. Combo Cleaner is owned and operated by Rcs Lt, the parent company of PCRisk.com read more.
Free Up Storage Space on Your Mac
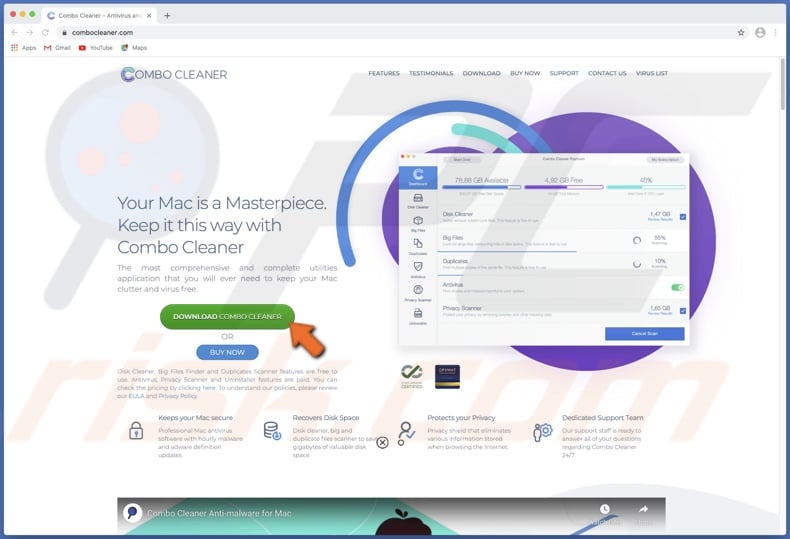
Before doing anything else, make sure that the problems with Chrome are actually caused by the browser itself. Chrome can be slow and keep crashing if you do not have enough space to ensure your Mac's decent performance. Try to clear up storage by using Combo Cleaner. It is a great and very easy-to-use tool for clearing your Mac's storage and more.
1. Download Combo Cleaner for free and open it from Launchpad, Finder, or Spotlight.
2. Go to "Disk Cleaner", located in the left sidebar.
3. Click on "Start Scan".
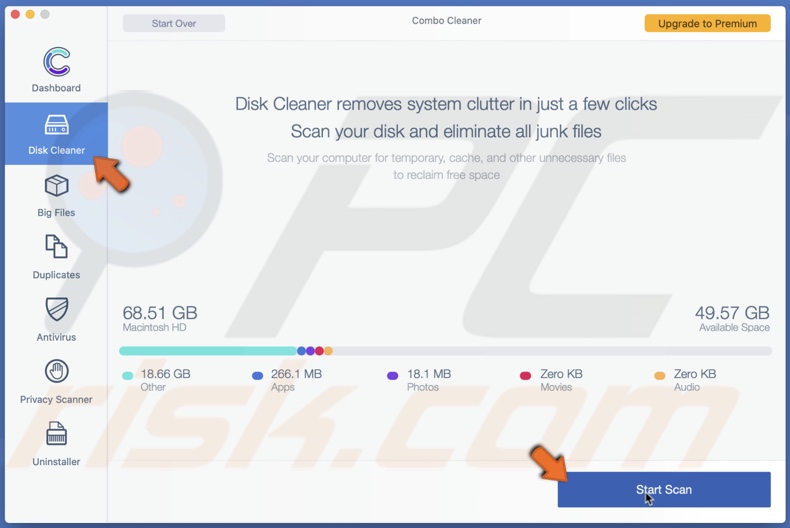
4. When the scan is finished, click on "Remove".
If this method does not solve the problem, proceed to the following troubleshooting steps.
Delete Google Chrome Browsing Data
Delete your browsing data. Sometimes Chrome can act up due to compiled browsing data stored in the browser.
1. Open Google Chrome from Launchpad, Finder, or Spotlight.
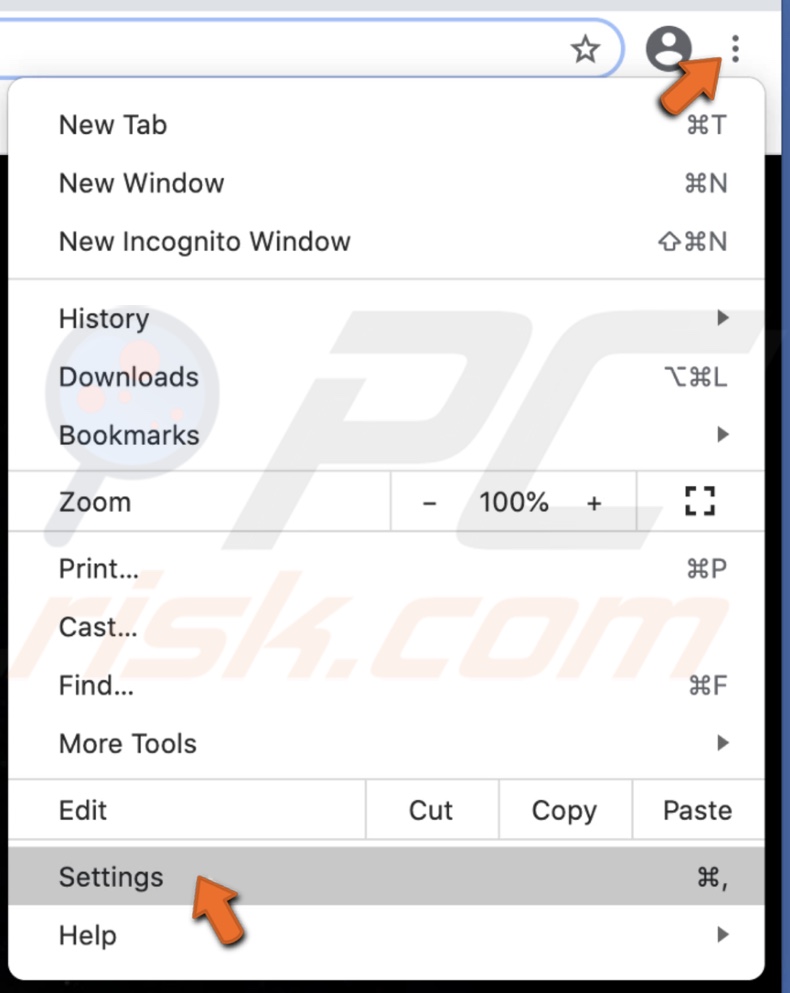
2. In the Chrome window in the upper right corner, click on the three dots next to your profile picture.
3. Click on "Settings".
4. In the Settings window, scroll down until you see the Advanced section.
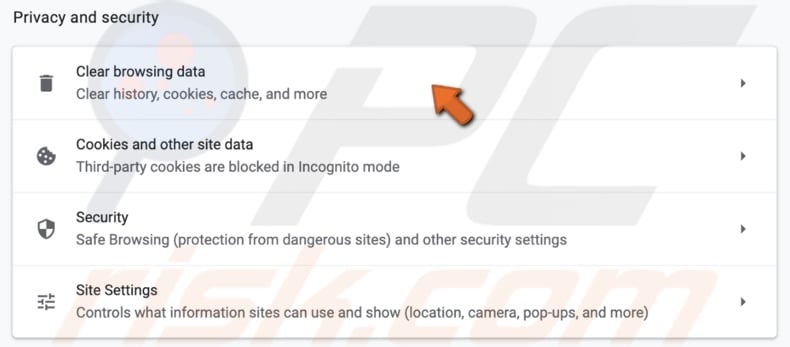
5. Expand the Advanced section, and under "Privacy and security", find "Clear browsing data". The "Privacy and security" option can also be at the top of the Settings window.
6. In the "Basic" tab, open the drop-down menu next to "Time range" and select "All time".
7. Click on "Clear data".
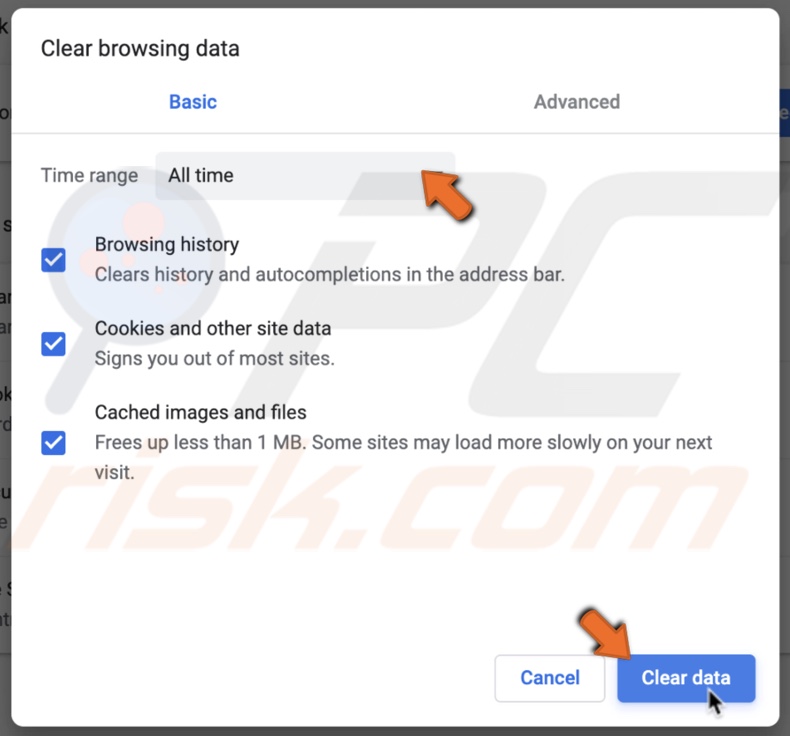
Check if the browser works as it should.
Quit Google Chrome
Sometimes Chrome can encounter various problems and start crashing or can get stuck. Try quitting your browsing session and restarting your Mac.
1. When the Google Chrome browser is open, go to the upper menu and click on the Apple logo.
2. Then click on "Force Quit".
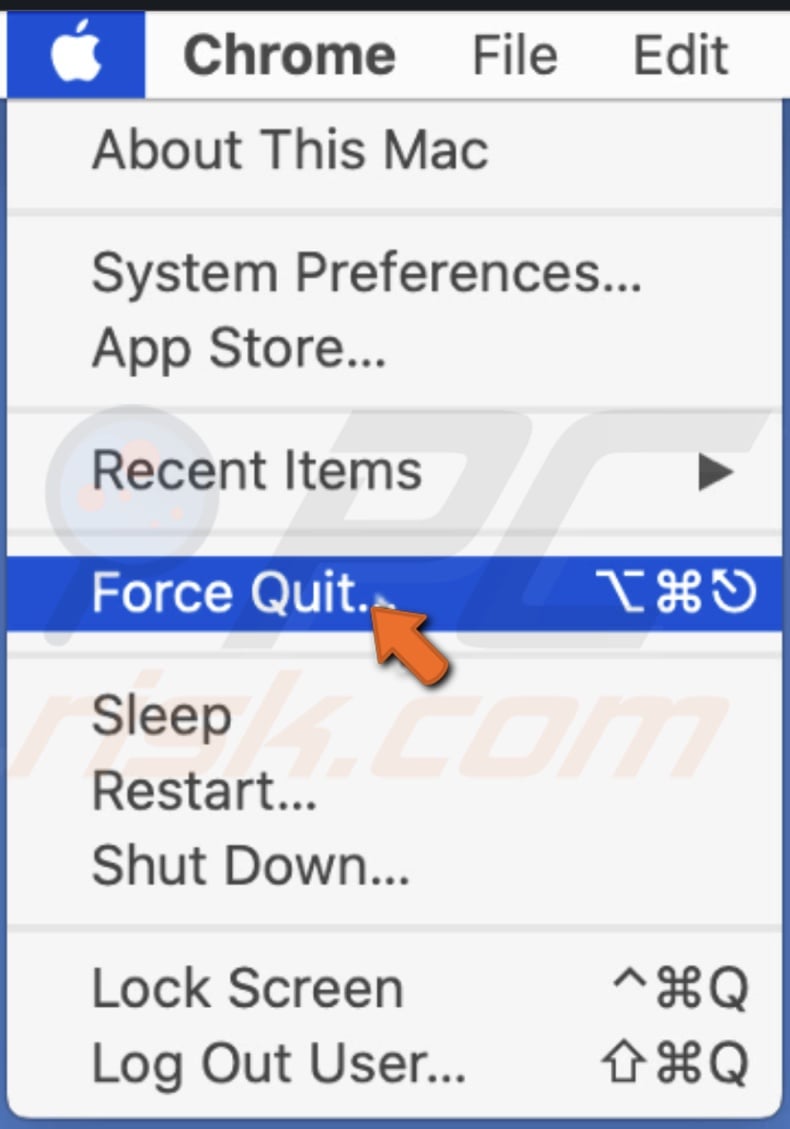
3. Select "Google Chrome" in the pop-up window and click on "Force Quit".
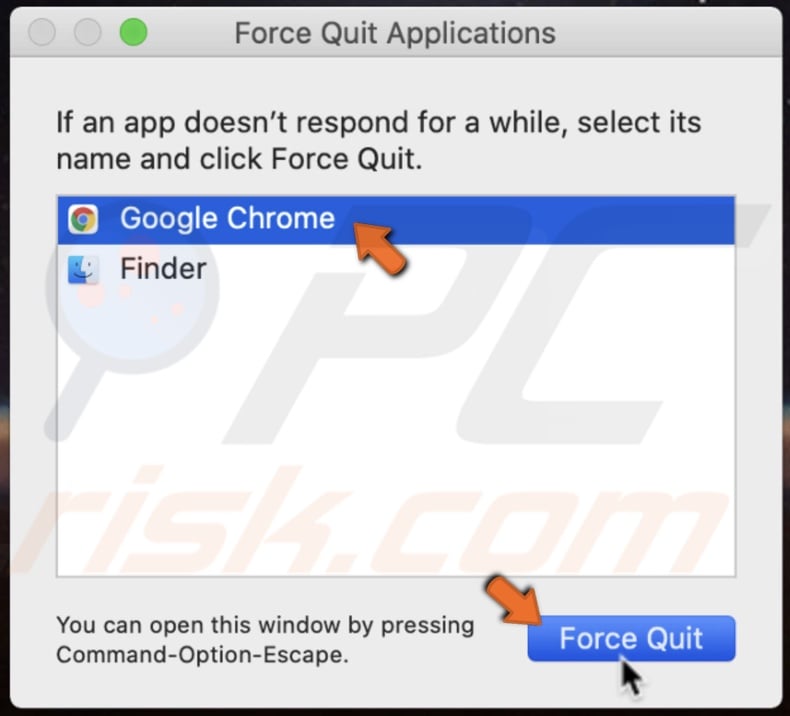
4. Restart your Mac by going to the upper menu, clicking on the Apple logo, then on "Restart", and in the pop-up window, click on "Restart" again.
When your Mac reboots, open Chrome and check if it works fine.
Check Google Chrome Extensions
If your Google Chrome browser started not working correctly not long after you installed an extension to your browser, then the problem might be with the extension. A lousy extension can cause your browser to keep crashing and act up. In this case, you will need to delete the faulty extension. You will have to do that in incognito mode as it automatically disables all extensions.
1. Open Google Chrome from Launchpad, Finder, or Spotlight.
2. In the Chrome window in the upper right corner, click on the three dots next to your profile picture.
3. Then click on "More Tools" and then on "Extensions".
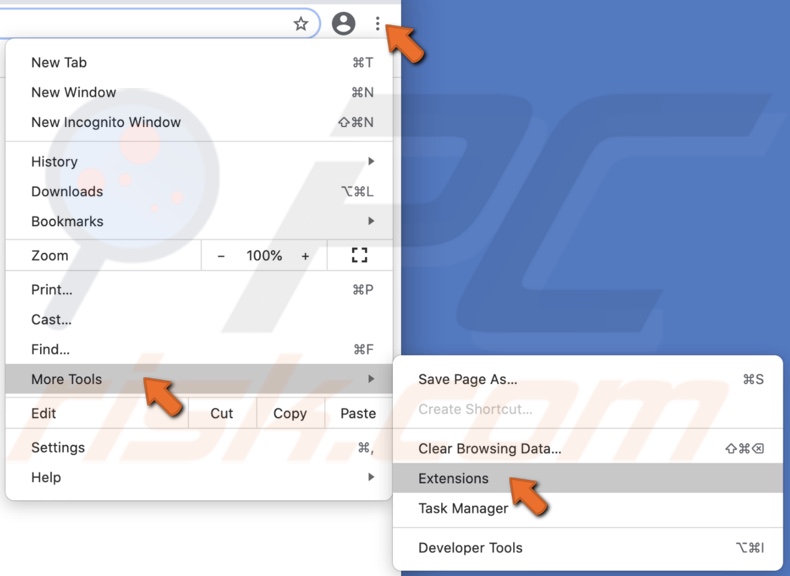
4. In the Extensions window, disable all extensions and then enable each extension one by one to check which one causes the crash of the browser.
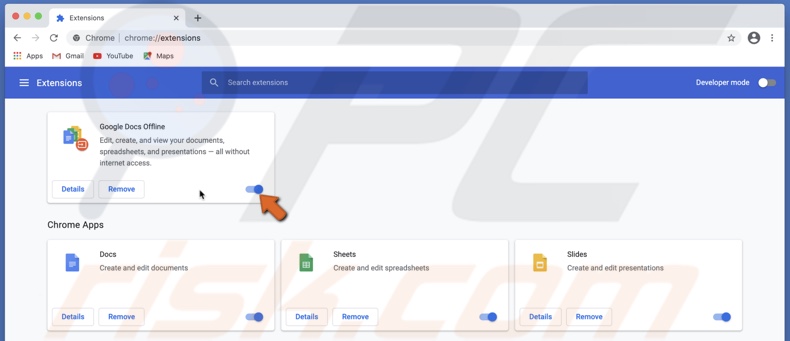
5. When you find the problematic extension, click on the "Remove" button under the extension's name to delete it.
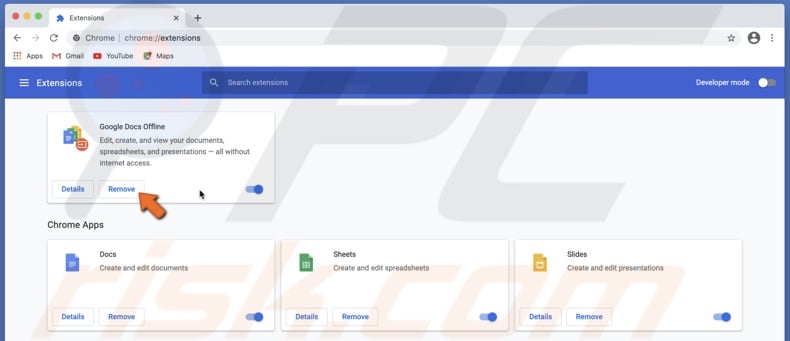
Check if Google Chrome is working normally again.
Turn Off Hardware Acceleration
If your Google Chrome browser is freezing or crashing nonstop, try turning off hardware acceleration.
1. Open Google Chrome from Launchpad, Finder, or Spotlight.
2. In the Chrome window in the upper right corner, click on the three dots next to your profile picture.
3. Click on "Settings".

4. In the Settings window, scroll down until you see the Advanced section.

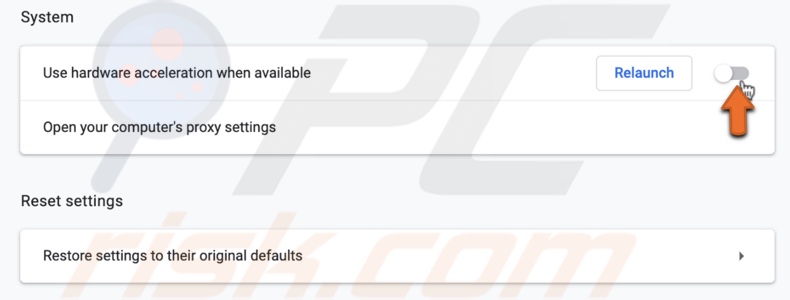
5. Expand the Advanced section, and under "System", find "Use hardware acceleration when available". Disable it. Then click on "Relaunch" to reopen Google Chrome.
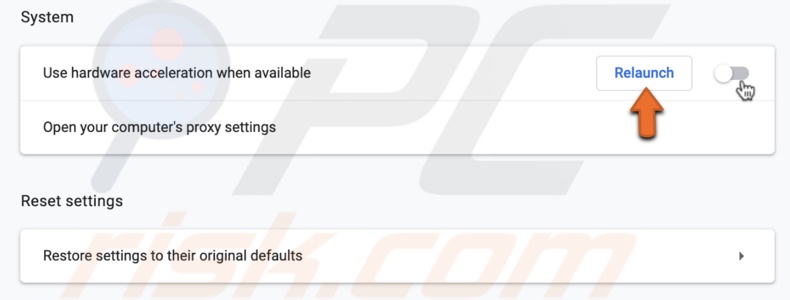
Chrome should start working properly.
Check for Google Chrome Updates
If nothing helps or only helps momentarily, check for Chrome updates. Maybe there is a bug with the browser itself, and Google released an update that fixes the issue.
1. Open Google Chrome from Launchpad, Finder, or Spotlight.
2. In the Chrome window in the upper right corner, click on the three dots next to your profile picture.
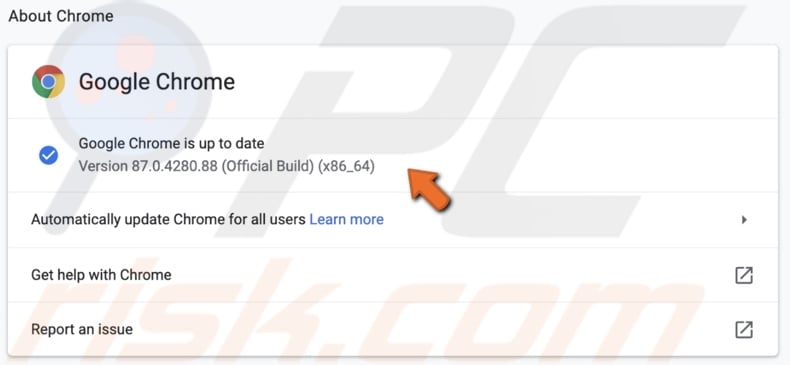
3. Hover over "Help" at the very bottom and then click on "About Google Chrome". A Settings window will appear.
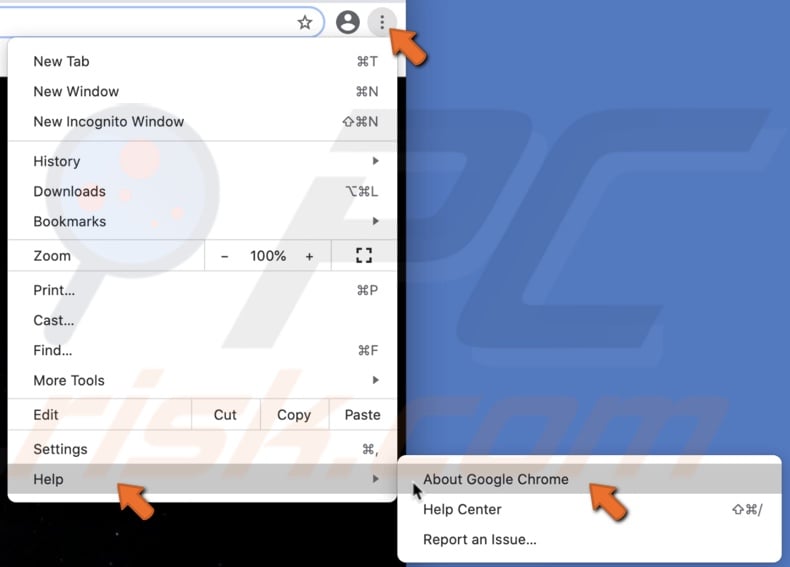
4. If there are any updates available for you, you will see them in this window.
If you have any extensions installed on Chrome, check for their updates as well.
1. Open Google Chrome from Launchpad, Finder, or Spotlight.
2. In the Chrome window in the upper right corner, click on the three dots next to your profile picture.
3. Then click on "More Tools" and then on "Extensions".

4. In the upper right corner, click on the slider next to "Developer Mode".
5. Then, click on "Update".

All extensions will be updated. Check if the browser works as it should.
Reinstall Google Chrome
You can also try to uninstall and reinstall the browser as sometimes Chrome might not install itself correctly the first time.
1. Right-click on Google Chrome located at the bottom of your screen in the Dock.
2. Click on "Quit".
3. Then, open Finder.
4. Click on "Applications" in the left sidebar.
5. Find and select "Google Chrome".
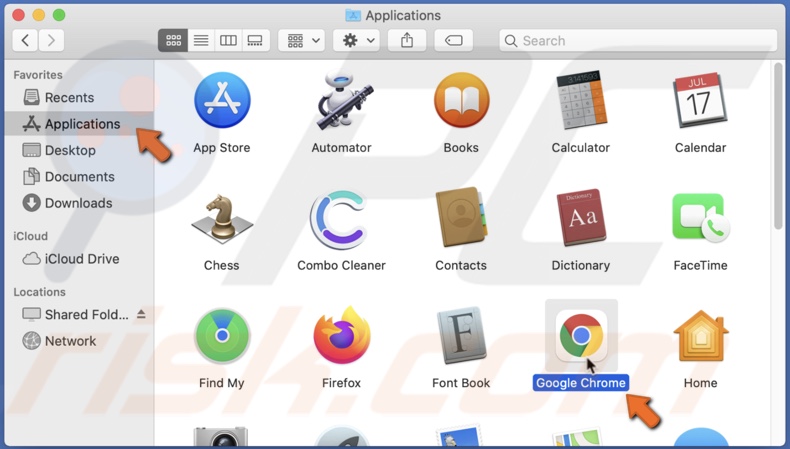
6. Then drag it to the Trash and delete it.
7. Go to the upper menu and click on "Go".
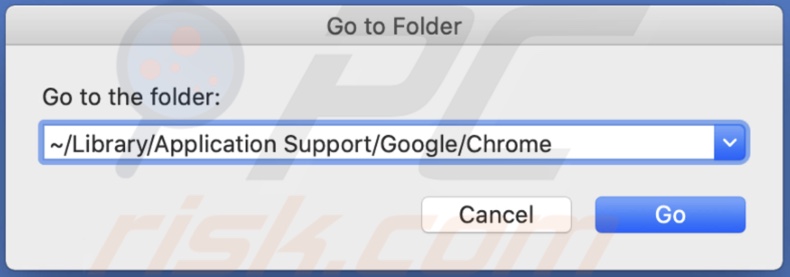
8. Then click on "Go to Folder".
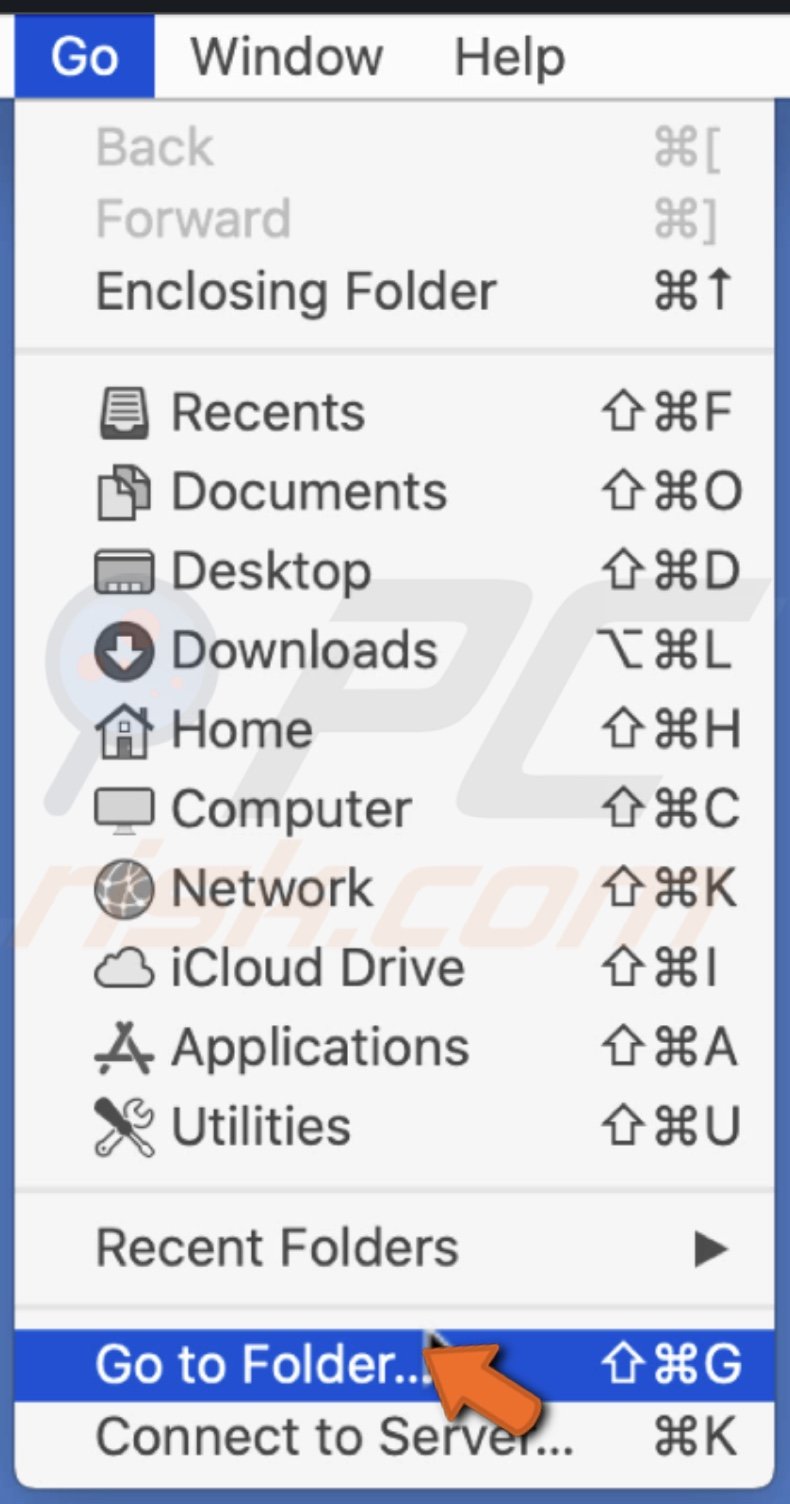
9. In the pop-up window, enter the line: ~/Library/Application Support/Google/Chrome
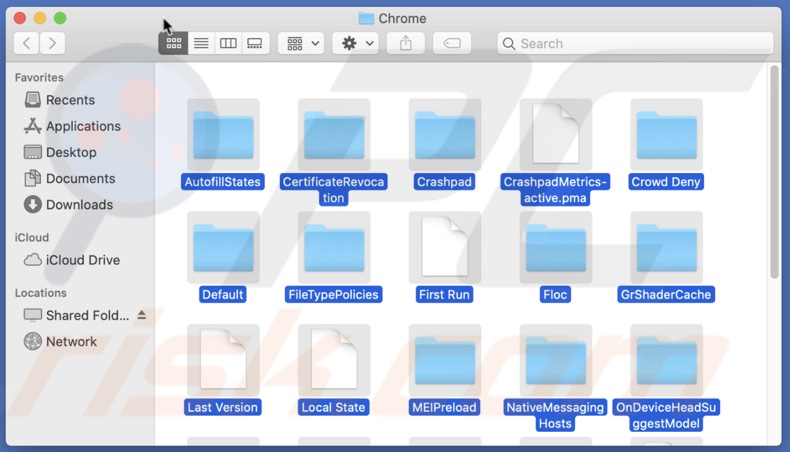
10. Select all folders, drag them to the Trash and delete them.
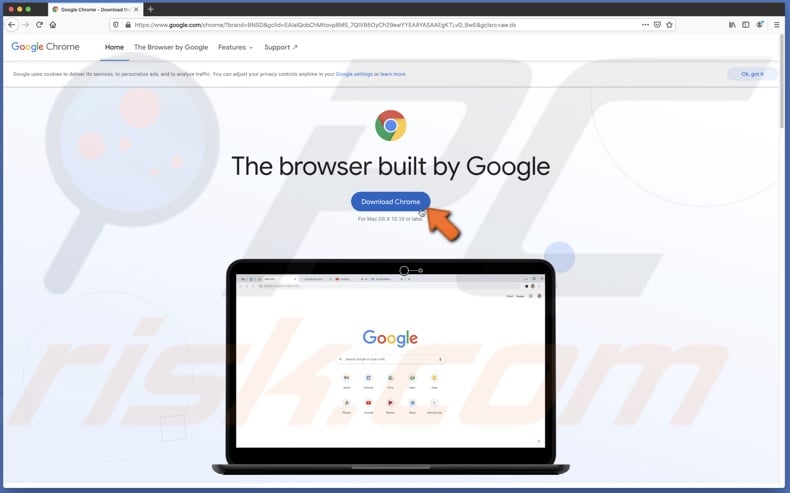
11. Open a different browser and go here to download Google Chrome again.
12. Click on "Download Chrome" and proceed with the installation steps.
Check if the browser works properly.
We hope that the information above was helpful. Let us know in the comments which method helped you solve the problem!
Share:

Karolina Peistariene
Author of how-to guides for Mac users
Responsible for collecting, analyzing, and presenting problem-solving solution articles related to macOS issues. Years of macOS experience combined with solid research and analyzing skills help Karolina provide readers with working and helpful solutions as well as introduce various features Mac has to offer.
▼ Show Discussion