How to Manage Your Folders on Mac?

(updated)
Get Free Scanner and check your computer for errors
Fix It NowTo fix found issues, you have to purchase the full version of Combo Cleaner. Free trial available. Combo Cleaner is owned and operated by Rcs Lt, the parent company of PCRisk.com read more.
How to Manage Your Folders on macOS. Change Folder Color, Password Protect Important Folders, And More?
A folder is an excellent tool for organizing your files. It is also called a directory and is used for storing files, other folders, shortcuts, programs, and more on your Mac.
In this article, you will find out how to manage your created folders. Below you will find out how you can customize folder icons, change folder color, encrypt a folder with a password, zip and unzip a folder, combine a couple of folders into one, and more.
Video on Manage Your Folders on macOS
Table of Contents:
- Introduction
- How to Change Folder Color
- How to Customize Folder Icon
- How to Zip and Unzip a Folder
- How to Merge Folders
- How to Password Protect a Folder
- How to Hide Folders
- Video on Manage Your Folders on macOS
Download Computer Malware Repair Tool
It is recommended to run a free scan with Combo Cleaner - a tool to detect viruses and malware on your device. You will need to purchase the full version to remove infections. Free trial available. Combo Cleaner is owned and operated by Rcs Lt, the parent company of PCRisk.com read more.
How to Change Folder Color
By default, the folder color is blue. You may want to personalize your Mac and change the folder color or maybe change each folder's color so you can differentiate them faster. You can change the color of an existing or a new folder. Follow the steps below to change the color of a folder.
1. Right-click on a folder that you want to change the color.
2. Click on "Get Info".
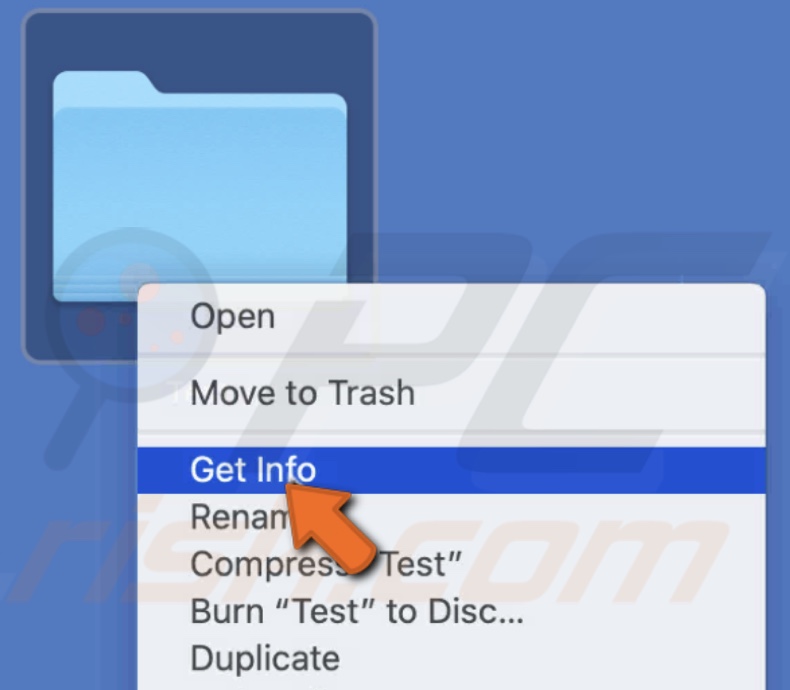
3. You will see a window pop up with the basic information about your folder. Click on the folder icon at the top of the window. You will see an outline appear.
![]()
4. In the upper menu, click on "Edit" and select "Copy" or simultaneously press the Command + C keys on your keyboard.
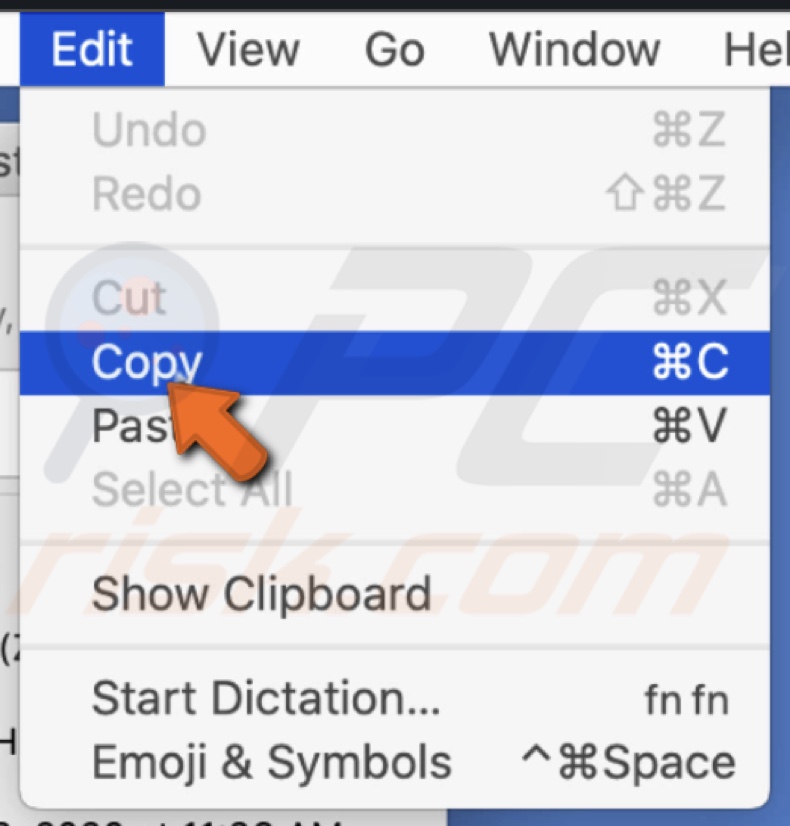
5. Open the Preview app from Launchpad, Finder, or Spotlight.
6. In the upper menu, click on "File".
7. Then click on "New from Clipboard".
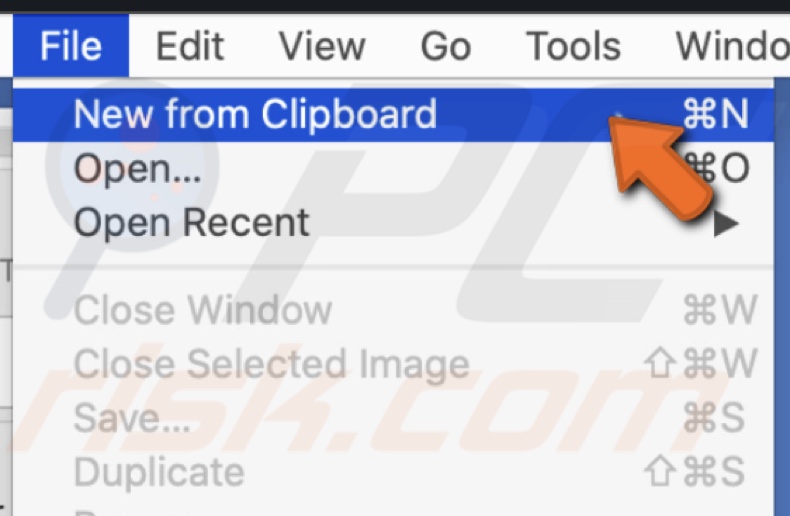
8. Click on the pencil icon at the top of the preview window.
9. Then, in the tool menu, click on the prism icon.
10. An "Adjust Color" sidebar in the right corner will appear. Use the slider next to "Saturation", "Tint", and "Sepia" in the sidebar to change the color of the folder.
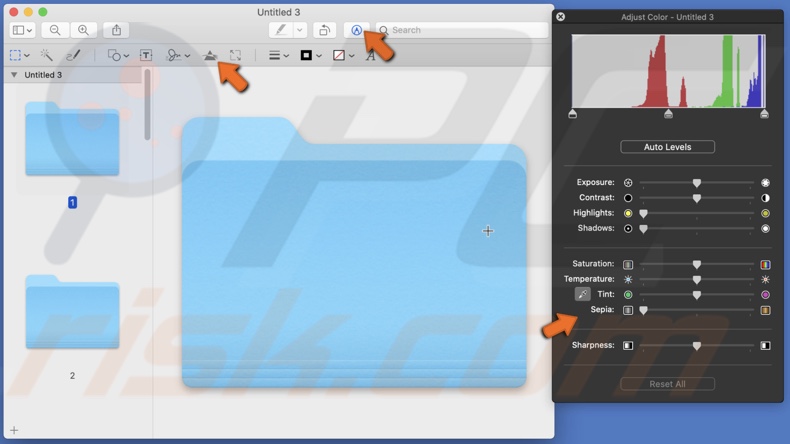
11. When you are satisfied with the color, close the "Adjust Color" sidebar.
12. In the upper menu, click on "Edit" and choose "Select All". You will see the dotted lines.
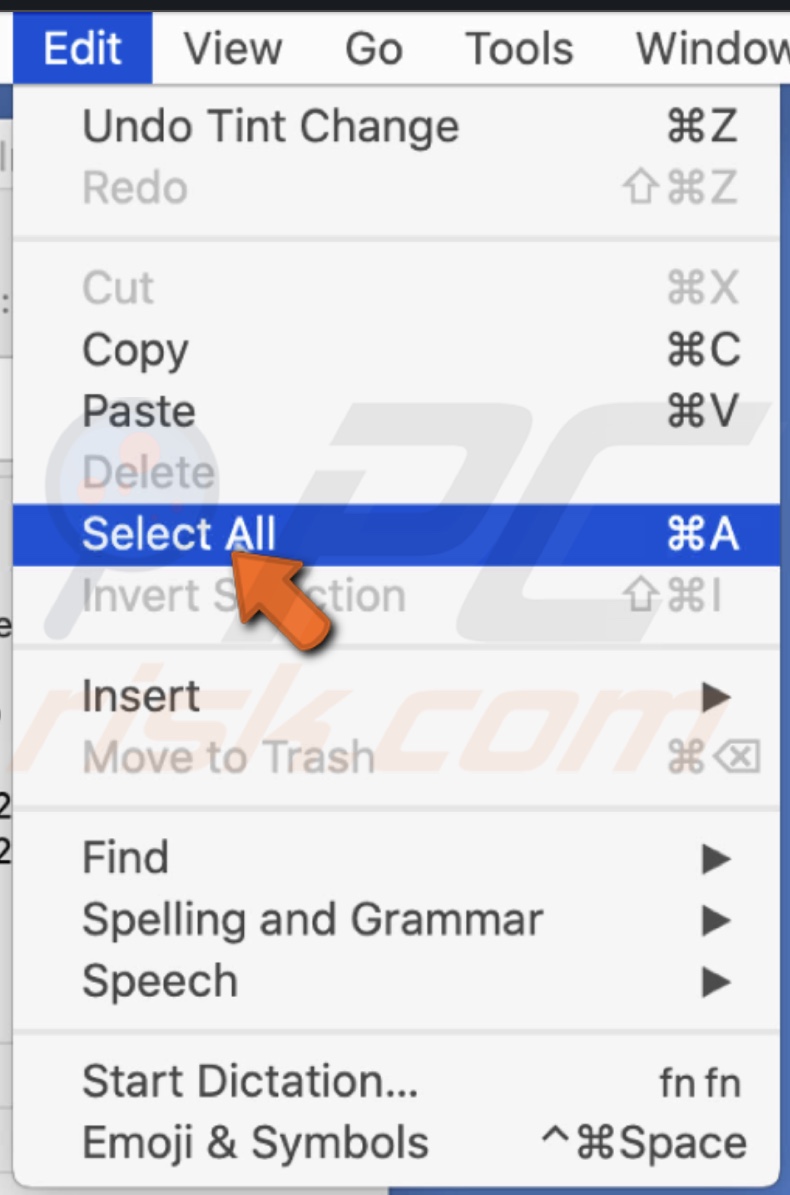
11. Then go to the upper menu again and click on "Edit".
12. Then click on "Copy".

13. Close the preview window and right-click on your folder.
14. Click on "Get Info".
15. Click on the folder icon at the top of the window and simultaneously press the Command + V keys on your keyboard or in the upper menu. Click on "Edit" and select "Paste".
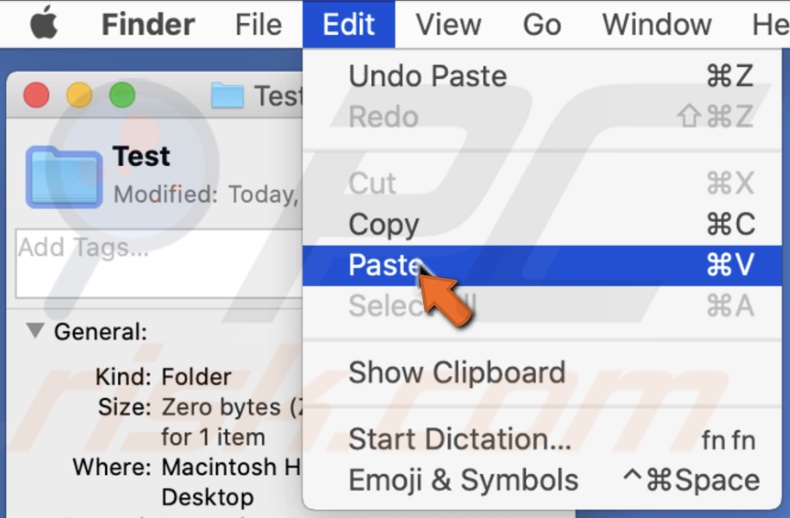
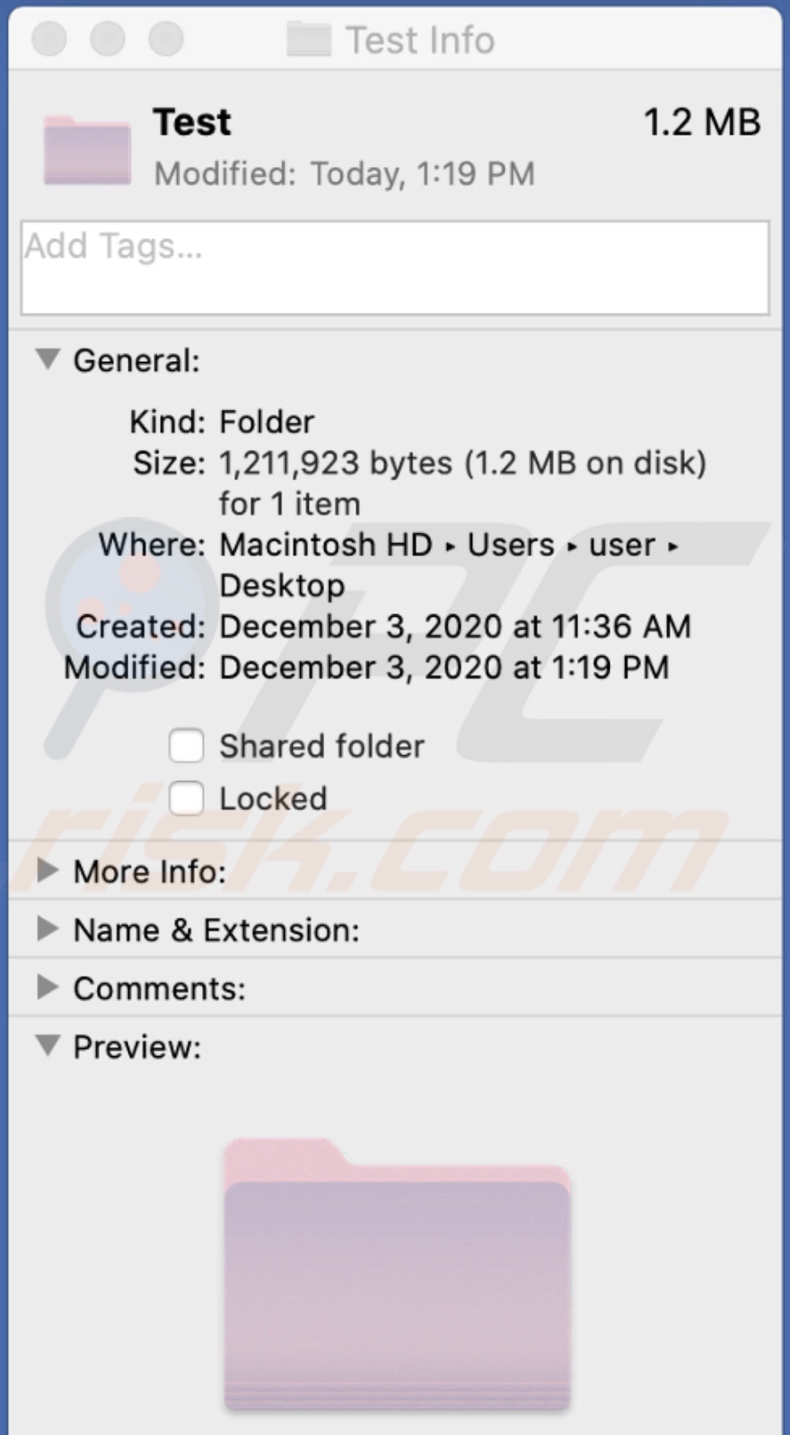
Now your folder has a different color. Changing the color of a folder will not delete the content inside it.
How to Customize Folder Icon
All you folder have the same icon by default. You can change the icon of a blue folder and replace it with a picture from the internet, maybe use your own photo or a created icon. You can do that by following the steps below.
1. If you want to use an image from the web, right-click on it and click on "Copy Image".
If you want to use an image that is located on your Mac, open it with the Preview app, go to the upper menu bar, click on "Edit", and then on "Copy".

2. Right-click on a folder that you want to customize.
3. Click on "Get Info".

4. You will see a window pop up with the basic information about your folder. Click on the folder icon at the top of the window. You will see an outline appear.
5. Go to the upper menu bar, click on "Edit," and then on "Paste".
![]()
You will see the icon of the folder change.
If, for some reason, you want to revert the change to the default icon, follow the steps below:
1. Right-click on a folder.
2. Click on "Get Info".
3. Click on the folder icon at the top of the window. You will see an outline appear.
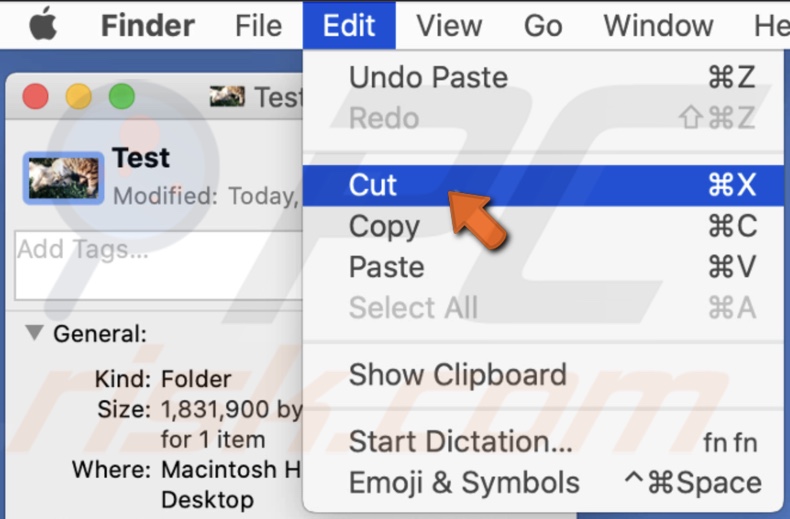
4. Go to the upper menu bar, click on "Edit," and then on "Cut".
How to Zip and Unzip a Folder
If you need to send a couple of folders containing many files to someone, it is better to compress the folder for a faster transfer. Or you might get a compressed folder, which you will need to unzip. Fortunately, your Mac has a built-in tool for this.
Zip folders:
1. Select all folders. Simultaneously press Control + A on your keyboard or hold Shift, select the first and last folders. Or you can hold the Command key and select the folders one by one.
2. Right-click on the selection.
3. Click on "Compress X Items".
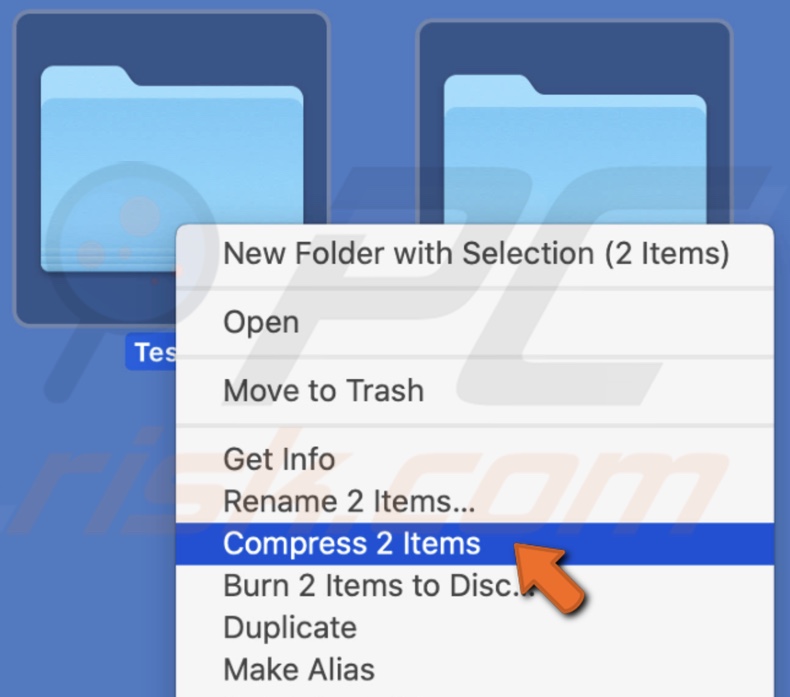
You will see your selected folders zipped into one file.
To unzip the folder, you just need to double-click on it.
How to Merge Folders
If you accidentally created two folders for the same purpose with the same name, it is more convenient to merge them than keeping two folders in different locations.
1. Select a folder that you want to move to the other one.
2. Hold down the Option key on your keyboard and drag the folder to the other one's location. Keep holding the Option key until you see a message window pop-up.

3. Click on "Merge".

You will only be able to merge both folders if they contain files, not in the other folder. Otherwise, you will be suggested to Stop or Replace the content.
How to Password Protect a Folder
If you share a Mac with other people and have sensitive information that you do not want other people to see, you can encrypt it with a password.
1. Open Disk Utility from Finder, Spotlight, or Utilities.
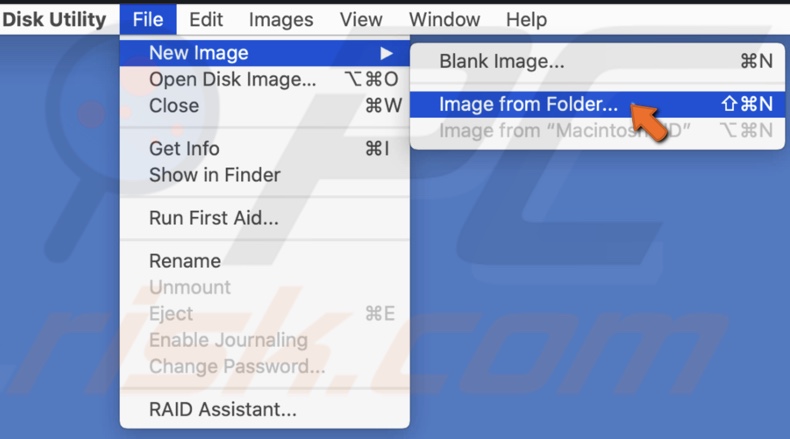
2. In the upper menu bar, click on "File".
3. Then click on "New Image" and on "Image from Folder".
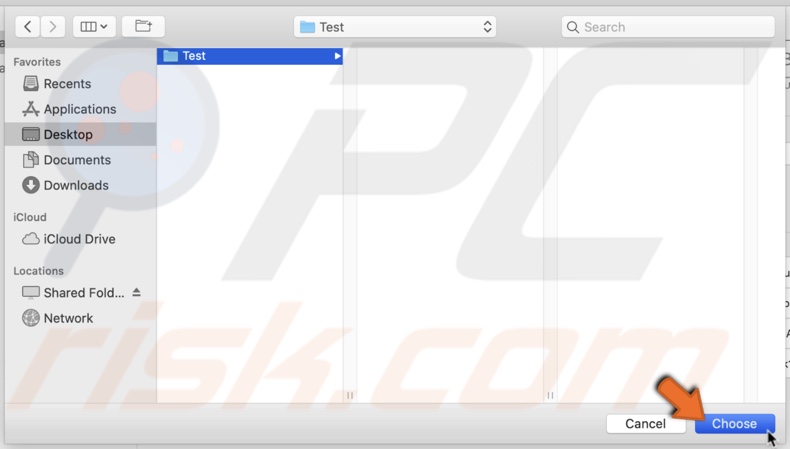
4. In the pop-up window, select the folder you want to encrypt.
5. Click on "Choose".
6. Click on the drop-down menu next to "Encryption" and choose "128-bit AES encryption (recommended)".
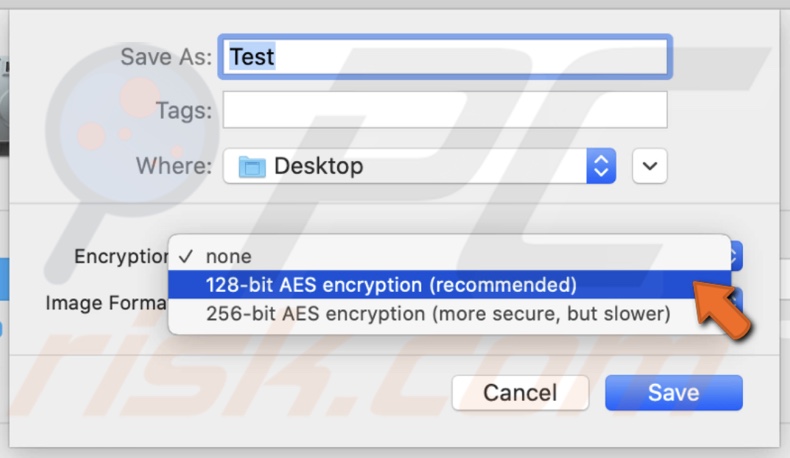
7. Enter the password. You will need to enter it two times to verify it.
8. Click on "Choose".
9. Click on the drop-down menu next to "Image Format" and choose "read/write".
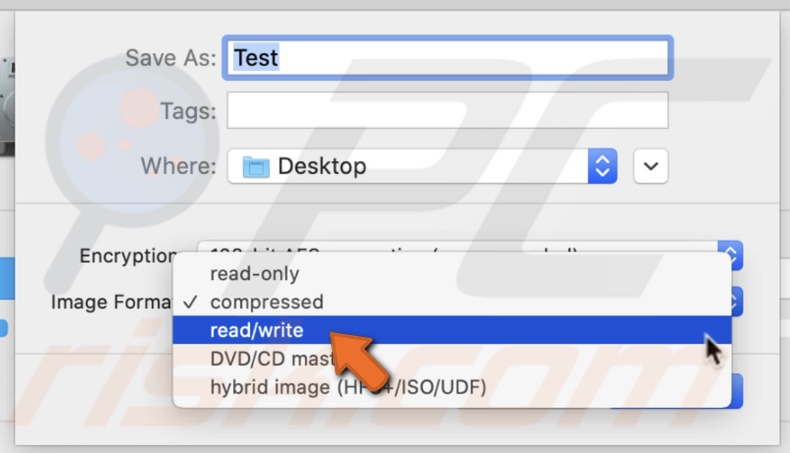
10. Click on "Save".
Now your folder is encrypted with a password and has a .dmg extension.

To view and re-lock the folder, follow the steps below:
1. Open the encrypted folder.
2. Enter the password you set.
3. You will see a disk image pop-up on your desktop. Double click on it to open. The folder will be accessible to everyone until you re-lock it.
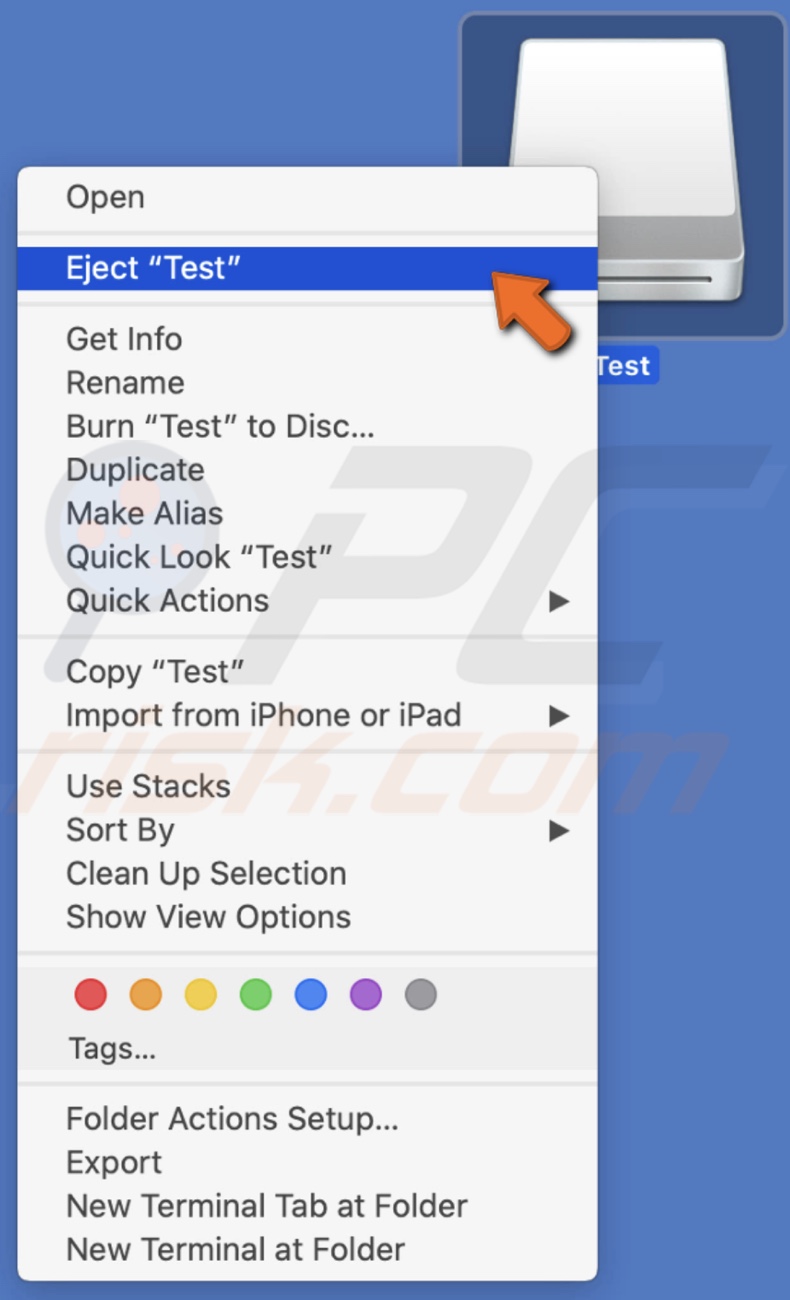
4. To re-lock the folder, right-click on it and choose "Eject 'Folder Name'".
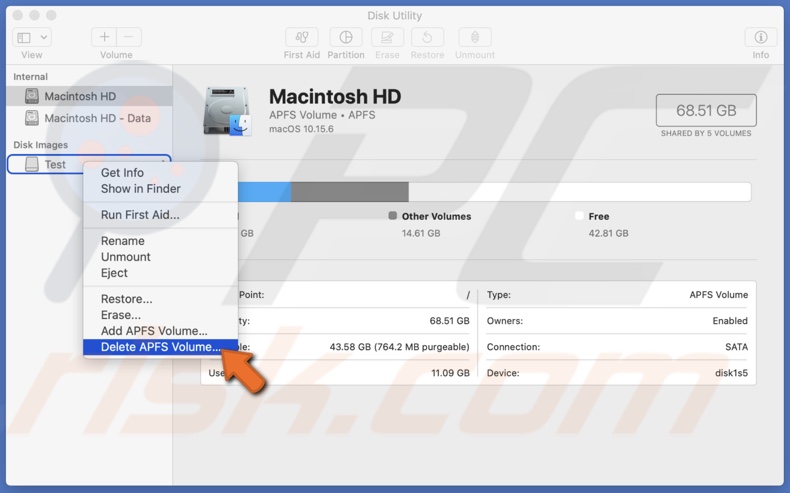
If you permanently delete the folder, go to "Disk Utility" and choose the locked folder from the left sidebar. Then right-click on it and click on "Delete APFS Volume".
How to Hide Folders
If you do not want others to see some files on your Mac, you can hide them with a quick Terminal command.
Hide folder:
1. Open Terminal From Finder, Spotlight, Utilities, or Launchpad.
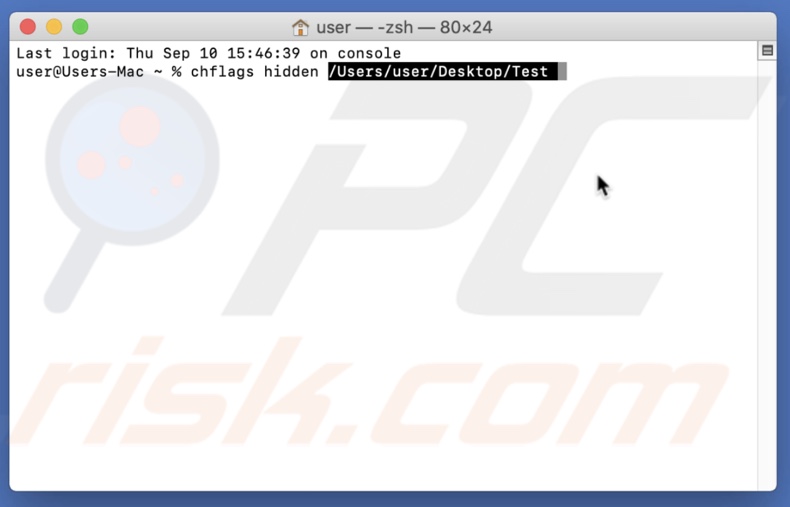
2. In the Terminal window, type in the command line: chflags hidden (space)
3. Select the folder you want to hide, drag it to the Terminal window, and execute the command.
View all hidden folders:
1. Open Terminal From Finder, Spotlight, Utilities, or Launchpad.
2. In the Terminal window, type in the command line: defaults write com.apple.finder AppleShowAllFiles -boolean true ; killall Finder
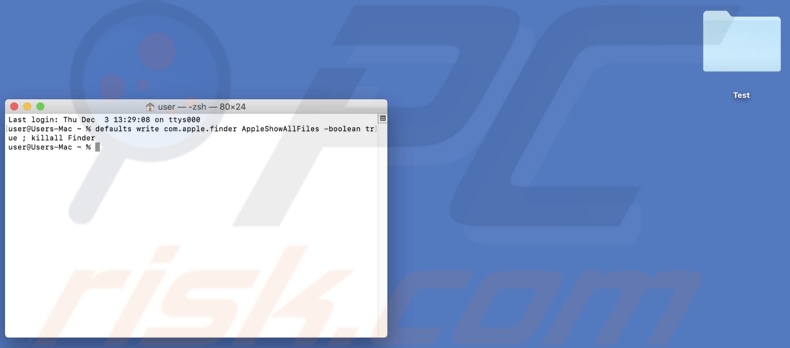
3. Open the Finder to see all files.
Unhide folder:
1. Open Terminal From Finder, Spotlight, Utilities, or Launchpad.
2. In the Terminal window, type in the command line: chflags nohidden (space)
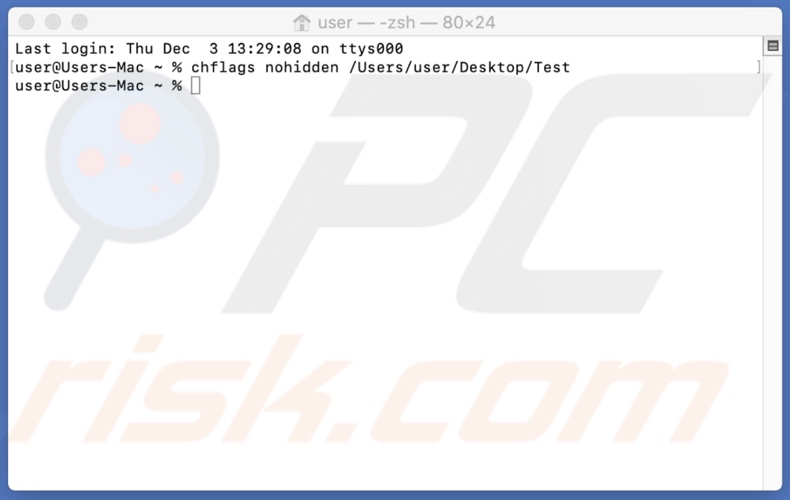
3. Select the folder you want to unhide, drag it to the Terminal window, and execute the command.
Hide all hidden folders:
1. Open Terminal From Finder, Spotlight, Utilities, or Launchpad.
2. In the Terminal window, type in the command line: defaults write com.apple.finder AppleShowAllFiles -boolean false ; killall Finder
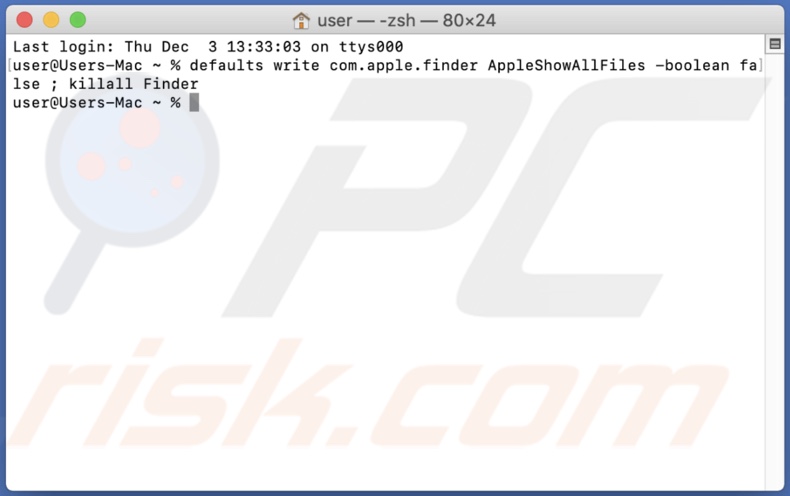
3. Open the Finder to see all files.
We hope you found this information useful!
Share:

Karolina Peistariene
Author of how-to guides for Mac users
Responsible for collecting, analyzing, and presenting problem-solving solution articles related to macOS issues. Years of macOS experience combined with solid research and analyzing skills help Karolina provide readers with working and helpful solutions as well as introduce various features Mac has to offer.
▼ Show Discussion