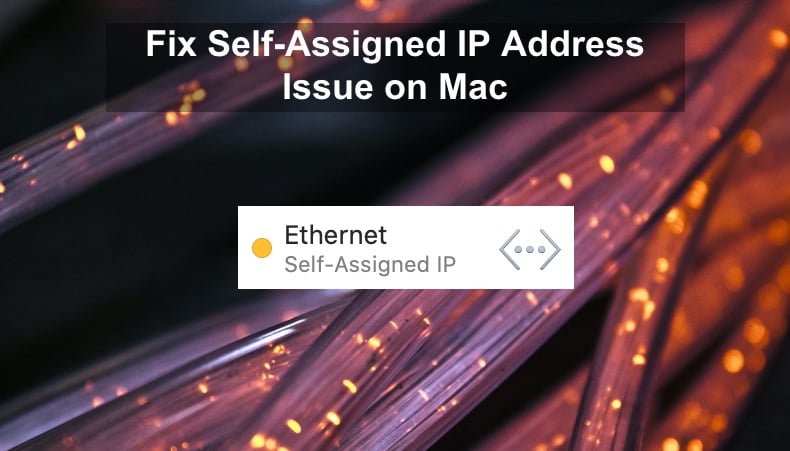
Fix Self-Assigned IP Address Issue On Mac

(updated)
Get Free Scanner and check your computer for errors
Fix It NowTo fix found issues, you have to purchase the full version of Combo Cleaner. Free trial available. Combo Cleaner is owned and operated by Rcs Lt, the parent company of PCRisk.com read more.
Fix Self-Assigned IP Address Issue on Mac
When you don't have access to the internet, it can be very frustrating for everyone. If your Mac can't connect to the internet, you won't be able to access any servers that use an internet connection. This issue can occur when the user made major configuration changes to the system.
The changes can be updating the macOS version, upgrading to a new version, switching to a new system, or restoring the whole system from a backup. When performing these kinds of configurations, settings might not migrate properly, creating problems.
Ethernet users can also experience such a problem. If in network settings, you see a message saying that "Ethernet has a self-assigned IP address and will not be able to connect to the internet," it means that the issue is a failure of DHCP on the cabled connection.
Don't worry, below you'll find ways how you can fix the issue with a self-assigned IP address on your Mac.
Video on Fix Self-Assigned IP Address Issue on Mac
Table of Contents:
- Introduction
- Check Your Network Preferences
- Method 1. Reset Network Configuration
- Method 2. Renew DHCP Lease
- Method 3. Create New Network Location
- Method 4. Reset the Firewall
- Method 5. Set Service Order
- Method 6. Change DNS Servers
- Video on Fix Self-Assigned IP Address Issue on Mac
Download Computer Malware Repair Tool
It is recommended to run a free scan with Combo Cleaner - a tool to detect viruses and malware on your device. You will need to purchase the full version to remove infections. Free trial available. Combo Cleaner is owned and operated by Rcs Lt, the parent company of PCRisk.com read more.
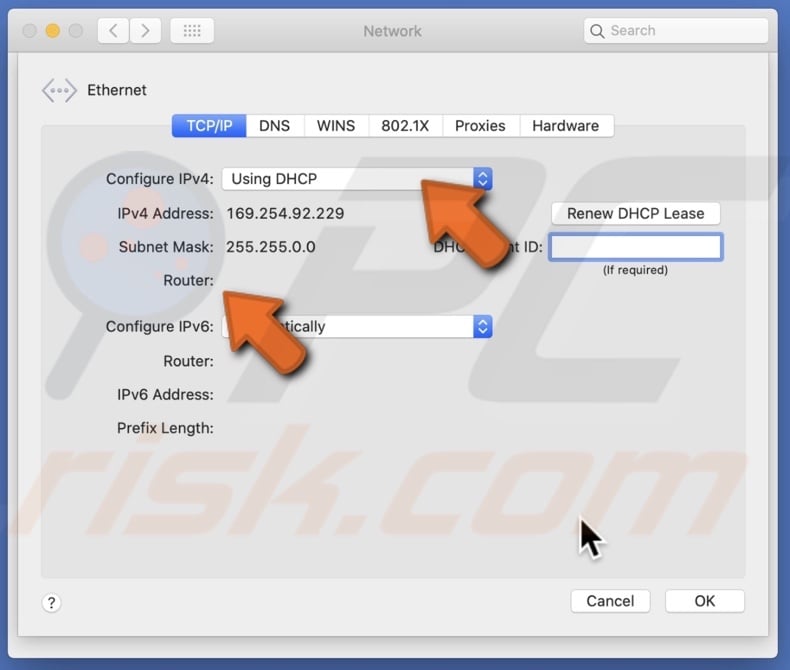
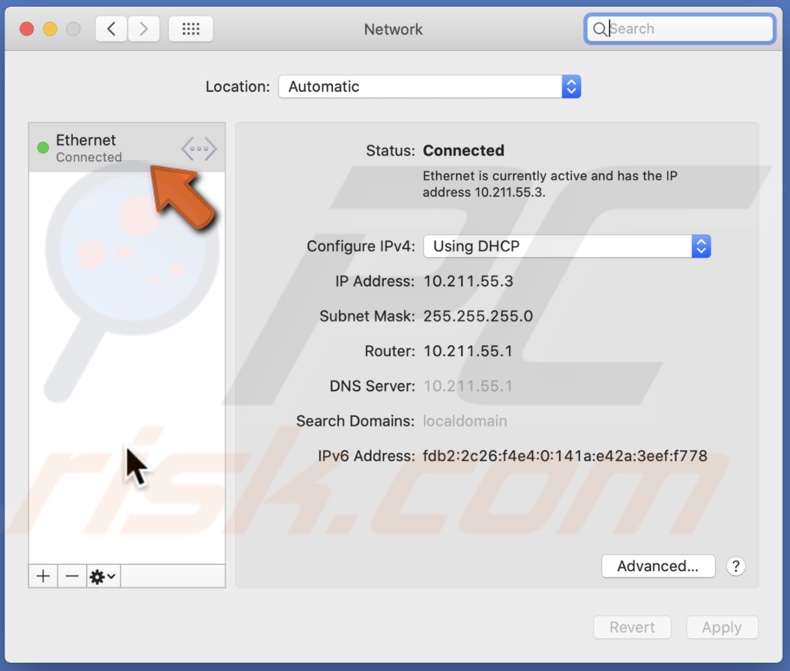
Check Your Network Preferences
First, you'll need to check TCP/IP settings.
1. Click on the Apple logo in the menu bar.
2. Go to "System Preferences."
3. Find and go to Network settings.
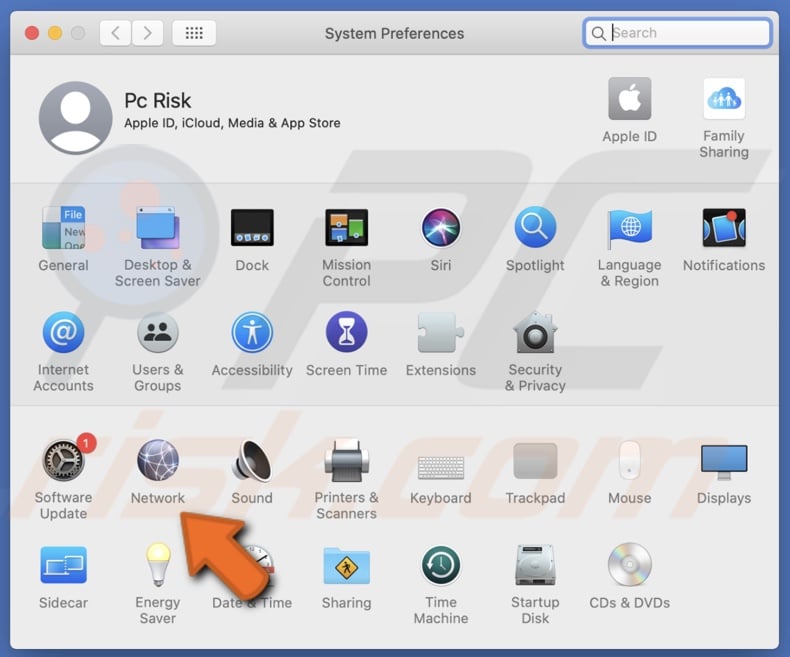
4. Click on the "Advanced" button.

5. Go to the TCP/IP tab.
If you see that Configure iPv4 is set to Using DHCP but Router is not set with any IP address, try the following method to fix the problem.
Reset Network Configuration
This method will reset your network configurations.
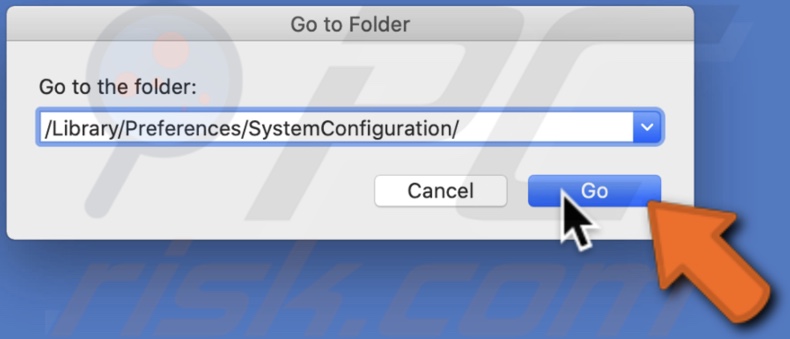
1. Launch Finder.
2. In the menu bar, click on "Go" and then click on "Go to Folder."
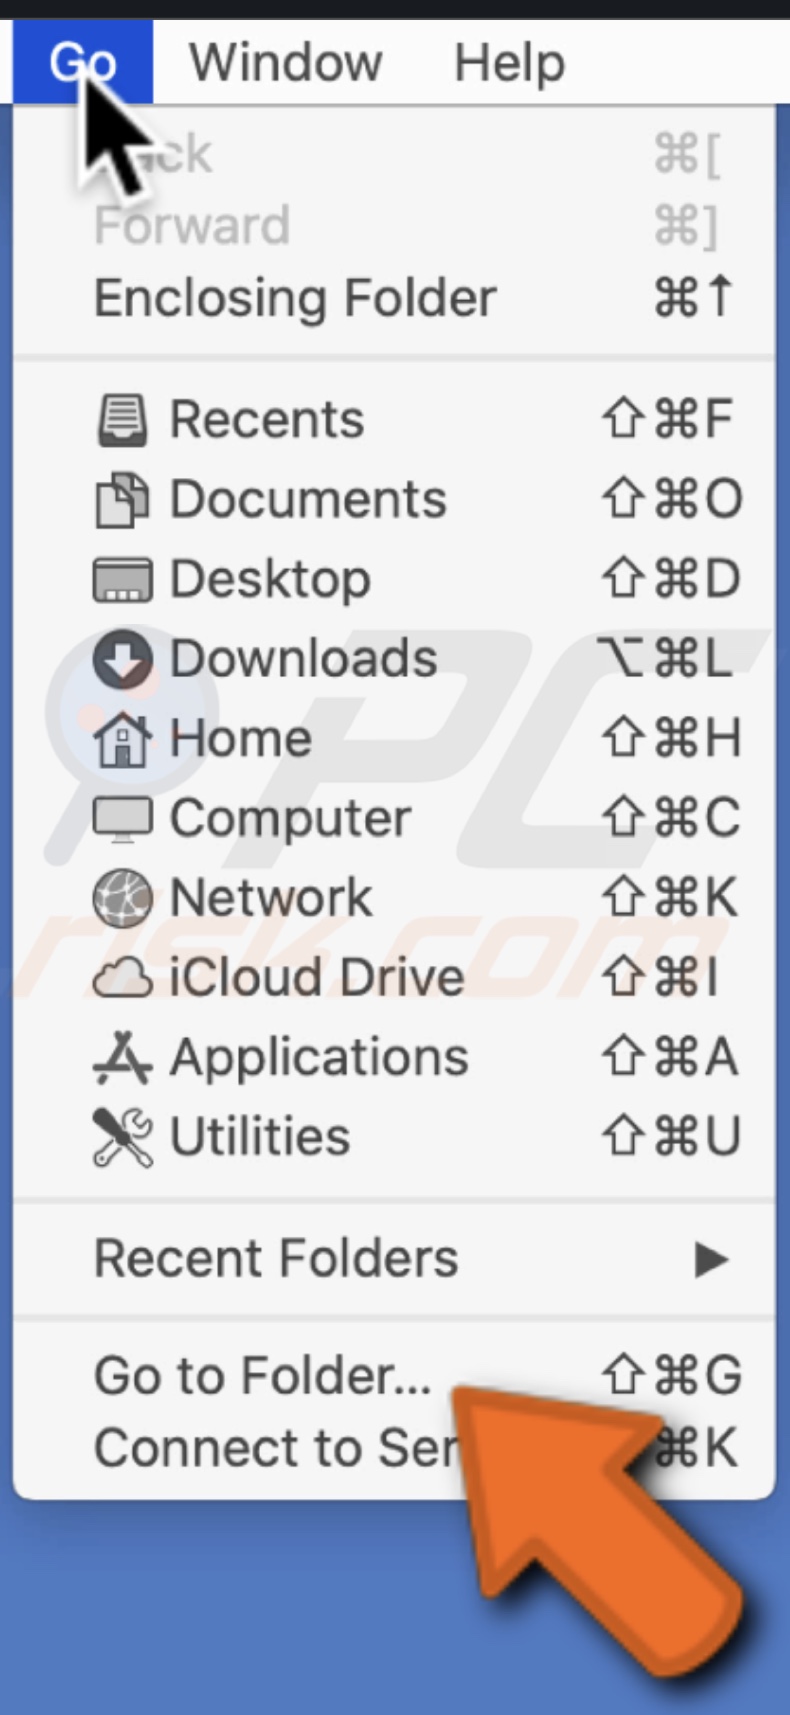
3. In the pop-up window enter the line: /Library/Preferences/SystemConfiguration/
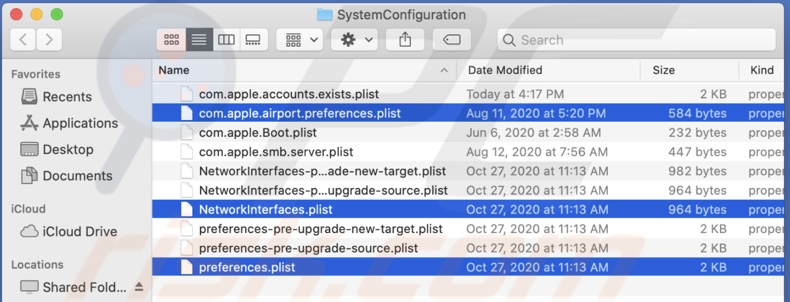
4. Delete these files:
com.apple.airport.preferences.plist
Networkinterface.plist
preferences.plist
5. Shut down your Mac and then power it back on.
6. Log in and connect your Wi-Fi.
7. Go to the TCP/IP setting again and check if the Router has an
After your Mac restarts, it should recreate the files that you deleted.
Renew DHCP Lease
Try renewing your DHCP lease on your Mac.
1. Click on the Apple logo in the menu bar.
2. Go to "System Preferences."
3. Find and go to the "Network" settings.
4. Select your Wi-Fi or Ethernet if it's not selected automatically.
5. Click on the "Advanced" button.
6. Go to the TCP/IP tab.
7. Next to IPv4 Address line, find and click on the "Renew DHCP Lease" button.
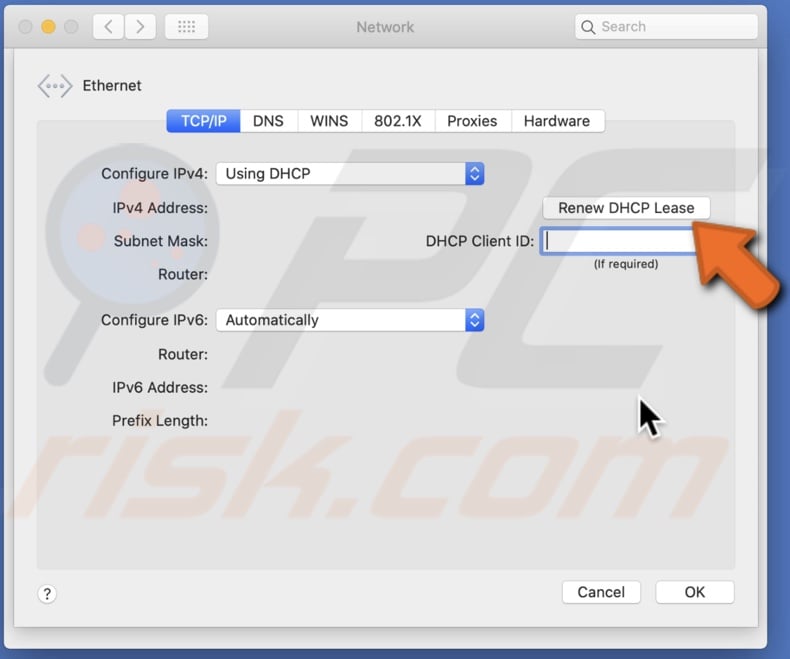
8. Click on "OK."
After the lease is renewed, check if you're able to connect to your network.
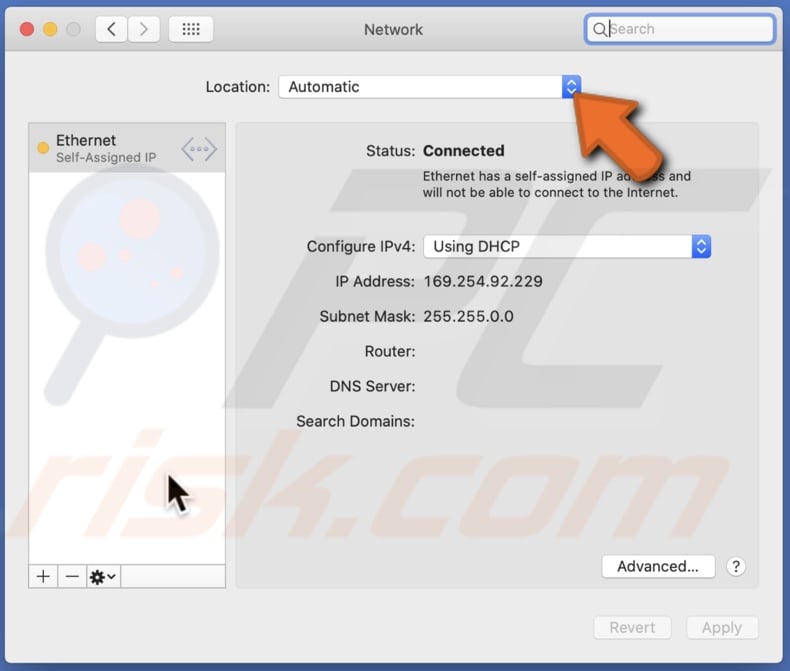
Create New Network Location
If renewing the DHCP lease didn't help, try creating a New Network Location and then renew the lease.
1. Click on the Apple logo in the menu bar.
2. Go to "System Preferences."
3. Find and go to the "Network" settings.
4. Next to "Location", click on the drop-down menu.
5. Click on "Edit Locations."
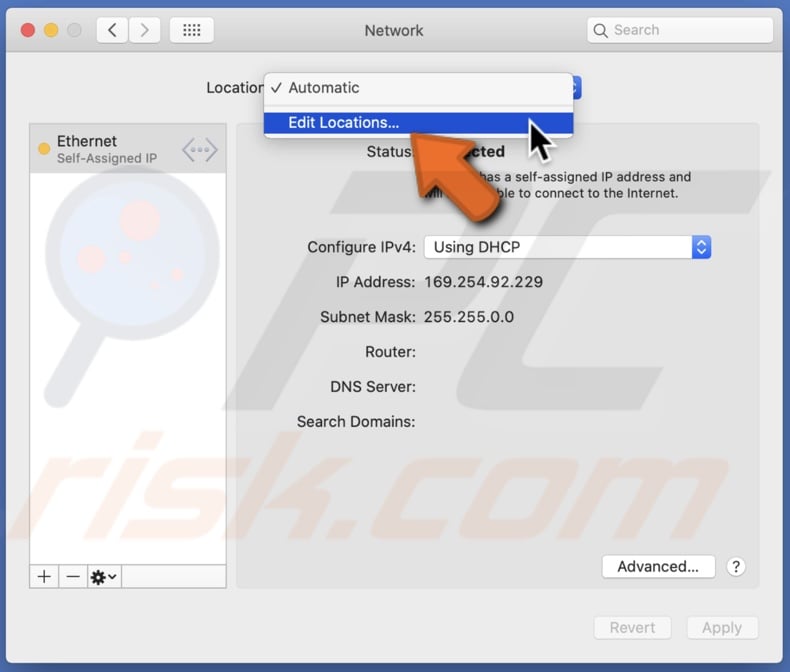
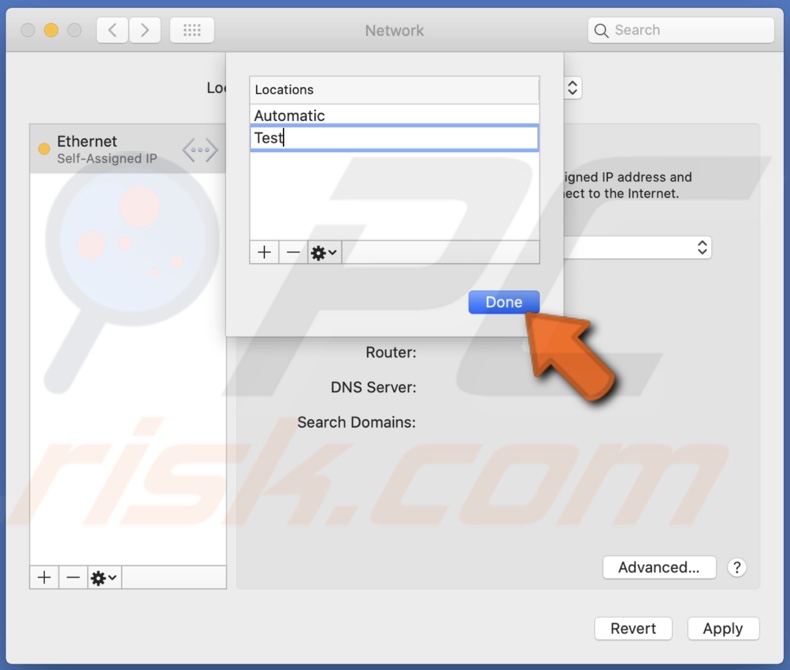
6. Click on the + icon to add New Location.
7. Type in the name for the New Network Location.
8. Click on "Done."
9. Select your Wi-Fi or Ethernet if it's not selected automatically.
10. Click on the "Advanced" button.
11. Go to the TCP/IP tab.
12. Next to IPv4 Address line, find and click on the "Renew DHCP Lease" button.
13. Click on "OK."
After the lease is renewed, check if you're able to connect to your network.
Reset The Firewall
As mentioned before, if you did any configuration changes to the system, your Mac's Firewall might have experienced configuration issues. Try to fix the problem by resetting the Firewall.
1. Launch Finder.
2. In the menu bar, click on "Go" and then click on "Go to Folder."
3. In the pop-up window, enter in: /Macintosh HD/Library/Preferences/
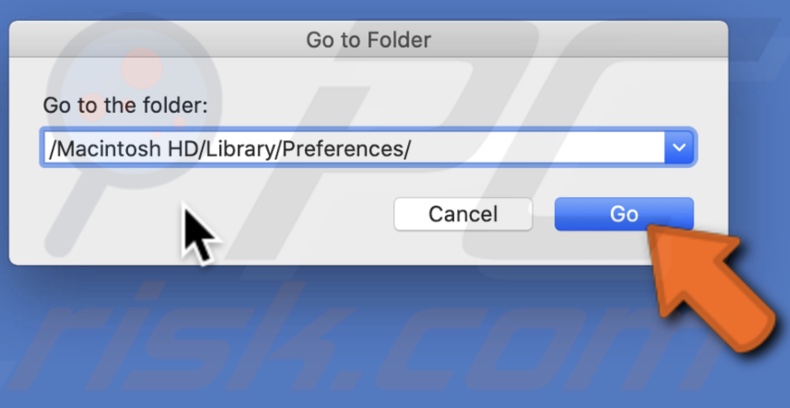
4. Delete file: com.apple.alf.plist
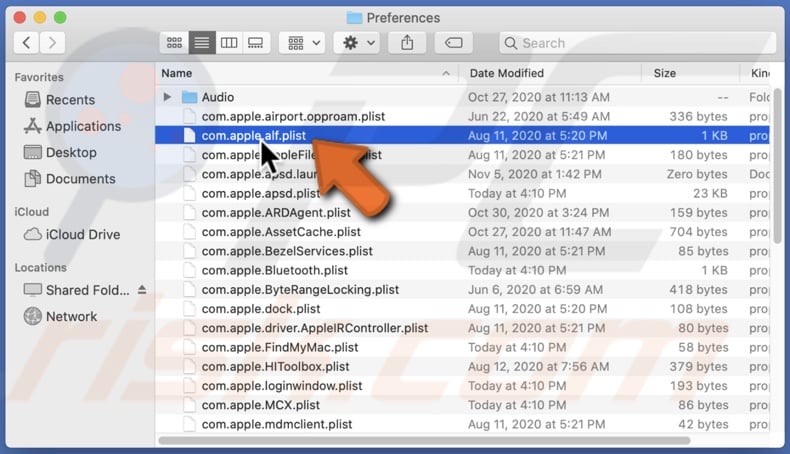
5. Shut down your Mac and then power it back on.
After the system boots, if you are asked to allow access to numerous programs and services, choose depending on your preferences and then try to connect to your network.
Set Service Order
You can try to set the interface order that connects to the internet.
1. Click on the Apple logo in the menu bar.
2. Go to "System Preferences."
3. Find and go to the "Network" settings.
4. Click on the gear icon at the bottom next to the + and - buttons.
![]()
5. Click on "Set Service Order."
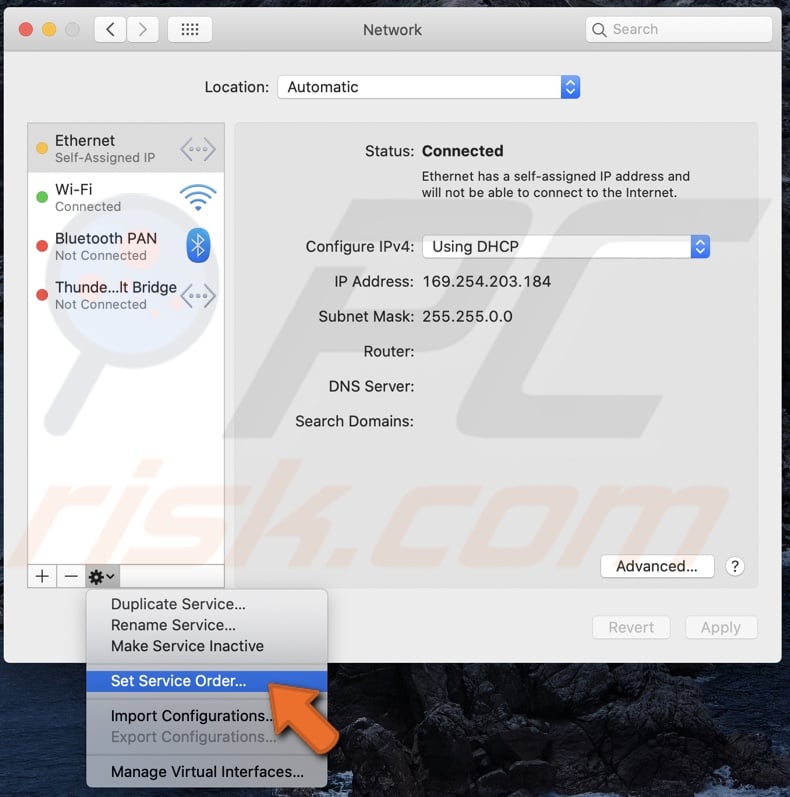
6. Drag services to the top of the list.
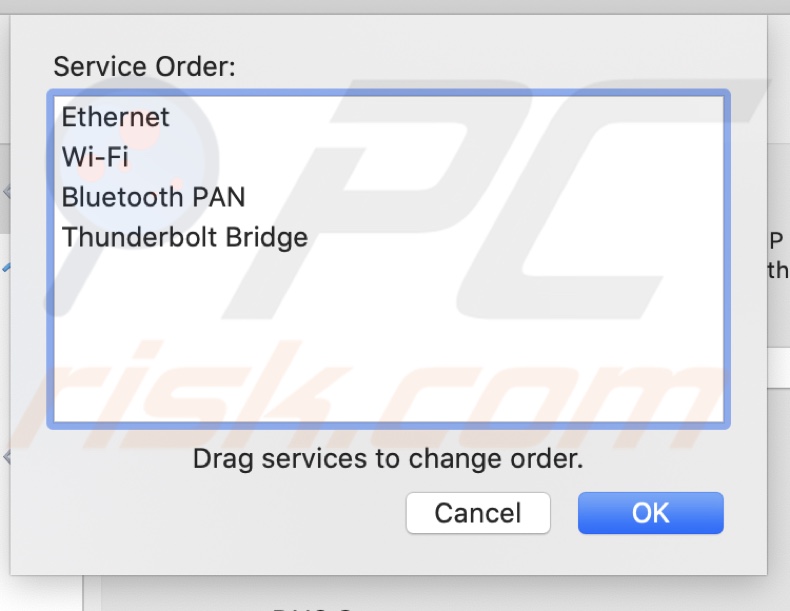
If you're using Wi-Fi, select the Wi-Fi and drag it to the top.
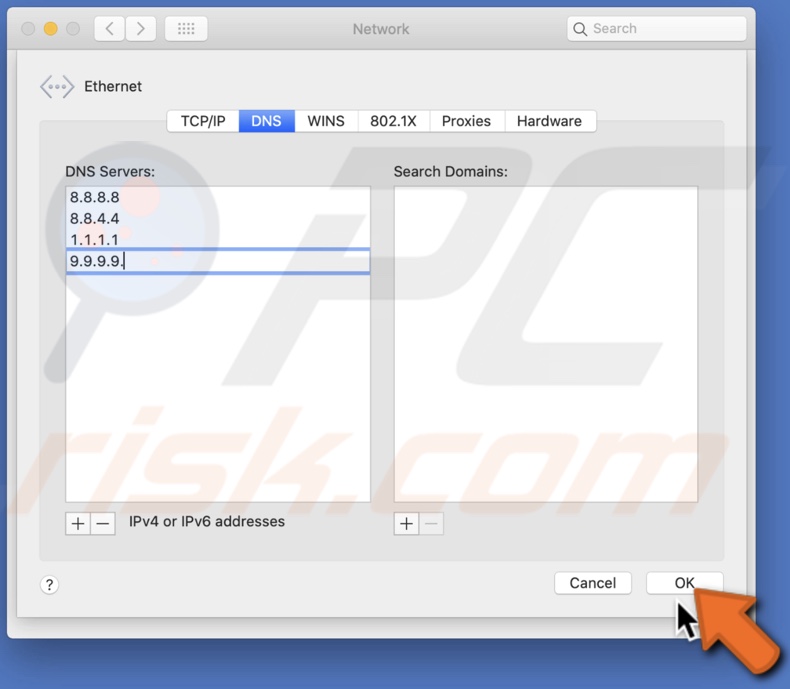
Change DNS Servers
Try changing the DNS servers.
1. Click on the Apple logo in the menu bar.
2. Go to "System Preferences."
3. Find and go to the "Network" settings.
4. Select your Wi-Fi or Ethernet if it's not selected automatically.
5. Click on the "Advanced" button.
6. Go to the "DNS" tab.
7. Click on the + icon.
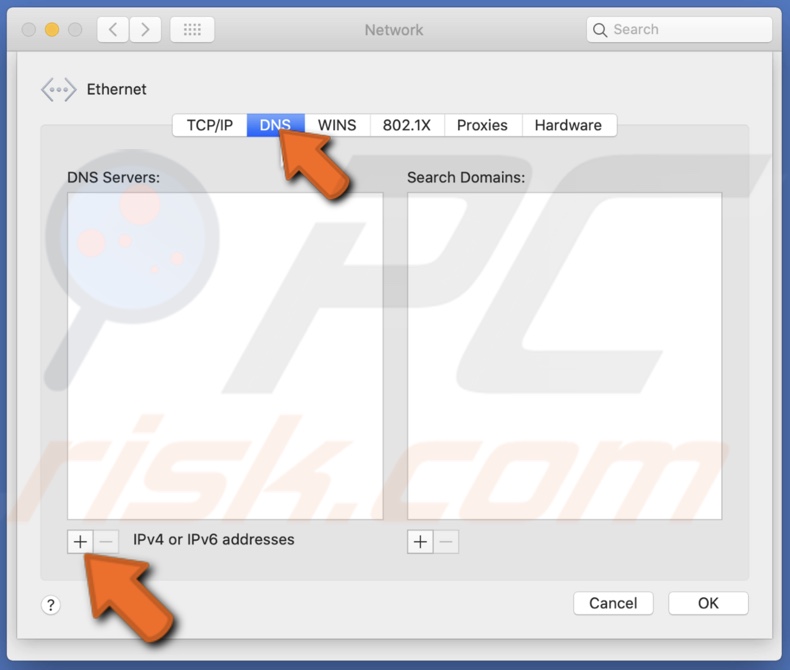
8. Add these numbers:
- 8.8.8.8
- 8.8.4.4
- 1.1.1.1
- 9.9.9.9
9. Click on "OK."
If you're still having problems, please contact the Apple Support team.
If any of these methods helped, let us know in the comments!
Share:

Karolina Peistariene
Author of how-to guides for Mac users
Responsible for collecting, analyzing, and presenting problem-solving solution articles related to macOS issues. Years of macOS experience combined with solid research and analyzing skills help Karolina provide readers with working and helpful solutions as well as introduce various features Mac has to offer.
▼ Show Discussion