How to Convert HEIC Images to JPG on Mac

(updated)
Get Free Scanner and check your computer for errors
Fix It NowTo fix found issues, you have to purchase the full version of Combo Cleaner. Free trial available. Combo Cleaner is owned and operated by Rcs Lt, the parent company of PCRisk.com read more.
5 Easy Ways to Convert HEIC Images to JPG on Mac
If you only use iOS and macOS, then there is a high chance that you didn't encounter any problems and, for the most part, didn't even notice when an image is in HEIC or JPG format because usually, it doesn't matter.
Mac and other Apple devices, as well as Samsung and Google, have successfully adopted HEIC, and most social platforms will automatically convert HEIC files to JPG. The same goes when sharing HEIC files with non-Apple device users.
Still, sometimes you might run into problems using images in this format. There might be issues with Windows OS and third-party photo apps as they don't support HEIC yet. Converting your images to JPG would mean that you can use your photographs with any software you usually do.
Until HEIC becomes the standard, you might want to know how to easily convert HEIC images to JPG format on your Mac, so when an issue arises with incompatibility, you can quickly resolve it.
Video On How To Convert HEIC Images to JPG on Mac
Table of Contents:
- Introduction
- Method 1. Drag And Drop
- Method 2. Export Images In Different Formats
- Method 3. Export From The Preview App
- Method 4. Exporting With Quick Action Function
- Method 5. Online Conversion Tools
- Video On How To Convert HEIC Images to JPG on Mac
Download Computer Malware Repair Tool
It is recommended to run a free scan with Combo Cleaner - a tool to detect viruses and malware on your device. You will need to purchase the full version to remove infections. Free trial available. Combo Cleaner is owned and operated by Rcs Lt, the parent company of PCRisk.com read more.
Drag And Drop
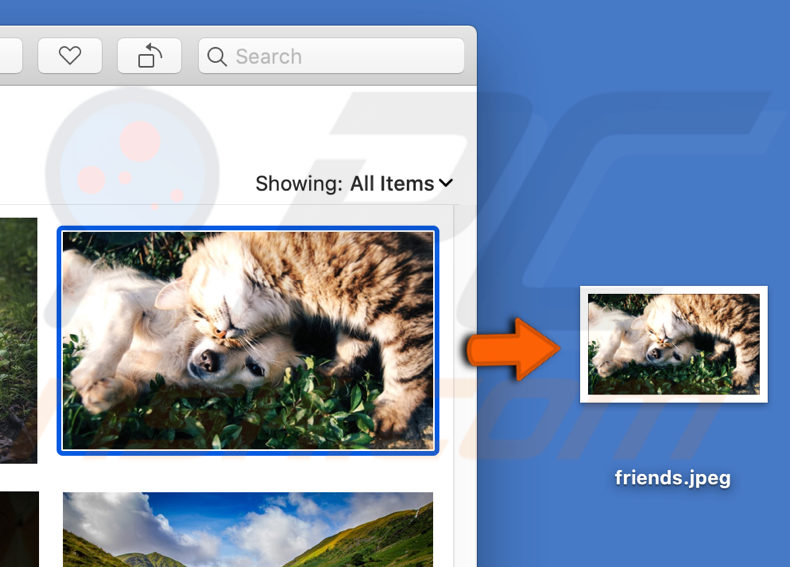
The Photos App has an effortless way to convert HEIC photos to JPG by dragging and dropping photos from the app directly to your desktop.
1. Open the Photos app from your Launchpad.
2. Find your picture.
3. Click on your picture, drag it to the desktop or some other folder within Finder, and then drop it.
Export Images In Different Formats
You can also convert images in the Photos app via the export function. You can use Export when you need to change photo configuration settings.
1. Open the Photos app from your Launchpad.
2. Select image or images.
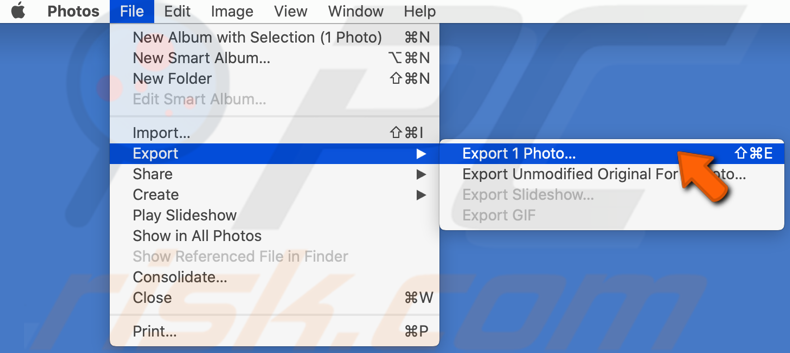
3. In the menu bar, click on "File".
4. Click on "Export" and then "Export Photo".
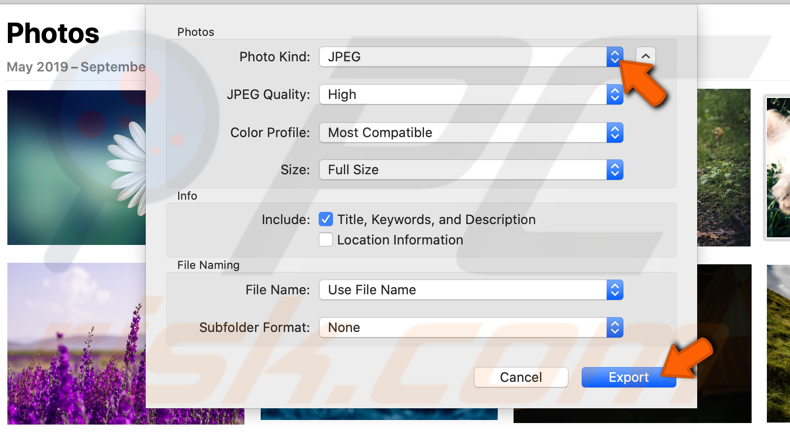
 5. In the dialog box, choose JPEG, preferred image quality, and tweak other configurations as desired.
6. Click on "Export".
Export From The Preview App
Convert HEIC photos to JPEG prom the built-in Preview app using the export function.
1. Open Finder.
2. Find a folder with stored HEIC photos.
3. Select image or images.
4. Right-click on the selected photo/photos.
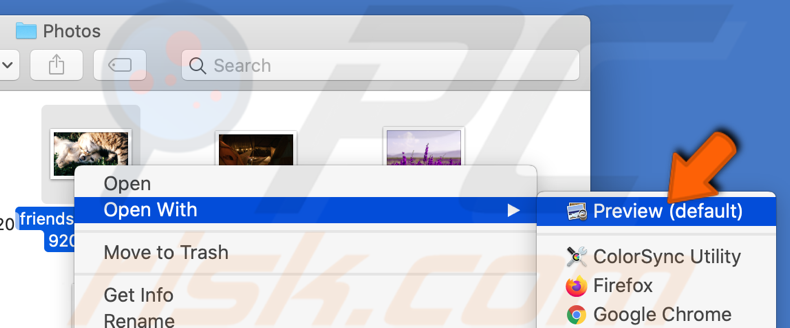
5. Choose "Open With" and then choose "Preview".
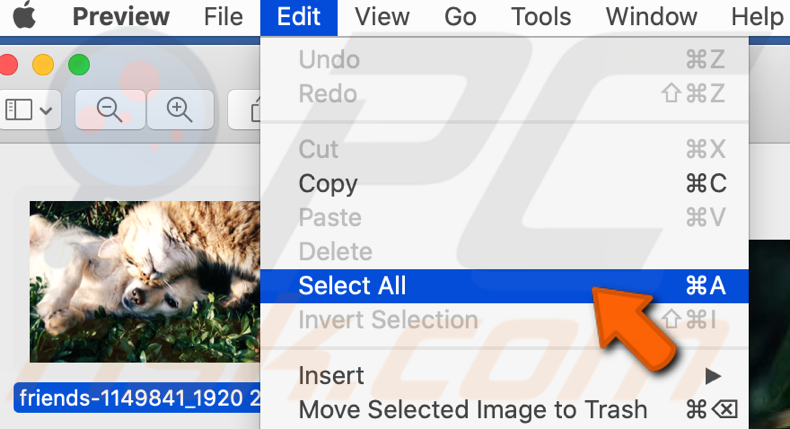
 6. In the menu bar, click on "Edit" and select "Select all".
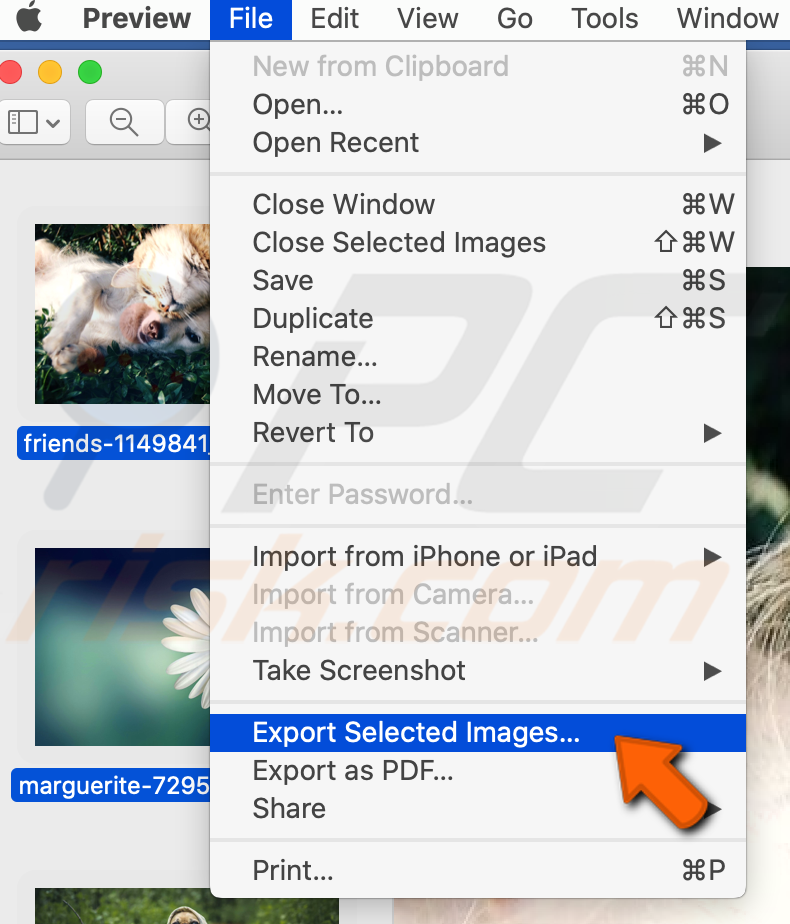
 7. Then click on "File" and select "Export Selected Images".
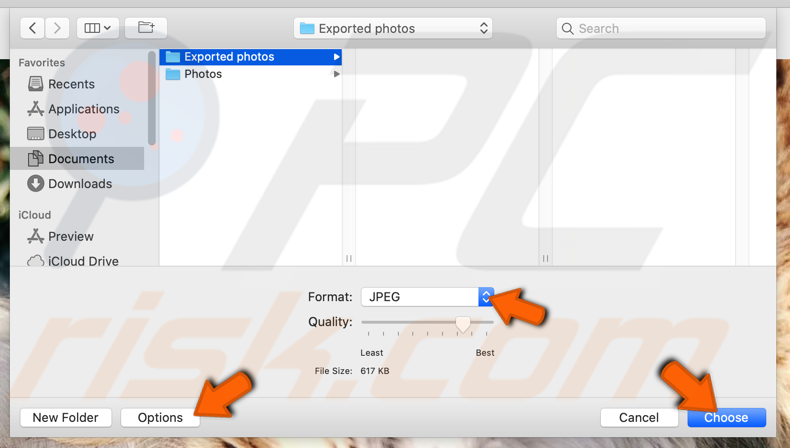
 8. Select the export folder, click on "Options", select JPEG from the format menu, and choose.
Execute the 6th step only if you choose more than one photo.
Exporting With Quick Action Function
To use Quick Action to quickly convert HEIC to JPG, first, you need to set up Quick Action, and then you'll be able to convert your photos easily.
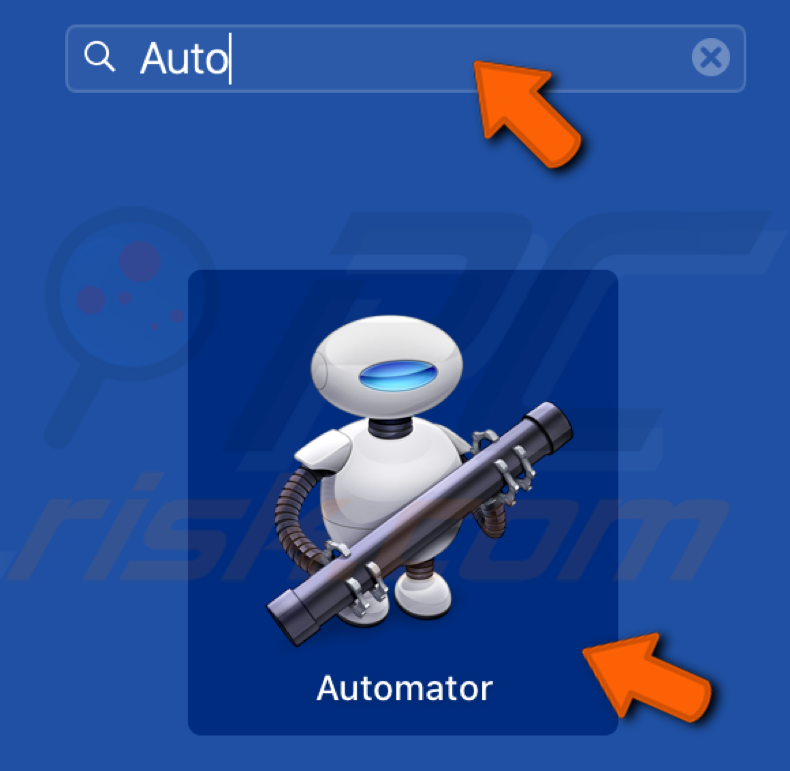
1. Launch Automator from the Launchpad.
 2. Click "New Document".
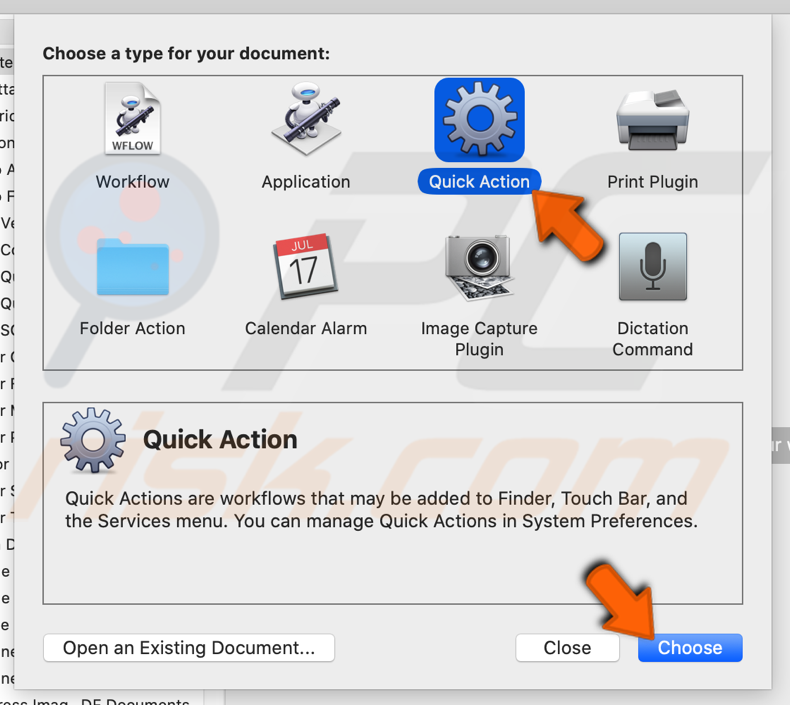
3. From the template list, choose "Quick Action" and click on "Choose".
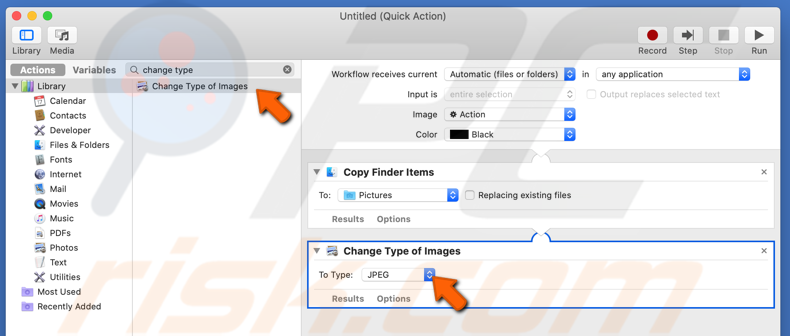
 4. In the search bar, type "Copy Finder".
5. Drag "Copy Finder Items" to the right side of the screen.
 6. In the search box, type "change type".
7. Drag "Change Type of Images" to the right side of the screen.
8. Change type to JPEG.
 9. In the menu bar, click "File" and "Save".
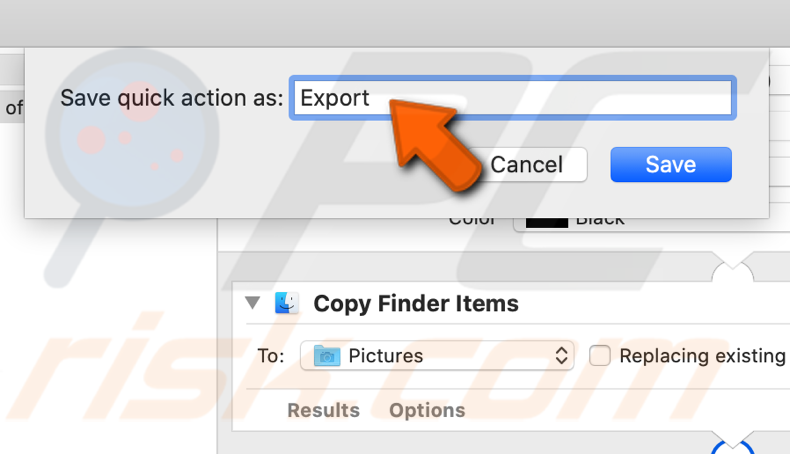
10. Name your action “Export” or "Export to JPG" and click “Save” again.
 11. Open the folder with your HEIC image.
12. Right-click on your image, choose "Quick Action" and "Export".
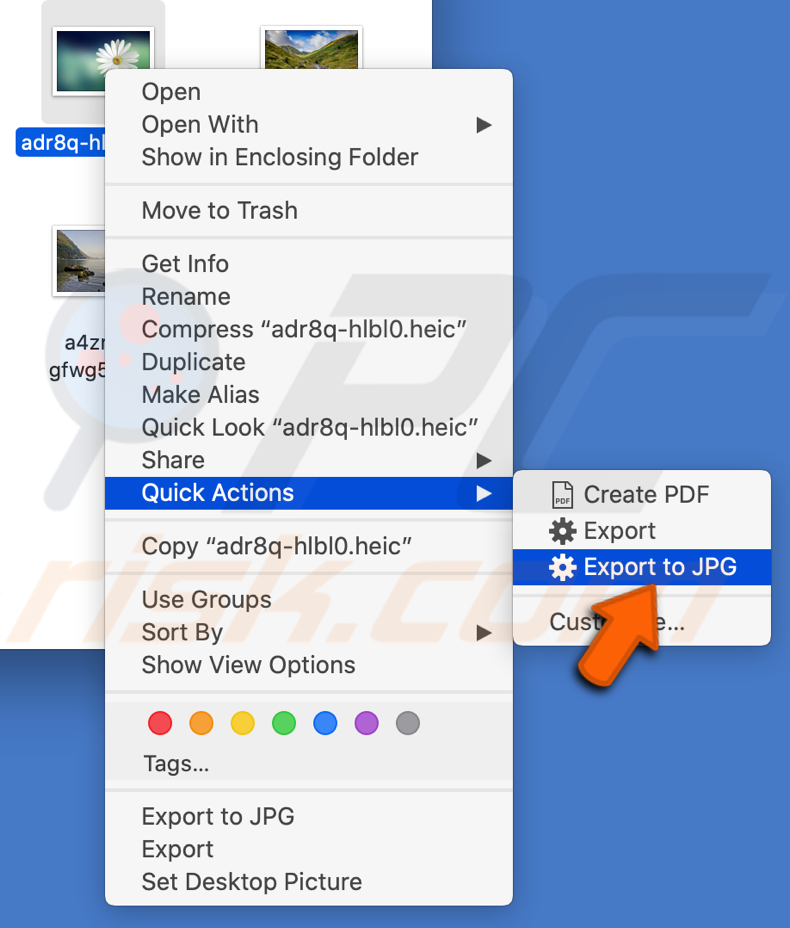
If you want to convert images without creating a copy, skip steps 4 to 6.
Online Conversion Tools
If you have an older macOS version and none of the above methods helped, you can always convert your HEIC files with online HEIC converter tools. There are plenty of free and paid conversion tools. Choose the one that’s best for you, and you’re good to go.
Share:

Karolina Peistariene
Author of how-to guides for Mac users
Responsible for collecting, analyzing, and presenting problem-solving solution articles related to macOS issues. Years of macOS experience combined with solid research and analyzing skills help Karolina provide readers with working and helpful solutions as well as introduce various features Mac has to offer.
▼ Show Discussion