How to Restore Files From Time Machine Backup on Mac?

(updated)
Get Free Scanner and check your computer for errors
Fix It NowTo fix found issues, you have to purchase the full version of Combo Cleaner. Free trial available. Combo Cleaner is owned and operated by Rcs Lt, the parent company of PCRisk.com read more.
How to Restore Files and Software Using Time Machine Backup on Mac
Time Machine creates a backup of the Mac operating system, including all files and folders, system preferences, installed applications, and others. The tool should be enabled on all Mac computers since it is one of the easiest ways to protect your data in case of the operating system or internal storage failure or corruption.
This application takes periodic snapshots of all data and applications and stores them on an external device. The snapshots are taken hourly, daily, and weekly. This could consume a lot of storage space. However, when disks are running low, Time Machine automatically removes the oldest backup files and replaces them with the most recent ones.
This article describes methods to restore files from Time Machine snapshots and a complete system backup.
Table of Contents:
- Introduction
- Recover corrupted or missing files via Time Machine backup
- Reach backups without connected Time Machine's storage
- Transfer files using Time Machine backup
- Restore operating system from Time Machine's backup
- Boot your Mac from the Time Machine backup
Download Computer Malware Repair Tool
It is recommended to run a free scan with Combo Cleaner - a tool to detect viruses and malware on your device. You will need to purchase the full version to remove infections. Free trial available. Combo Cleaner is owned and operated by Rcs Lt, the parent company of PCRisk.com read more.
Recover corrupted or missing files via Time Machine backup
If you have enabled the Time Machine application, you can restore all files. This function can save time if a file modification results in an unexpected error or accidentally saves essential information. Time Machine stores the current version of all data when the snapshot was taken.
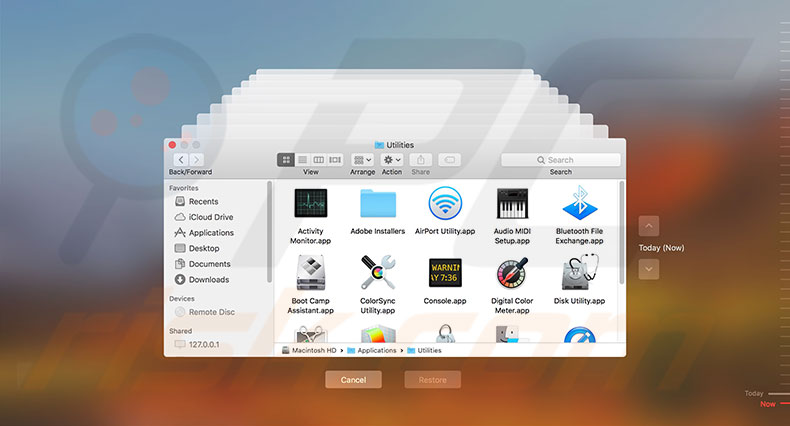
1. To reach files saved within snapshots, first launch the Time Machine application by using Spotlight. Press the keyboard shortcut of Command and Spacebar and type Time Machine. Alternatively, go to the Applications folder via Finder to launch the Time Machine application.
2. Here, you can browse through the list of backups sorted from oldest to newest by clicking the up and down arrows on the screen.
3. When you find the file you are looking for, select and press Spacebar to preview.
4. When you are sure this is the correct file, click the Restore button.
5. If you cannot see the snapshot, click on the Cloud icon to download the current snapshot. You can reach and restore files from that particular snapshot, even if Time Machine's external storage is not connected to your computer.
If you seek specific information from a text-based file, simply select and use the copy/paste function to select only the required lines.
Reach backups without connected Time Machine storage
You might encounter a situation whereby you cannot connect the external storage used for Time Machine backups. Fortunately, Time Machine can recover from this situation. You can access the last backup snapshot without the connected storage device when you launch the Time Machine application. You can restore any file from a particular snapshot - this might be useful if the external storage is unavailable, in a different location, etc.
Transfer files using Time Machine backup
As mentioned above, Time Machine's backups are helpful in various situations. Although you can restore earlier versions of your files or perform a complete system restore, it may be useful to transfer your data from one Mac computer to another.
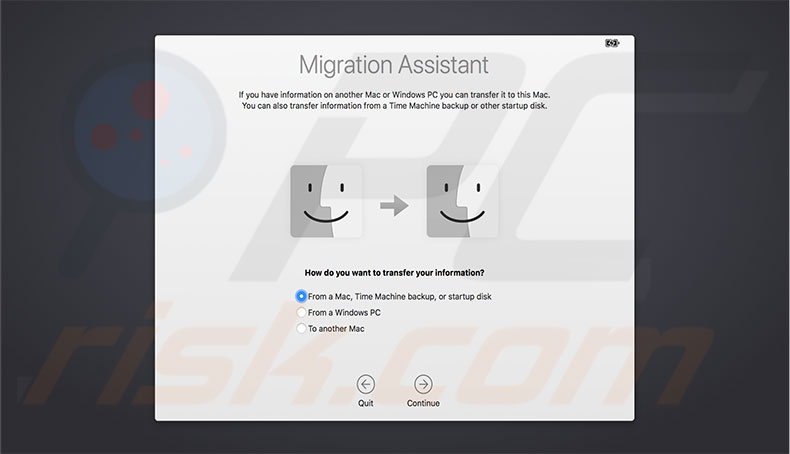
For example, if your old Mac is not working and you wish to set up a new machine, external storage with Time Machine backups is an effective way to restore your favorite applications, calendar events, etc. If both computers are still working, consider using the Migration Assistant tool, which automatically transfers data between two Macs.
Furthermore, this tool also works with Time Machine backups. If you wish to retain the latest version of the operating system but require the data from your old computer, the Migration Assistant will add all content from Time Machine backups to your new Mac.
1. To transfer content from a backup using this application, connect your external storage with Time Machine's backup.
2. Then launch it using Spotlight. Simply press the keyboard shortcut of Command and Spacebar and type Migration Assistant. Alternatively, launch Finder and go to the Utilities folder under Applications.
3. When the application starts, click Continue, select to transfer data from Time Machine backup, and click Continue.
4. You may be prompted to enter a password to confirm your actions. Enter your account password. A list with all existing backups in chronological order will pop up.
5. Choose the most recent (or other option) and click Continue. The tool will begin to copy your data.
Depending on the size of backup and speed of both external storage and internal hard disks, this process may take a few minutes up to several hours to complete.
Restore operating system from Time Machine backup
If you wish to completely restore your operating system from a backup, you must enter macOS Recovery. This is one of the easiest ways to revert the operating system to an earlier version. It might also be an efficient solution when your computer software is struggling. In addition, restoring the whole operating system will help if your computer becomes infected with a virus or malware.
1. To access the Recovery menu, connect your external storage (containing the backup files) and shut down the Mac.
2. Start it up, and after the startup chime, press and hold down Command and R.
3. Keep holding these keys until the Apple logo appears. Release them and wait until the macOS Utilities pop-up window appears.
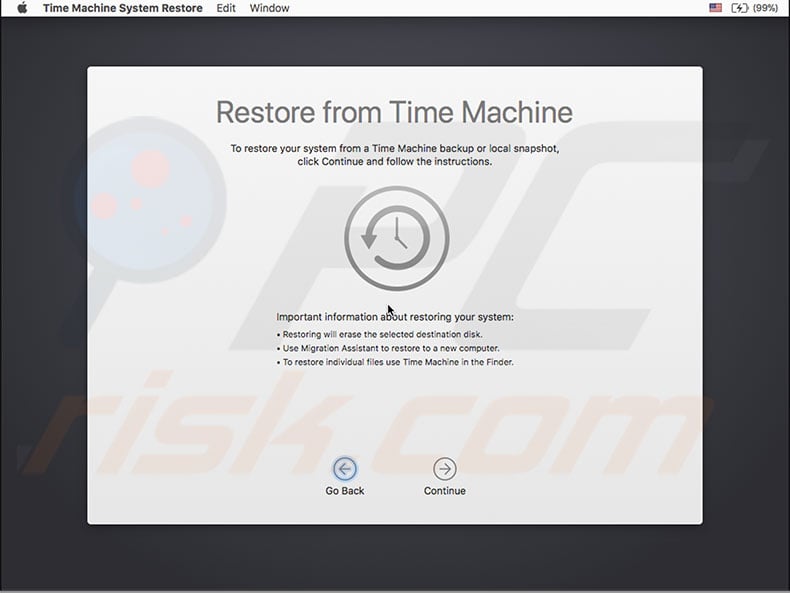
4. From the list of options, choose Restore from Time Machine backup and click Continue.
5. Select the volume containing your backup file and then select the backup file by checking the date, time, and macOS version. When the process completes, the Mac will restart automatically.
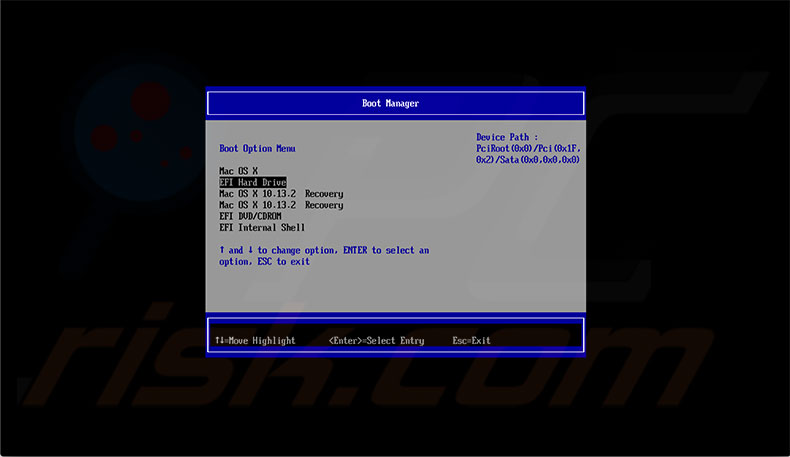
Boot your Mac from the Time Machine backup
Starting your computer from the Time Machine backup is helpful when trying to troubleshot computer problems. If you are unsure if your operating system is struggling, test it by booting your computer from Time Machine backup:
Shut down the computer, hold down the Option (Alt) key to enter the Startup Manager screen, and choose EFI boot as your startup disk.
Share:

Karolina Peistariene
Author of how-to guides for Mac users
Responsible for collecting, analyzing, and presenting problem-solving solution articles related to macOS issues. Years of macOS experience combined with solid research and analyzing skills help Karolina provide readers with working and helpful solutions as well as introduce various features Mac has to offer.
▼ Show Discussion