How to Manage and Disable Web Notifications on Mac?

(updated)
Get Free Scanner and check your computer for errors
Fix It NowTo fix found issues, you have to purchase the full version of Combo Cleaner. Free trial available. Combo Cleaner is owned and operated by Rcs Lt, the parent company of PCRisk.com read more.
How to Manage and Remove Website Notifications on Mac Computers Using Safari, Chrome, or Firefox?
With Mac OS X Mavericks, Apple introduced a website feature to apply push notifications directly to the computer desktop. This kind of notification appears in the top right corner of the window and within the notification center. The appearance of these notifications is also now modified. When clicking them, Safari automatically loads the web page.
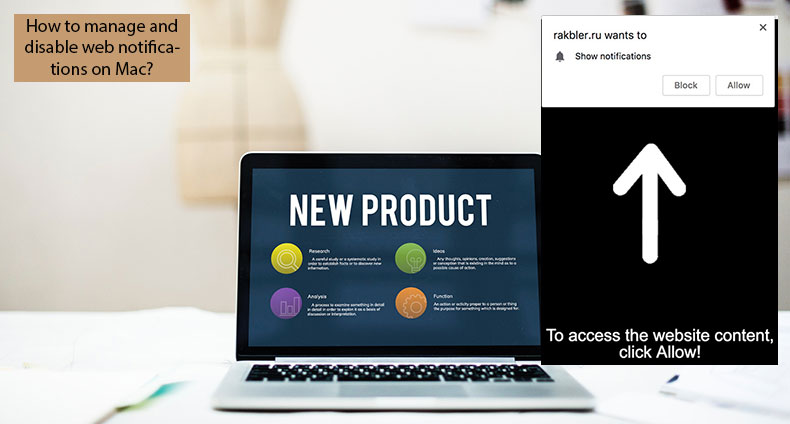
This may seem like a great feature. However, most current websites offer this functionality. Therefore, you might experience several notifications that you do not require and are of no interest. You can adjust permissions to display notifications via a straightforward method in Safari or visit Mac System Preferences.
In this article, we describe both methods to manage website notifications and provide more detailed information about how to modify how they appear and deal with potentially unwanted programs (PUPs) that display spam-based notifications.
Video showing How to Manage Website Notifications via Safari on Mac?
Table of Contents:
- Introduction
- Manage website notifications permissions via Safari
- Manage website notifications permissions on Google Chrome
- Disable website notifications on Mozilla Firefox
- Modify the appearance of notifications on Mac
- Clear computer with Combo cleaner
- Video showing How to Manage Website Notifications via Safari on Mac?
Download Computer Malware Repair Tool
It is recommended to run a free scan with Combo Cleaner - a tool to detect viruses and malware on your device. You will need to purchase the full version to remove infections. Free trial available. Combo Cleaner is owned and operated by Rcs Lt, the parent company of PCRisk.com read more.
Manage website notifications permissions via Safari
We begin with the most straightforward method to adjust or altogether disable push notifications.
1. To reach the settings, you must launch the Safari web browser application using the Dock icon, launchpad, or Spotlight.
2. Once you see the Safari window, click on Safari in the menu bar at the top of the screen and select Preferences. Alternatively, you can use the keyboard shortcut of Command and Comma (,).
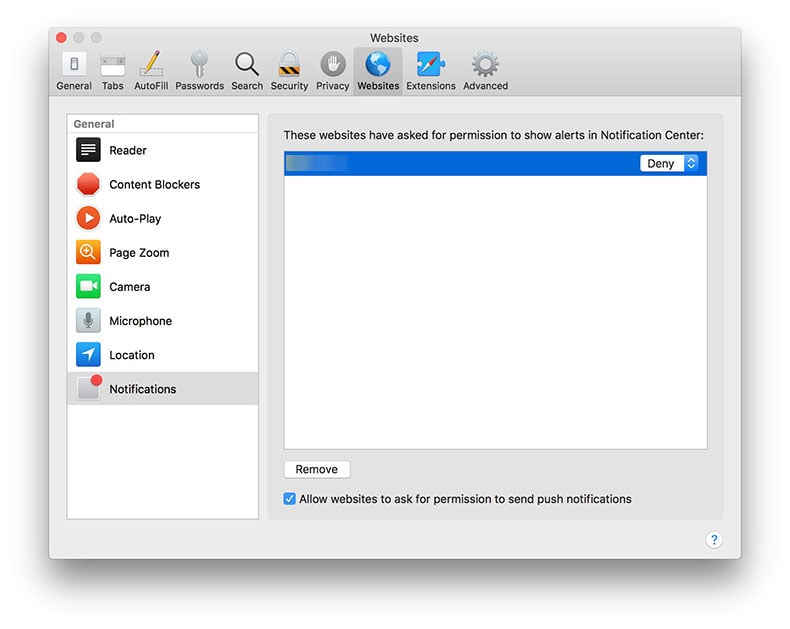
3. In Preferences, select the Websites tab, and then choose Notifications from the left sidebar. You will find a list of visited websites offering the notifications function.
4. In each line, a drop-down menu provides an Allow and Deny option. Decide whether you would like to receive notifications from a specific website. You can also remove any or all websites from the list with the Remove button.
5. To select several websites, hold down Command.
If you wish to select all items from the list, press the keyboard shortcut of Command and A.
Furthermore, if you wish to prevent Safari from asking about permissions to display notifications, remove the checkmark from the box next to 'Allow websites to ask for permission to send push notifications'.
Manage website notifications permissions on Google Chrome
If you are using the Google Chrome browser application and wish to disable various website notifications:
1. Launch the browser and click on three dots at the top right corner of the window.
2. Then select Settings from the pop-up menu.
3. In the new window, scroll to the bottom, and then click on Advanced settings.
4. Navigate the Privacy & Security category and click on Content Settings.
5. Now click on Notifications.
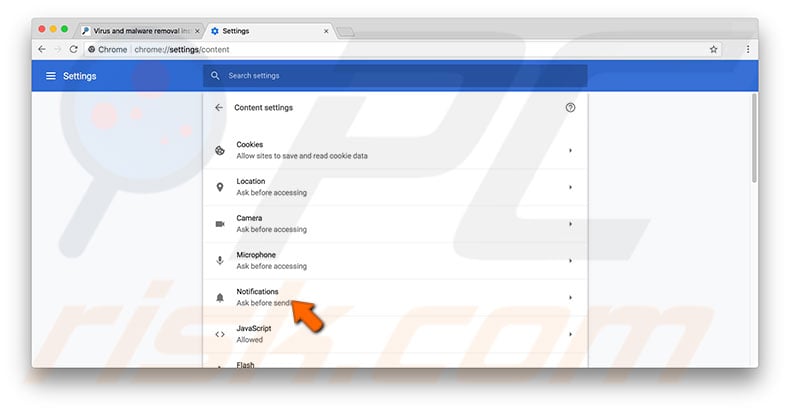
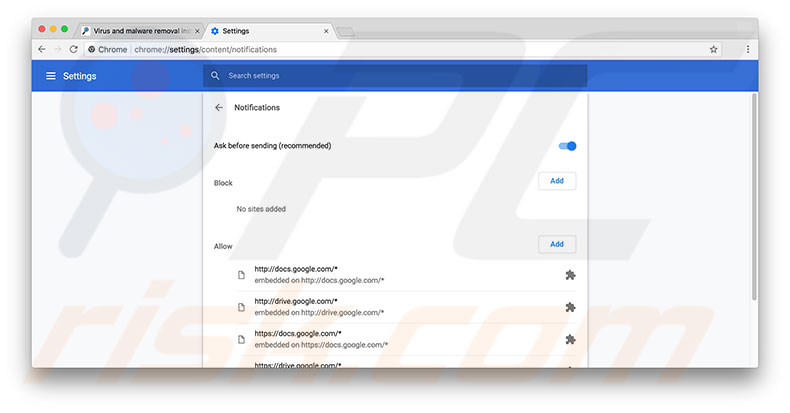
6. Finally, when you have reached the section to adjust notification permissions, simply click on the three dots icon (similar to Chrome's menu icon), and choose Allow, Edit, or Remove.
7. If you click the Edit option, you will be able to change the URL address.
Disable website notifications on Mozilla Firefox
If you use the Mozilla Firefox browser, the way to change notification permissions is somewhat different.
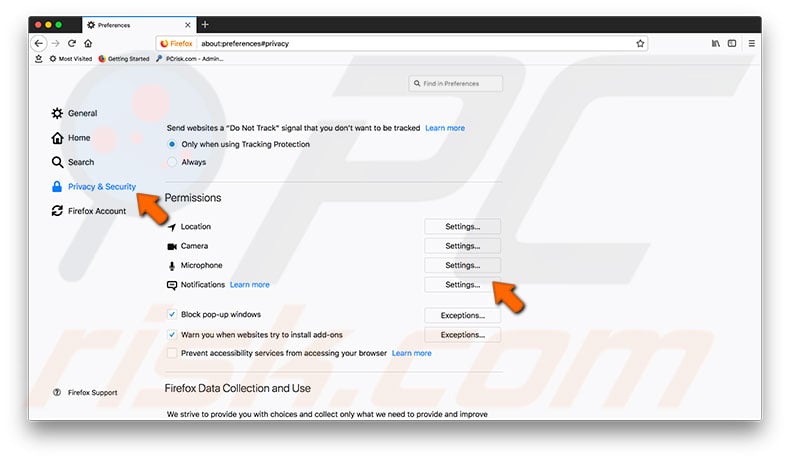
1. First, launch the application, click on the three bars menu icon, and then select Preferences. Alternatively, simply press the keyboard shortcut of Command and Comma (,).
2. Now choose Privacy & Security from the left-hand bar.
3. In the main window, scroll down until you find the Permissions section.
4. Click on the Settings.. button next to Notifications.
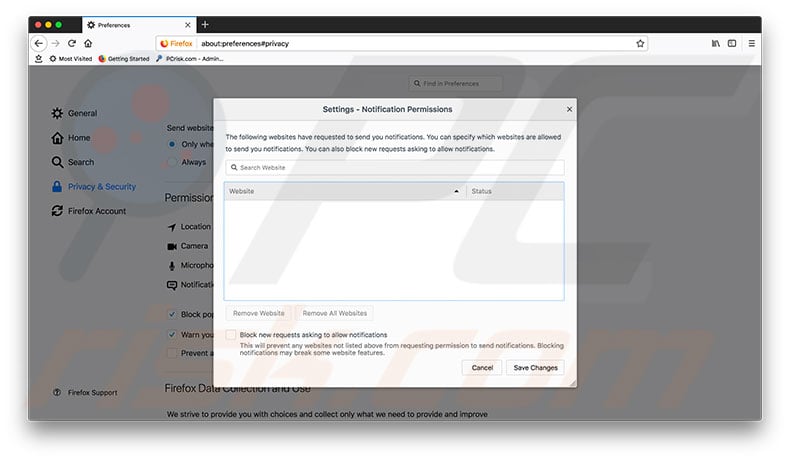
5. Here, you can change permissions and/or remove the URL address from the list. In addition, below the list, you will find an option called 'Block new requests asking to allow notifications' - enabling this option will disable all incoming requests to allow website notifications. Therefore, you will not be prompted to grant permission to notifications from any website you visit.
Modify the appearance of notifications on Mac
As mentioned above, you can choose the appearance of notifications and apply several additional options. This method works with all application-related notifications.
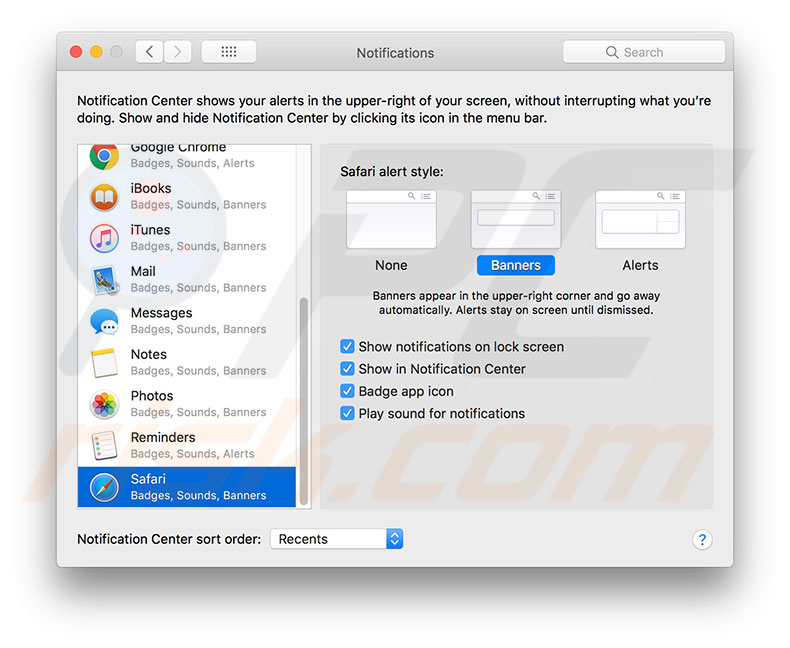
1. To begin, click on the Apple logo in the menu bar at the top of the screen and select System Preferences.
2. Open the Notifications pane, and then click on Safari in the left-hand panel.
3. In the main window, you can choose None, Banners, or Alert style notifications. Additional settings include enabling notifications on the lock screen, notification center, display badge app icon, and play sounds. Detailed information about Notifications you will find in this article.
Clear computer with Combo cleaner
An urgent problem has recently emerged whereby cybercriminals use push notifications to hide software that infects Mac computers. Potentially unwanted programs and malicious software might display notifications and various ads within the browser and sometimes in the notifications center.
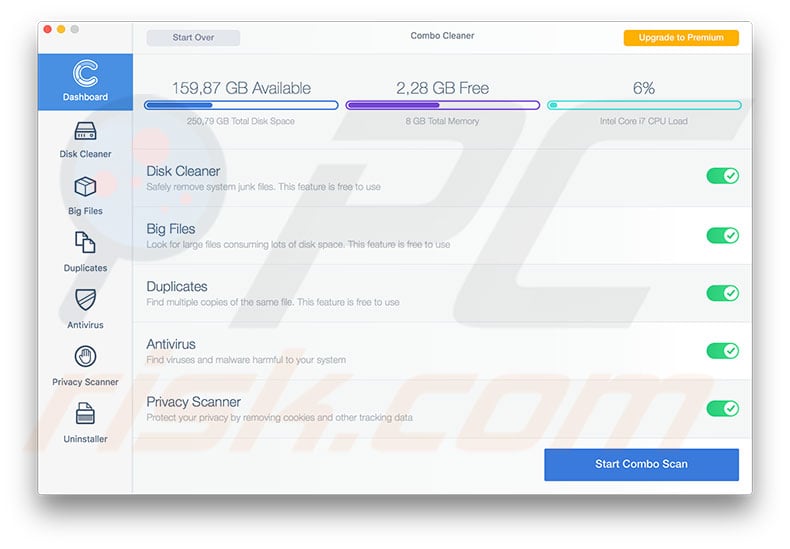
To scan and clear the system, we recommend Combo Cleaner. This software contains two virus scan engines, checks for Mac-based malware infections, and searches for generic PC security threats. The detailed review you will find in this article.
Share:

Karolina Peistariene
Author of how-to guides for Mac users
Responsible for collecting, analyzing, and presenting problem-solving solution articles related to macOS issues. Years of macOS experience combined with solid research and analyzing skills help Karolina provide readers with working and helpful solutions as well as introduce various features Mac has to offer.
▼ Show Discussion