How to Reset Your Mac to Default Settings?

(updated)
Get Free Scanner and check your computer for errors
Fix It NowTo fix found issues, you have to purchase the full version of Combo Cleaner. Free trial available. Combo Cleaner is owned and operated by Rcs Lt, the parent company of PCRisk.com read more.
How to Reset Your Mac (macOS or OS X) to Default Settings and Erase the Disk?
You would never wish to make your iCloud or personal hard disk data public as a Mac user. Therefore, if you are selling/giving away your Mac or iOS device, you must wipe all data from your computer or mobile device. The best way is to perform a factory reset, which may be useful when your computer or mobile device has problems.
You can delete all data manually, but this will take a great deal of time, and you might not be able to delete certificates and licenses you have purchased and added to your apps. A factory reset will return your mac or mobile device to the default settings - wiping all data will make it appear as if it has just been unpacked from the box. This article demonstrates the factory reset with other tips and information.
Video showing How to Reset Your Mac to Default Settings
Table of Contents:
- Introduction
- Check works before you start performing any factory reset
- Disable FileVault
- Remove iTunes Authorizations
- Deactivate programs and remove authorizations
- Sign Out your iCloud
- Factory Reset MacBook Air and other Macs using macOS Recovery
- Restore from Time Machine backup
- Video showing How to Reset Your Mac to Default Settings
Download Computer Malware Repair Tool
It is recommended to run a free scan with Combo Cleaner - a tool to detect viruses and malware on your device. You will need to purchase the full version to remove infections. Free trial available. Combo Cleaner is owned and operated by Rcs Lt, the parent company of PCRisk.com read more.
Check works before you start performing any factory reset.
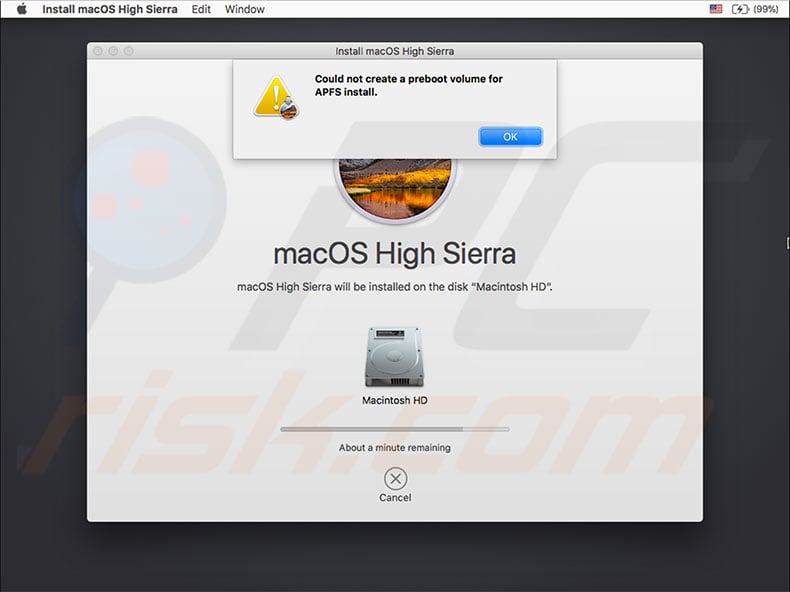
High Sierra works on Apple's latest file system called APFS. Users rarely encounter problems when resetting their Macs. However, sometimes an error appears displaying 'Could not create a Preboot Volume for APFS install'. Apple support states that you should choose macOS extended when formatting your drive and not the new file system, APFS. If, however, you have already started to reset your system and have this problem, there is a solution.
1. First, shut down your Mac.
2. Then hold down Option + Command + R while turning on your computer.
This combination will start an Internet Recovery, and you can try to reinstall High Sierra. You may be forced to repeat this step several times until it works.
Create a BackUp
Create a backup of everything you will/may need in the future. Use Time Machine or another application to backup your system. We recommend that you make two cloud and two physical (local or remote) backups. Also, consider using drive cloning apps such as Carbon Copy Cloner, Super Duper, ChronoSync, or similar. These create an identical copy of your drive. Unlike Time Machine, are bootable backups (i.e., if your computer ever stops working, you can boot your computer directly from these copies).
Disable FileVault
FileVault encrypts the entire disk to protect against unauthorized access to data stored on your startup disk. People rarely use this feature, but you may need to check it out, especially if you log in with your account password (FileVault requires password secured log in).
How to disable FileVault?
1. Go to System Preferences.
2. Choose Security & Privacy.
3. Then select the FileVault tab.
4. Click on the lock icon to unlock it.
5. Enter an administrator name and password.
6. Now turn off FileVault and restart your Mac.
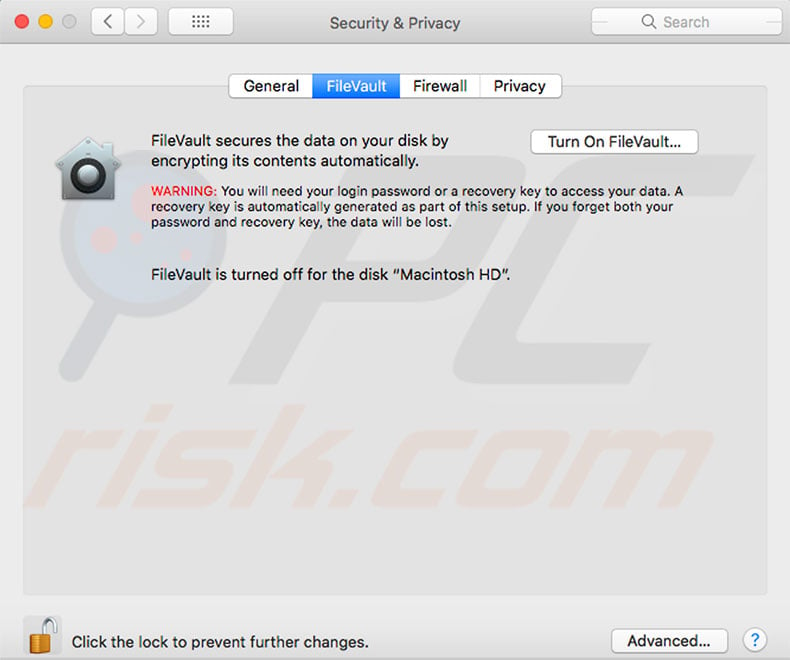
When your computer loads, decryption of your startup drive begins in the background. The decryption of all disks on your mac will take some time - you can check progress by entering the FileVault tab in Security & Privacy preferences.
Remove iTunes Authorizations
iTunes has a built-in authorization tool to grant permission to access all iTunes content from the device/s you authorized. The maximum number of authorized devices is five, so do not give away your iTunes content and access permissions when selling your old mac.
Your content will not be deleted from your device when you deauthorize it - you will simply deny permission to access protected content (which can be recovered anytime by re-authorizing the same device). Do not skip the deauthorize step since if you sell your authorized device and later decide to deauthorize it, you will be forced to deauthorize all of your devices and then re-authorize all usable devices again. This will be time-consuming and inconvenient.
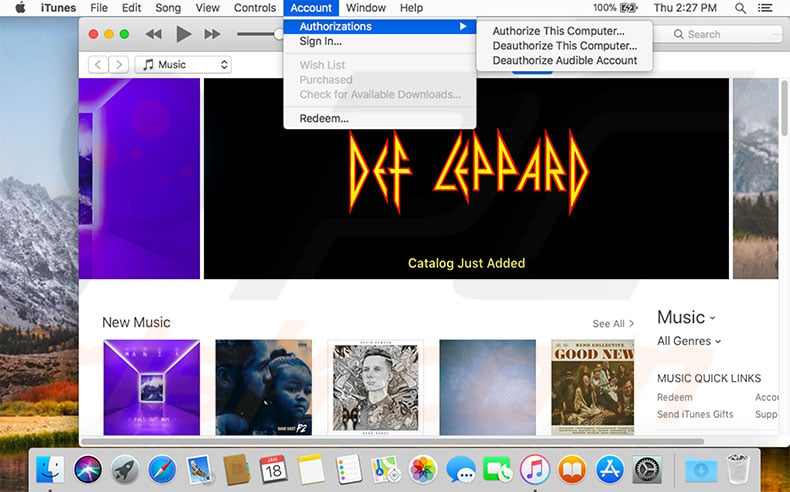
How to deauthorize your Mac:
1. Open iTunes (login with your Apple ID if required).
2. From the menu bar at the top left of your screen, choose Account.
3. Select Authorizations, and finally, click on 'Deauthorize This Computer...'.
4. If required, enter your Apple ID and password and click Deauthorize.
Deactivate programs and remove authorizations
Many third-party applications require machine authorization and activation, especially image, audio/video editing, and software design packages. For example, most Adobe programs require activation.
To activate an application, login with a valid user license. Deactivation dissociates an application from a valid user license. If you need to use the same application on another device, you do not need to uninstall - simply deactivate and use the license on the other machine. Look up your programs list to find and deactivate programs.
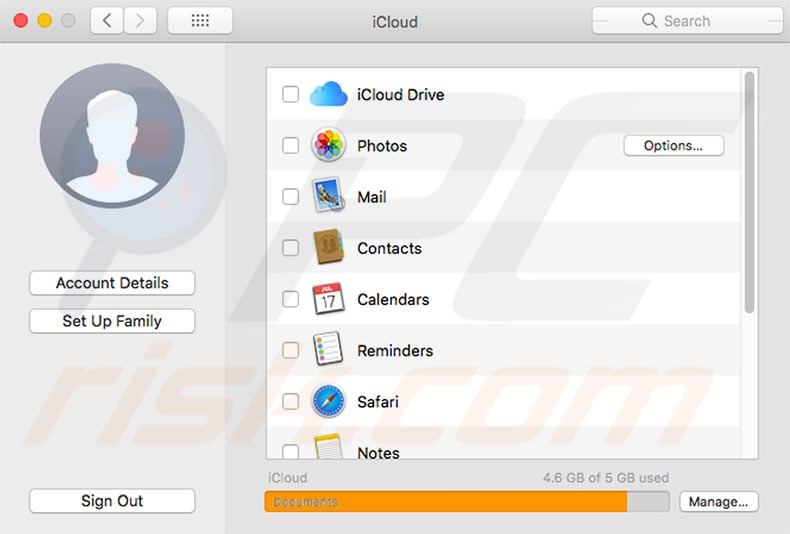
Sign Out your iCloud
Find my Mac ensures you have a copy of your iCloud data before proceeding.
1. Open the Apple menu at the top left of your screen.
2. Select System Preferences.
3. Then, choose iCloud and Sign Out.
4. Ensure you have removed all personal data by selecting Delete From Mac in each pop-up. All of your data, such as iCloud contacts, calendar signs, etc., will be wiped from your Mac.
Sign Out of iMessage
1. Open your Messages application.
2. Go to iMessage Preferences.
2. Select Accounts, choose your account and click Sign Out.
Factory Reset MacBook Air and other Macs using macOS Recovery
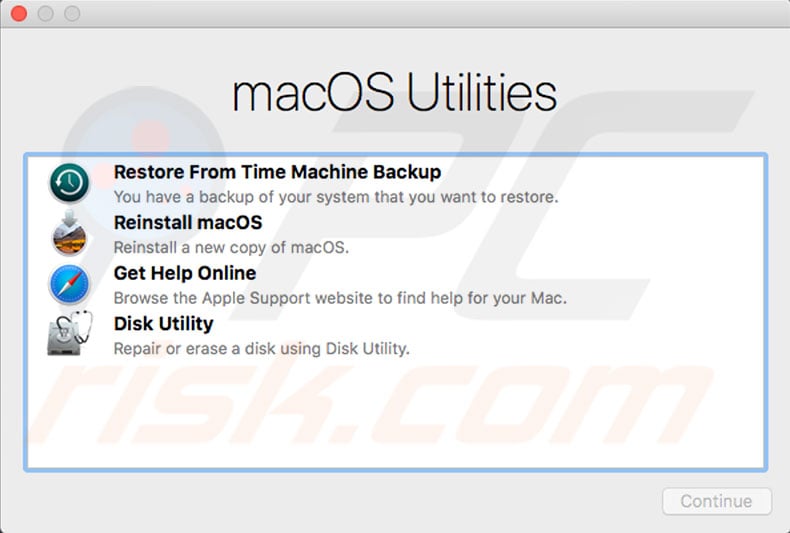
macOS Recovery is a segment of the built-in recovery system. The Utilities menu allows you to fully erase the internal hard drive. If you require a clean and fresh installation of your operating system, you can reinstall macOS to clear all private associations, such as your data, user accounts, Apple ID, etc.
How to reset your Mac using macOS?
1. Turn on or restart your MacBook.
2. Hold down the Option + Command + R keys until you see the Apple logo, and then release them.
3. When the Utilities window pops up, the startup is completed.
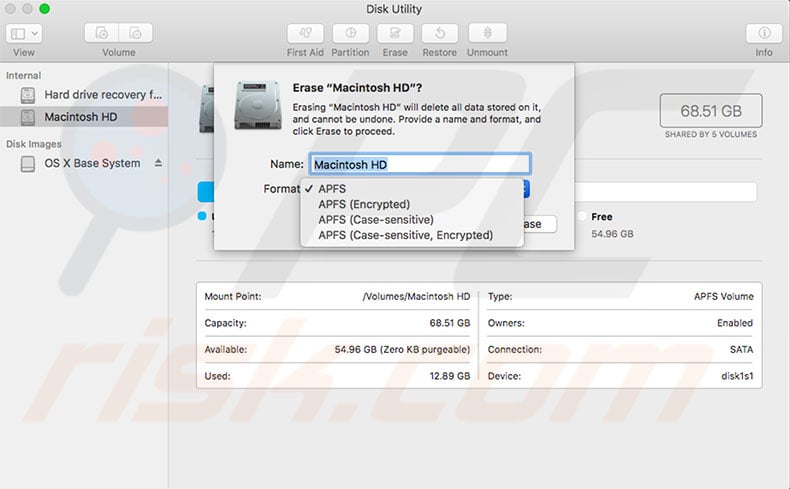
4. Use Disk Utility to wipe your startup and any other internal hard disks. Select your drive name from the sidebar and click Erase.
5. In the format menu, choose Mac OS Extended (unless you use High Sierra).
6. Above, select APFS, type a new name for your disk (we recommend that you leave the default - Macintosh HD), and click Erase.
Note: this will wipe all data on the disk, including personal files and data.
7. Once erasing is complete, return to the Recovery menu.
8. Select Reinstall macOS, and follow the on-screen instructions.
9. When the Mac completes the installation, it will restart to a setup assistant. If you are selling/giving away your mac and wish to leave it in a factory default state, do not follow the assistant - just press Command and Q, and then click Shut Down.
10. If you are retaining your Mac, follow the assistant and set up your clean system.
Restore from Time Machine backup
If you have a Time Machine backup, use it to restore. This procedure will erase the disk and then replace all data from a backup - this will return the computer to the state before the backup.
1. Launch your macOS Recovery and choose Restore from Time Machine Backup.
2. Follow the on-screen instructions to proceed.
Another way to reinstall macOS is by using the App Store. Open the App Store and use the search field. Once you have found a version, download and install it.
Share:

Karolina Peistariene
Author of how-to guides for Mac users
Responsible for collecting, analyzing, and presenting problem-solving solution articles related to macOS issues. Years of macOS experience combined with solid research and analyzing skills help Karolina provide readers with working and helpful solutions as well as introduce various features Mac has to offer.
▼ Show Discussion