How to Create an Apple ID Without a Credit Card?

(updated)
Get Free Scanner and check your computer for errors
Fix It NowTo fix found issues, you have to purchase the full version of Combo Cleaner. Free trial available. Combo Cleaner is owned and operated by Rcs Lt, the parent company of PCRisk.com read more.
How to Create an Apple ID Without a Credit Card (iPhone, iPad, or Mac)?
To use your device to the fullest, you need to add your Apple ID so you can access certain features. When creating an Apple ID, you're asked to add a payment method. If you don't want to, you don't have to, as it's not mandatory.
But if you want to use the Family Sharing feature, it's a different story. To turn on Family Sharing, you need to add your credit card information or select another available payment method. This way, you can allow your children to purchase things on their devices without giving them your credit card information.
If you don't want your child to access your credit card, you can create a new Apple ID without adding the payment method. If you're using Family Sharing, you can disable the Purchase Sharing option.
In this article, you'll find out how to create an Apple ID without adding your credit card information and how to remove the payment method from an existing one.
Video showing How to Create an Apple ID Without a Credit Card:
Table of Contents:
- Introduction
- How to create an Apple ID without setting up a payment method?
- How to remove a payment method from an existing Apple ID account on Mac?
- How to remove a payment method from your Apple ID account on iPhone and iPad?
- Video showing How to Create an Apple ID Without a Credit Card
Download Computer Malware Repair Tool
It is recommended to run a free scan with Combo Cleaner - a tool to detect viruses and malware on your device. You will need to purchase the full version to remove infections. Free trial available. Combo Cleaner is owned and operated by Rcs Lt, the parent company of PCRisk.com read more.
How to create an Apple ID without setting up a payment method?
1. Open iTunes on your computer.
2. Make sure you are in your resident country's iTunes Store by checking the flag in the bottom-right corner of the window.
3. If the flag does not match your country of residence, click it and change the location to the correct country.
4. Next, find the drop-down menu with the title of sections in the upper-left corner and change it to Apps, Movies, Music, or Audiobooks.
5. Enter the Store by clicking the App Store button, top-middle.
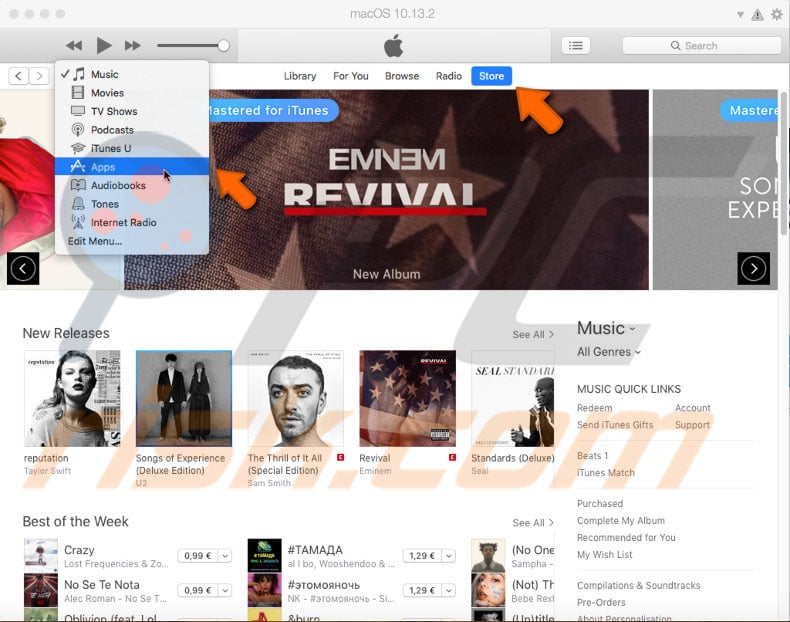
6. In the Store, find any free content and click the Get button.
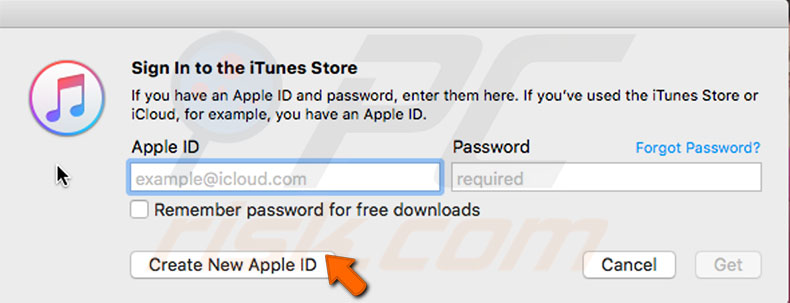
7. When the Store asks you to sign in with your Apple ID, click Create New Apple ID.
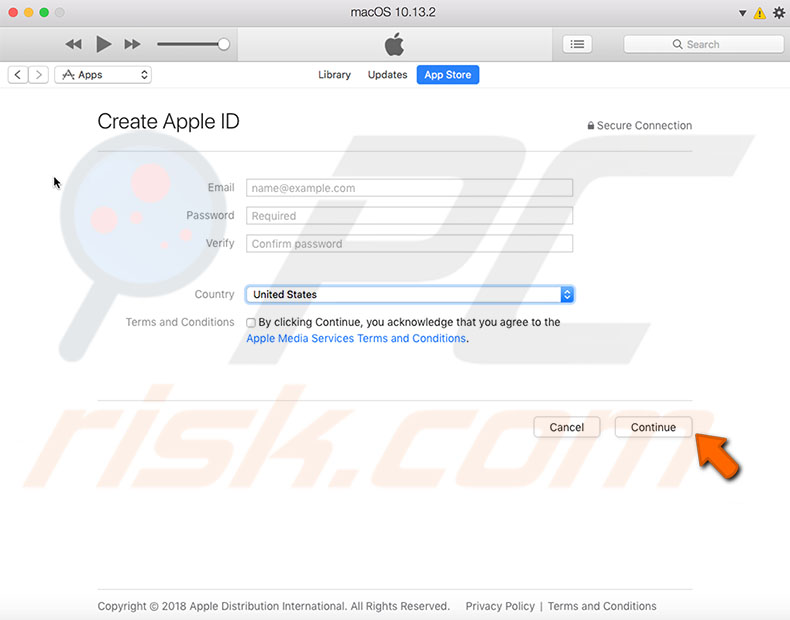
8. Next, complete the primary registration form with email and password, and agree to the Terms and Conditions.
9. Make sure you choose a strong enough password. When all fields are complete with your information, click on Continue.
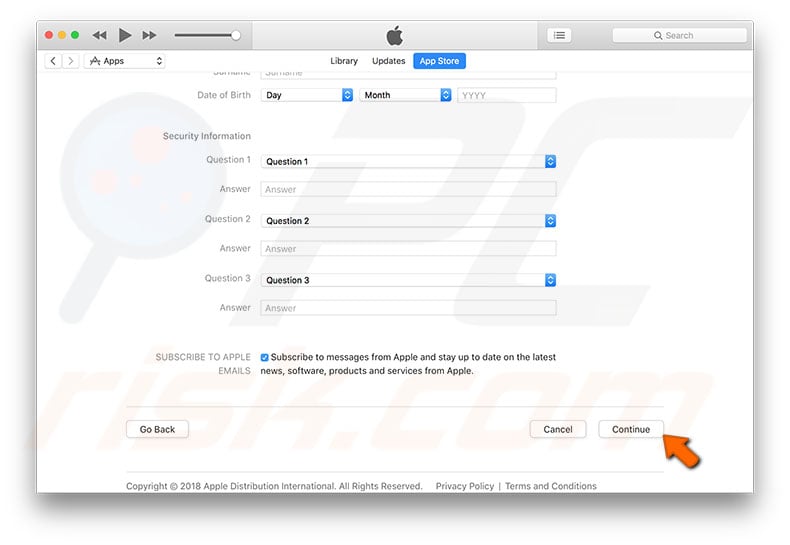
10. Another form with personal and security information will pop up. Once the form is completed with the correct information, click on Continue.
NOTE: Security questions are required to recover your lost password. We strongly recommend that you write down the security questions and answers and save them if you forget them.
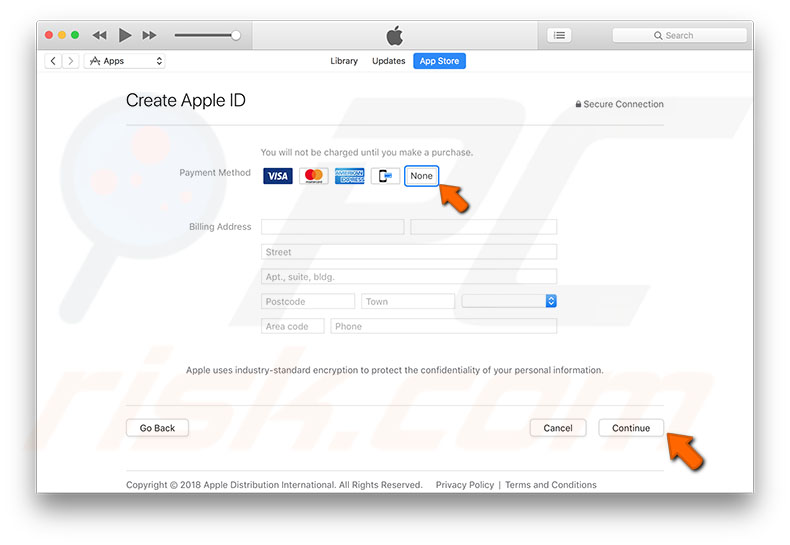
11. The next window is crucial. Choose your payment method and billing address. If you do not wish to set up any payment method, choose None.
12. Complete the billing address form with your details and click Continue.
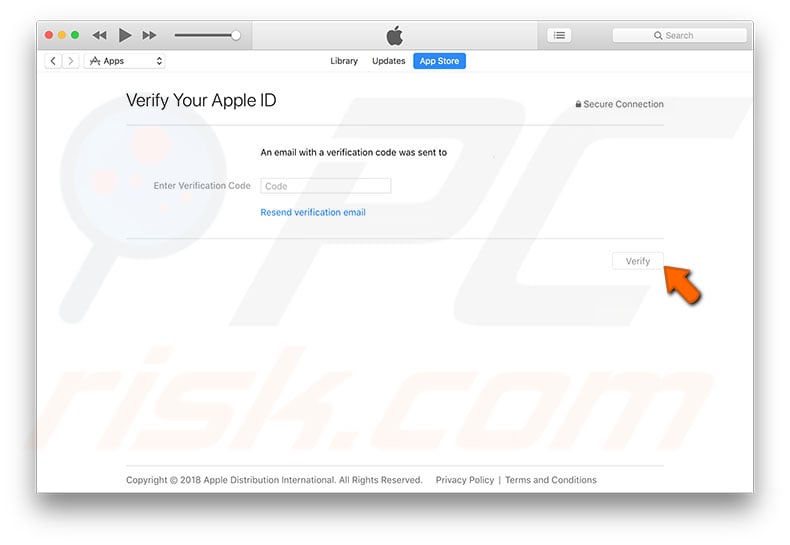
13. Finally, the Store will ask you to confirm registration by entering a verification code sent to your email address. After entering the code, press Continue.
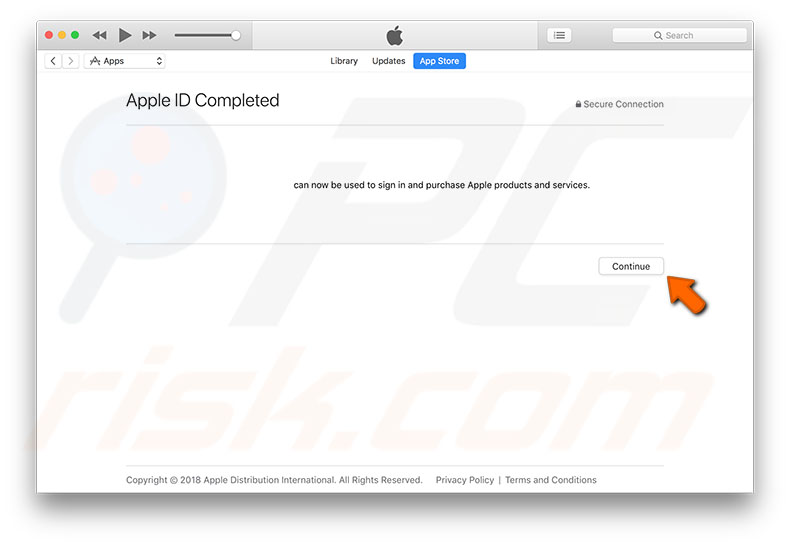
14. An Apple ID registration has now been formed without setting up a payment method. You can use this ID on any Apple device whenever it asks for the Apple ID sign-up.
How to remove a payment method from an existing Apple ID account on Mac?
1. Open iTunes.
2. Click on Account in the lower-left corner.
3. Enter your Apple ID email and password, and then click Sign in.
4. In the new window, you will see your account information. In the Apple ID summary section payment information line, choose Edit.

5. When the payment information window opens, choose None and click Done.
How to remove a payment method from your Apple ID account on iPhone and iPad?
1. Go to Settings and tap your profile.
2. Then choose Payment & Shipping. If required, enter your Apple ID password.
3. To change the payment method, select your current payment method, remove your card number and other information, and then save.
If you are using iOS 10.2 or older, remove the existing payment method by choosing None, and then save.
Share:

Karolina Peistariene
Author of how-to guides for Mac users
Responsible for collecting, analyzing, and presenting problem-solving solution articles related to macOS issues. Years of macOS experience combined with solid research and analyzing skills help Karolina provide readers with working and helpful solutions as well as introduce various features Mac has to offer.
▼ Show Discussion