How to customize Windows 8 Start Menu?
Windows 8 utilizes a new Start menu, but without options to remove it. Fortunately, however, you can personalize it via customization options. This tutorial describes how to change the background 'pin' items and otherwise organize and customize the look of the Windows 8 Start menu. Users can customize by addition or removal of unwanted tiles/applications, grouping or naming the applications, and also by adding shortcuts and website bookmarks to the Start menu. Follow this tutorial to learn how to customize your Start menu.
1. Changing Start Menu background and color.
To change the background color, press win+c or move your mouse to the right upper/lower corner of the screen, once the charm opens, click on 'Settings'.
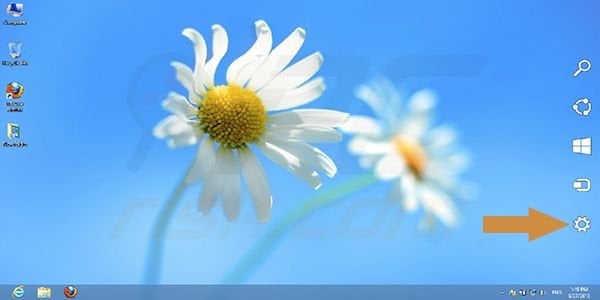
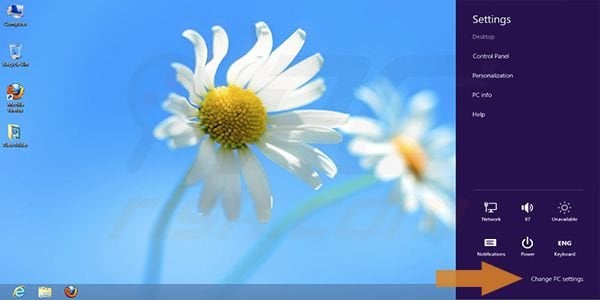
Choose 'Change PC settings'. If you are using a tablet, swipe your finger from the right side of your device screen - this will open charm.
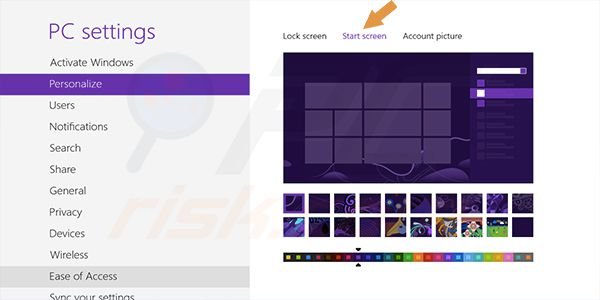
Once you enter the PC settings, choose 'Personalize' and then click on 'Start screen'. Start screen settings will appear, and here you can choose your preferred background image and color.
2. Pinning items to the Start Menu.
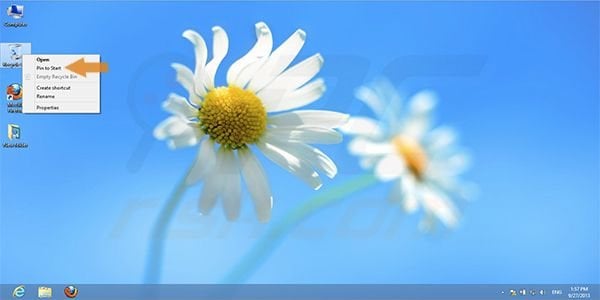
Press alt+d to enter the desktop. Try adding some folders and website bookmarks to the Start menu. To 'pin' a shortcut or folder, simply click the right mouse button over it and choose 'Pin to Start'.
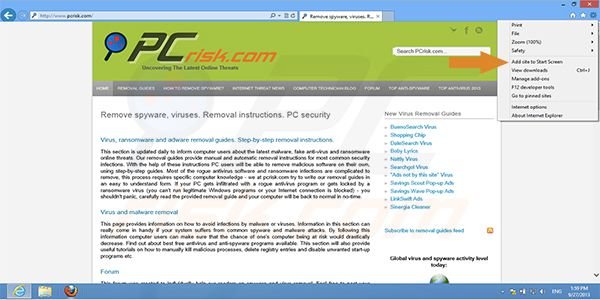
In order to 'pin' a website, go to Internet Explorer, click the settings icon on the right side of the screen, and choose 'Add site to Start Menu'. Note that this function is available on Internet Explorer only.
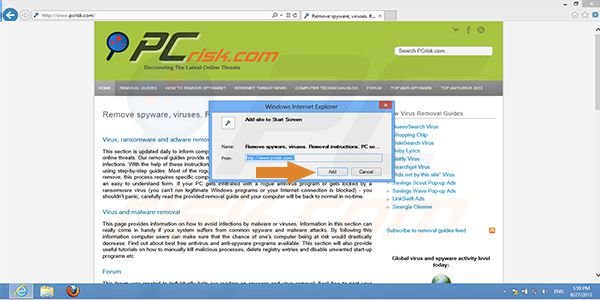
 A window appears, and here you enter the required website URL. After entering the URL, click 'Add'. The website bookmark will immediately be added to your Start menu.
3. Grouping the applications in the menu.
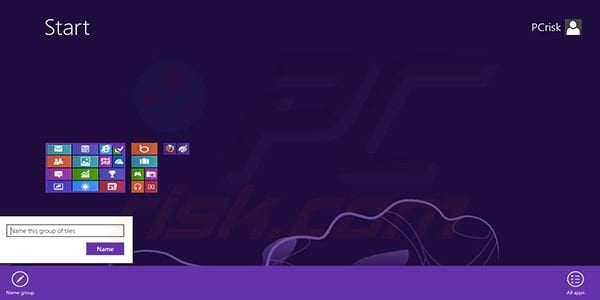
To group applications, drag the shortcuts or tiles from one group to another. To name the groups, click Ctrl and scroll the mouse wheel down - the groups will minimize. Next, right click on the required group and a menu on the bottom of the screen will appear. Click 'Name group' and enter the required name. Grouping and naming applications is a great way to design a quick and well-ordered Start menu.
4. Enabling/disabling Start Menu live tiles.
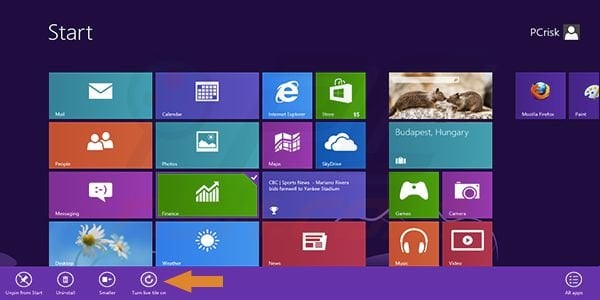
To enable/disable live tiles such as weather, messages, etc., simply right click on the tile and choose 'Turn live tile on/off'.
5. Resizing Start Menu tiles.
Right click on the tile and choose Larger/Smaller from the the menu on the bottom of the screen.
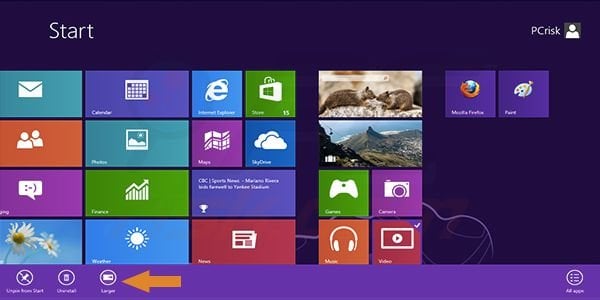
Here is a video showing the above Windows 8 Start Menu customization possibilities:
Share:

Tomas Meskauskas
Expert security researcher, professional malware analyst
I am passionate about computer security and technology. I have an experience of over 10 years working in various companies related to computer technical issue solving and Internet security. I have been working as an author and editor for pcrisk.com since 2010. Follow me on Twitter and LinkedIn to stay informed about the latest online security threats.

▼ Show Discussion