How to remove a managed Google Chrome extension?
"This extension is managed and cannot be removed or disabled" (Google Chrome) - how to remove?
This article describes how to remove a 'managed' Google Chrome extension. Note that recently, there a rise in adware infections, and in many cases, these potentially unwanted programs (PUP) install on users' Internet browsers disguised as legitimate extensions. Commonly, adware is bundled with free software downloaded from the Internet, the installation of which, is often a consequence of not paying close attention to the installation steps. To avoid inadvertent adware or PUP installation, Internet users should always install freeware choosing the 'Custom Installation' option rather than 'Typical Installation' - and be sure to opt-out of any changes to your Internet browser settings. Also, disallow installation of any additional software. In this removal guide I will demonstrate how to remove the SelectionLinks managed Google Chrome extension. I chose this extension simply as an example, however, this removal guide is generic and will help you to remove any managed Chrome extension.
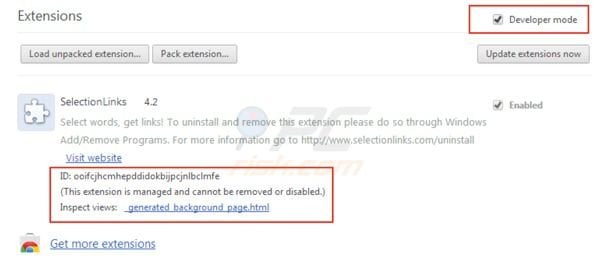
To check the Google Chrome extensions: Click on the wrench or bars icon (top right of the screen), select 'Tools' and click 'Extensions'. Here is an example of a managed Google Chrome extension (it is greyed-out, and therefore, users are unable to disable or remove it):

When dealing with managed Google Chrome extensions, first check for any recently-installed software within your operating system's 'Add/remove programs'. In some cases, uninstalling this software will also eliminate the associated Internet browser extension.
Windows 7 users:
Click "Start" ("Windows Logo" in the bottom left corner of your desktop), choose "Control Panel". Locate "Programs and Features". Look for recently added software, select the entry and click Uninstall.
Windows XP users:
Click "Start", choose "Settings" and click "Control Panel". Locate and click "Add or Remove Programs". Locate "Programs and Features". Look for "recently added software, select this entry, and click Remove.
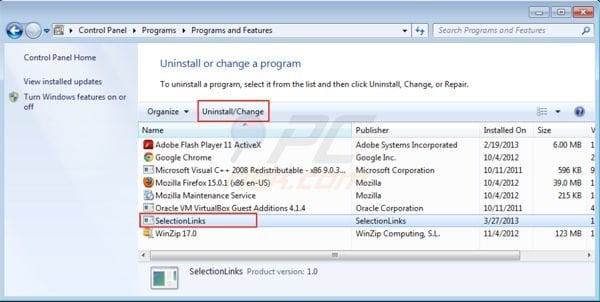
After uninstalling the unwanted software, check your Internet browser extensions. If you continue to observe unwanted entries in your Google Chrome extensions list, continue with the removal instructions.
Firstly, you need to make a note of the ID of the unwanted managed extension. You will need this in later removal steps to verify the ID of an extension. Click on the wrench or bars icon (top right of the screen), select "Tools" and click on "Extensions", select "Developer Mode".
To remove a managed Chrome extension, you firstly need to close Google Chrome:
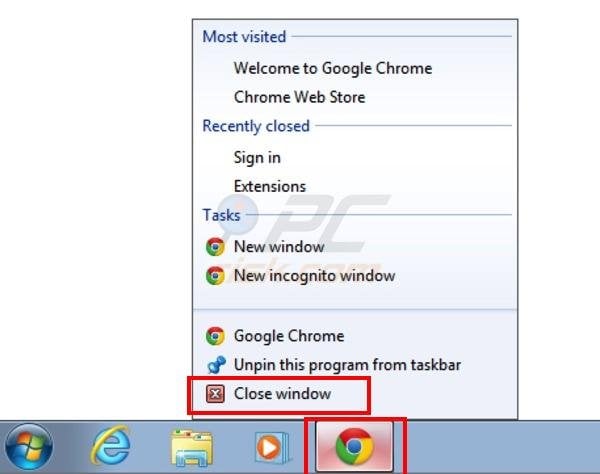
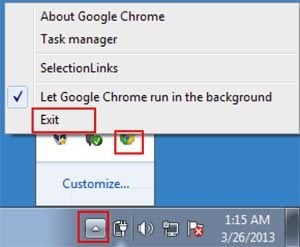
After closing Google Chrome, remove the registry entries of the managed extension:
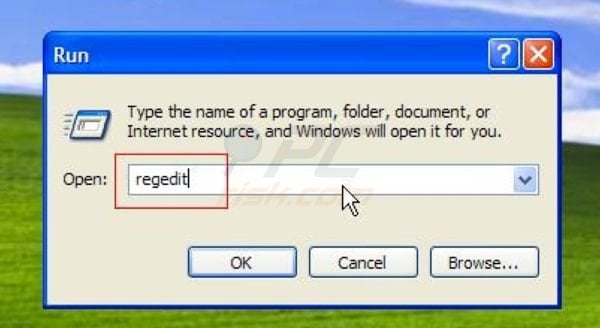
In Windows XP - Click Start, Run. In the opened window type "regedit".

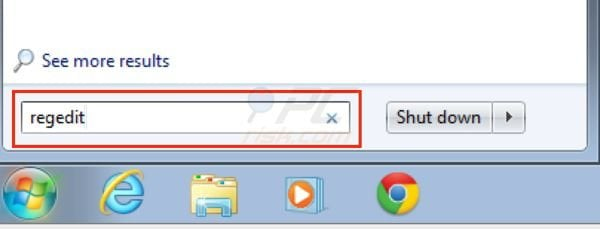
In Windows 7 - Click Windows Logo (Start), in the "Search Programs and Files" field, type "regedit" and press Enter.
In the opened Registry Editor, select HKEY_LOCAL_MACHINE, then select SOFTWARE:

When in the SOFTWARE directory, select "Policies", "Google", "Chrome" and "ExtensionInstallForcelist":
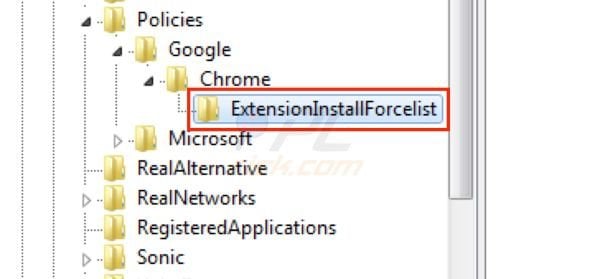
Remove the registry key matching the Data value of the managed extension's ID (right click on the registry key and select "Delete"):


After removing the registry entry of the managed Chrome extension, remove the associated files. To do this, Open "My Computer" and navigate to "C:\Users\YOUR USER NAME\AppData\Local\Google\Chrome\User Data\Default\Extensions". Remove the directory matching the ID of the managed Chrome Extension.
You can access your AppData directory by typing %appdata% in the Run dialog box.

After removing this directory, open Google Chrome and check the extensions list. The managed extension should now be eliminated.

Share:

Tomas Meskauskas
Expert security researcher, professional malware analyst
I am passionate about computer security and technology. I have an experience of over 10 years working in various companies related to computer technical issue solving and Internet security. I have been working as an author and editor for pcrisk.com since 2010. Follow me on Twitter and LinkedIn to stay informed about the latest online security threats.

▼ Show Discussion