How to Fix Msedge.exe Application Error on Windows 11
![]() Written by Rimvydas Iliavicius on
Written by Rimvydas Iliavicius on
How to Fix Msedge.exe Application Error on Windows 11
Many Microsoft Edge users report experiencing errors related to Msedge.exe, particularly when launching Edge. Some are also unsure of what Msedge.exe is, and is it safe. This article will provide more information about Msedge.exe and how to fix errors such as Msedge.exe Application Error.

What is Msedge.exe?
Msedge.exe is a background process that is part of Microsoft Edge, Microsoft’s default browser for Windows. Many users notice Msedge.exe using a significant amount of CPU and RAM, but that is normal and is dependent on browser demand. Therefore, Msedge.exe is completely safe.
Nevertheless, you should know that malware may be disguised as Msedge.exe and be named Msedge.exe.exe to obfuscate its presence. The legitimate version of the file is located in C:\Program Files (x86)\Microsoft\Edge\Application. Therefore, a similarly named executable or an executable with the same name located in a different location may indicate a malware infection.
To check whether Msedge.exe on your computer is safe, we recommend scanning it with Combo Cleaner.
Errors Related to Msedge.exe
Msedge.exe is vital to Microsoft Edge, so the browser won’t work if Msedge.exe is missing or corrupted. You may experience several errors/issues with Msedge.exe, as described below.
Msedge.exe – Application error. The application was unable to start correctly (0xc0000005).
Msedge.exe not found. You will get a “Msedge.exe not found” error if the file is missing from its intended location or corrupted by damage to the file. If Msedge.exe is not running, you won’t be able to launch Edge.
You may also experience other problems with Msedge.exe due to an outdated Edge version, outdated Windows, software conflicts, etc.
We have compiled several proven ways to fix “Msedge.exe – Application error” and “Msedge.exe not found” errors.
Video Tutorial on How to Fix Msedge.exe Application Error
Table of Contents:
- Introduction
- Method 1. Run the Deployment Image & Servicing Management (DISM) and System File Checker (SFC) Scans
- Method 2. Repair the Microsoft Edge Installation
- Method 3. Configure Access Rights
- Method 4. Update Using Windows 11 Installation Assistant
- Video Tutorial on How to Fix Msedge.exe Application Error
Method 1. Run the Deployment Image & Servicing Management (DISM) and System File Checker (SFC) Scans
You may get errors related to Msedge.exe due to a corrupted Msedge.exe or other system files. To repair corrupted and missing system files, run DISM and SFC commands.
The Deployment Image Servicing and Management (DISM) is a command-line tool that repairs damaged/corrupted Windows images.
The System File Checker (SFC) is a utility that repairs and replaces corrupted Windows system files, including all types of DLL files. SFC verifies all system files and replaces corrupted or missing files with copies cached in %WinDir%\System32\dllcache.
1. Hold down Windows+R keys to open Run.
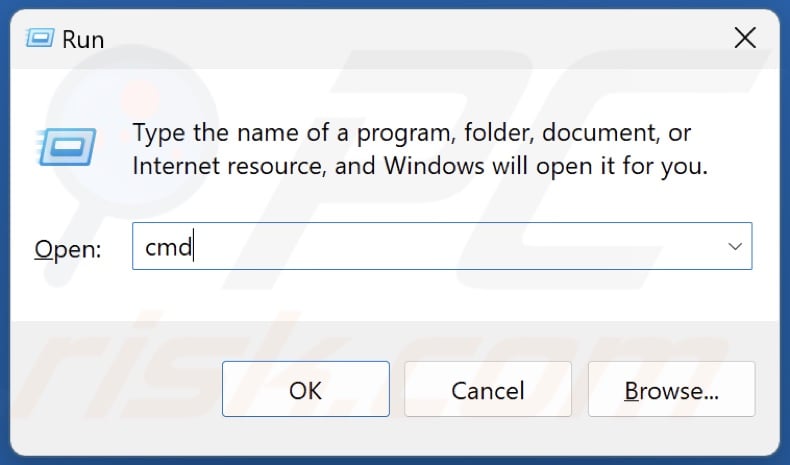
2. Type CMD in Run and hold down Ctrl+Shift+Enter keys to open Command Prompt as an administrator.
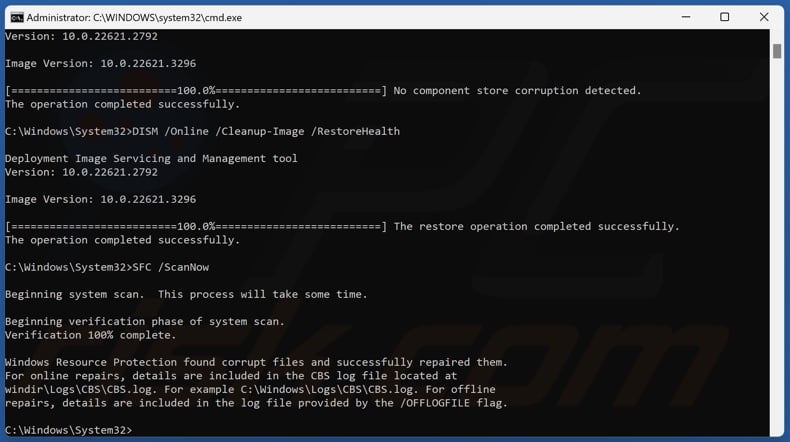
3. Type in DISM /Online /Cleanup-Image /ScanHealth in the Command Prompt window and press Enter.
4. Type in DISM /Online /Cleanup-Image /RestoreHealth and press Enter.
5. Lastly, type in SFC /ScanNow and press Enter.
6. Close the Command Prompt and restart your PC.
Method 2. Repair the Microsoft Edge Installation
In addition to running DISM and SFC scans, you can repair your Microsoft Edge installation in the Windows Settings app.
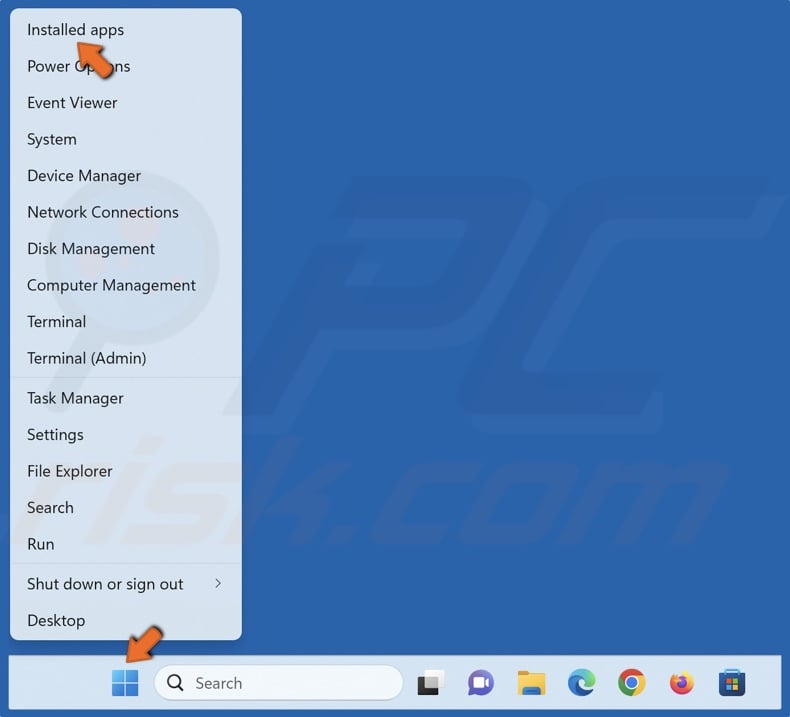
1. Right-click the Start menu button and click Installed apps.
2. Scroll through the apps list and find Microsoft Edge.
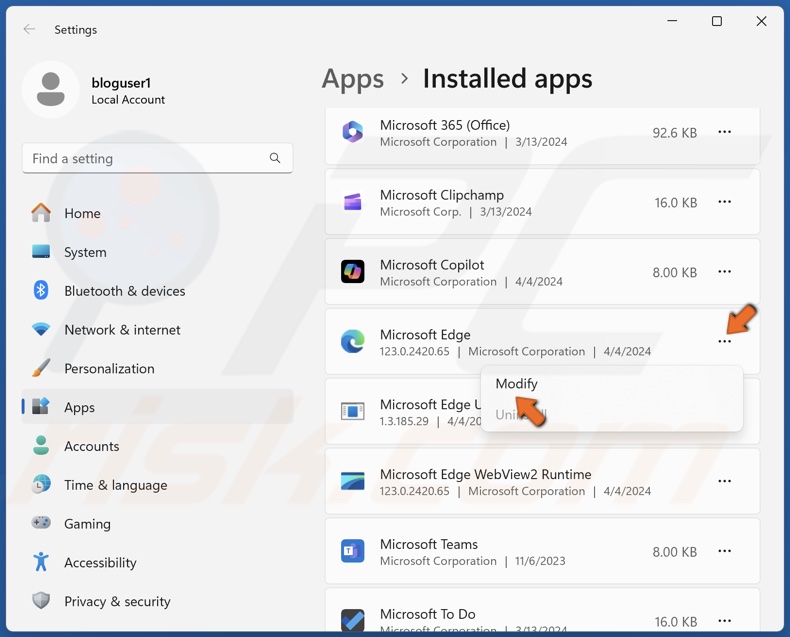
3. Click the three-dot button next to Edge and select Modify.
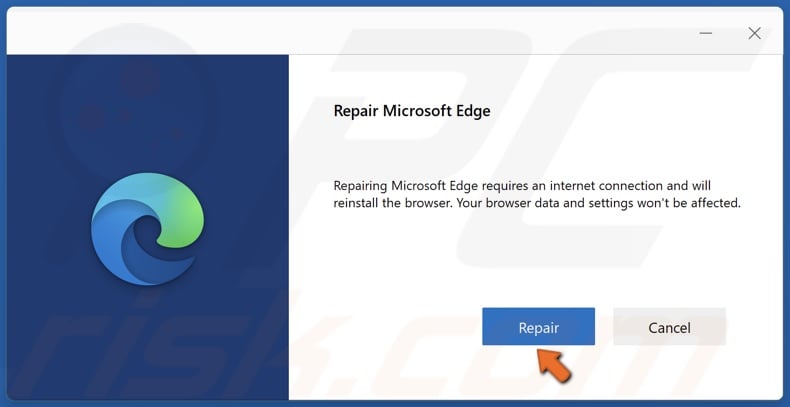
4. In the repair wizard window, click Repair. Wait for the repair to complete.
Method 3. Configure Access Rights
Sometimes, you may get an error for Msedge.exe because Microsoft Edge doesn’t have the right access permissions. To resolve the permissions-related issue, follow the instructions below.
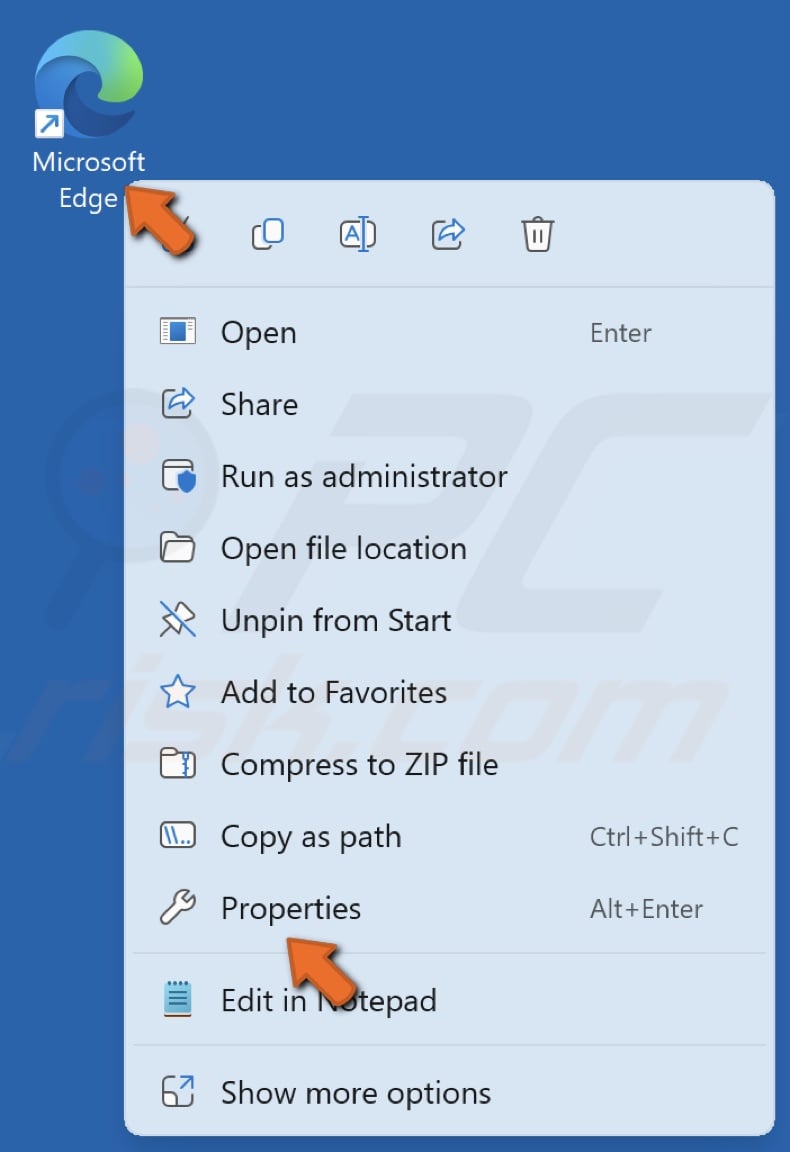
1. Right-click the Microsoft Edge shortcut and click Properties.
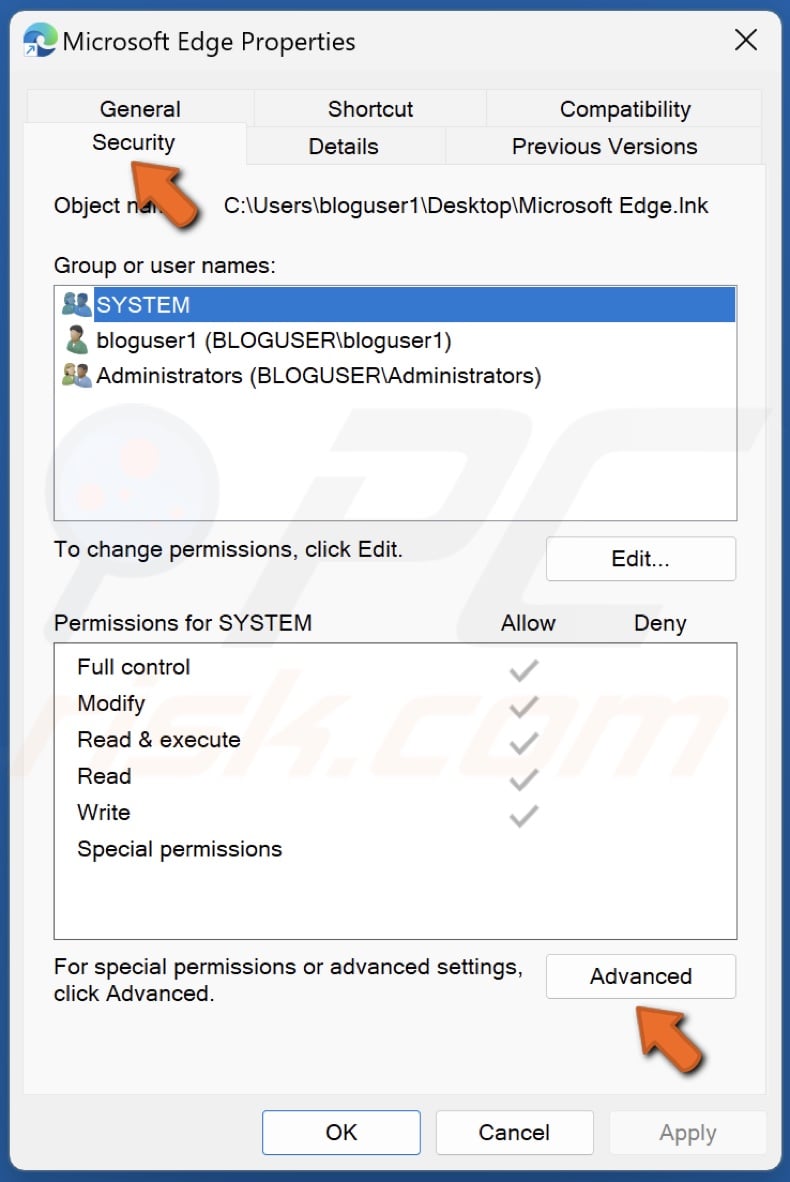
2. Select the Security tab and click Advanced.
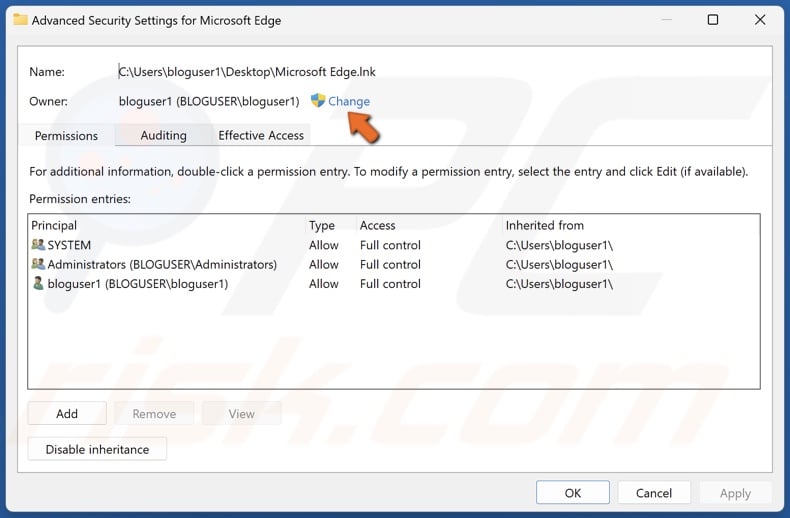
3. Click Change to change the owner.

4. Click Advanced.
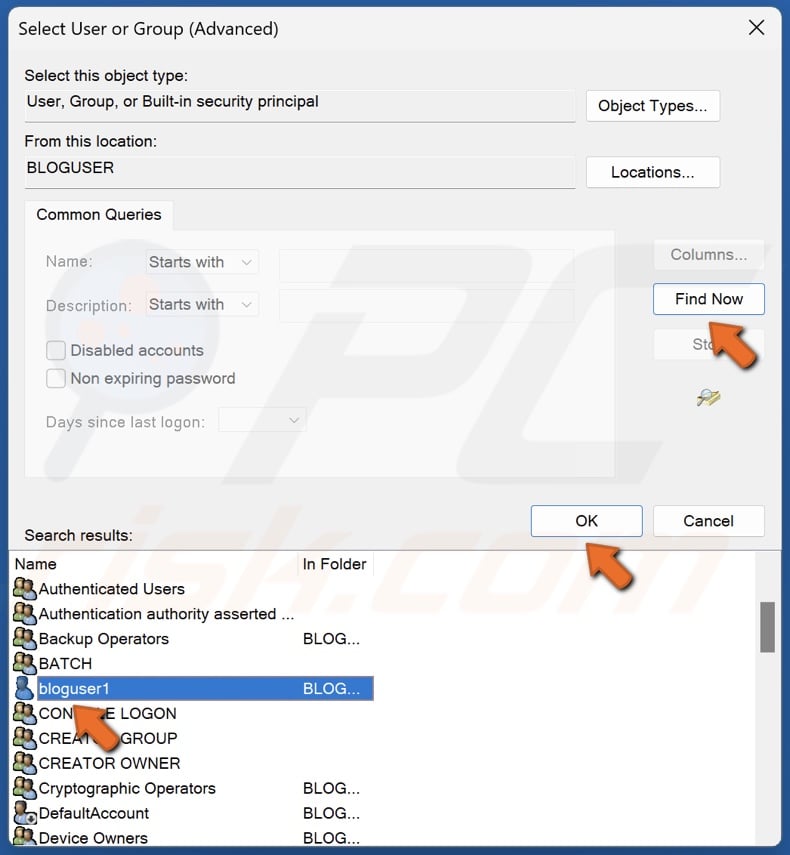
5. Click Find Now.
6. Select your administrator account and click OK.
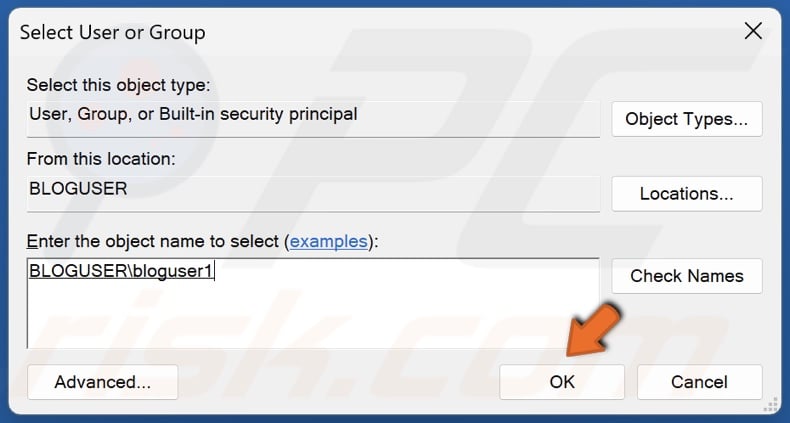
7. Click OK.

8. Click Apply.
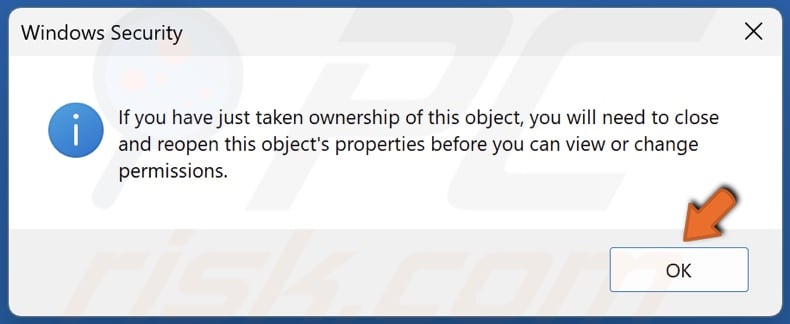
9. Click OK in the Windows Security prompt.
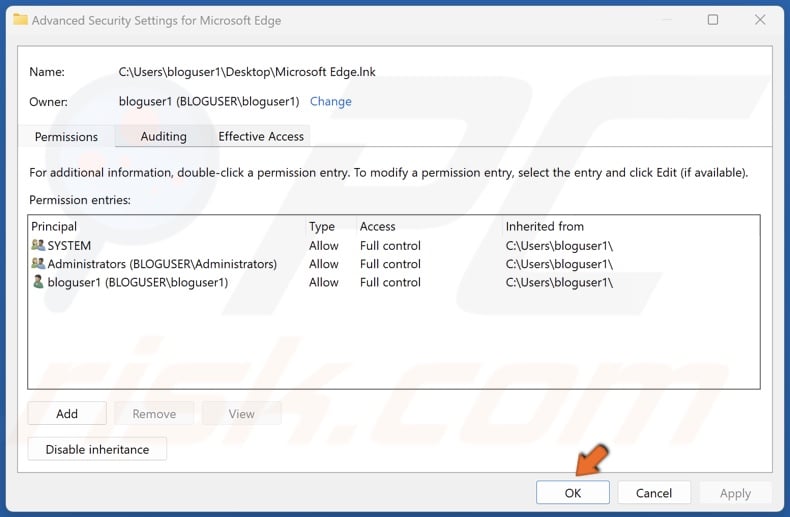
10. Click OK in the Advanced Security Settings for Microsoft Edge.
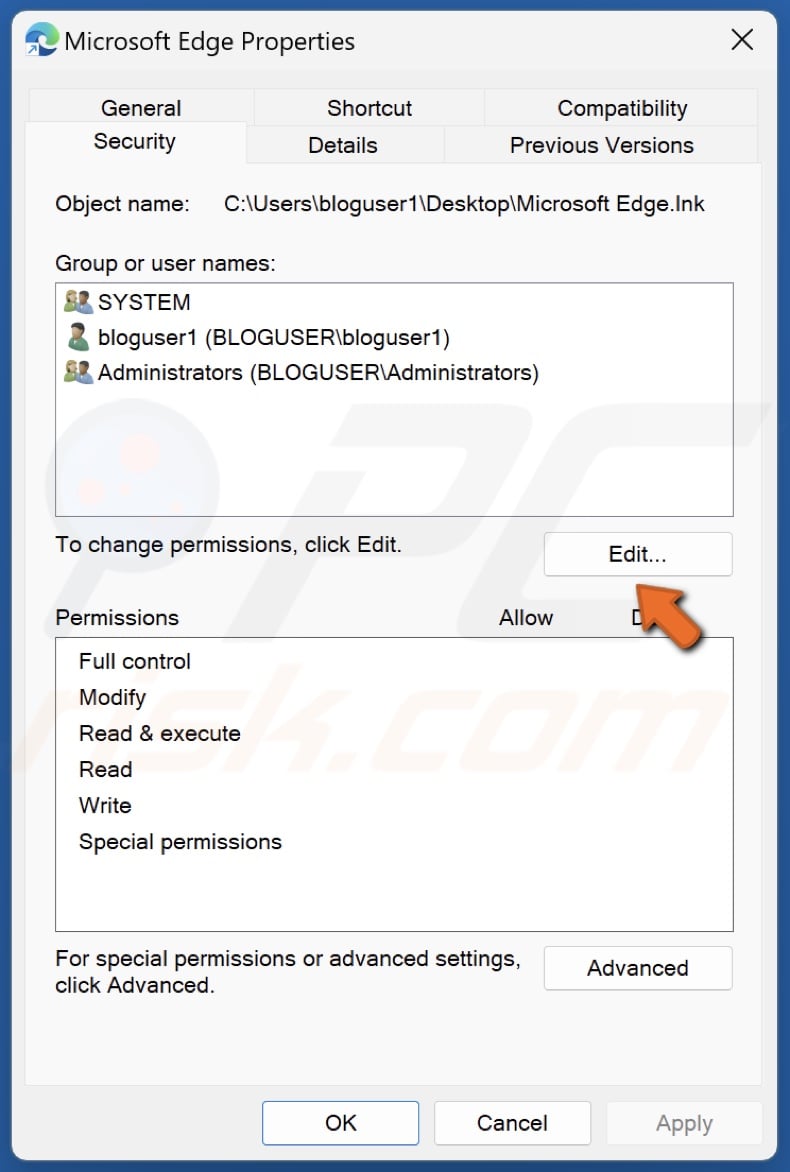
11. Click Edit.
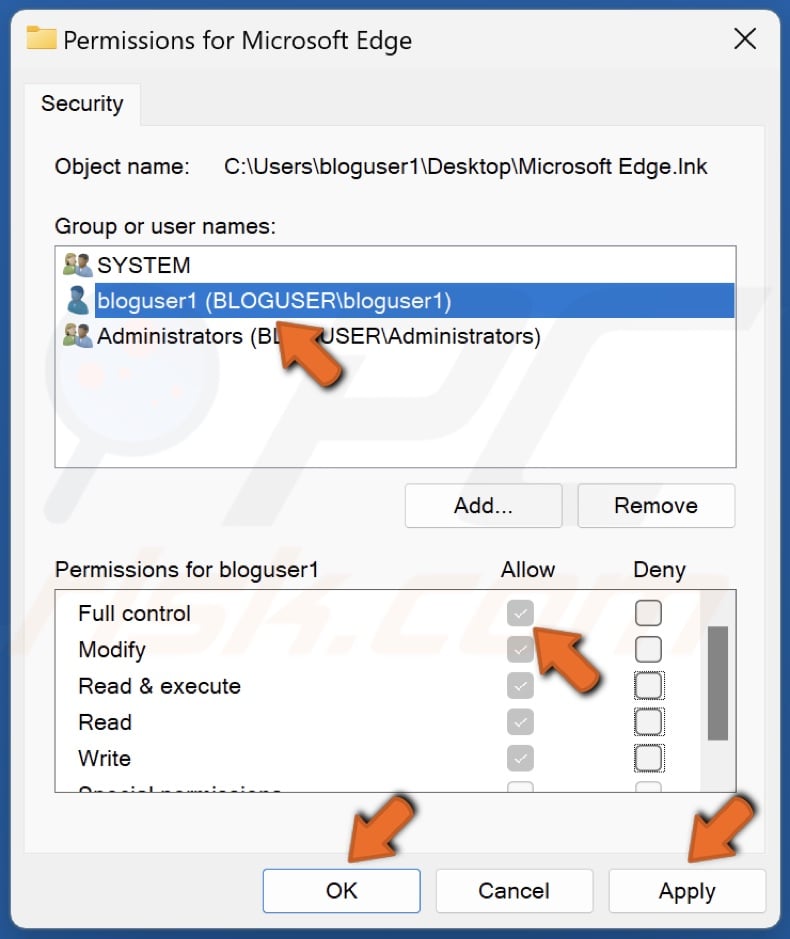
12. In the Permissions window, select your administrator account.
13. In the Permissions for Administrators section, mark the Allow checkbox next to Full Control.
14. Click Apply and click OK.
Method 4. Update Using Windows 11 Installation Assistant
Windows 11 Installation Assistant is designed to install the latest updates you miss or choose not to install. The Installation Assistant ensures that you have the latest Windows 11 version on your computer.
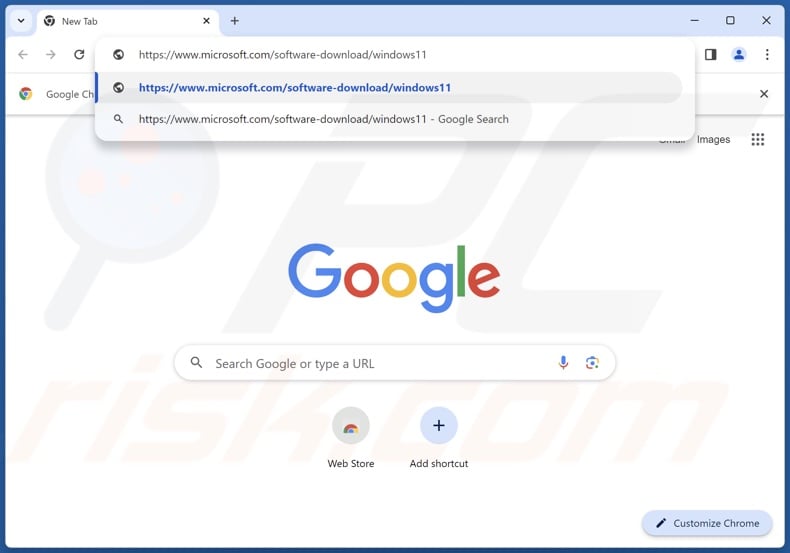
1. Open your web browser and go to the Windows 11 Installation Assistant webpage.

2. Under Windows 11 Installation Assistant, click Download Now.
3. Run Windows11InstallationAssistant.exe once it’s downloaded.
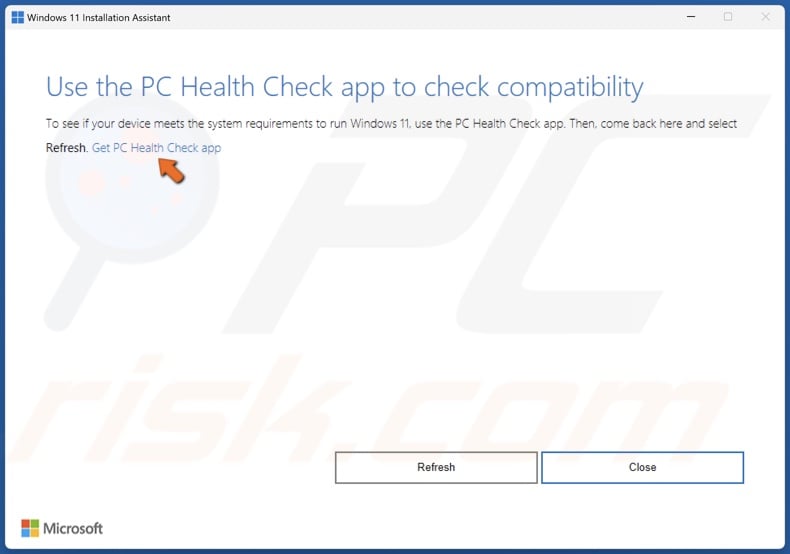
4. Click Get PC Health Check app.
5. Run WindowsPCHealthCheckSetup.msi once it's downloaded.
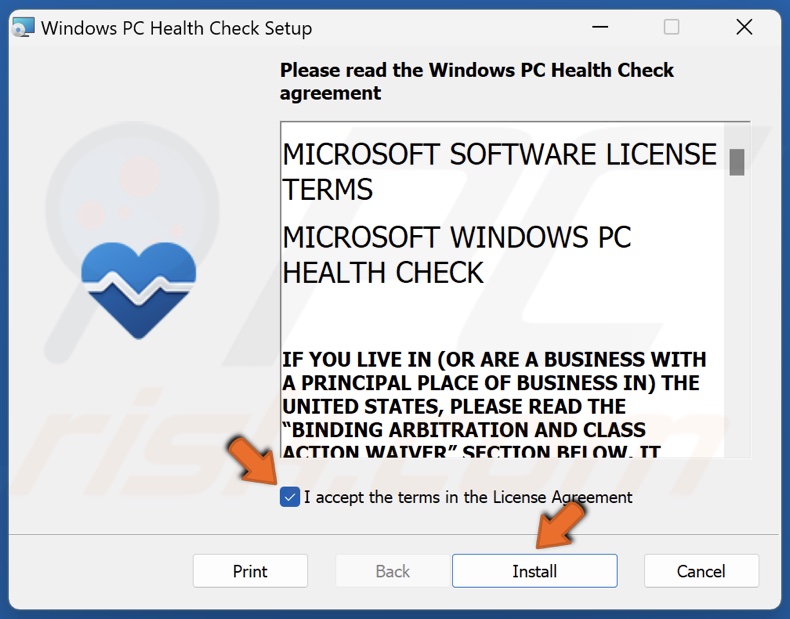
6. Accept the license agreement and click Install.
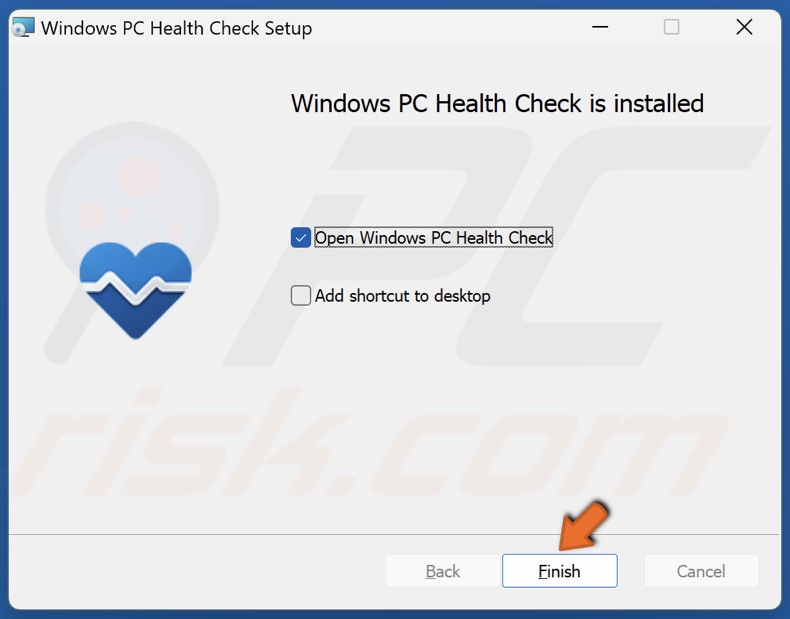
7. Click Finish.
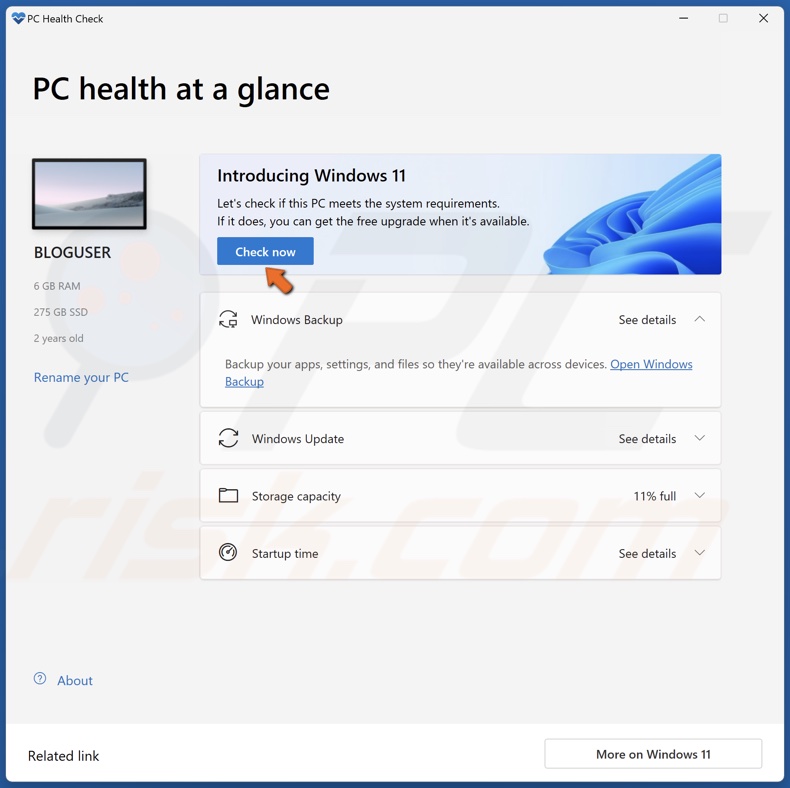
8. Click Check now.
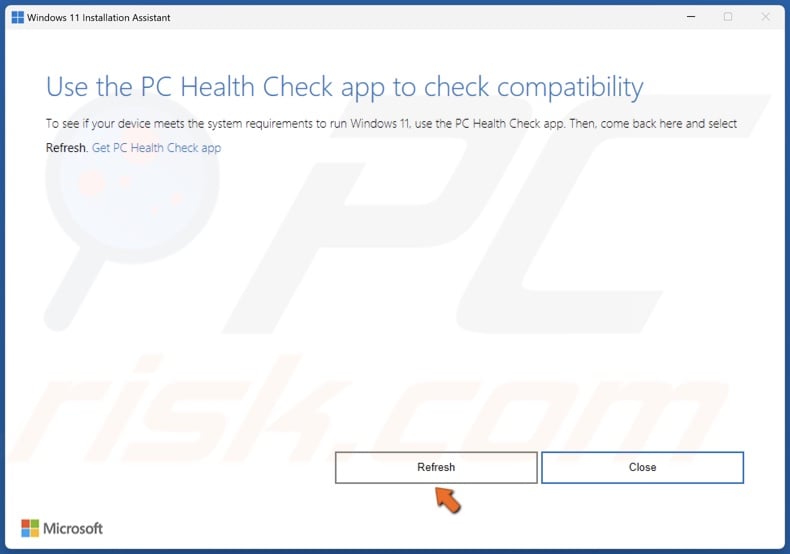
9. Go back to the Windows 11 Installation Assistant and click Refresh.
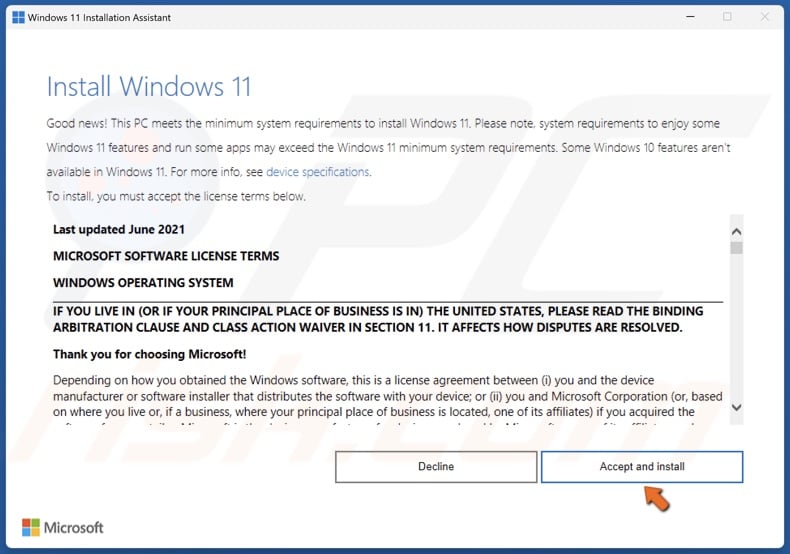
10. Click Accept and Install. Wait for the Windows 11 installation to complete. The installation will take a while.
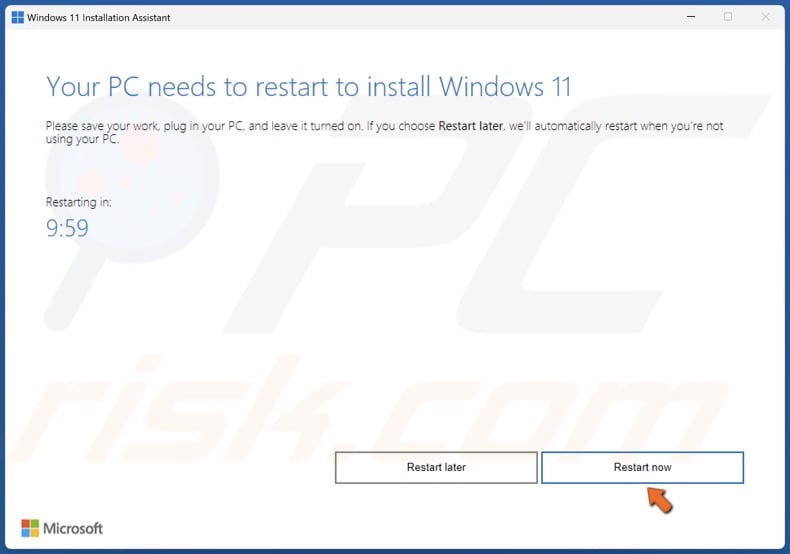
11. Click Restart now once the installation is complete.
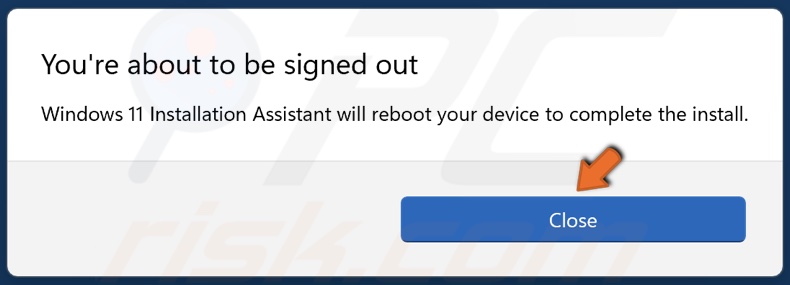
12. Click Close. Your PC will restart automatically and finish installing updates and setting up Windows.
Did this article help you fix the Msedge.exe error on your computer? Let us know by leaving a comment in the Discussion section below.

▼ Show Discussion